Unknown's avatar

Economical Video and Photography Studio in St. Louis: How to Get Premium Results Without Premium Waste

Decision makers don’t usually have a “video problem” or a “photo problem.” You have a throughput problem: more channels, faster timelines, tighter approvals, more internal stakeholders, and a constant need to refresh creative without restarting from zero.

An economical video and photography studio isn’t the one with the lowest day rate. It’s the one that reliably delivers usable, on-brand assets with minimal reshoots, predictable production time, and a post workflow designed for repurposing—so each shoot generates value across web, social, sales enablement, internal comms, recruiting, PR, and paid campaigns.

Below is how to think about economical production like an operator, not a shopper.


“Economical” doesn’t mean “cheap”—it means engineered efficiency

If you’ve ever paid for a “low-cost” shoot that required:

  • multiple revisions because messaging wasn’t locked,
  • preventable audio issues,
  • inconsistent lighting across interviews,
  • missing coverage that forced a pickup day,
  • or deliverables that didn’t match your platform needs…

…you already know the real cost is waste.

Economical production is designed to eliminate waste in four areas:

  1. Pre-production clarity (the fastest way to cut cost without cutting quality)
  2. On-set efficiency (less downtime, fewer surprises, more coverage per hour)
  3. Post-production discipline (fewer rounds, faster approvals, better versioning)
  4. Asset repurposing (one shoot → many outputs, not one output → one platform)

The biggest budget lever is pre-production (and it’s not glamorous)

Most teams underinvest in planning because planning isn’t visible. But it’s the most controllable variable you have.

What good pre-production looks like

  • Creative brief that’s actually usable: objective, audience, key messages, proof points, CTA, brand rules, and success metrics.
  • Shot list built from deliverables backward: you don’t “get B-roll.” You capture specific coverage that supports a narrative and multiple edits.
  • Interview architecture: who speaks to what, how you avoid redundancy, and how you build soundbites that edit cleanly.
  • Location and set strategy: controlling noise, reflections, foot traffic, and power access.
  • Approval map: who signs off on what, when, and how feedback is consolidated.

When these pieces are locked, production speeds up and post-production becomes a smooth assembly line—not a negotiation.


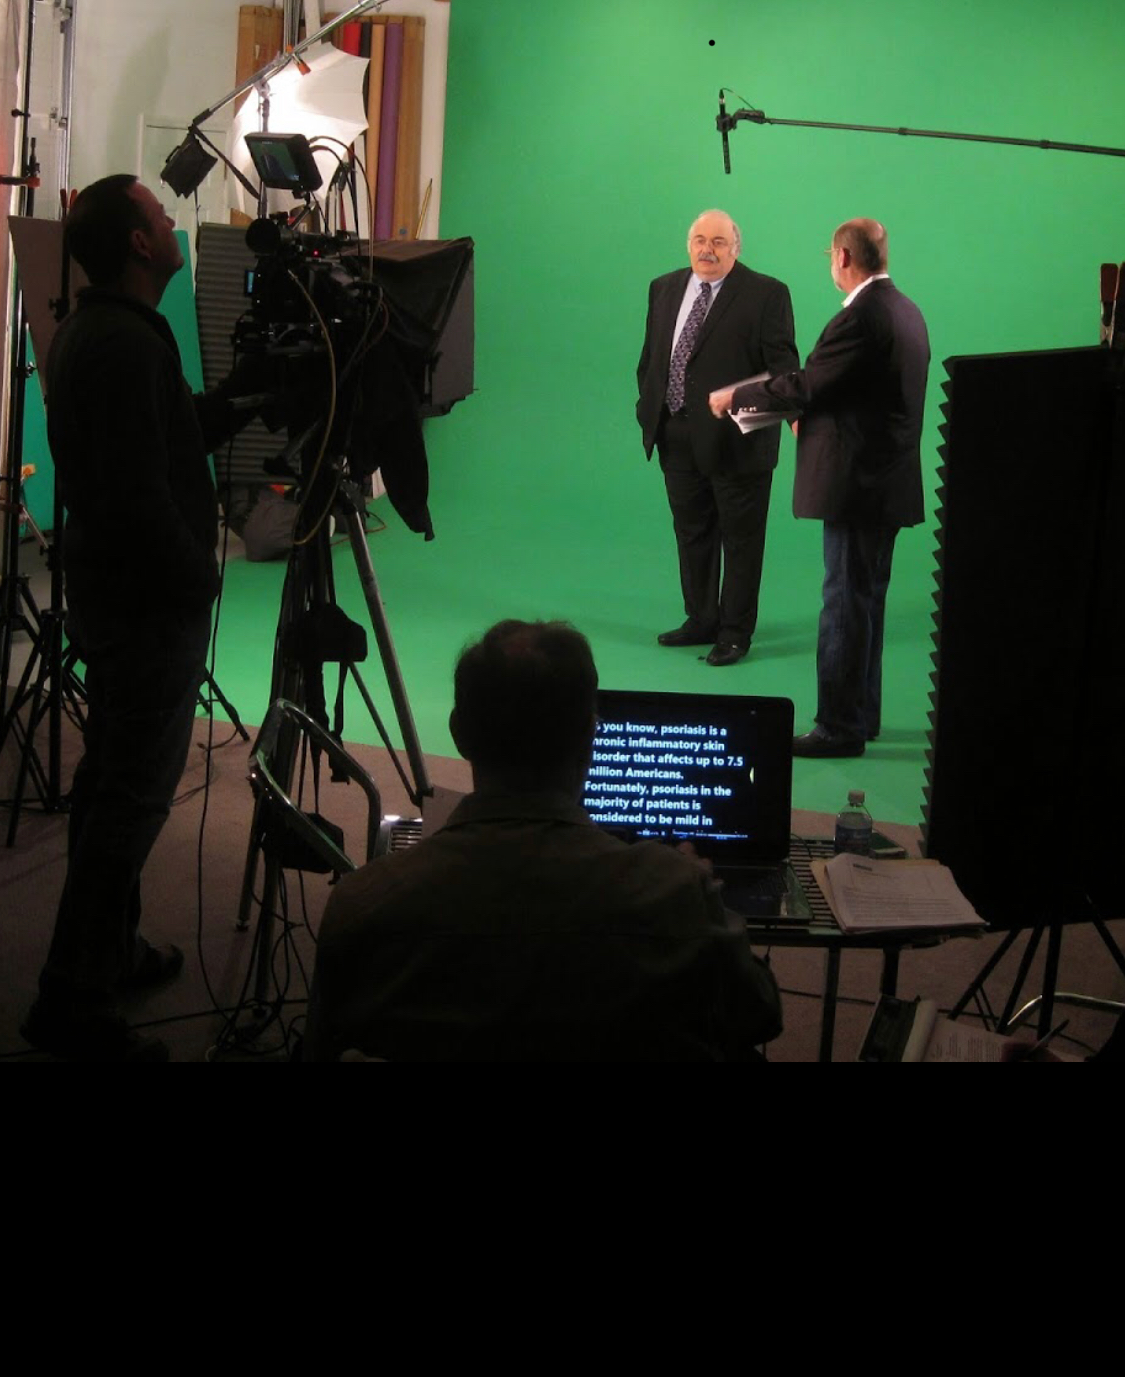
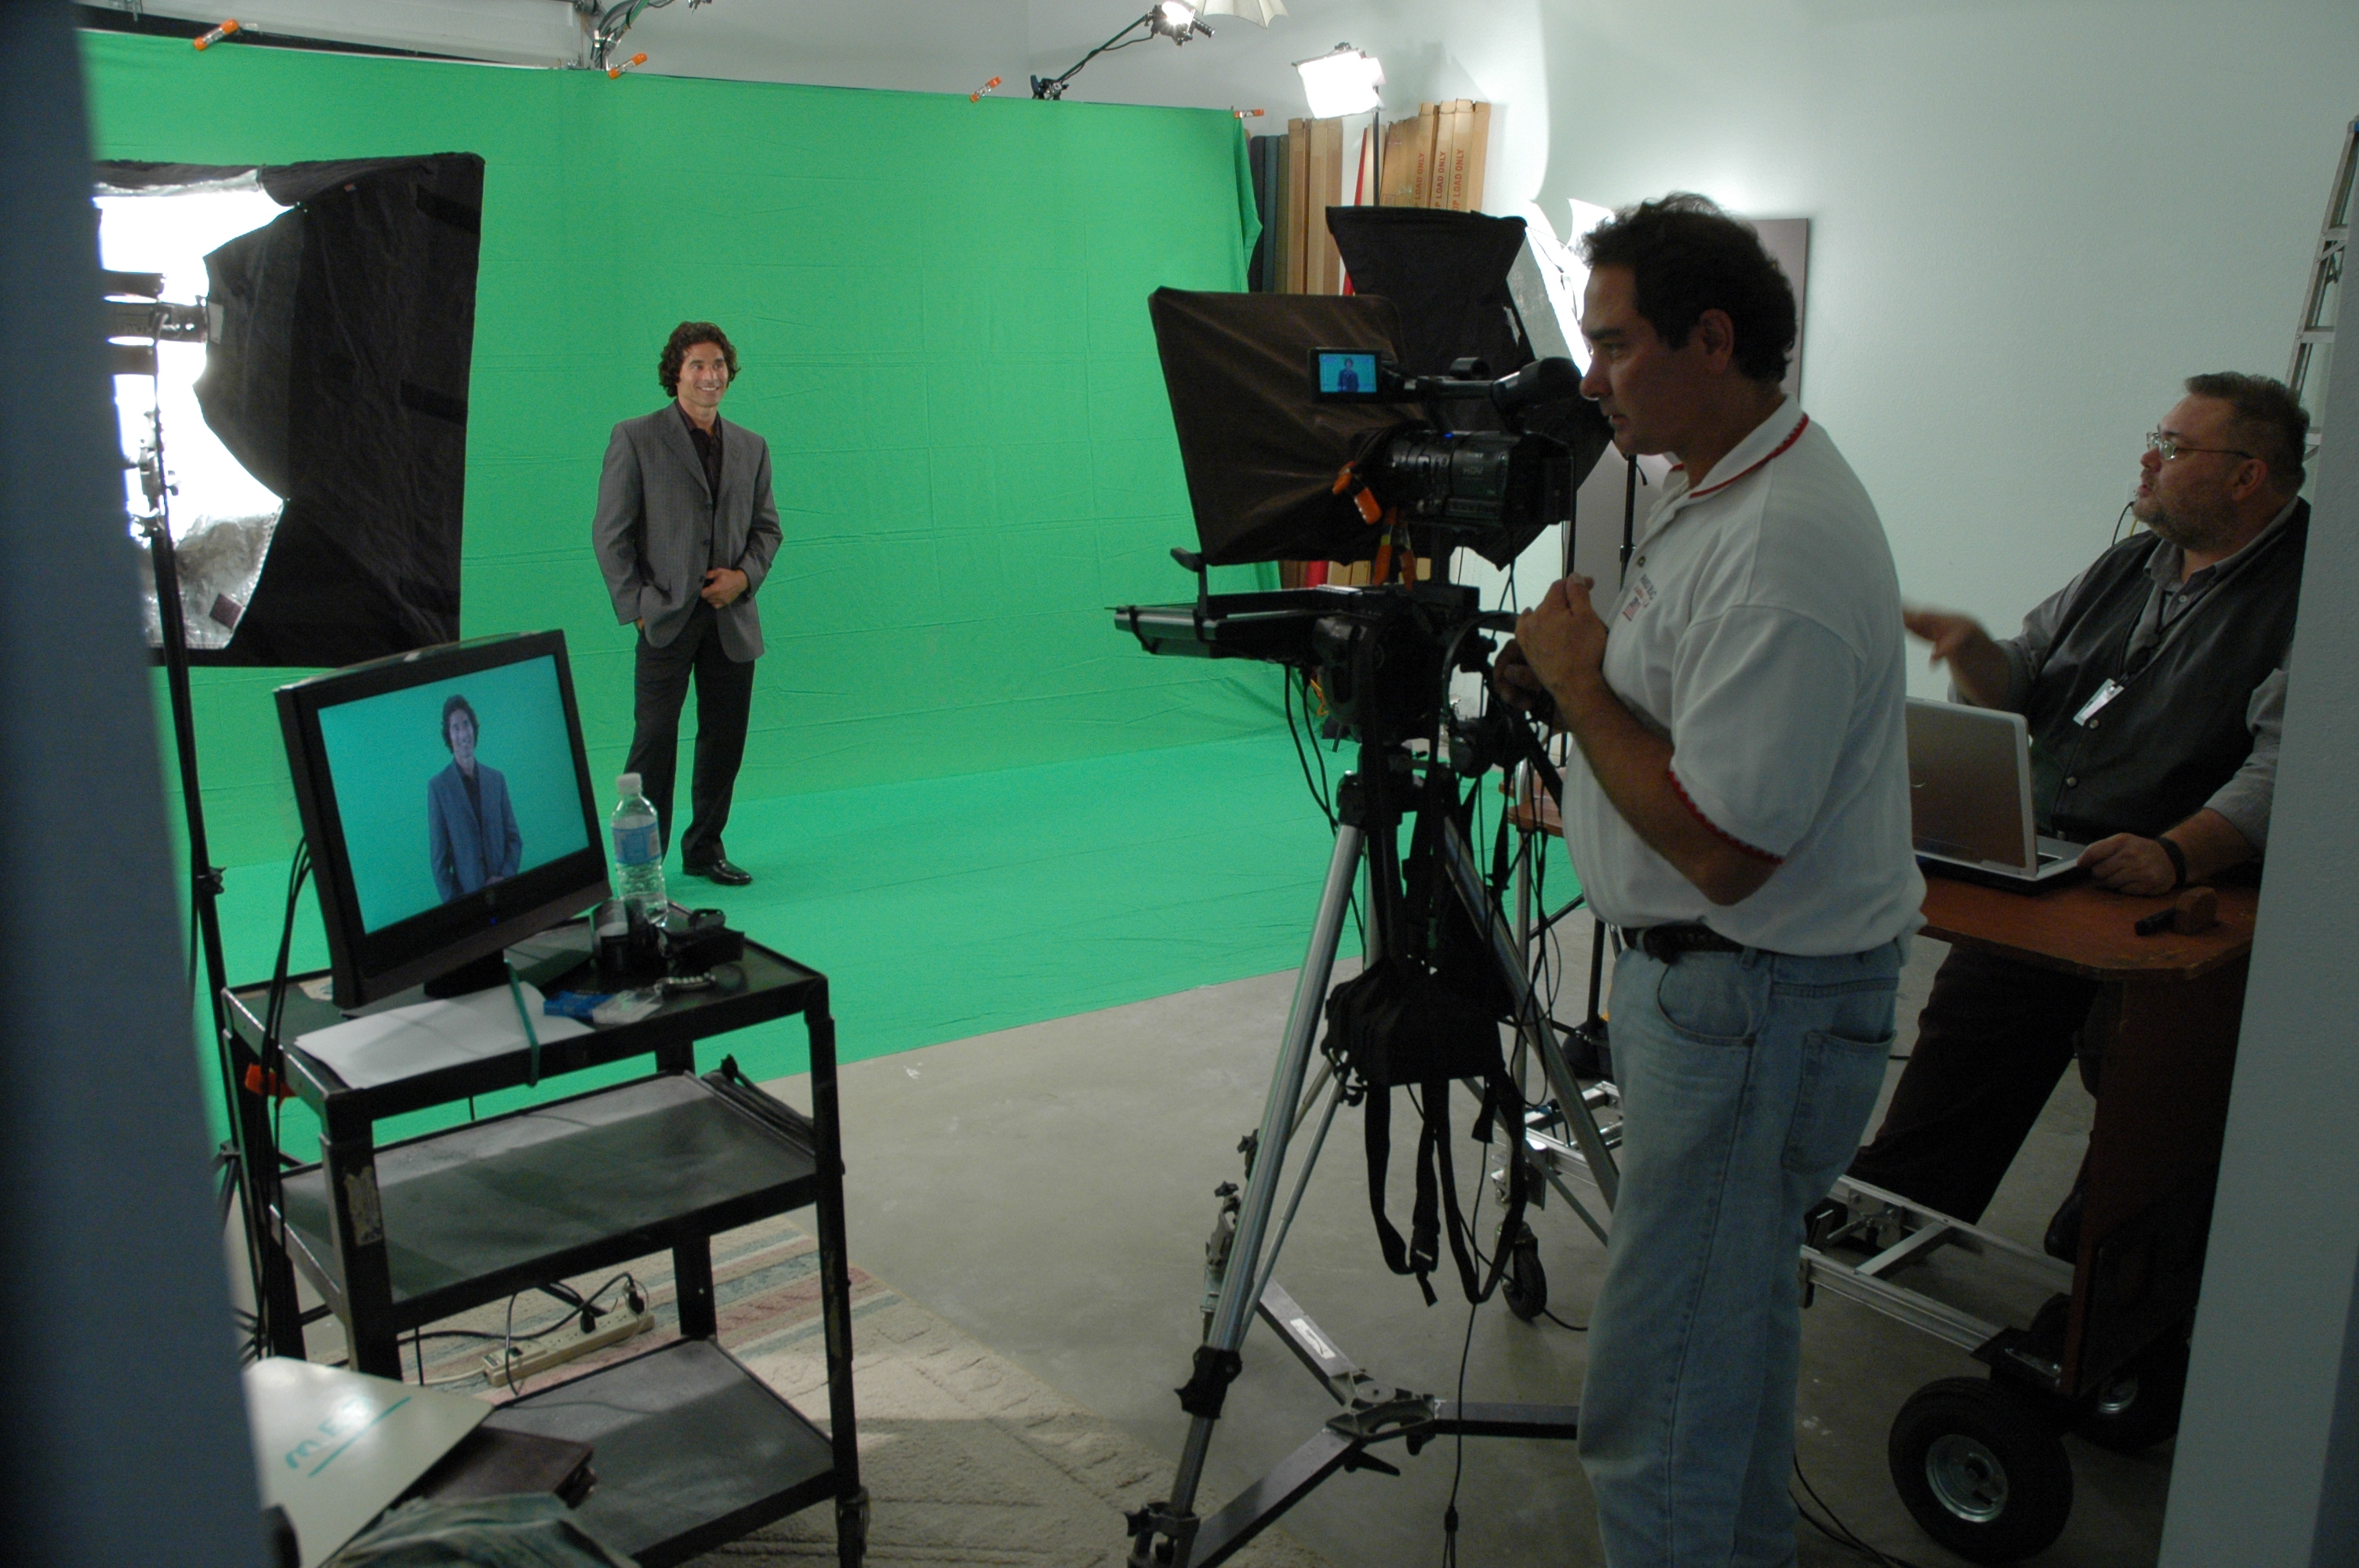
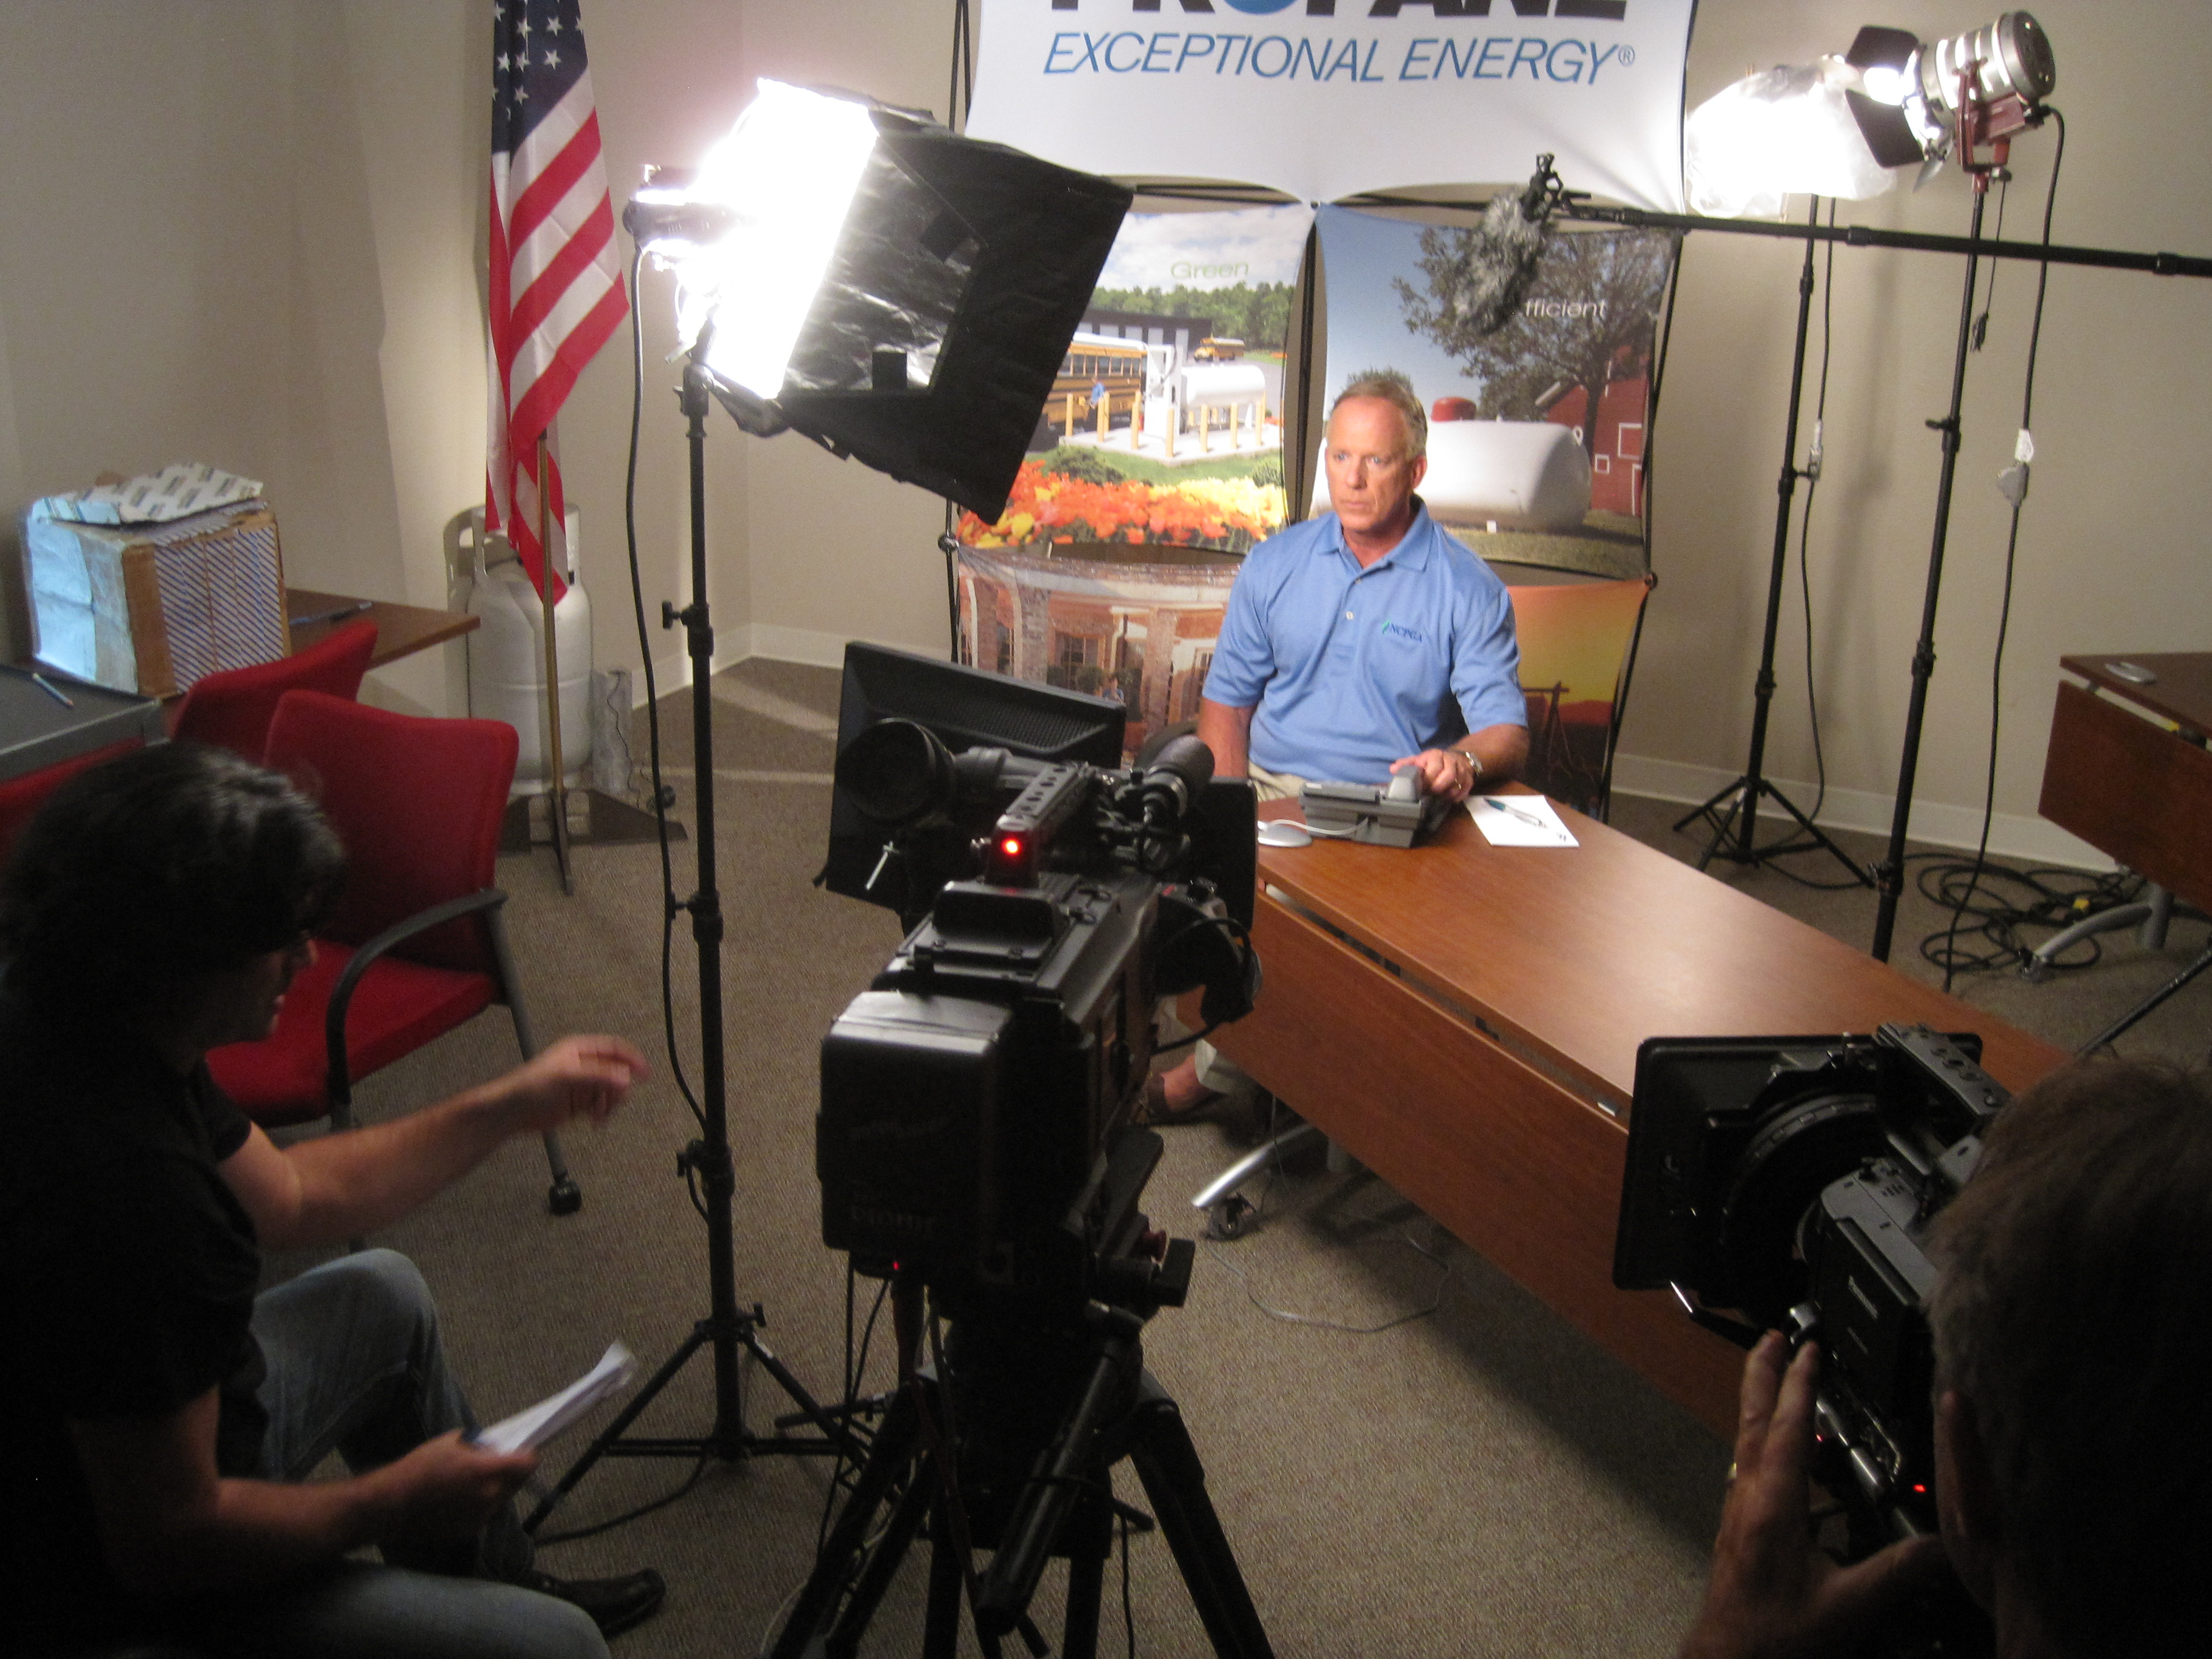
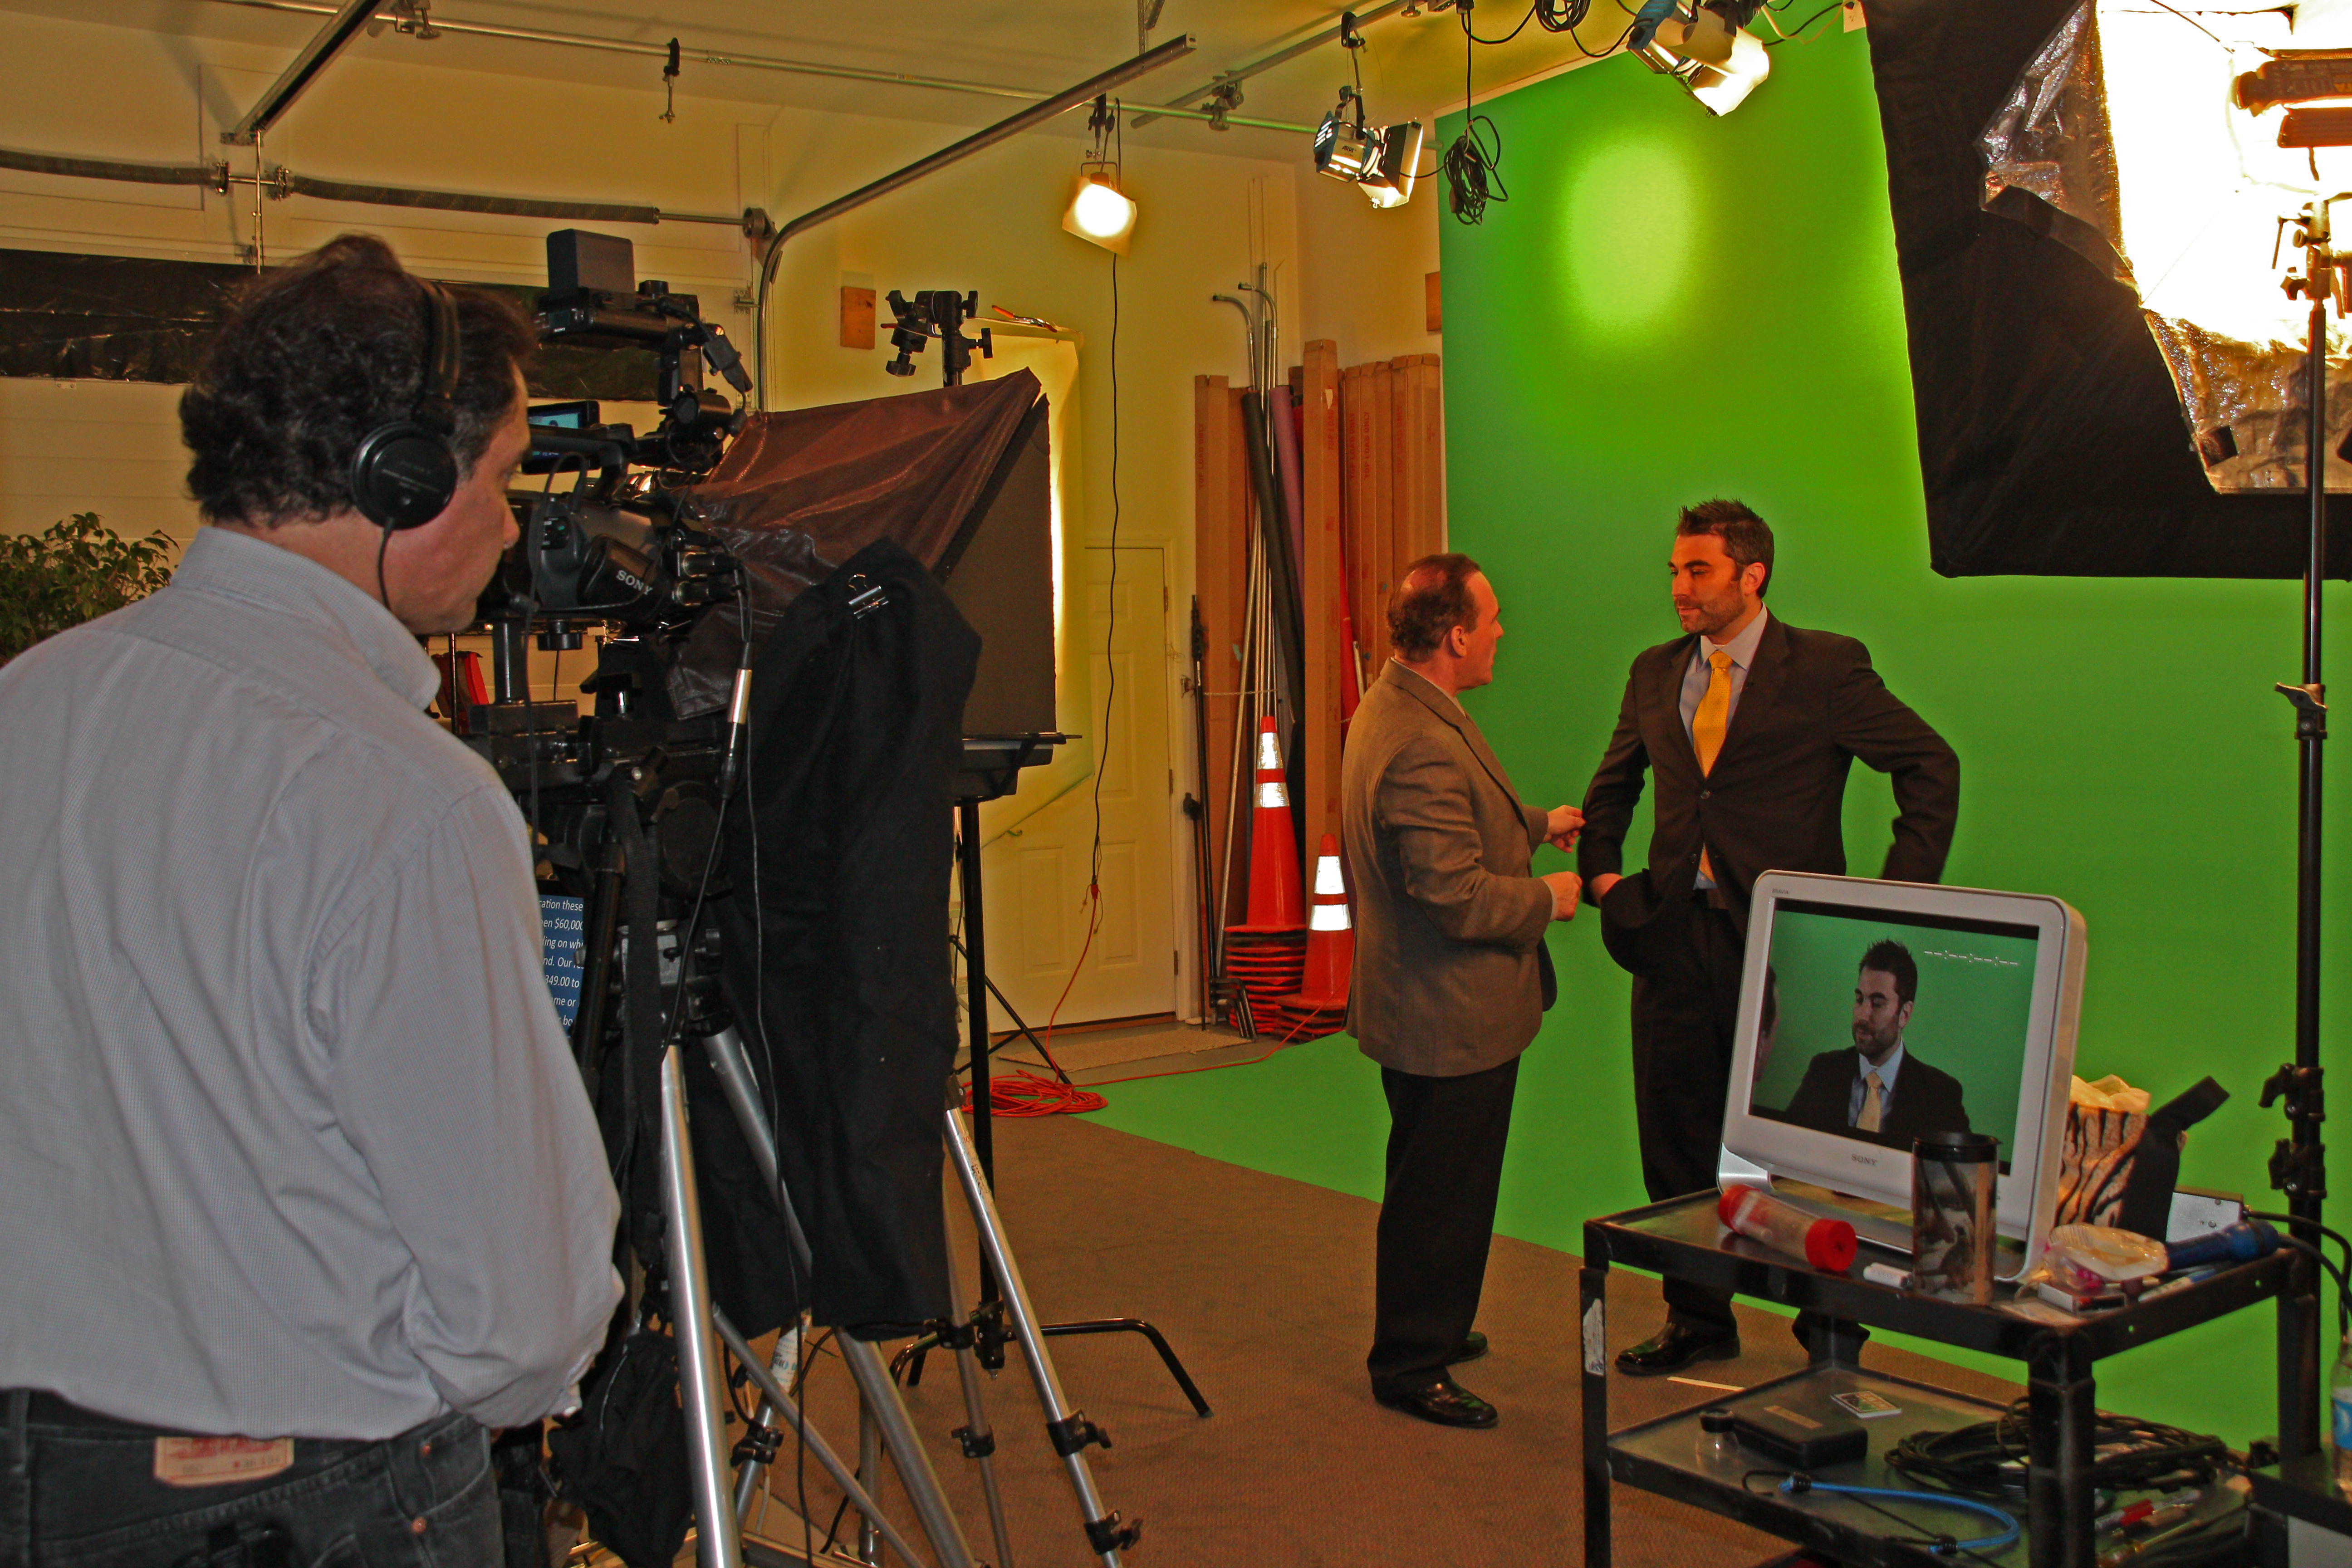
Studio vs. location: economical means choosing the right level of control

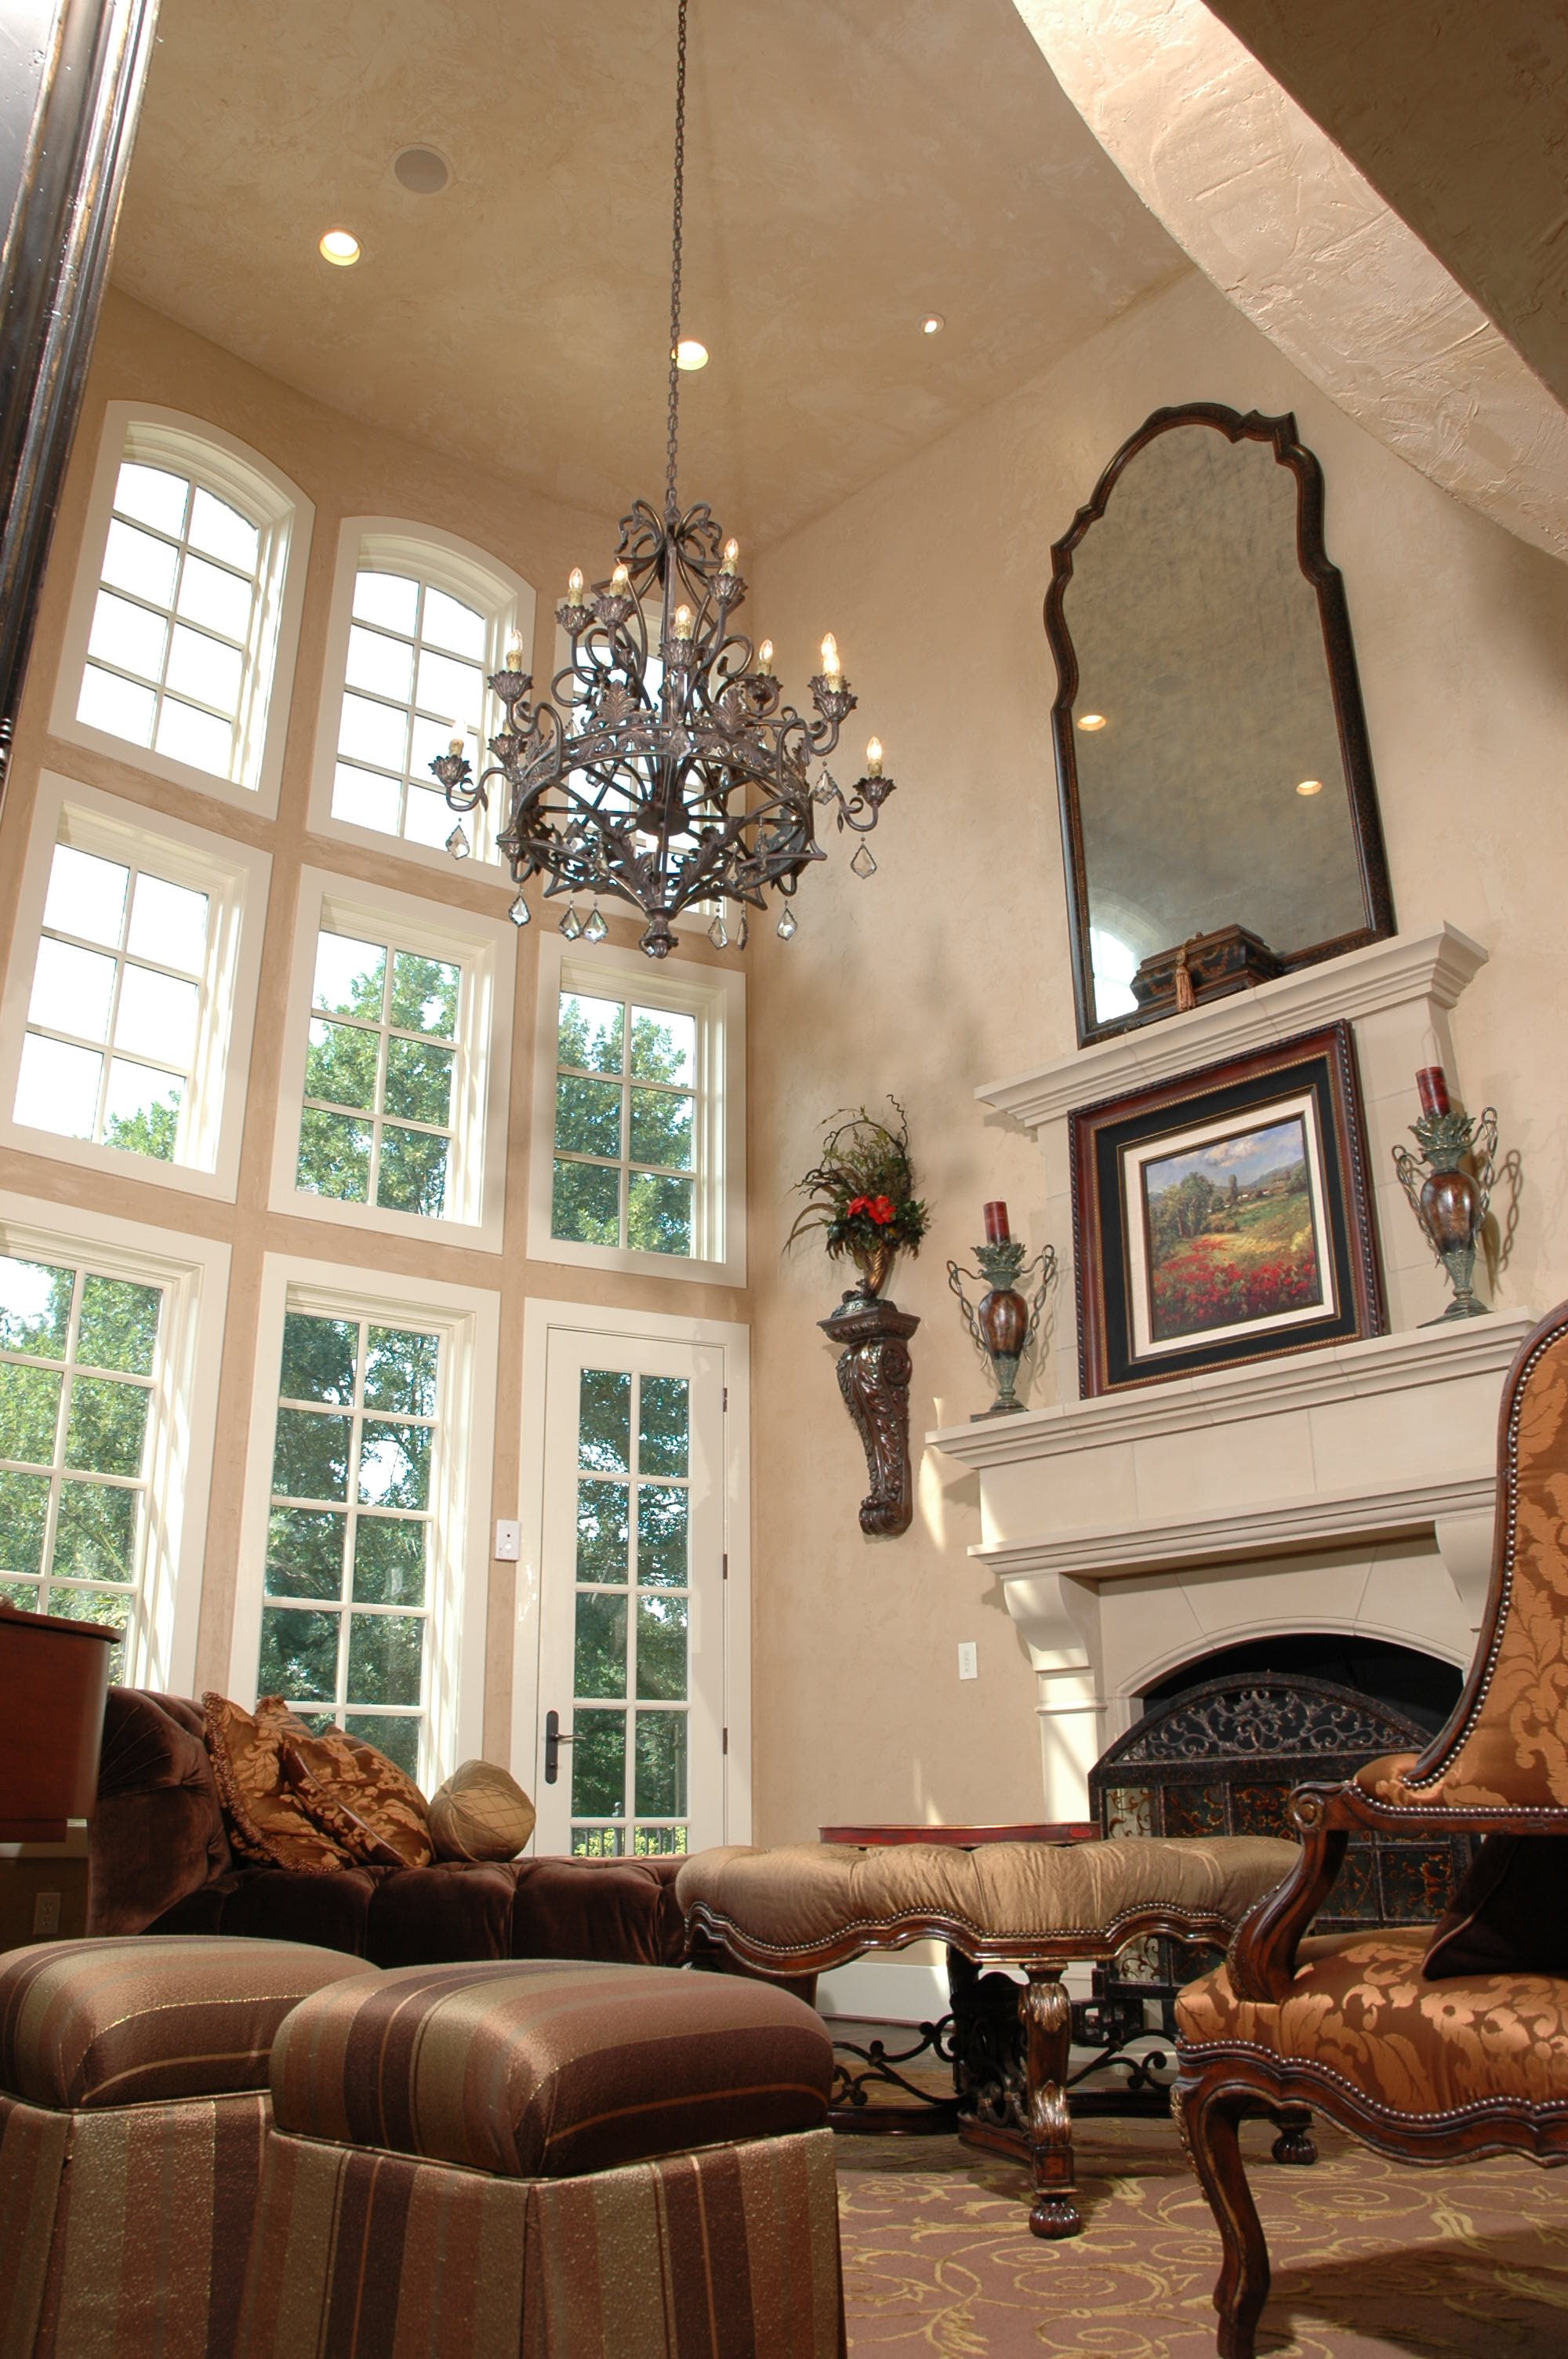
A controlled studio environment is often the most economical choice for:

  • executive interviews,
  • testimonials,
  • product explainers,
  • recruiting content,
  • training and internal messaging,
  • and “repeatable” brand content (monthly/quarterly releases).

Why? Because studios reduce variables:

  • consistent lighting,
  • consistent sound,
  • fewer interruptions,
  • faster setup,
  • repeatable looks across a campaign.

Location shoots can be essential (culture, operations, scale, authenticity), but they introduce cost drivers:

  • company disruptions,
  • ambient noise,
  • security and access,
  • permits,
  • weather,
  • and longer setup times.

The economical approach is often a hybrid:

  • studio for interviews and hero messaging,
  • location for purposeful B-roll and operational proof.

Lighting: the silent differentiator between “inexpensive” and “effective”

Lighting is where budget production often collapses—because it’s misunderstood.

Good lighting does three economical things:

  1. Flatters skin and reduces retouching time
  2. Creates separation and depth (so footage looks premium without expensive locations)
  3. Maintains continuity (so edits don’t reveal mismatched scenes)

In a studio, lighting is repeatable. That means:

  • faster setup for multi-person interview days,
  • consistent look across departments,
  • and easier future shoots that match earlier campaigns.

Audio is non-negotiable (and fixing bad audio is never economical)

Viewers forgive imperfect visuals faster than they forgive poor sound. And bad audio creates hidden cost:

  • longer edits,
  • more re-recording,
  • more approvals,
  • and often a total loss of credibility.

Economical production plans for audio like it’s the primary deliverable:

  • proper mic strategy (lav, boom, redundancy),
  • controlled room tone,
  • noise management,
  • and clean gain staging.

The payoff is speed: clean audio edits faster, grades better, and gets approved sooner.


The “coverage multiplier”: designing one shoot to feed many edits

This is where economical production becomes strategic.

Instead of one finished video, you want a content system:

  • 1 hero video (60–120 seconds)
  • 3–6 cutdowns (15–30 seconds)
  • 6–12 short clips (5–12 seconds) for paid/social
  • pull quotes and stills for web and sales decks
  • vertical versions for mobile platforms
  • alternate CTAs for different funnel stages

You don’t get this by “shooting more.” You get it by shooting smarter:

  • capturing transitions and clean action loops,
  • filming subject-specific B-roll that matches what’s being said,
  • building in short “headline lines” for social,
  • and maintaining consistent framing for clean punch-ins.

Post-production economics: version control beats endless revisions

The most expensive edit is the one that keeps getting reopened.

Economical post-production is a workflow, not a vibe:

  • clear deliverable specs (platform, length, aspect ratio, captions, file type)
  • edit milestones (outline → assembly → fine cut → color/sound → final)
  • feedback consolidation (one channel, one owner, one set of notes)
  • asset management (organized project files, labeled selects, reusable templates)

When the edit is structured, you reduce the number of review cycles and protect timelines—especially with multiple stakeholders.


AI as a cost-and-speed amplifier (when used correctly)

AI can absolutely make production more economical—but only when it’s used to accelerate real work (not create chaos).

High-impact, practical uses include:

  • transcript-based editing and faster selects,
  • caption workflows and versioning,
  • searchability across archives (find the right quote fast),
  • noise reduction and cleanup (when applied surgically),
  • metadata tagging for repurposing.

The key is restraint: AI should reduce friction while keeping human control over brand voice, legal risk, and story.


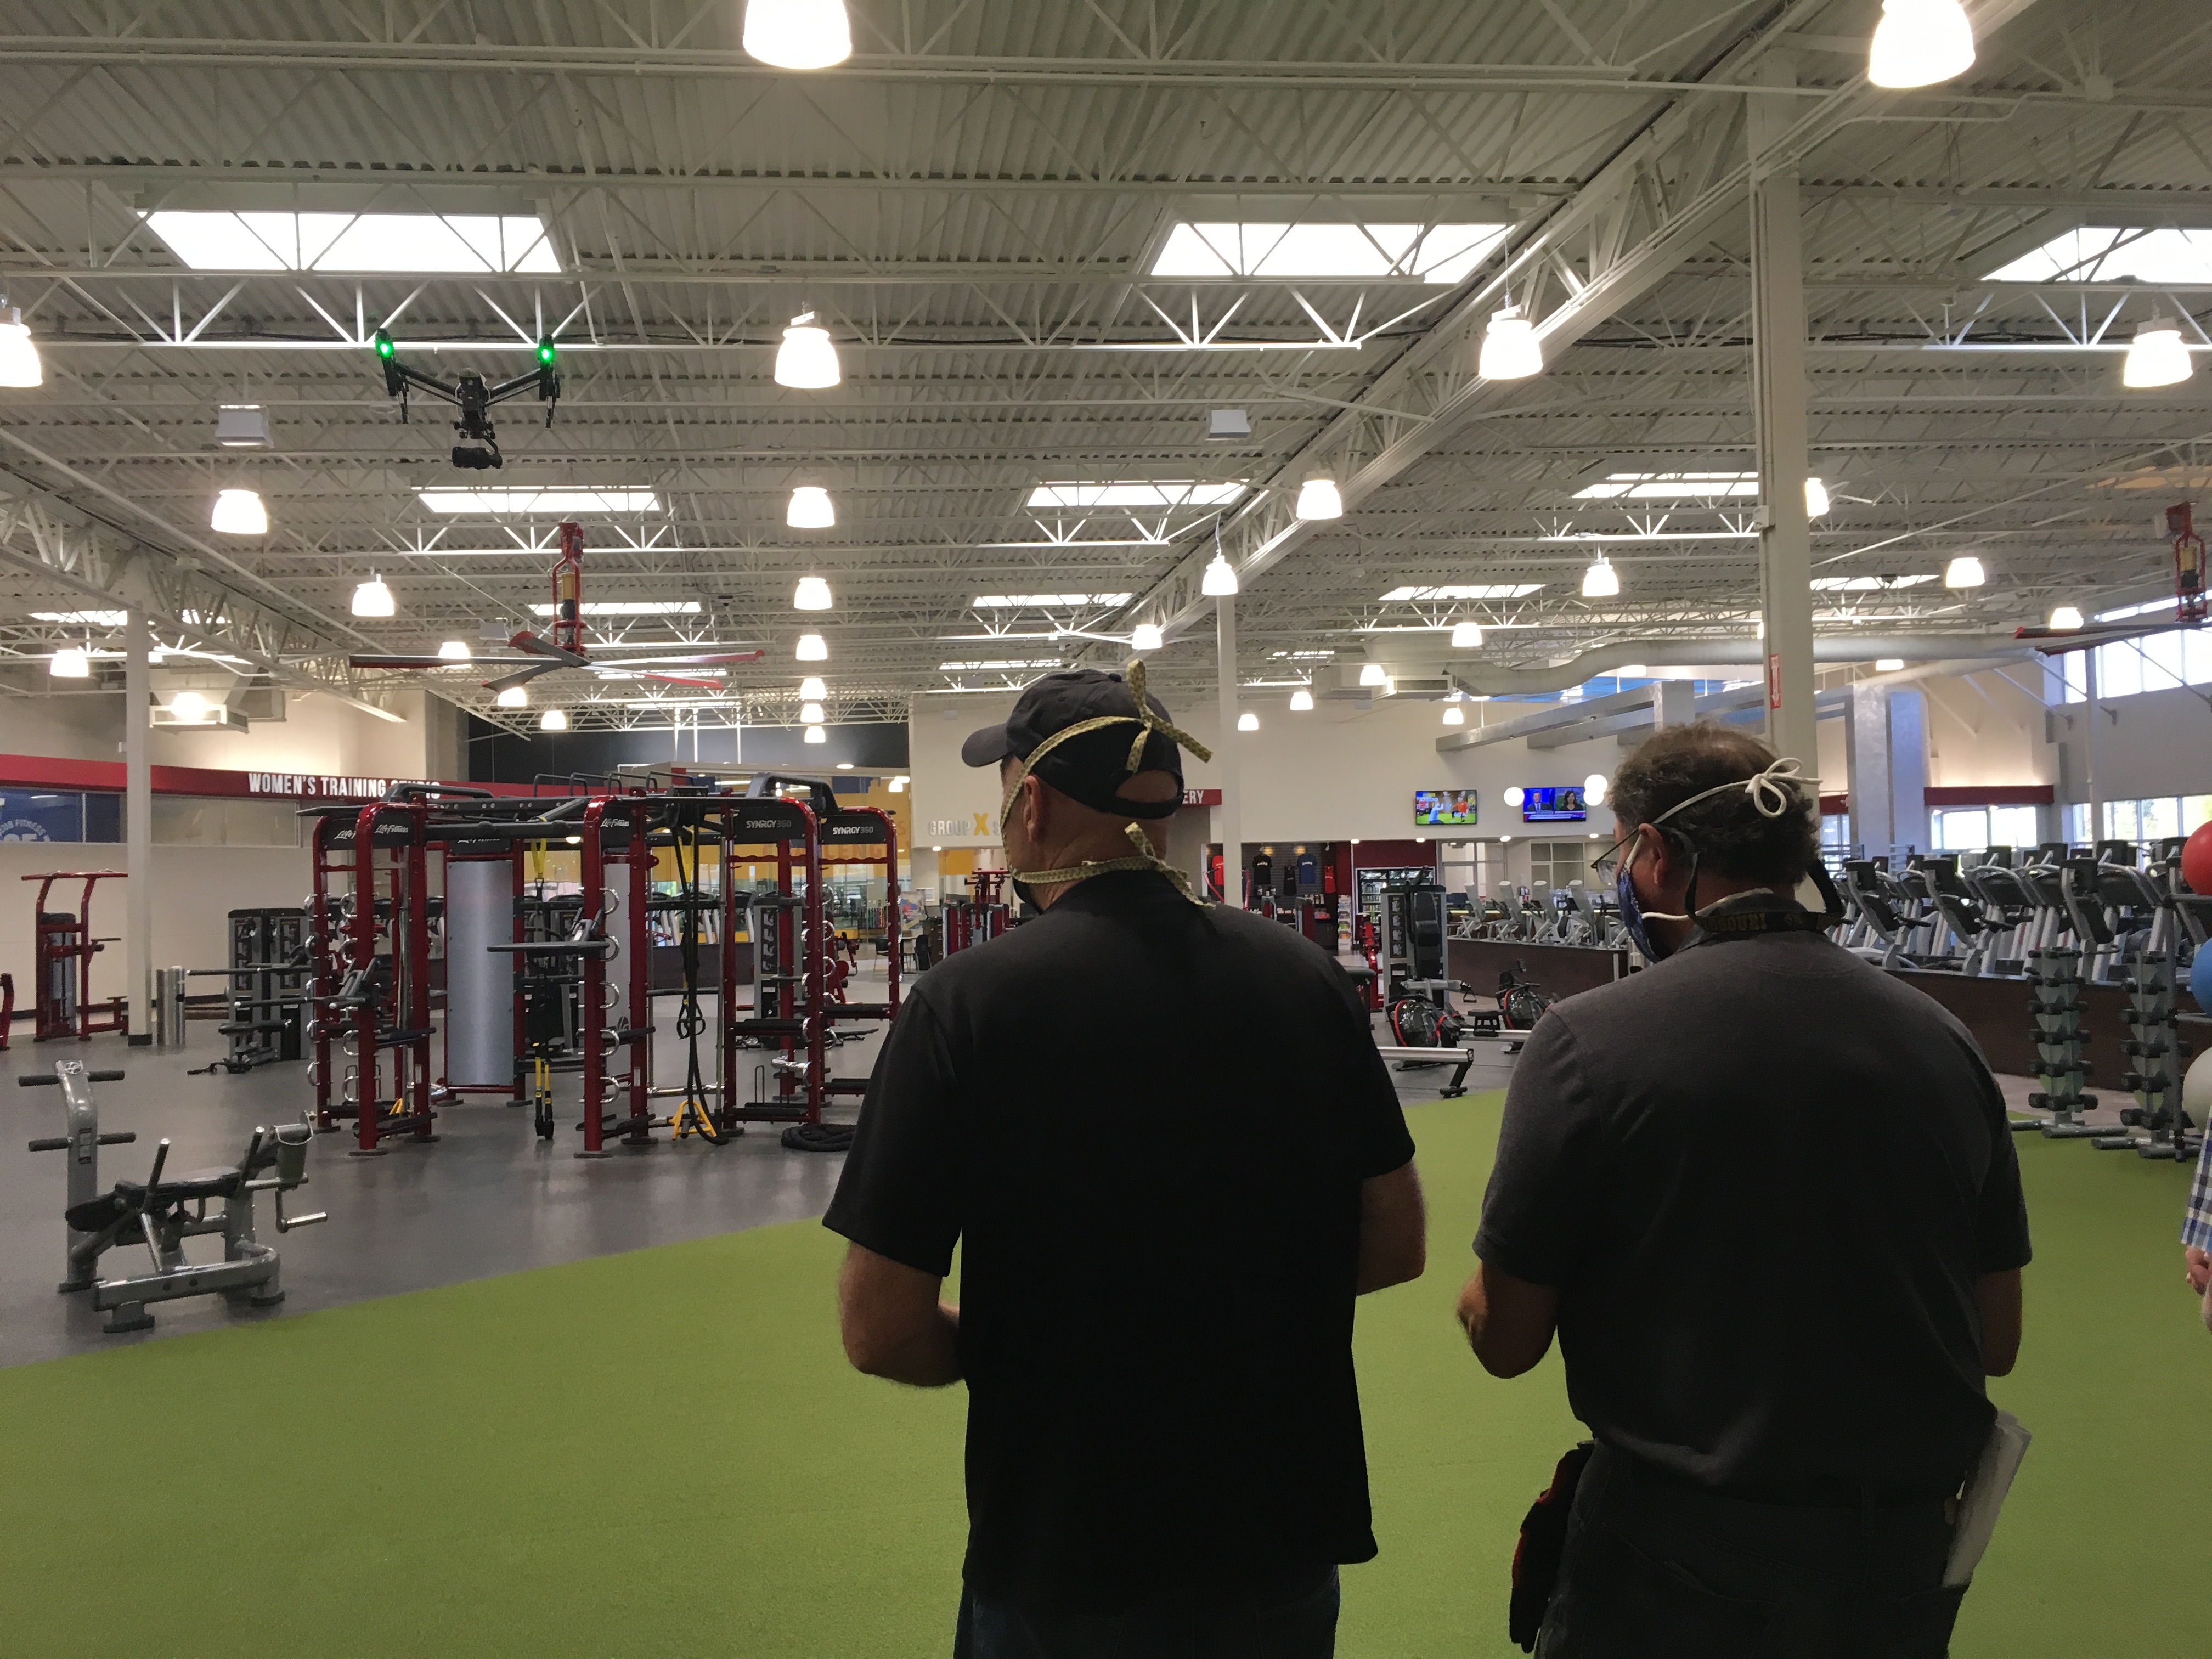
Indoor drones: when they help—and when they’re a distraction

Indoor drone work can be powerful for:

  • facility walk-throughs,
  • warehouse and operations coverage,
  • revealing scale and flow,
  • connecting scenes without hard cuts.

But it has to be executed with safety, planning, and purpose:

  • flight path design,
  • risk mitigation around people and equipment,
  • and shots that integrate into the narrative.

Used well, indoor drone footage can replace more expensive rigging, stabilize movement, and deliver “production value” without production drag.


Deliverables matter: economical means you get exactly what you need, in the right formats

Decision makers don’t want “the video.” You want:

  • the right versions,
  • correctly exported,
  • platform-ready,
  • and easy to deploy internally.

That includes clarity on:

  • aspect ratios (16:9, 9:16, 1:1),
  • compression and bitrate targets,
  • audio mix needs,
  • caption formats (burned-in vs sidecar),
  • still frames and thumbnails,
  • and a clean handoff for your marketing stack.

When deliverables are planned upfront, you avoid last-minute scramble and re-exports that eat time (and patience).


A quick checklist: how to evaluate an economical studio partner

Ask these questions before you commit:

  • How do you structure pre-production so we don’t waste shoot time?
  • How do you design deliverables for repurposing across channels?
  • What’s your audio plan, and what redundancies do you use?
  • How do you manage review cycles and feedback consolidation?
  • Can you maintain a consistent look across multiple shoot days/months?
  • What’s your approach to versioning (cutdowns, vertical edits, captions)?
  • How do you handle file formats, handoff, and archival?

A studio that answers these clearly is usually the one that protects your budget and your brand.


Why St Louis Video Studio is built for economical, high-impact production

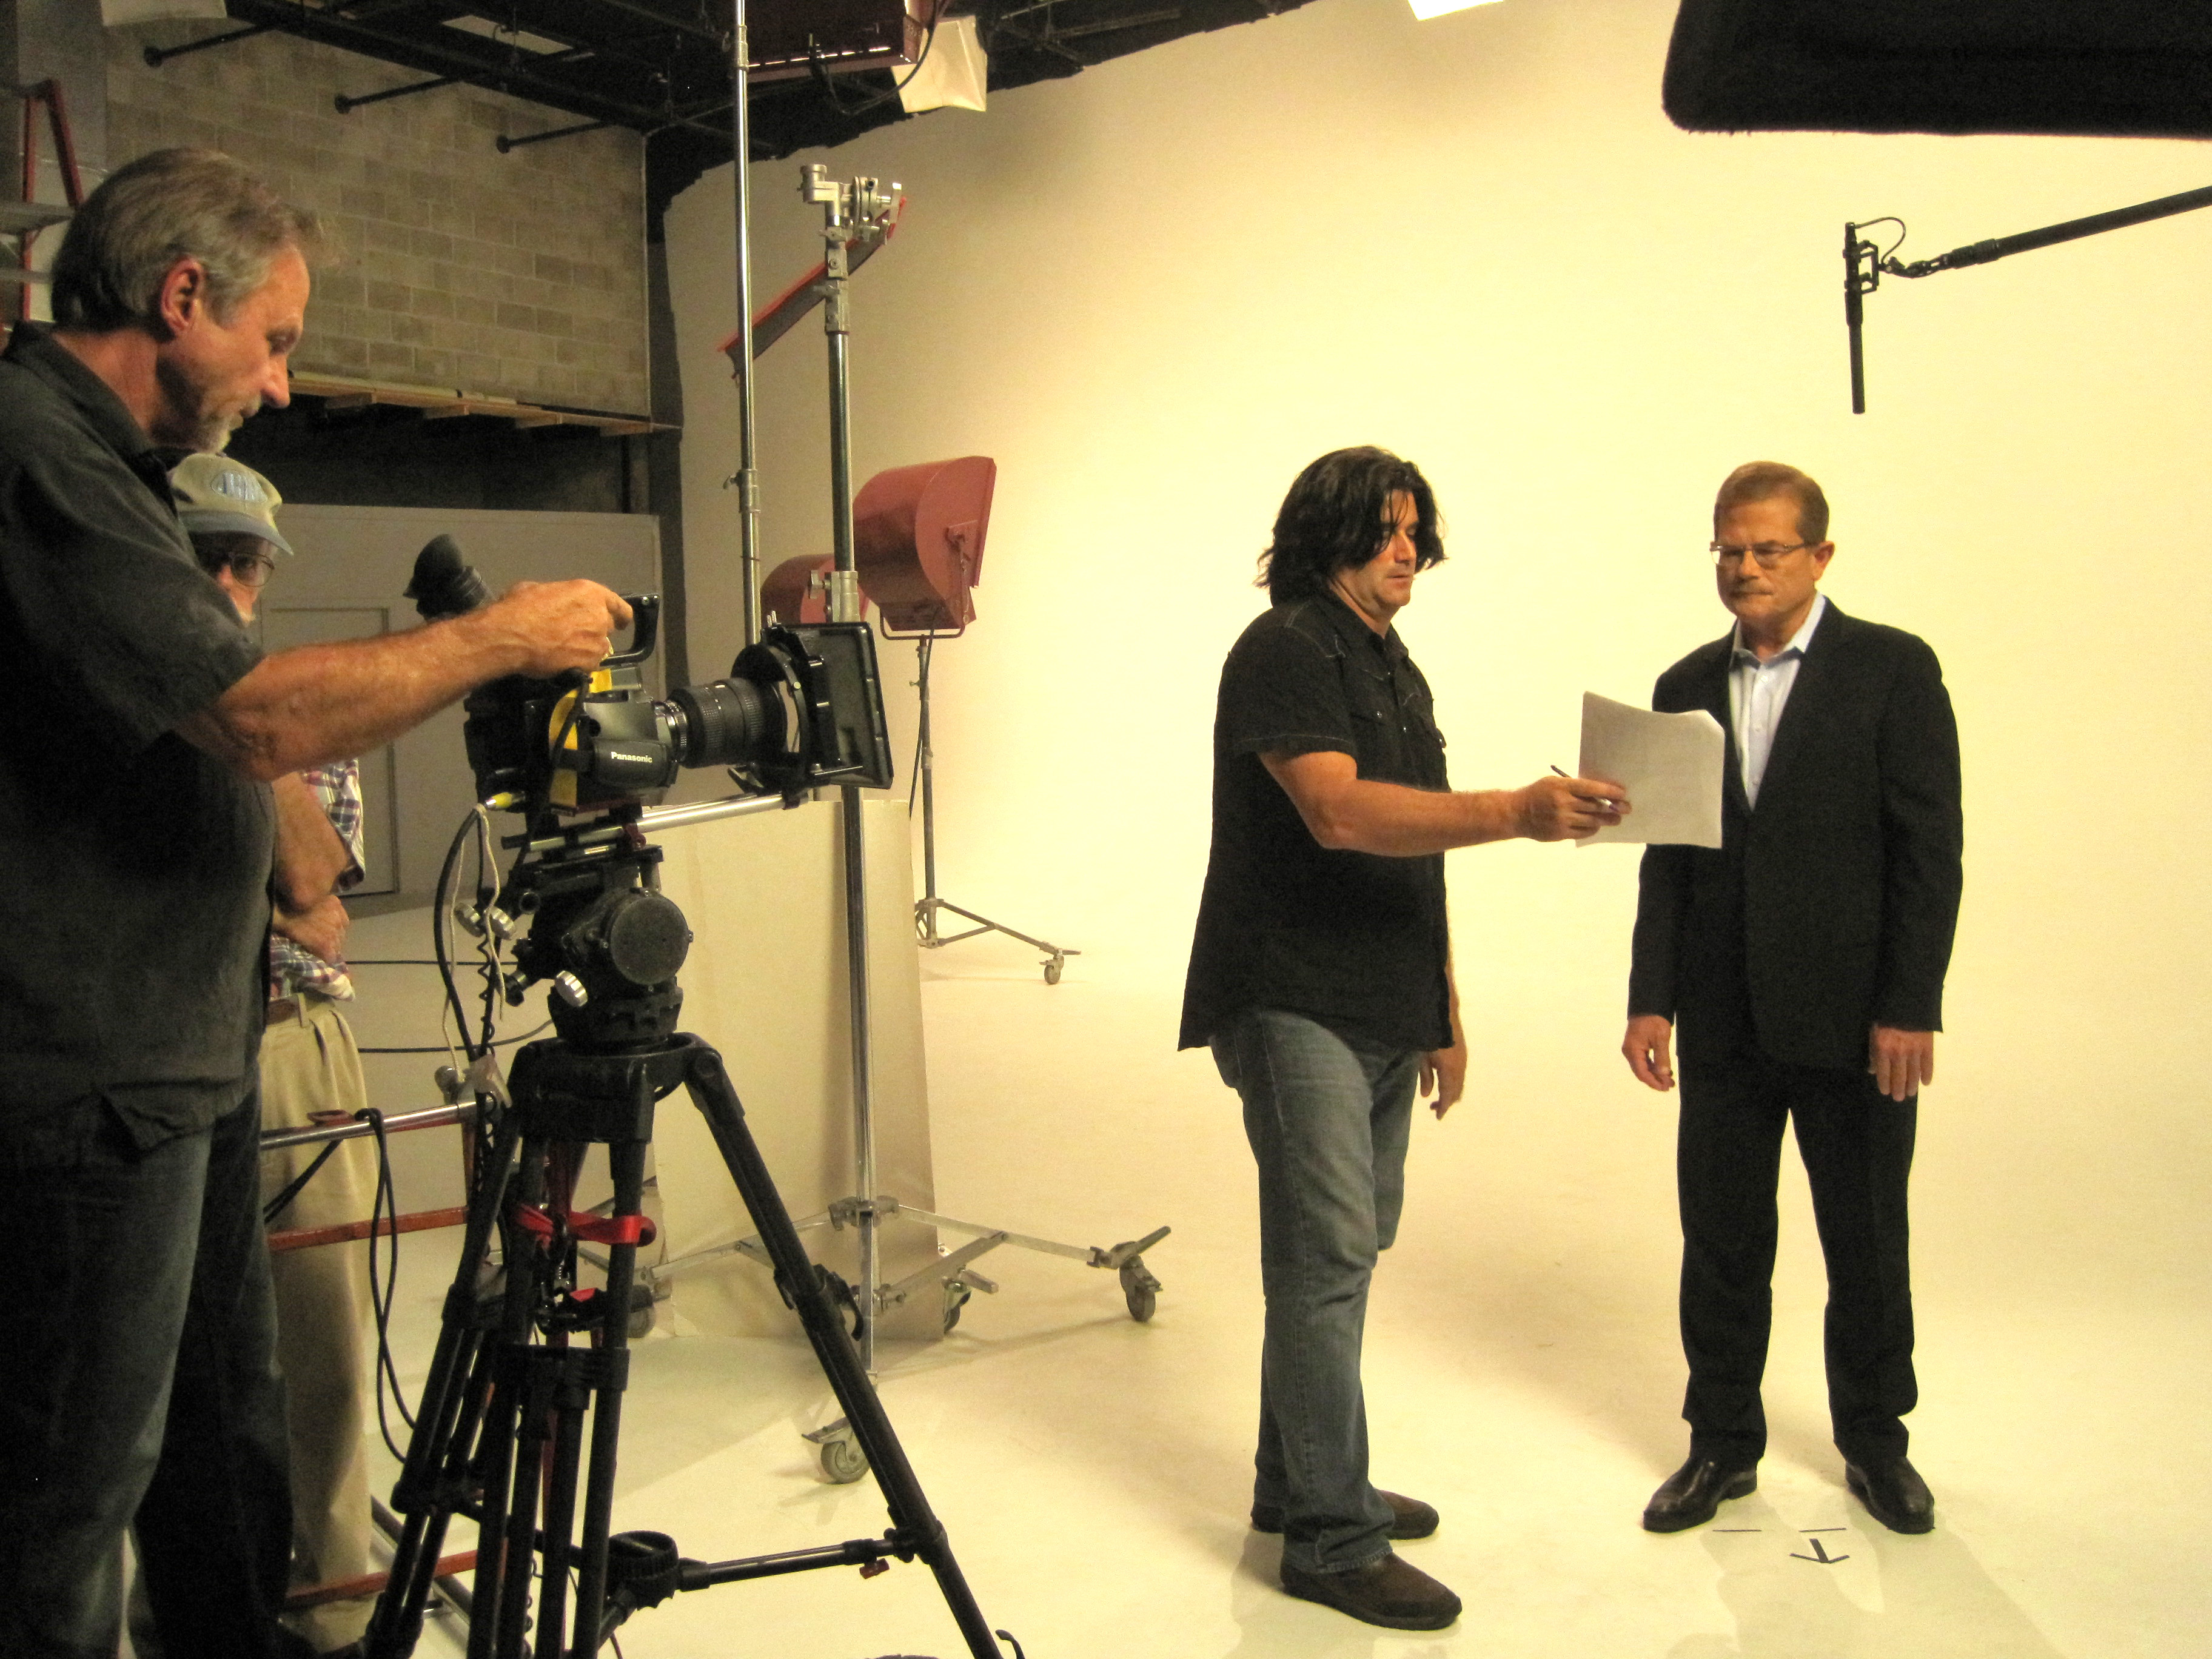
At St Louis Video Studio, we’ve spent decades refining a production model that’s efficient without cutting corners. As a full-service video and photography production corporation since 1982, we’ve worked with many businesses, marketing firms, and creative agencies in the St. Louis area—so we understand what decision makers need: reliable execution, predictable timelines, and assets that work across platforms.

We’re a full-service professional commercial photography and video production company with the right equipment and creative crew service experience for successful image acquisition. We offer full-service studio and location video and photography, as well as editing, post-production, and licensed drone work. St Louis Video Studio can customize your productions for diverse types of media requirements, and repurposing your photography and video branding to gain more traction is one of our specialties.

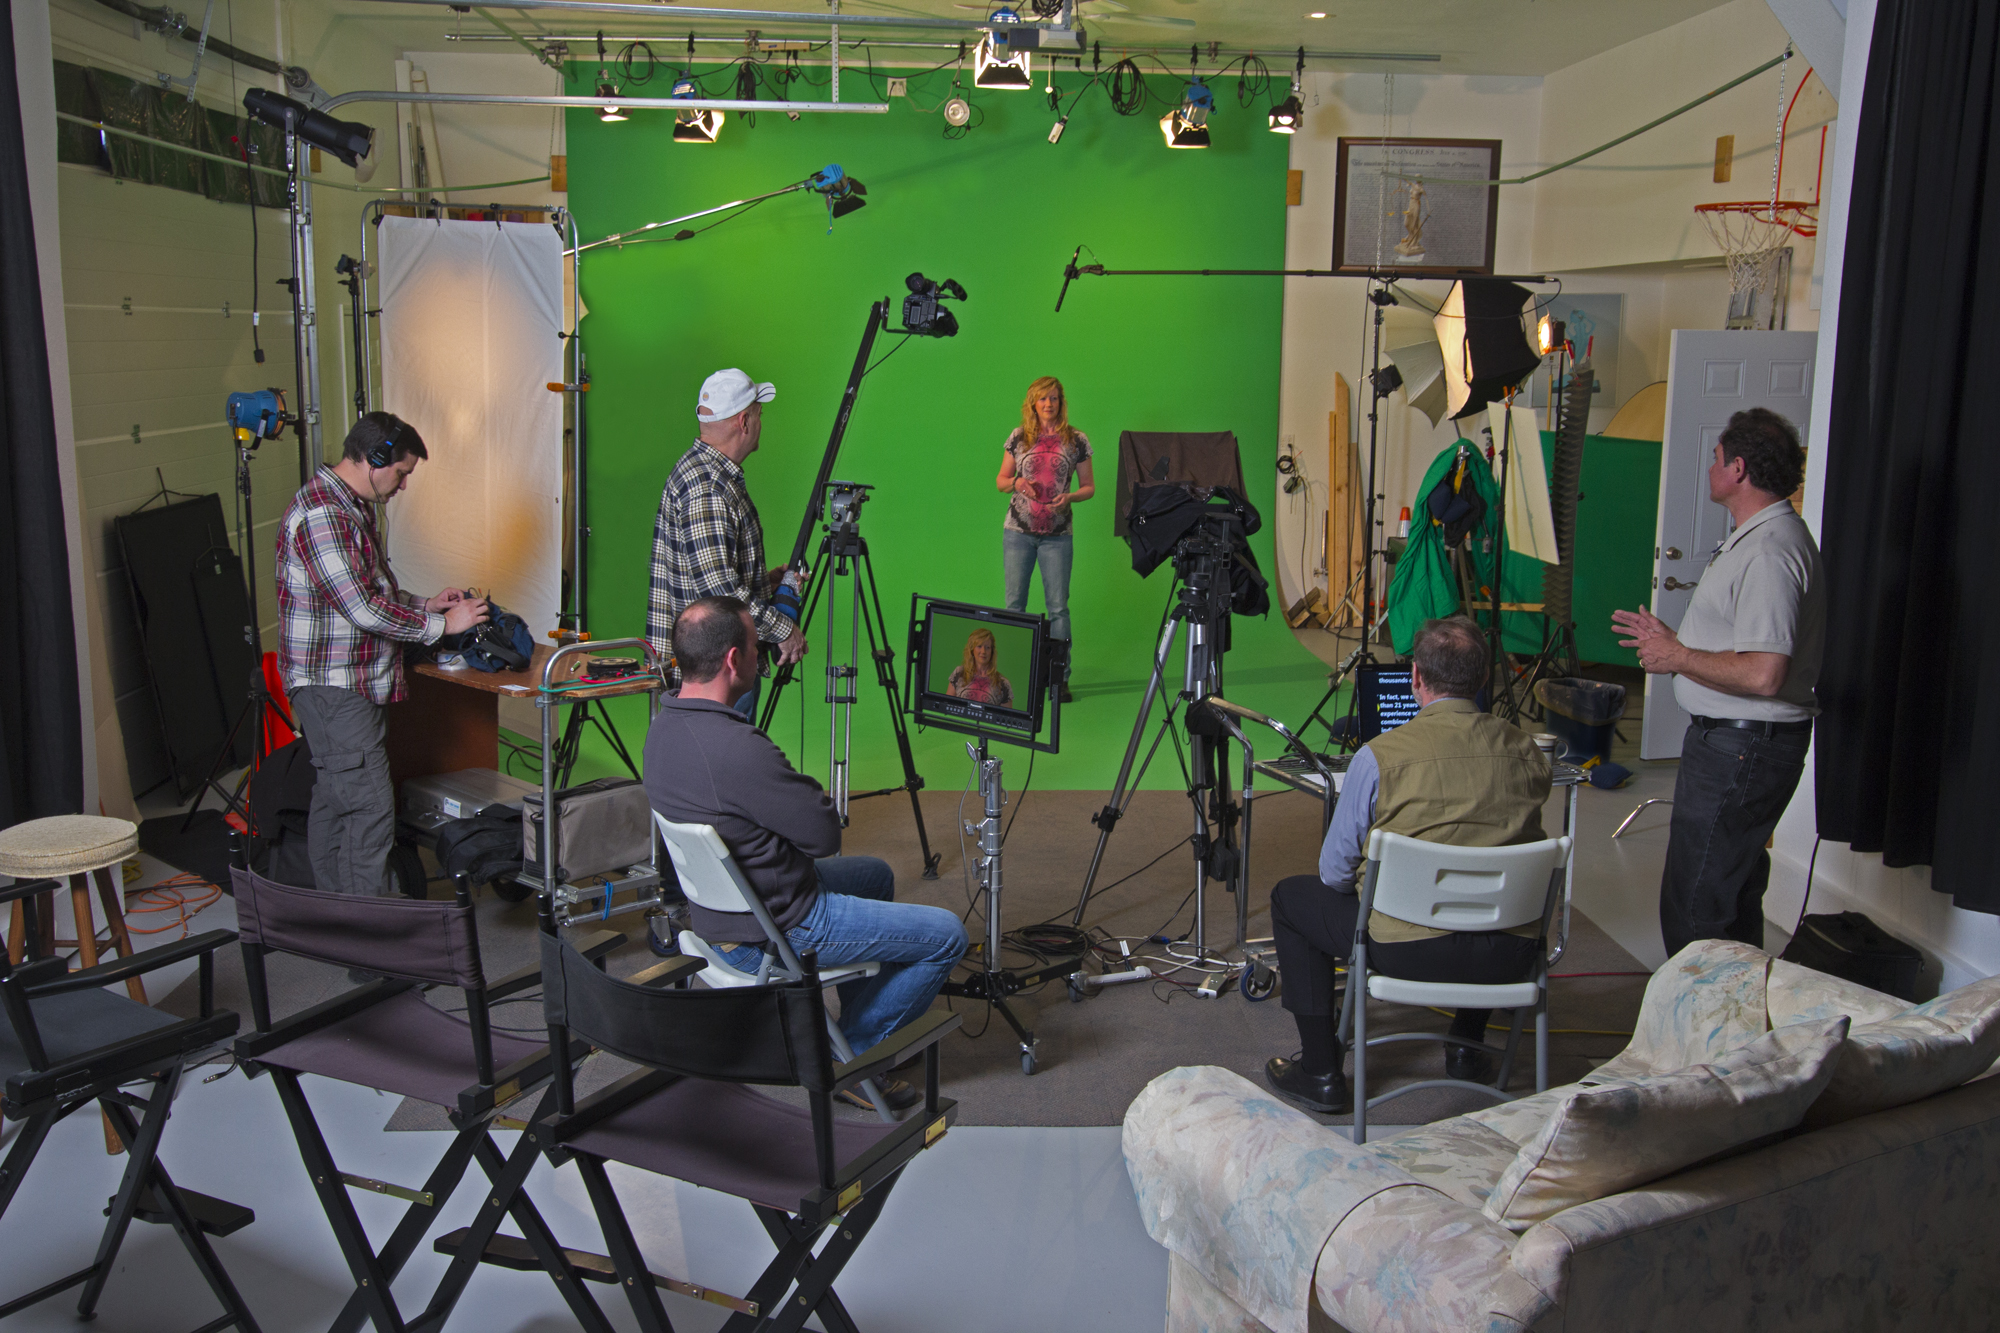
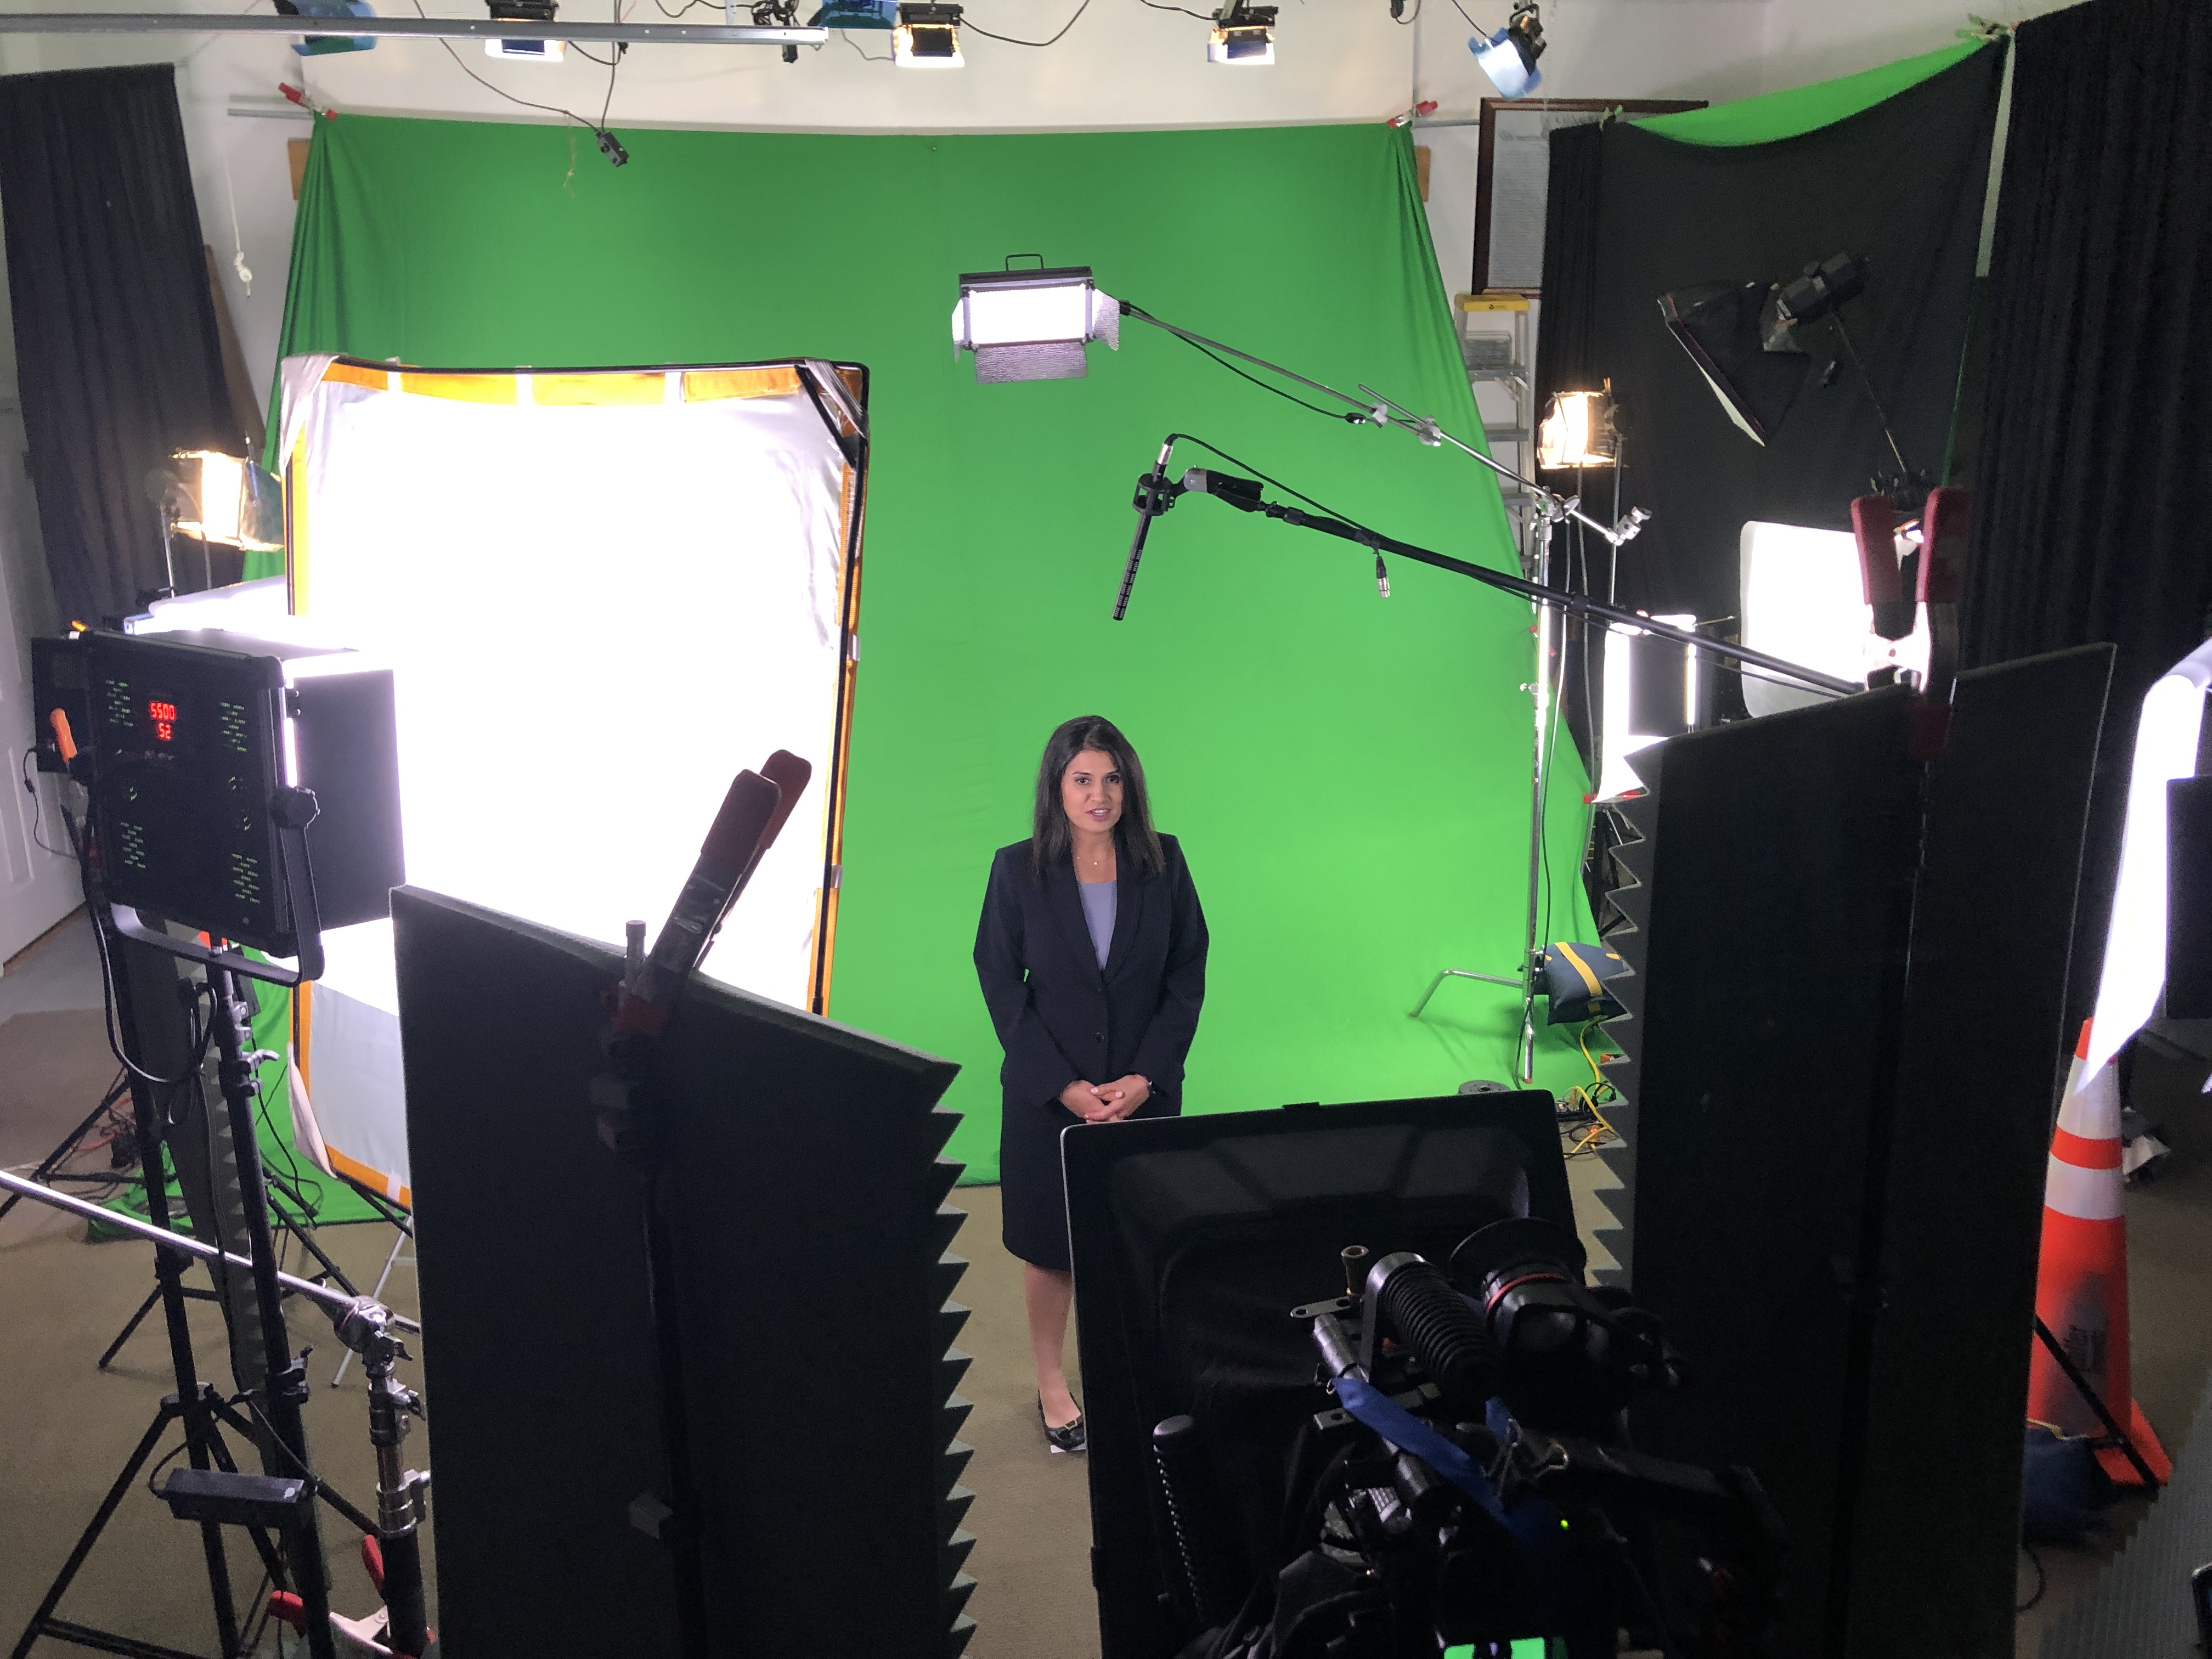
We’re well-versed in all file types, media styles, and accompanying software—and we use the latest in Artificial Intelligence across our media services to speed workflows without sacrificing quality. Our private studio lighting and visual setup is ideal for small productions and interview scenes, and our studio is large enough to incorporate props to round out your set. We support every aspect of your production—from setting up a private, custom interview studio to supplying professional sound and camera operators, as well as providing the right equipment—ensuring your next video production is seamless and successful. And yes, we can fly our specialized drones indoors when the shot calls for it.

If your goal is to produce more high-quality content with less waste—without compromising on brand, consistency, or production value—an economical studio partner should feel like a force multiplier. That’s exactly how we operate.

314-913-5626

stlouisvideostudio@gmail.com

Unknown's avatar

Maximizing Your Space: Tips for Setting Up a Small Video Studio

In today’s digital age, video content has become a powerful tool for businesses and individuals to communicate their messages effectively. Whether you’re a content creator, a small business owner, or a marketer, having a dedicated video studio can significantly enhance your production quality and brand presence. However, setting up a video studio in a small space can be a challenging task. In this article, we will provide you with expert tips on how to maximize your space and create an efficient small video studio.

Once your small video studio is set up, it’s important to test the equipment, lighting, and audio quality before starting your actual production.

1. Define Your Goals and Plan Ahead

Before diving into the setup process, it’s crucial to define your goals and determine what kind of videos you’ll be producing. Are you focusing on interviews, product demonstrations, or creative storytelling? Understanding your objectives will help you make informed decisions about equipment and layout.

Once you’ve defined your goals, create a detailed plan for your studio. Consider the dimensions of your space, the equipment you’ll need, and the layout that works best for your specific requirements. Planning ahead will save you time, money, and headaches in the long run.

2. Choose the Right Location

When dealing with limited space, choosing the right location for your video studio is paramount. Look for a spot with good natural lighting and minimal noise disturbances. A space near a window can provide ample natural light, reducing the need for additional lighting equipment.

Additionally, consider the acoustics of the room. Spaces with hard surfaces can create echoes and unwanted audio reflections. To mitigate this, add soundproofing materials like foam panels or curtains to absorb excess sound and improve audio quality.

3. Optimize Lighting

Lighting is one of the most critical factors in creating high-quality videos. In a small video studio, maximizing the available light is essential. Here are some tips to optimize lighting in your small space:

  • Utilize natural light: Position your shooting area near a window to make the most of natural light. Keep in mind that the intensity and quality of natural light can change throughout the day, so plan your shooting schedule accordingly.
  • Invest in lighting equipment: Supplement natural light with artificial lighting to maintain consistent illumination. LED panels or softboxes are affordable and versatile lighting options for small spaces.
  • Use reflectors and diffusers: Reflectors bounce light back onto the subject, filling in shadows, while diffusers soften harsh light. These inexpensive tools can significantly improve the quality of your videos.

4. Consider Backgrounds and Set Design

The background and set design play a crucial role in creating a visually appealing video. In a small studio, you need to be strategic in utilizing the limited space effectively. Here are some tips for background and set design in a small video studio:

  • Keep it simple: Avoid cluttered backgrounds that can distract viewers from your main subject. Opt for solid colors or simple patterns that complement your branding.
  • Create depth: Use depth and perspective techniques to make your small space appear larger. Experiment with different camera angles and depth of field to add visual interest.
  • Portable backdrops: Invest in portable backdrop systems that can be easily set up and removed. This allows you to switch backgrounds quickly, depending on the type of video you’re producing.

5. Use Space-Saving Equipment

In a small video studio, every inch of space matters. Choosing compact and space-saving equipment is crucial to maximize your available area. Consider the following:

  • Camera and tripod: Select a compact camera with excellent video capabilities to save space. A tripod with a small footprint will provide stability without occupying too much floor space.
  • Foldable equipment: Look for collapsible light stands, reflectors, and diffusers that can be easily folded and stored when not in use.
  • Wall-mounted equipment: Opt for wall-mounted or ceiling-mounted equipment such as lights, microphones, and monitors. This frees up valuable floor space and keeps your studio clutter-free.
  • Multifunctional furniture: Use furniture that serves multiple purposes. For example, a desk can double as a workstation and storage space for your equipment, or a bookshelf can store props and accessories while also acting as a backdrop.
  • Wire management: Keep your cables organized and out of the way. Consider using cable management solutions such as cable clips, velcro straps, or cable sleeves to avoid a messy and hazardous setup.

6. Efficient Storage Solutions

Effective storage solutions are essential to maintain a well-organized and functional small video studio. Here are some ideas to optimize your storage space:

  • Shelving units: Install sturdy shelves to store equipment, props, and accessories. Adjustable shelves allow you to customize the height according to your needs.
  • Carts and rolling racks: Invest in carts or rolling racks to store frequently used equipment, allowing for easy access and mobility. This is particularly useful if your studio serves multiple purposes or needs to be moved around.
  • Vertical storage: Make use of vertical space by installing hooks, pegboards, or wall-mounted racks to hang and store items such as cables, headphones, and smaller equipment.

7. Soundproofing and Acoustic Treatment

In a small video studio, soundproofing and acoustic treatment are crucial to ensure professional audio quality. Here are some tips for soundproofing and acoustic treatment:

  • Seal gaps and cracks: Inspect the room for any gaps or cracks where sound can leak. Use weatherstripping or acoustic sealant to seal them and prevent external noise from entering your recordings.
  • Add sound-absorbing materials: Install sound-absorbing panels or acoustic foam on the walls to reduce echoes and unwanted reflections. Place a thick rug or carpet on the floor to further improve sound quality.
  • Isolate noisy equipment: If you have equipment that generates noise, such as air conditioning units or computer fans, try to isolate them or use soundproof enclosures to minimize their impact on your recordings.

8. Optimizing Post-Production Workflow

Efficient post-production workflow is essential for small video studios to maximize productivity and deliver high-quality content. Consider the following tips:

  • Invest in a fast computer: A powerful computer with sufficient processing power and RAM will ensure smooth video editing and rendering processes.
  • Use external storage: External hard drives or network-attached storage (NAS) devices provide additional storage space for your video files, keeping your computer’s storage uncluttered.
  • Organize your files: Create a clear folder structure to organize your video files, project files, and assets. Naming conventions and tagging systems can help you locate files quickly and avoid confusion.
  • Streamline your editing process: Learn keyboard shortcuts and utilize video editing software features that can speed up your editing process. Consider creating templates or presets for common tasks or effects to save time.

9. Test and Iterate

Once your small video studio is set up, it’s important to test the equipment, lighting, and audio quality before starting your actual production. Make adjustments as needed and iterate on your setup to achieve the best results.

Experiment with different camera angles, lighting setups, and background options to find what works best for your specific content and style. Don’t be afraid to make changes and improvements along the way.

Conclusion

Setting up a small video studio may come with its challenges, but with careful planning and optimization, you can create a highly functional and efficient space. By defining your goals, optimizing lighting and sound, utilizing space-saving

314-913-5626

stlouisvideostudio@gmail.com

Unknown's avatar

The Importance of Consistency in Product and Service Photography.

In today’s world where most businesses operate digitally, it’s important to create a visual appeal that stands out from the crowd. One of the most important elements in showcasing what a company has to offer is product and service photography. However, it’s not just about snapping a few pictures; consistency in product and service photography is crucial for creating a cohesive brand image and building trust with customers.

By maintaining a consistent visual identity, businesses can create a unique and recognizable brand that stands out from the competition.

The impact of consistent product and service photography on branding

Consistent product and service photography helps businesses create a unique and recognizable brand identity. It’s not just about capturing the products or services beautifully but also about presenting them consistently across all platforms. By maintaining a consistent look and feel, businesses can create a brand image that customers can easily recognize and remember. This consistency is vital, especially when customers are exposed to a multitude of brands and products every day.

Consistency in product and service photography also helps businesses communicate their values and professionalism. By presenting their products and services in the best possible light, businesses can show their customers that they care about attention to detail, quality, and overall customer experience. This can help increase customer trust and loyalty, leading to repeat business and positive word-of-mouth marketing.

How consistent photography can improve customer perception and trust

Consistency in product and service photography can improve customer perception and trust in several ways. Firstly, it helps customers understand the products or services better. By presenting products or services consistently, businesses can ensure that customers are seeing the most accurate and high-quality representation of their offerings.

Secondly, consistent photography can help customers remember a business. When customers see a consistent visual identity across different platforms, it registers in their minds as a unique and recognizable brand. This can help businesses stand out from the competition and increase brand recall.

Lastly, consistent photography can improve customer trust. When customers see that a business takes their brand image seriously and presents their products or services consistently, it communicates a sense of professionalism and reliability. This can help customers feel more confident in their purchasing decisions and may lead to increased sales and customer loyalty.

Tips for maintaining consistency in product and service photography

Maintaining consistency in product and service photography is not an easy task, but there are several tips that businesses can follow to ensure they are presenting a cohesive brand image.

Firstly, businesses should create a visual style guide that outlines the guidelines for their product and service photography. This guide should include information about color schemes, lighting, composition, and any other visual elements that contribute to the brand’s identity.

Secondly, businesses should use the same equipment and settings for their photography sessions. This will help ensure that the images are consistent in terms of lighting, color, and overall quality.

Thirdly, businesses should use the same editing software and techniques for all of their images. This will help ensure that the images have a consistent look and feel, even if they were taken at different times or locations.

Lastly, businesses should train their photographers or hire a professional photographer who understands the brand’s visual identity and can maintain consistency in their work.

The role of color, lighting, and composition in consistent photography

Color, lighting, and composition are essential elements in creating consistent product and service photography.

Color is an important aspect of a brand’s visual identity and can help create a sense of emotion or mood in the images. Businesses should choose a color scheme that aligns with their brand values and use it consistently across all platforms.

Lighting is also crucial in product and service photography. It can affect the overall mood of the images and can make products look more appealing. Consistency in lighting can help create a cohesive look and feel across all images.

Composition is the arrangement of visual elements in an image. It can help direct the viewer’s attention and create a sense of balance and harmony. Consistent composition can help create a recognizable brand identity and ensure that all images are visually appealing.

The benefits of using a professional photographer for consistent imagery

While it’s possible to take product and service images in-house, using a professional photographer can provide several benefits.

Firstly, professional photographers have the skills and equipment to create high-quality images. This can help ensure that the images are consistent in terms of lighting, color, and overall quality.

Secondly, professional photographers have experience in creating visually appealing images that align with a brand’s identity. They can help businesses create a unique and recognizable visual identity that stands out from the competition.

Lastly, professional photographers can save businesses time and money by creating a library of high-quality images that can be used across all platforms. This can help businesses maintain consistency in their visual identity and save resources in the long run.

Examples of brands that have successfully implemented consistent photography

Several brands have successfully implemented consistent photography in their marketing strategies.

One example is Apple, which is known for its consistent and high-quality product photography. Apple’s product images are always shot against a white background with consistent lighting, highlighting the product’s design and features. This consistency has helped create a premium and recognizable brand identity.

Another example is Nike, which uses consistent product and lifestyle photography across all platforms. Nike’s images are always visually appealing and showcase the brand’s values of athleticism, performance, and innovation. This consistency has helped build a strong brand identity and has contributed to the brand’s success.

Best practices for using consistent photography on social media and marketing materials

Consistent photography is essential for social media and marketing materials. Here are some best practices businesses can follow to ensure their photography is consistent across all platforms.

Firstly, businesses should use the same visual style guide for all platforms. This will help ensure that the images are consistent in terms of color, lighting, and composition.

Secondly, businesses should use the same editing software and techniques for all images. This will help ensure that the images have a consistent look and feel across all platforms.

Lastly, businesses should use the same hashtags and captions for all images. This will help create a cohesive message across all platforms and improve brand recall.

Common mistakes to avoid when trying to maintain consistency in photography

Maintaining consistency in product and service photography is not easy, and businesses may make mistakes along the way. Here are some common mistakes to avoid.

Firstly, businesses should avoid using different equipment or settings for different photography sessions. This can lead to inconsistency in lighting, color, and overall quality.

Secondly, businesses should avoid using different editing techniques or software for different images. This can result in inconsistency in the images’ overall look and feel.

Lastly, businesses should avoid using images that do not align with their brand’s visual identity. This can confuse customers and lead to a weaker brand identity.

Conclusion emphasizing the importance of consistent photography in building a strong brand identity

In conclusion, consistent product and service photography is essential for building a strong brand identity and improving customer perception and trust. By maintaining a consistent visual identity, businesses can create a unique and recognizable brand that stands out from the competition. This consistency can translate to increased sales and customer loyalty. By following the tips and best practices outlined in this article, businesses can maintain consistency in their product and service photography and create a strong brand identity that resonates with their customers.