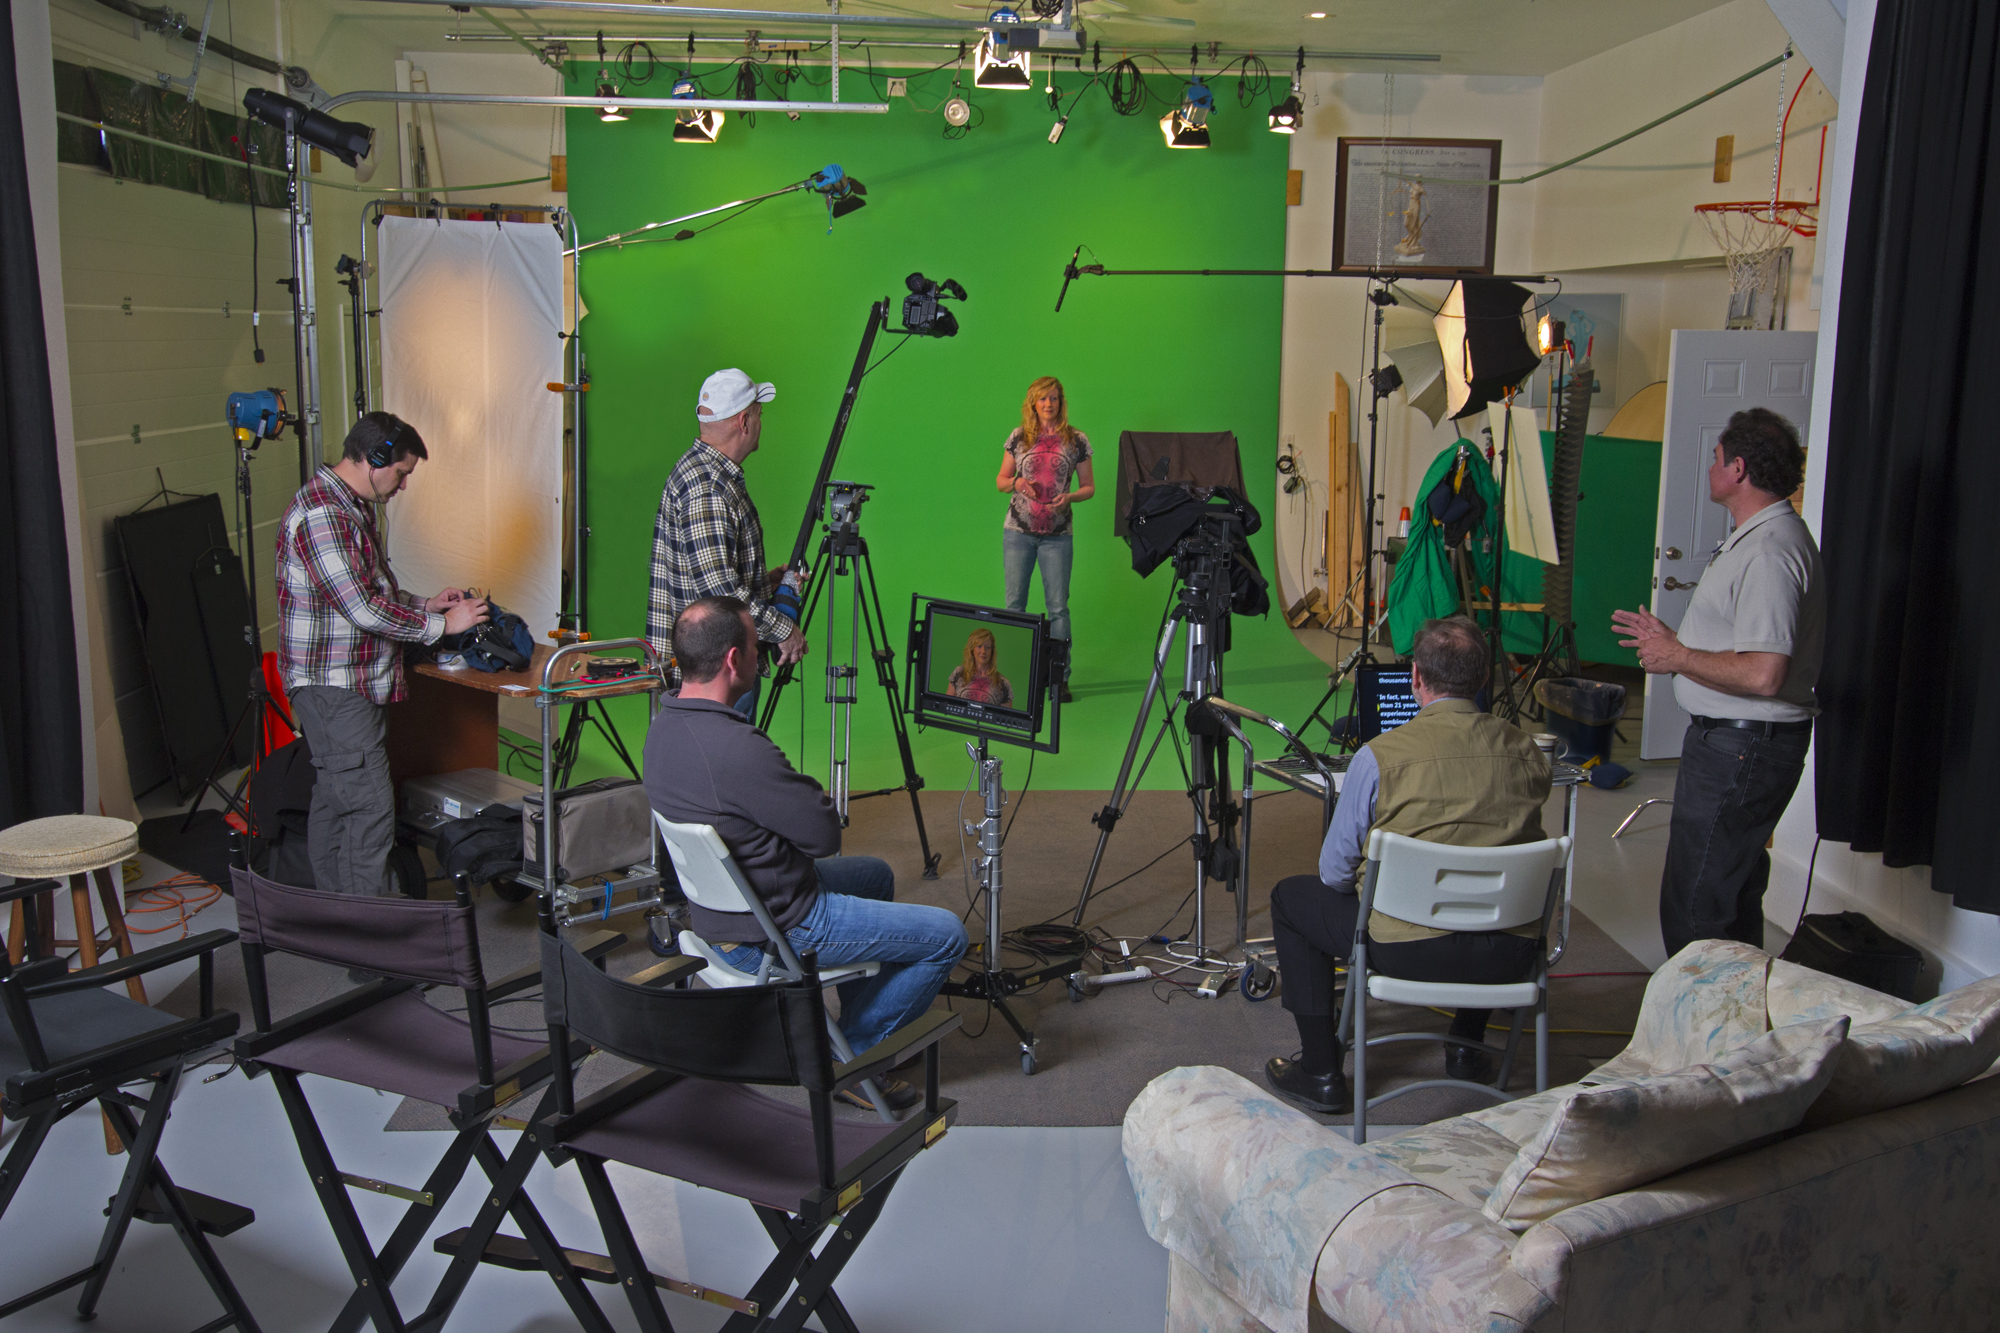
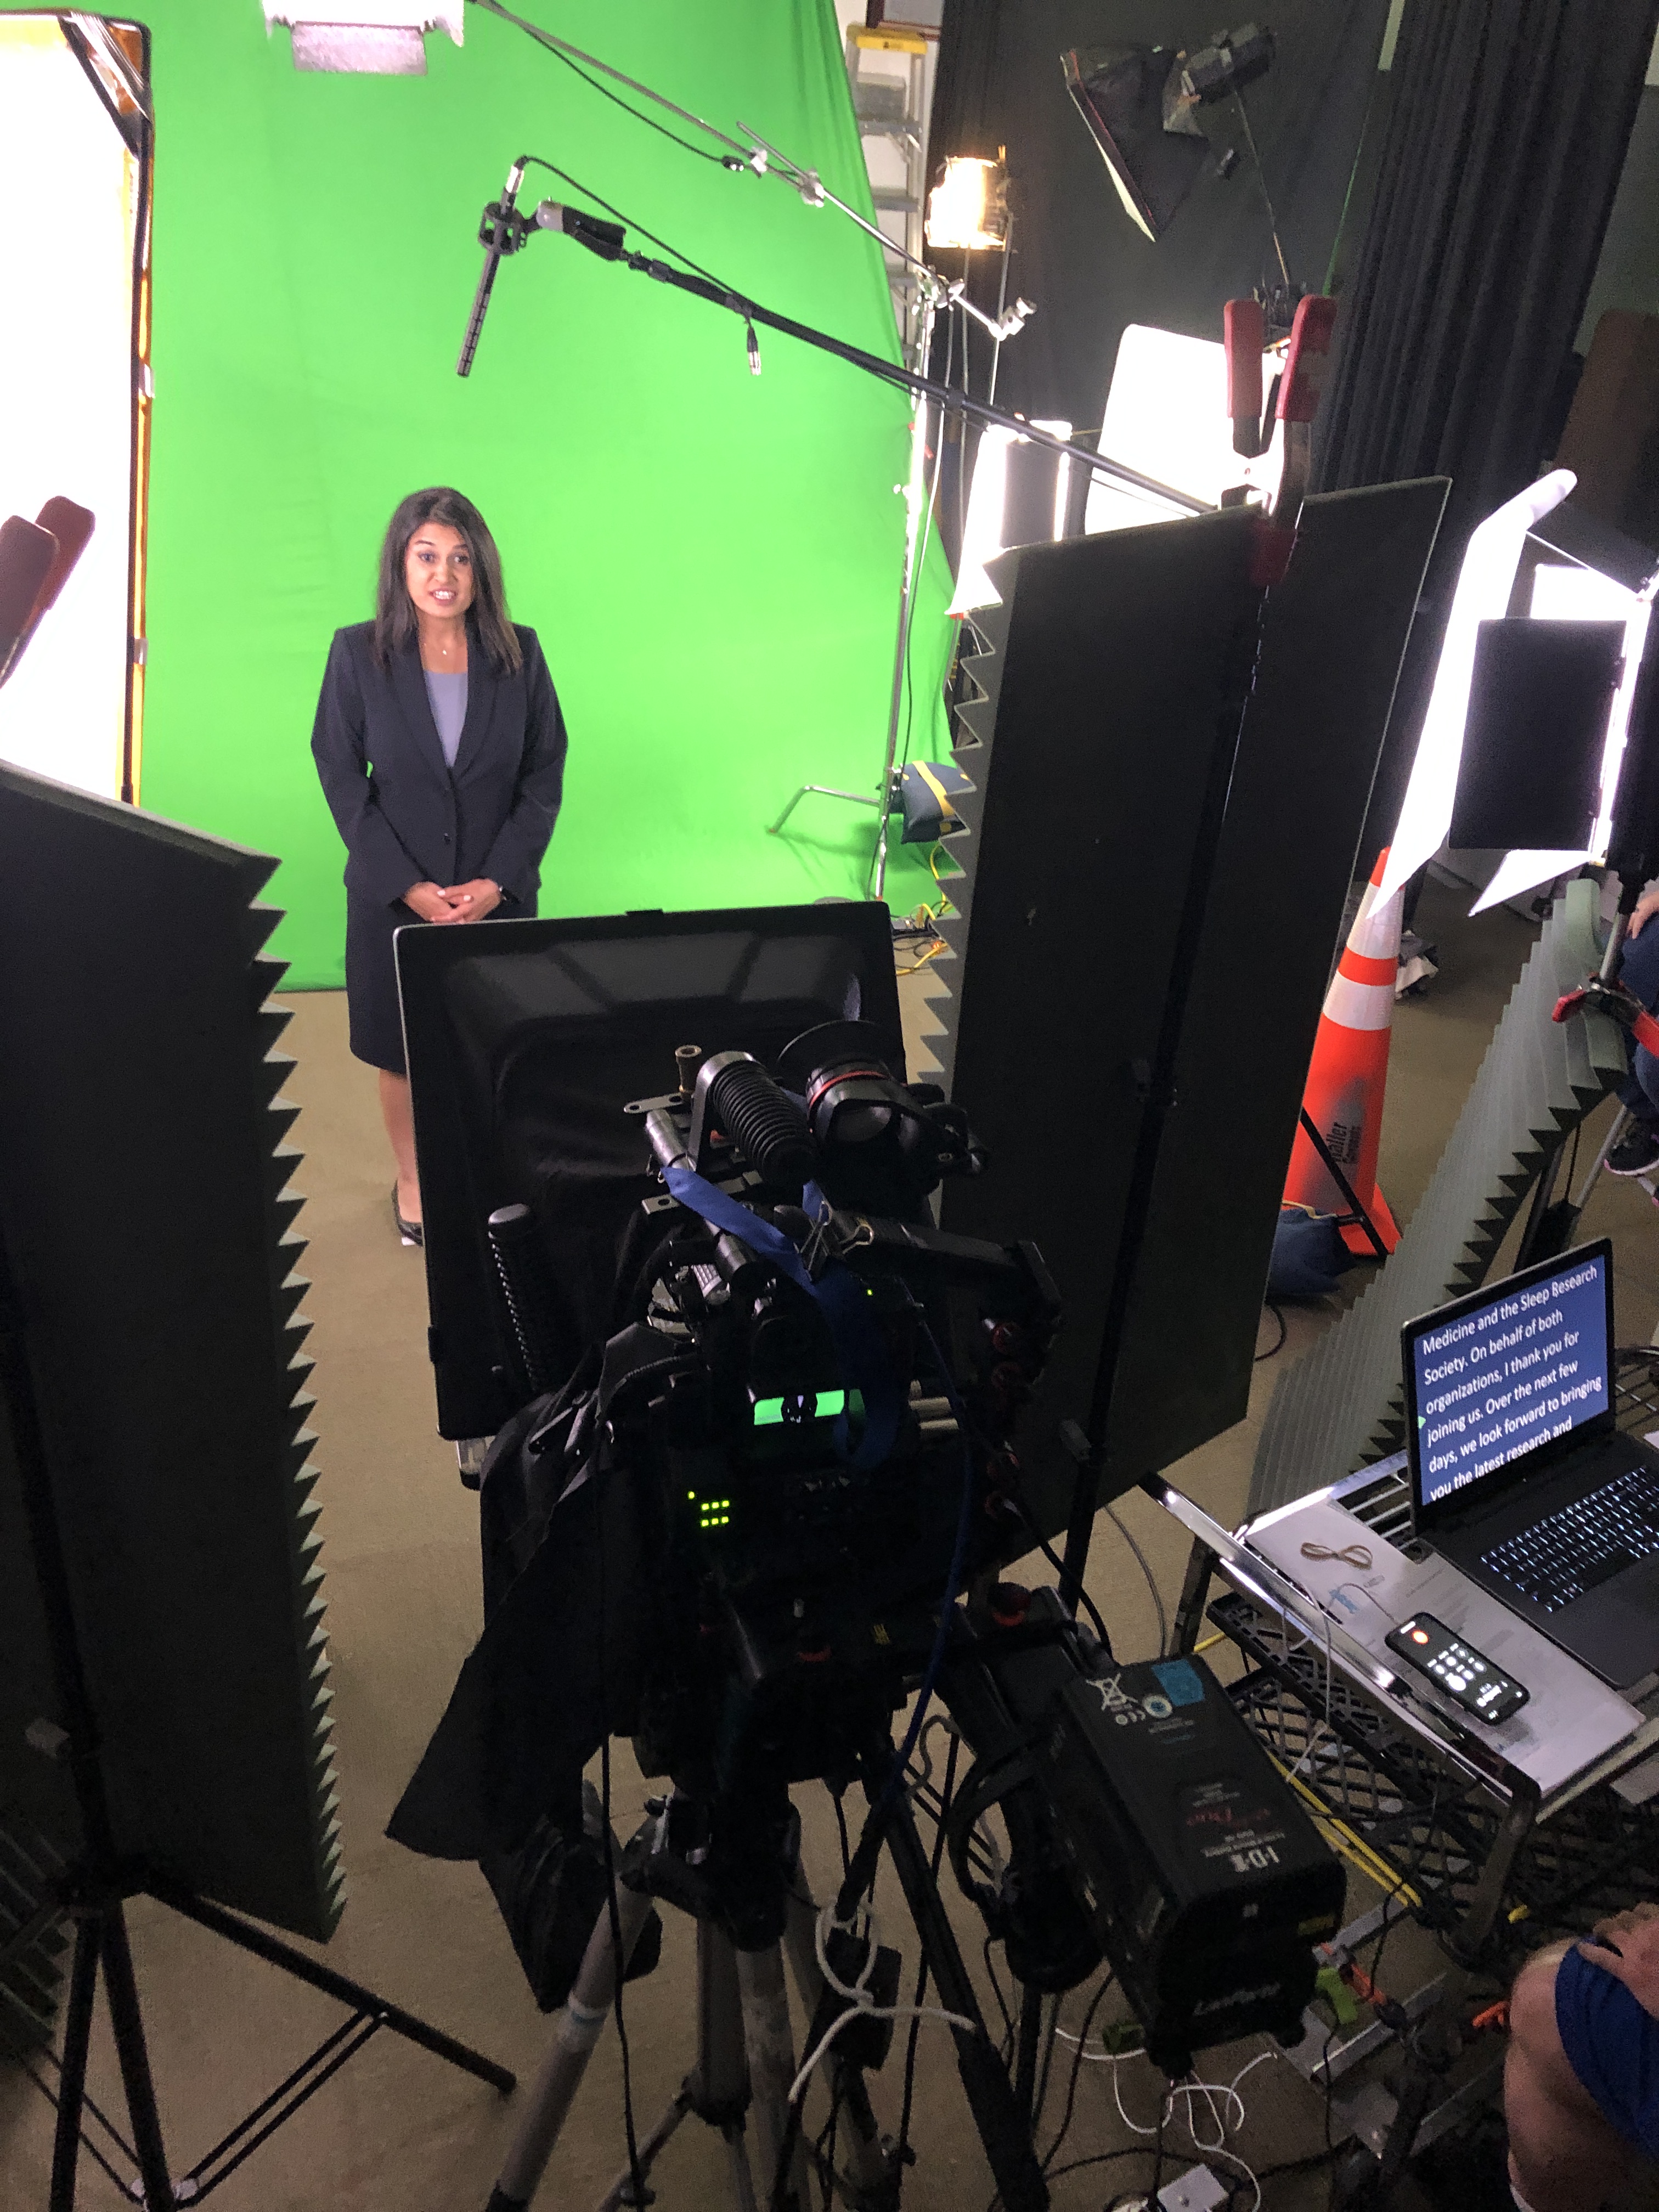
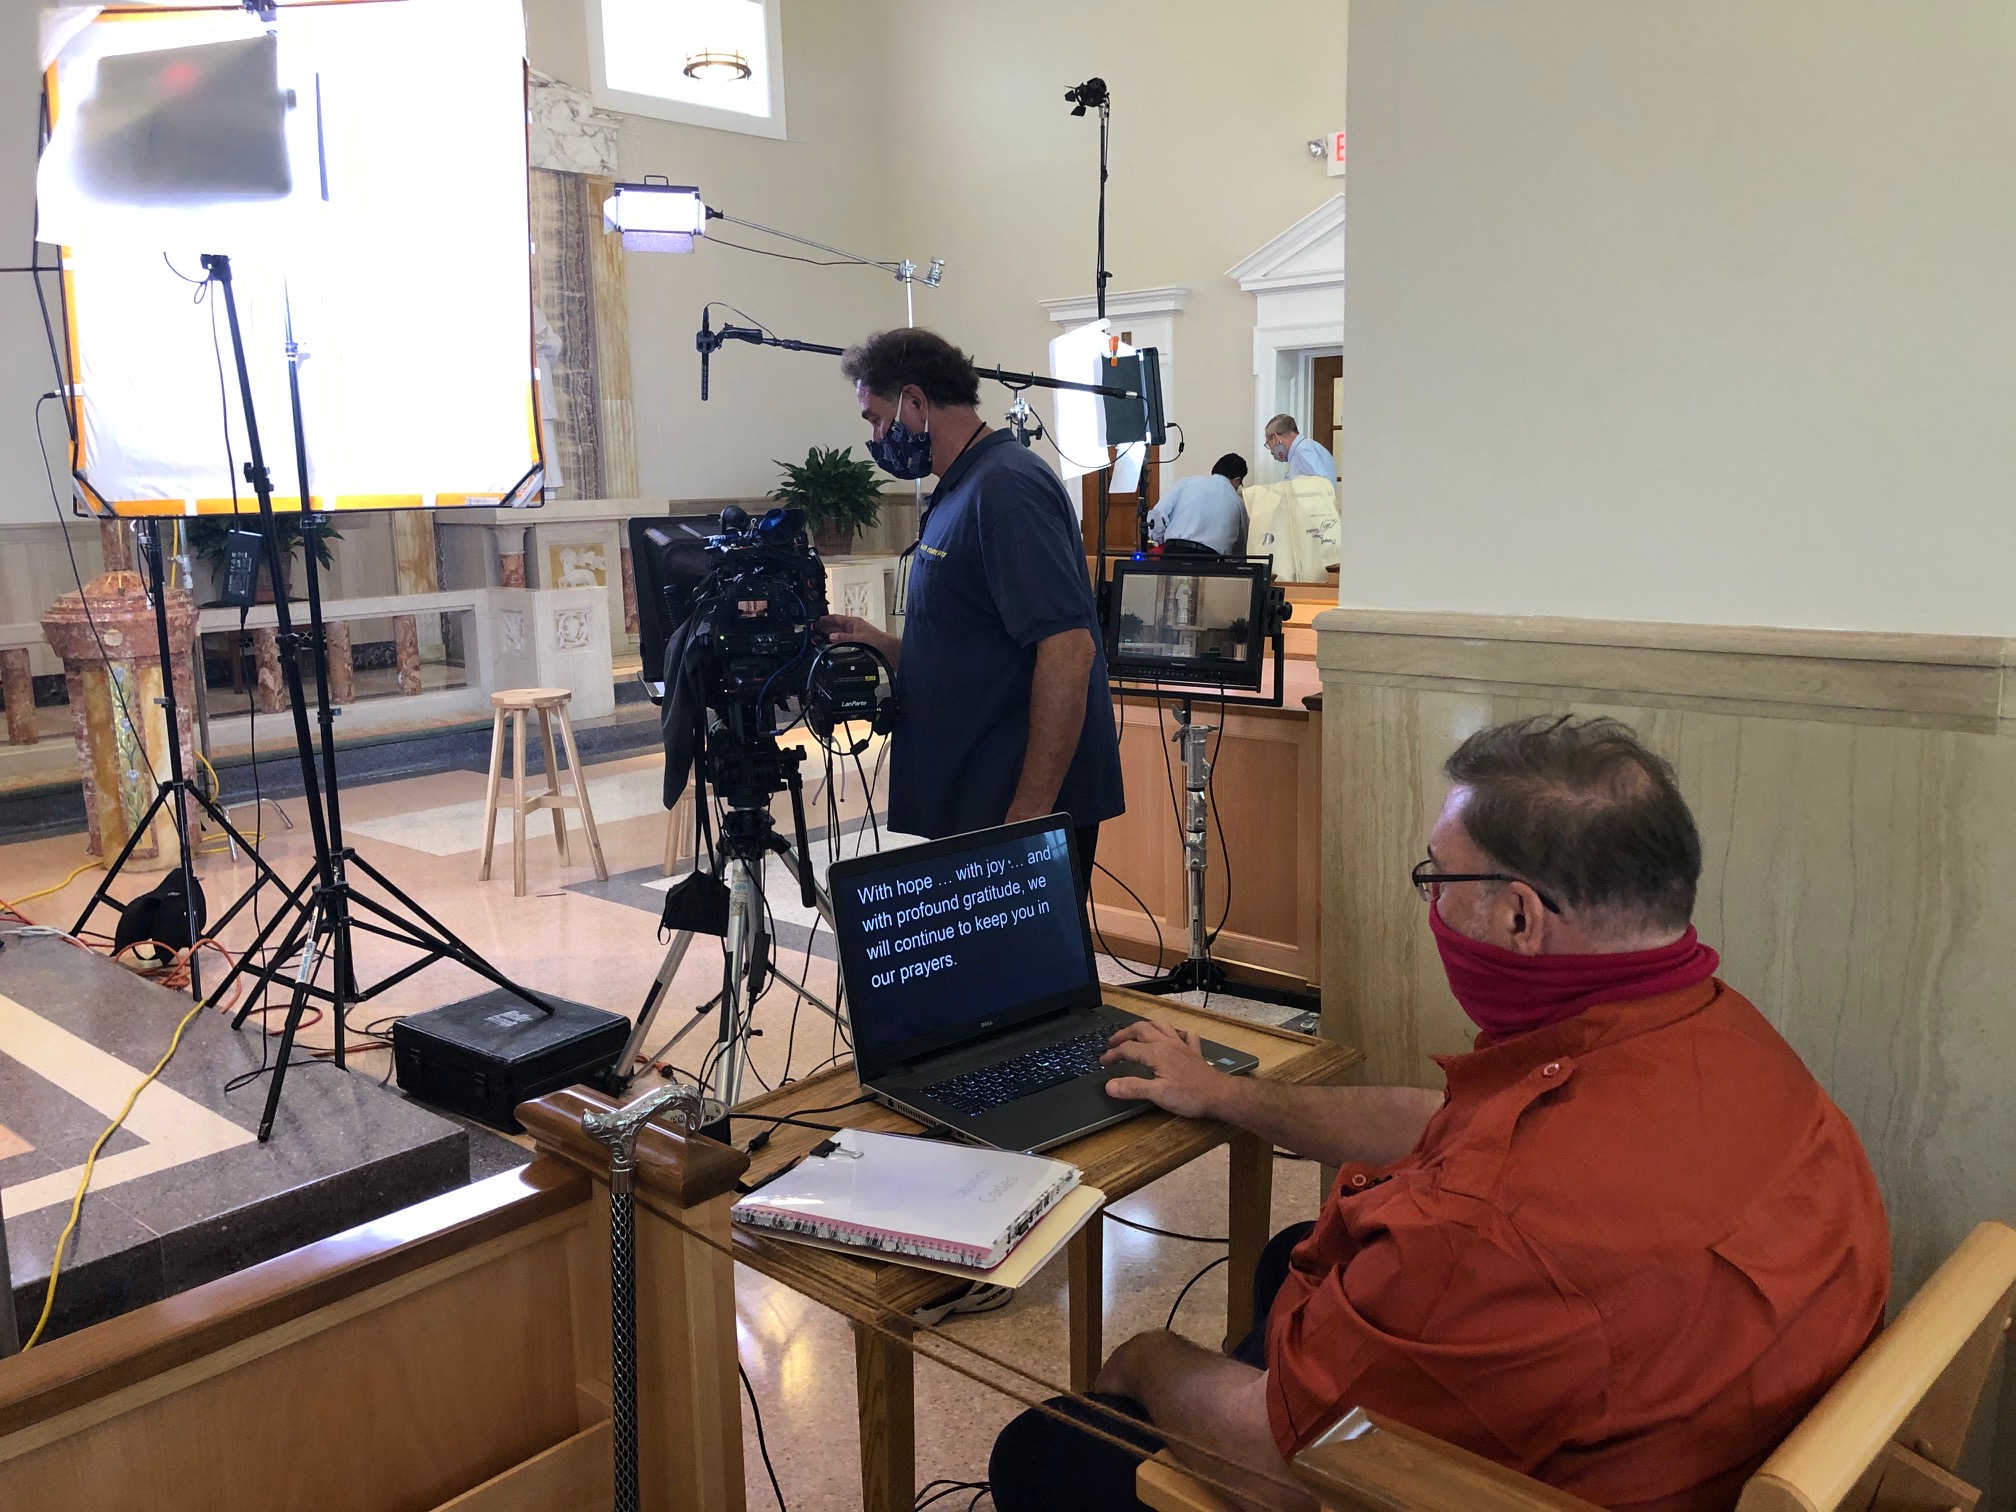
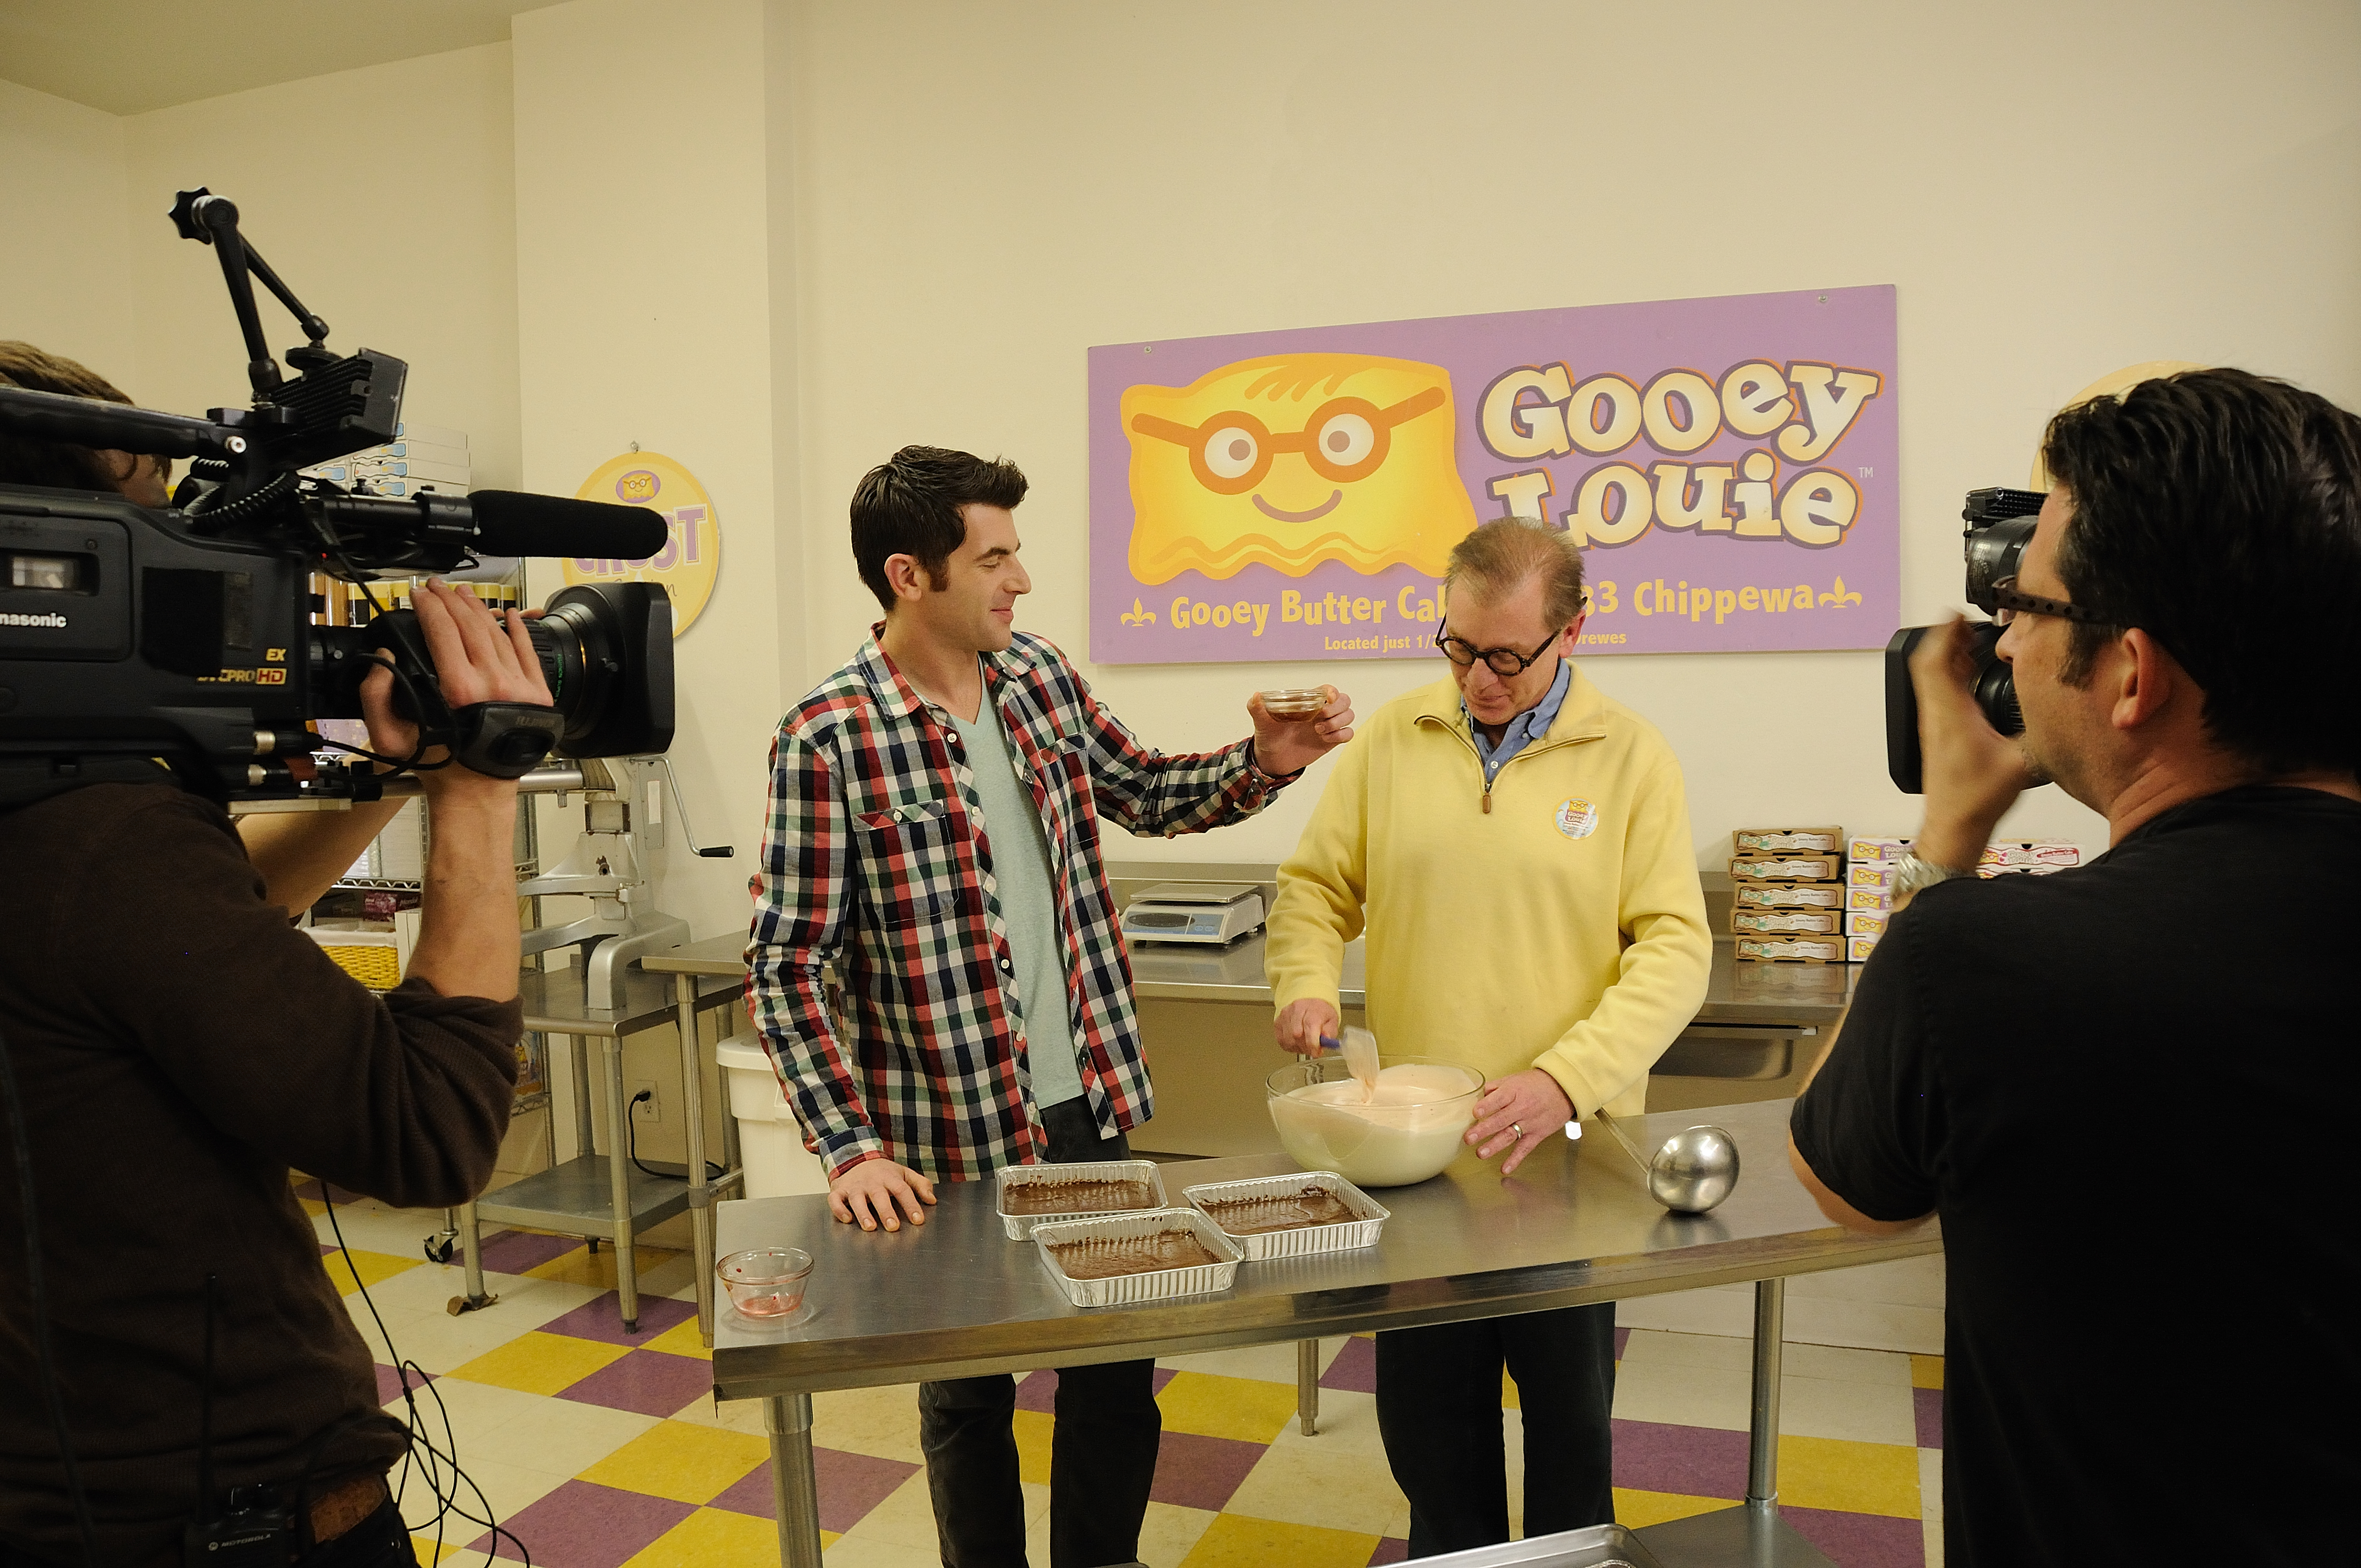
Sizzle Reels vs. Traditional Marketing: Which Is More Effective for Conventions?

In the realm of business promotion and marketing, especially in the context of conventions and large-scale events, the choice between sizzle reels and traditional marketing methods is pivotal. Both avenues offer unique advantages and serve distinct purposes in capturing audience attention and conveying brand messages effectively. Let’s delve into the nuances of each approach to help decision-makers discern the most suitable strategy for their upcoming conventions.

Maintain consistency in branding across all traditional marketing collateral to reinforce brand recognition and credibility.

Understanding Sizzle Reels

What are Sizzle Reels? Sizzle reels, also known as demo reels or highlight reels, are short, captivating videos designed to showcase the essence and highlights of a product, service, or brand. These reels are typically fast-paced, visually stimulating, and infused with dynamic editing techniques to create excitement and intrigue.

Advantages of Sizzle Reels:

  • Engagement: Sizzle reels excel at grabbing viewers’ attention within the first few seconds, making them ideal for capturing the fleeting focus of convention attendees amidst the hustle and bustle.
  • Memorability: The condensed format of sizzle reels facilitates easy recall, ensuring that key brand messages and visuals stay etched in the minds of the audience long after the convention ends.
  • Versatility: Sizzle reels can be tailored to suit various platforms and purposes, whether displayed on large screens at the convention venue or shared across social media channels to extend reach beyond the event.

Best Practices for Sizzle Reels:

  • Keep it Concise: Aim for brevity to maintain audience interest and avoid information overload.
  • Focus on Impactful Visuals: Emphasize compelling imagery and dynamic sequences to evoke emotion and captivate viewers.
  • Align with Brand Identity: Ensure that the tone, style, and messaging of the sizzle reel align closely with the overarching brand identity and marketing objectives.

Exploring Traditional Marketing Methods

Traditional Marketing Approaches: Traditional marketing methods encompass a spectrum of strategies such as print advertisements, brochures, banners, and face-to-face interactions. While not as technologically advanced as sizzle reels, these methods retain their relevance and effectiveness in certain contexts, especially within the realm of conventions.

Advantages of Traditional Marketing:

  • Tangibility: Physical marketing materials offer a tactile experience that digital media cannot replicate, allowing attendees to engage more intimately with the brand.
  • Personalized Interaction: Face-to-face interactions facilitated by traditional marketing methods enable direct communication between representatives and potential clients, fostering trust and rapport.
  • Complementary Role: Traditional marketing methods can complement sizzle reels by providing supplementary information and reinforcing key messages conveyed in the videos.

Best Practices for Traditional Marketing:

  • Strategic Placement: Position marketing materials strategically throughout the convention venue to maximize visibility and foot traffic.
  • Interactive Elements: Incorporate interactive elements into traditional marketing materials, such as QR codes linking to sizzle reels or augmented reality experiences, to enhance engagement and interactivity.
  • Consistent Branding: Maintain consistency in branding across all traditional marketing collateral to reinforce brand recognition and credibility.

Making the Decision: Sizzle Reels vs. Traditional Marketing

Considerations for Decision-Makers:

  • Audience Demographics: Understanding the demographics and preferences of convention attendees is crucial in determining which approach will resonate most effectively.
  • Event Goals and Objectives: Align the choice of marketing strategy with the overarching goals and objectives of the convention, whether it’s to generate leads, raise brand awareness, or showcase new products/services.
  • Budget and Resources: Evaluate the budgetary constraints and available resources to ensure optimal allocation between sizzle reels and traditional marketing methods.

The Hybrid Approach: In many cases, a hybrid approach that combines elements of both sizzle reels and traditional marketing can yield the most comprehensive and impactful results. By leveraging the strengths of each method synergistically, businesses can create a multifaceted marketing campaign that engages attendees on multiple levels and maximizes ROI.

St Louis Video Studio: Your Partner in Success

At St Louis Video Studio, we understand the intricacies of effective image acquisition and brand promotion in the context of conventions and business events. As a full-service professional commercial photography and video production company, we offer a comprehensive suite of services tailored to meet diverse media requirements.

Our experienced team of photographers, videographers, editors, and licensed drone pilots is equipped with the latest technology and creative expertise to elevate your brand presence and captivate your target audience. Whether you require full-service studio and location video and photography, editing, post-production, or customized branding solutions, we have the capabilities and experience to bring your vision to life.

Contact St Louis Video Studio today to discover how we can collaborate to make your next convention or event a resounding success.


St Louis Video Studio Full-Service Professional Commercial Photography and Video Production Company

Services Offered:

  • Studio and Location Video and Photography
  • Editing and Post-Production
  • Licensed Drone Pilots
  • Customized Branding Solutions

In conclusion, the decision between sizzle reels and traditional marketing for conventions depends on various factors, including audience demographics, event goals, and budget considerations. By leveraging the expertise and services of St Louis Video Studio, businesses can maximize the effectiveness of their marketing efforts and leave a lasting impression on convention attendees.

314-913-5626

stlouisvideostudio@gmail.com

Mistakes to Avoid When Hiring a Videographer for Your Business

In the realm of business, the visual aspect plays a pivotal role in capturing attention, conveying messages, and establishing brand identity. With the proliferation of digital media, hiring a professional videographer has become essential for businesses aiming to create impactful visual content. However, not all videographers are created equal, and making the wrong choice can lead to wasted resources and disappointing results. Here are some common mistakes to avoid when hiring a videographer for your business:

An experienced videographer not only has a keen eye for detail but also possesses the technical proficiency to handle various shooting conditions and challenges.

1. Neglecting to Review Portfolios

One of the most critical mistakes is failing to thoroughly review the videographer’s portfolio. A portfolio showcases the videographer’s style, expertise, and versatility. By neglecting this step, you risk hiring someone whose aesthetic doesn’t align with your brand or whose skill level doesn’t meet your expectations.

2. Ignoring Experience and Expertise

Experience matters significantly in videography. An experienced videographer not only has a keen eye for detail but also possesses the technical proficiency to handle various shooting conditions and challenges. Ignoring experience and opting for a cheaper, inexperienced option can compromise the quality of your final product.

3. Overlooking Equipment Quality

Quality equipment is indispensable in videography. High-resolution cameras, professional-grade microphones, and lighting equipment contribute to the overall quality of the video. Hiring a videographer who lacks access to proper equipment may result in subpar visuals and audio, ultimately diminishing the impact of your content.

4. Failing to Communicate Expectations Clearly

Effective communication is key to a successful collaboration with a videographer. Failing to communicate your expectations clearly regarding the project scope, timeline, budget, and creative vision can lead to misunderstandings and dissatisfaction. Establishing open and transparent communication from the outset ensures that both parties are aligned and working towards the same goals.

5. Not Considering Post-Production Services

The role of post-production should not be underestimated. Editing, color grading, and adding visual effects are essential steps in enhancing the final product’s quality and appeal. Hiring a videographer who lacks proficiency in post-production or doesn’t offer these services may result in an unfinished or underwhelming video.

Conclusion: Choose Wisely, Choose St Louis Video Studio

In conclusion, when hiring a videographer for your business, it’s crucial to avoid these common mistakes to ensure a successful outcome. At St Louis Video Studio, we understand the importance of delivering high-quality visual content that resonates with your audience and enhances your brand image.

As a full-service professional commercial photography and video production company, St Louis Video Studio offers:

  • Full-service studio and location video and photography
  • Editing and post-production services
  • Licensed drone pilots for aerial footage
  • Expertise in all file types and styles of media
  • Customized productions tailored to diverse media requirements
  • Specialization in repurposing photography and video branding for increased traction

With our extensive experience and state-of-the-art equipment, we have served numerous businesses, marketing firms, and agencies in the St. Louis area for their corporate photography and video needs. Don’t compromise on quality. Choose St Louis Video Studio for your next project and experience the difference firsthand.

Contact us today to discuss your videography needs and discover how we can elevate your visual content.

314-913-5626

stlouisvideostudio@gmail.com

Planning and Scripting Your Corporate Branding Video for Maximum Impact

In the dynamic landscape of corporate branding, video content has become an indispensable tool for businesses to convey their message effectively. Whether you’re aiming to introduce a new product, showcase company culture, or communicate your brand’s values, a well-planned and scripted video can make a significant impact. As an experienced photographer and video director at St. Louis Video Studio, I’ve witnessed firsthand the power of strategic planning and scripting in creating compelling corporate branding videos. In this guide, I’ll walk you through the essential steps to plan and script your corporate branding video for maximum impact.

Whether you opt for a polished and professional aesthetic or a more casual and relatable tone, stay true to your brand persona to resonate with viewers on a deeper level.

Understanding Your Audience and Goals

Before diving into the creative process, it’s crucial to have a clear understanding of your target audience and the goals you aim to achieve with your video. Conduct thorough market research to identify your audience’s demographics, preferences, and pain points. This information will guide the tone, style, and messaging of your video, ensuring it resonates with your intended viewers. Additionally, define specific objectives for your video, whether it’s increasing brand awareness, driving sales, or fostering customer loyalty.

Crafting a Compelling Storyline

Every successful corporate branding video tells a story that captivates and engages the audience. Begin by outlining the key message you want to convey and brainstorming creative ways to bring it to life. Consider incorporating elements such as customer testimonials, behind-the-scenes footage, or visual storytelling techniques to make your narrative more compelling. Remember to keep your storyline concise and focused to maintain viewer interest throughout the video.

Developing a Detailed Script

Once you have a solid storyline in place, it’s time to draft a detailed script for your video. A well-written script serves as the blueprint for your production, guiding the dialogue, narration, and scene transitions. Start by structuring your script into distinct sections, including an attention-grabbing introduction, informative body content, and a strong call-to-action. Pay attention to pacing and flow, ensuring that each segment seamlessly transitions into the next.

Visualizing the Production

With your script finalized, it’s essential to visualize how each scene will come to life on screen. Consider factors such as location, lighting, props, and talent casting to create a visually captivating experience for your viewers. Storyboarding can be a valuable tool in this process, allowing you to sketch out each shot and determine the composition and camera angles beforehand. Collaborate closely with your production team to ensure that your vision aligns with technical feasibility and budget constraints.

Leveraging Brand Identity

Your corporate branding video should serve as a reflection of your brand identity and values. Incorporate elements such as brand colors, logos, and messaging consistently throughout the video to reinforce brand recognition and recall. Additionally, infuse your video with authenticity and sincerity to establish a genuine connection with your audience. Whether you opt for a polished and professional aesthetic or a more casual and relatable tone, stay true to your brand persona to resonate with viewers on a deeper level.

Editing and Post-Production

The editing and post-production phase is where your corporate branding video truly comes to life. Work closely with skilled editors and post-production specialists to refine the footage, add visual effects, and enhance audio quality. Pay attention to pacing, transitions, and storytelling elements to ensure a cohesive and engaging final product. Incorporate feedback from stakeholders and conduct thorough quality assurance testing to guarantee that your video meets the highest standards of excellence.

Conclusion

Planning and scripting your corporate branding video is a meticulous process that requires careful consideration of your audience, goals, and brand identity. By following the steps outlined in this guide, you can create a compelling video that resonates with your viewers and achieves your business objectives. Remember to stay true to your brand voice and leverage the expertise of experienced professionals to bring your vision to life.

As a full-service video and photography production company, St. Louis Video Studio has worked with many businesses, marketing firms, and agencies in the St. Louis area for their corporate photography and video. Contact us today to learn more about how we can help you create impactful corporate branding videos that elevate your brand presence and drive results.

Contact St. Louis Video Studio


By Bruce Robert, Photographer and Video Director at St. Louis Video Studio

St. Louis Video Studio is a full-service professional commercial photography and video production company with the right equipment and creative crew service experience for successful conference documentation. We offer full-service studio and location video and photography, as well as editing and post-production. St. Louis Video Studio can customize your productions for diverse types of media requirements. Repurposing your photography and video branding to gain more traction is another specialty. We are well-versed in all file types and styles of media and accompanying software.

314-913-5626

stlouisvideostudio@gmail.com

Training Videos Production and Editing Techniques

In the ever-evolving landscape of corporate communication and education, training videos have emerged as a powerful tool to convey information, inspire learning, and ensure consistency in message delivery. At St. Louis Video Studio, we understand the importance of producing high-quality training videos that not only inform but also engage and inspire your audience. With a team of experienced videographers, directors, and producers, as well as state-of-the-art equipment and a creative crew, we have the expertise to create impactful training videos tailored to your specific needs. In this comprehensive guide, we will delve into the art and science of training video production and editing techniques, sharing our insights and industry best practices.

What specific skills, knowledge, or information do you want your audience to gain from watching the video?

The Power of Training Videos

Before we dive into the technical aspects of training video production and editing, let’s explore why training videos are such a valuable tool for businesses and organizations.

1. Accessibility and Consistency

Training videos offer the advantage of accessibility. They can be viewed anytime, anywhere, allowing employees or learners to access crucial information at their convenience. This accessibility ensures that everyone receives the same message consistently, reducing the risk of miscommunication.

2. Engagement and Retention

Engagement is the key to effective learning. Well-produced training videos have the ability to captivate the audience’s attention and maintain their focus throughout the training. When learners are engaged, they are more likely to retain the information being presented.

3. Cost-Effective Training

Compared to traditional in-person training sessions, producing training videos can be more cost-effective in the long run. Once created, these videos can be used repeatedly without incurring additional expenses, making them a smart investment for organizations of all sizes.

4. Scalability

Training videos can be easily scaled to accommodate a growing audience. Whether you need to train a small team or an entire organization, video content can be distributed effortlessly to reach everyone who needs it.

Planning Your Training Video

Effective training videos begin with careful planning. Here are the key steps to consider when creating your training video:

1. Define Your Objectives

Before you even pick up a camera, you must clearly define the objectives of your training video. What specific skills, knowledge, or information do you want your audience to gain from watching the video? Understanding your goals will guide every aspect of the production process.

2. Identify Your Target Audience

Consider the demographics, experience levels, and needs of your target audience. Tailoring your training video to their preferences and requirements will ensure that it resonates with them and effectively conveys the intended message.

3. Scripting and Storyboarding

A well-crafted script is the backbone of any training video. It should be concise, easy to understand, and engaging. Consider breaking down complex topics into manageable sections and using visual aids to enhance comprehension. Storyboarding can help you visualize the flow of your video and plan the shots you need.

4. Choose the Right Location

Depending on your content, you may need to shoot your training video in a studio, on location, or even outdoors. At St. Louis Video Studio, we offer full-service studio and location video production, ensuring that you have the right environment for your training video.

5. Selecting the Right Equipment

The quality of your video production equipment matters. High-definition cameras, professional lighting, and audio recording equipment are essential for producing a polished and engaging training video. At St. Louis Video Studio, we are equipped with state-of-the-art tools to ensure your video looks and sounds exceptional.

Video Production Techniques

Now that we’ve covered the planning phase, let’s delve into the video production techniques that will help you create a training video that truly shines.

1. Professional Videography

Our team of experienced videographers at St. Louis Video Studio understands the nuances of capturing compelling footage. Whether you’re shooting in a studio or on location, our professionals know how to compose shots, manage lighting, and ensure that the video looks visually appealing.

2. Interviews and Testimonials

Including interviews and testimonials in your training video can add a human touch and credibility to your message. We excel at shooting talking heads, interviews, and testimonials, ensuring that your subjects come across as confident and relatable.

3. B-Roll Footage

In post-production editing, having ample B-roll footage is invaluable. B-roll footage provides context, visual interest, and helps smooth transitions between different segments of your training video. We always capture appropriate B-roll to enhance the final product.

4. Teleprompters for Professional Delivery

For training videos that require a scripted message, using teleprompters can greatly enhance the delivery. Teleprompters help presenters maintain eye contact with the camera while seamlessly delivering their lines. This results in a more professional and efficient message delivery.

5. Aerial Video

For certain training videos, aerial footage can provide a unique perspective and captivate the audience. At St. Louis Video Studio, we have the capability to fly drones and capture stunning aerial shots for your training video’s B-roll.

Post-Production Editing

The magic of training video production often happens in the post-production phase. Here, skilled editors bring together all the elements to create a cohesive and engaging final product.

1. Video Editing

Video editing involves selecting the best shots, arranging them in a logical sequence, and adding transitions to ensure a smooth flow. This process also includes color correction, audio enhancement, and the addition of text overlays or graphics when necessary.

2. Audio Enhancement

Clean and clear audio is crucial for effective training videos. Our post-production team employs audio enhancement techniques to eliminate background noise, balance audio levels, and ensure that the message is heard loud and clear.

3. Graphics and Animation

To clarify complex concepts or highlight key points, graphics and animation can be integrated into your training video. Our team has experience in creating visually appealing and informative graphics that enhance the learning experience.

4. Music and Sound Effects

The right music and sound effects can elevate the emotional impact of your training video. We can help you select appropriate music or create custom soundscapes that enhance the overall viewing experience.

5. File Types and Delivery

At St. Louis Video Studio, we are well-versed in all file types and styles of media. Whether you need your training video in a specific format or require various versions for different platforms, we can deliver the final product in the exact specifications you need.

Repurposing Your Training Videos

Training videos can be a valuable asset beyond their initial purpose. Repurposing your productions can help you gain more traction and maximize your investment. Here are some strategies for repurposing training videos:

1. Microlearning Modules

Break down longer training videos into bite-sized microlearning modules. These shorter segments can be shared independently, making it easier for learners to absorb and revisit specific topics.

2. Webinars and Live Training

Use excerpts from your training videos in webinars or live training sessions. This can serve as a teaser to encourage participation and later reference the full video for a comprehensive understanding.

3. Social Media Clips

Create short clips or highlights from your training videos to share on social media platforms. This can generate interest and direct viewers to the full video for more in-depth information.

4. Training Manuals and Guides

Integrate video content into your training manuals or guides to provide a multimedia learning experience. Videos can complement written instructions and make them more engaging.

5. Continuous Learning

Encourage continuous learning by making training videos accessible in your learning management system (LMS) or on your company’s intranet. This allows employees to revisit training materials whenever they need a refresher.

Conclusion

As a full-service video creation company, St. Louis Video Studio has worked with numerous businesses and organizations in the St. Louis area to create impactful training videos and other video productions. Our experienced videographers, directors, and producers are dedicated to delivering high-quality content that meets your unique needs. Whether you require training videos, talking heads, interviews, testimonials, or aerial B-roll footage, we have the expertise and equipment to bring your vision to life.

Don’t miss the opportunity to harness the power of training videos for your organization’s growth and development. Contact St. Louis Video Studio today to discuss your project, and let us help you create training videos that educate, engage, and inspire. Elevate your training initiatives with our creative expertise and state-of-the-art production capabilities. Your success is our priority.

314-913-5626

stlouisvideostudio@gmail.com

Essential Tips for Retouching Professional Headshots

In the world of business, first impressions matter. And when it comes to making a lasting impression, a professional headshot can be your secret weapon. Whether it’s for your LinkedIn profile, company website, or promotional materials, a well-retouched headshot can convey confidence, professionalism, and approachability. At St. Louis Video Studio, we understand the importance of a polished image, and as experienced business photographers, we’re here to share some essential tips for retouching professional headshots.

Skin retouching is often the most crucial step in headshot retouching.

Why a Professional Headshot Matters

Before we dive into the nitty-gritty of retouching, let’s briefly discuss why having a professional headshot is so crucial in today’s business landscape.

  1. First Impressions: Your headshot is often the first thing potential clients, employers, or colleagues see. A professional headshot can leave a positive and memorable impression.
  2. Brand Image: Your headshot is a reflection of your personal and corporate brand. It conveys a sense of professionalism, trustworthiness, and attention to detail.
  3. Consistency: Using professionally retouched headshots across all your marketing materials ensures consistency in your brand image, making it easier for your audience to recognize and remember you.
  4. Engagement: Research has shown that profiles with professional headshots receive more engagement and connection requests on platforms like LinkedIn.

Now that we’ve established the importance of professional headshots, let’s delve into the art of retouching to make those headshots shine.

The Art of Retouching

1. Start with the Basics

Before diving into advanced retouching techniques, start with the basics. Ensure that the exposure, color balance, and sharpness of your headshot are on point. Use professional software like Adobe Photoshop or Lightroom to make these adjustments. Properly exposed and well-balanced photos provide a solid foundation for further enhancements.

2. Skin Retouching

Skin retouching is often the most crucial step in headshot retouching. Here’s how to do it effectively:

  • Blemish Removal: Use the healing brush or spot healing tool to eliminate minor blemishes, acne, or skin imperfections. Be cautious not to overdo it, as you want to maintain a natural appearance.
  • Skin Smoothing: The key to skin smoothing is subtlety. Use the frequency separation technique to separate texture and color. Then, use a soft brush to even out skin tones without losing skin texture completely.
  • Dodge and Burn: Use the dodge and burn tools to emphasize highlights and shadows, giving the skin a more three-dimensional look.

3. Eyes and Teeth

The eyes are the windows to the soul, and they should be the focus of your headshot. Here’s how to make them pop:

  • Whiten Teeth: Use the teeth whitening tool to brighten the subject’s smile. Keep it natural; overly white teeth can look unnatural.
  • Enhance Eyes: Use the dodge tool to brighten the whites of the eyes and enhance the iris’s color. Pay attention to removing any red-eye effect if present.

4. Hair Retouching

Hair is another crucial element of a headshot. Here’s how to make it look its best:

  • Flyaway Hair: Use the clone stamp or healing brush to remove stray hairs that may be distracting.
  • Hair Volume: To add volume to hair, use the dodge and burn tools selectively. Enhance the highlights and shadows to give hair a fuller look.

5. Clothing and Accessories

Pay attention to clothing and accessories, as they contribute to the overall impression:

  • Wrinkles: Use the clone stamp or healing brush to remove wrinkles or creases in clothing.
  • Jewelry and Accessories: Enhance the appearance of jewelry or accessories by adjusting highlights and shadows.

6. Background

Consider the background of your headshot. A clean and simple background often works best for professional headshots. Use the selection tools to isolate the subject and then apply changes to the background if necessary.

7. Color Grading

Color grading can help create a cohesive and visually appealing look for your headshot. Adjust the colors to match your brand or desired mood. Be subtle with color grading to maintain a natural appearance.

8. Save in the Right Format

When you’ve completed the retouching process, save your headshot in the appropriate format. JPEG is suitable for web use, while TIFF or PNG may be preferable for high-quality prints.

Customizing Headshot Images for Diverse Media

At St. Louis Video Studio, we understand that different media platforms and purposes require tailored headshot images. Our experienced team of photographers and retouchers can customize your headshots to meet the specific requirements of various media types. Whether you need headshots for your website, social media profiles, business cards, or printed materials, we’ve got you covered.

Repurposing Your Branding Images

In today’s fast-paced digital world, repurposing your branding images can help you gain more traction and extend the lifespan of your content. At St. Louis Video Studio, we are well-versed in all file types and styles of media, as well as the accompanying software necessary for repurposing. We can assist you in repurposing your headshots for different marketing campaigns, presentations, and social media posts, ensuring that your brand message reaches a wider audience.

St. Louis Video Studio: Your Trusted Partner in Professional Headshots

In conclusion, a professional headshot is a powerful tool for making a strong first impression in the business world. However, achieving the perfect headshot often requires expert retouching skills. Whether you’re a corporate professional, entrepreneur, or job seeker, having a polished headshot can make a significant difference in how you are perceived.

At St. Louis Video Studio, we have the expertise, experience, and state-of-the-art equipment needed to create stunning headshots that align with your brand and convey professionalism. Our full-service approach means we can handle every aspect of your headshot, from the initial photoshoot to retouching and customization for diverse media needs.

As a full-service photographer, St. Louis Video Studio has worked with many businesses and agencies in the St. Louis area for their corporate photography and video. Trust us to deliver exceptional headshots that will elevate your professional image and leave a lasting impression. Contact us today to schedule your headshot session and experience the difference our expertise can make.

Contact St. Louis Video Studio for all your professional headshot needs, and let us help you shine in the business world.

314-913-5626

stlouisvideostudio@gmail.com

Mastering the Art of Speaking on Camera with Teleprompters

In the world of videography, the ability to speak confidently and smoothly on camera is a skill that can make or break a production. Whether you’re filming a corporate interview, a promotional video, or a documentary, delivering your message effectively is paramount. One tool that can greatly assist in this endeavor is the teleprompter. In this comprehensive guide, we will delve into the art of speaking on camera with teleprompters, covering everything from setup and usage to tips and tricks for a natural and engaging delivery.

To appear more authentic, incorporate natural hand gestures and facial expressions while speaking.

What is a Teleprompter?

A teleprompter, short for “television prompter,” is a device used to display a script or text for a presenter or speaker to read while looking directly into the camera lens. It consists of a transparent glass or acrylic screen that is mounted in front of the camera lens, with a screen positioned at the base of the teleprompter. The text is displayed on this screen in a mirrored format, making it appear normal when reflected onto the glass in front of the camera. This allows the speaker to maintain eye contact with the audience while reading the script.

Teleprompters are widely used in various media productions, including news broadcasts, talk shows, and video marketing content, to ensure that the speaker can deliver their lines smoothly and confidently.

The Benefits of Using a Teleprompter

Using a teleprompter offers several advantages, especially for individuals who may not have extensive experience speaking on camera. Here are some key benefits:

1. Improved Script Delivery

One of the primary advantages of using a teleprompter is that it helps ensure the speaker delivers the script exactly as intended. This can be crucial when conveying important information, maintaining a consistent tone, or sticking to a specific time frame.

2. Enhanced Eye Contact

Maintaining eye contact with the camera is essential for connecting with your audience. Teleprompters enable speakers to read their lines while appearing to look directly at the viewers, creating a more engaging and personal connection.

3. Reduced Memorization Stress

For those who struggle with memorizing lengthy scripts, a teleprompter can alleviate the pressure. Instead of relying on memory, speakers can focus on delivering their lines naturally and confidently.

4. Greater Efficiency

Teleprompters can significantly speed up the production process. With the script displayed in front of them, speakers can read their lines more quickly and reduce the number of retakes, saving time and resources.

5. Professional Appearance

Using a teleprompter can elevate the overall production quality and make your videos appear more polished and professional.

Setting Up a Teleprompter

Now that we’ve covered the benefits of using a teleprompter, let’s dive into the process of setting one up for your video shoot.

1. Choose the Right Teleprompter

There are various teleprompter models available, ranging from portable options for on-location shoots to larger studio setups. Consider your specific needs and budget when selecting the right teleprompter for your project.

2. Mounting the Teleprompter

Position the teleprompter in front of the camera lens. It should be at eye level or slightly above the camera, ensuring the text is aligned with the lens. Use a sturdy tripod or mount to secure the teleprompter in place.

3. Adjusting Font Size and Speed

Most teleprompter software allows you to customize the font size and scrolling speed of the text. Adjust these settings to suit the speaker’s reading pace and comfort.

4. Calibrating the Reflection

Ensure that the text on the teleprompter screen is reflected correctly onto the glass or acrylic panel. The text should be easy to read and not distorted.

5. Rehearse with the Teleprompter

Before the actual shoot, have the speaker practice reading from the teleprompter. This will help them become comfortable with the device and ensure a more natural delivery.

Tips for Speaking Effectively with a Teleprompter

While using a teleprompter can make script delivery smoother, it still requires some practice and technique to appear natural and engaging. Here are some tips for mastering the art of speaking on camera with a teleprompter:

1. Focus on Pacing

Pay attention to the speed at which you read the text. Avoid rushing through it or speaking too slowly. Practice maintaining a steady pace that matches the tone of your message.

2. Use Natural Gestures

To appear more authentic, incorporate natural hand gestures and facial expressions while speaking. Avoid rigid or robotic movements, which can make you seem disconnected from the content.

3. Emphasize Key Points

Even when using a teleprompter, it’s essential to emphasize key points and convey enthusiasm or conviction when appropriate. Adjust your tone and delivery to match the content.

4. Maintain Eye Contact

While it’s tempting to focus solely on the teleprompter, make a conscious effort to connect with the camera lens. This creates a sense of engagement with your audience.

5. Practice, Practice, Practice

The more you practice with a teleprompter, the more comfortable and proficient you will become. Consider rehearsing with different scripts to improve your versatility.

Common Challenges and How to Overcome Them

Using a teleprompter may seem straightforward, but like any skill, it comes with its own set of challenges. Here are some common issues and strategies to address them:

1. Appearing Stiff

Some speakers may appear stiff or unnatural when using a teleprompter. To overcome this, practice relaxation techniques and focus on maintaining a relaxed posture.

2. Losing Your Place

It’s not uncommon for speakers to lose their place on the teleprompter screen. To avoid this, use a pointer or your finger to follow along as you read. This can help you stay on track.

3. Over-Reliance on the Teleprompter

While a teleprompter is a valuable tool, it’s essential not to become overly dependent on it. Familiarize yourself with the content beforehand so that you can speak confidently even if the teleprompter fails.

4. Technical Issues

Teleprompters can sometimes experience technical glitches. Have a backup plan in place, such as printed cue cards or a memorized version of the script, just in case.

Teleprompter Software and Apps

In addition to the physical teleprompter hardware, there is a wide range of teleprompter software and apps available for various devices and platforms. These tools offer additional features and flexibility for teleprompter users. Here are a few popular options:

  • Teleprompter Pro: A versatile teleprompter app available for iOS and Android devices. It offers customizable text settings, remote control options, and mirroring capabilities.
  • ProPrompter: A professional teleprompter software used by many broadcasters and production companies. It offers advanced features such as script editing, live script updates, and compatibility with external controllers.
  • CuePrompter: A free web-based teleprompter tool that is simple to use. It allows you to import and edit scripts, control scrolling speed, and offers a clean and user-friendly interface.
  • PromptSmart: A teleprompter app for iOS devices that uses voice recognition to scroll the script automatically. It also provides adjustable scrolling speed and customizable fonts.

Conclusion

Mastering the art of speaking on camera with teleprompters can significantly enhance the quality of your video productions. By using this valuable tool effectively, you can ensure that your message is delivered smoothly, maintain eye contact with your audience, and project a professional image.

As a full-service photo and video creation company, St Louis Video Studio has worked with many businesses in the St. Louis area to create impactful communication and branding productions. We specialize in business video either on location or in our studio. We have experienced videographers and photographers to cover any project that you might have. If you’re looking to take your video production to the next level and want to explore the possibilities of using teleprompters, don’t hesitate to reach out to us. Our extensive equipment and broad crew experience ensure that we can help you create memorable videos that get results. Contact us today to discuss your video needs and how we can assist you in achieving your communication goals.

314-913-5626

stlouisvideostudio@gmail.com

Shoot The Proper Use of B-Roll for Your Client Testimonials

In the world of video production, creating compelling client testimonials is an essential component of showcasing your company’s success stories. While the spoken words of your satisfied clients are undoubtedly important, the visual element that accompanies these testimonials can make all the difference. This visual component is often referred to as B-roll footage, and when used effectively, it can elevate your client testimonials to a whole new level. In this comprehensive guide, we will delve deep into the art and science of using B-roll to enhance your client testimonials.

Avoid shaky or handheld footage, as it can be distracting and diminish the quality of your video.

Understanding the Role of B-Roll

Before we dive into the specifics of using B-roll effectively, let’s clarify what B-roll actually is and why it is so crucial in the context of client testimonials.

What Is B-Roll?

B-roll is supplementary or secondary footage that is used alongside the primary or “A-roll” footage. In the context of client testimonials, the A-roll typically consists of the interview or dialogue with the client, where they share their experiences and opinions. The B-roll, on the other hand, consists of footage that supports and enhances the narrative by providing visual context, variety, and depth.

Why Is B-Roll Important?

B-roll serves several important purposes in client testimonials:

  1. Visual Engagement: B-roll helps maintain visual interest throughout the video. It prevents viewers from getting bored by continuously staring at a talking head.
  2. Storytelling: B-roll can help tell a more comprehensive and compelling story. It adds context to the client’s words and reinforces their message.
  3. Professionalism: High-quality B-roll footage can make your video production appear more professional and polished.

Now that we’ve established the importance of B-roll, let’s explore how to use it effectively in your client testimonials.

Planning Your B-Roll Shots

Creating effective B-roll footage begins with thoughtful planning. Here are some key considerations to keep in mind:

1. Know Your Client’s Story

Understanding your client’s story is paramount. Before shooting any B-roll, conduct thorough interviews with your clients to uncover the most compelling aspects of their experience. This will help you identify what visuals will best support their narrative.

2. Create a Shot List

Once you have a clear understanding of the client’s story, create a shot list. This list should outline specific shots or scenes you need to capture to illustrate their journey or success story. Include a variety of shots, such as close-ups, wide shots, and action shots, to keep the visual narrative dynamic.

3. Scout Locations

If your client testimonials include on-location shots, scout the locations in advance. This allows you to plan your shots, assess lighting conditions, and address any potential challenges.

4. Consider Lighting and Composition

Pay careful attention to lighting and composition when shooting B-roll. Proper lighting can make or break a shot, and well-composed frames add to the overall visual appeal of your video.

Shooting Techniques for B-Roll

Now that you have your plan in place, let’s explore some shooting techniques to capture stunning B-roll footage:

1. Steady Camera Work

Stability is key to professional-looking B-roll. Use a tripod or a stabilizer to ensure smooth and steady shots. Avoid shaky or handheld footage, as it can be distracting and diminish the quality of your video.

2. Capture Detail

Close-up shots of relevant details can add depth and texture to your video. Whether it’s a product, a location, or a person’s expression, capturing details can help convey the story more effectively.

3. Establishing Shots

Begin your B-roll sequences with establishing shots. These are wide-angle shots that set the scene and provide context for the viewer. They are especially useful when transitioning to a new location or segment.

4. Action Shots

To create dynamic B-roll, capture action shots that show your client or product in motion. This can add energy and excitement to your testimonials.

5. Natural Lighting

Whenever possible, utilize natural lighting. It can create a visually appealing and authentic look. If you must use artificial lighting, make sure it complements the scene and doesn’t create harsh shadows.

Editing B-Roll Into Your Testimonials

Once you have captured your B-roll footage, it’s time to integrate it into your client testimonials effectively.

1. Align B-Roll with the Narrative

During the editing process, ensure that your B-roll aligns seamlessly with the client’s narrative. The visuals should complement and enhance what is being said, creating a cohesive story.

2. Maintain a Smooth Flow

Transitions between A-roll and B-roll should be smooth and unobtrusive. Use techniques like crossfades or cutaways to avoid abrupt changes that can disrupt the viewer’s engagement.

3. Use Sound Design

Sound design plays a significant role in enhancing B-roll footage. Consider adding ambient sounds or music that complements the visuals and helps convey the intended mood.

Examples of Effective B-Roll Usage

To further illustrate the power of B-roll in client testimonials, let’s look at some examples:

Example 1: Product Showcase

Imagine a client testimonial for a tech company. The client is raving about the ease of use and functionality of their product. To complement this narrative, the B-roll includes close-up shots of the product being interacted with, highlighting its user-friendly features.

Example 2: Success Story

In a client testimonial for a business consultancy, the client discusses how their company’s revenue doubled after implementing the consultancy’s strategies. The B-roll includes before-and-after shots of the client’s office, team meetings, and financial charts displaying the growth.

Example 3: Service Experience

For a client testimonial related to a luxury hotel, the client praises the exceptional service they received. The B-roll showcases hotel staff providing personalized service, luxurious room amenities, and stunning views from the hotel’s location.

Final Thoughts on B-Roll for Client Testimonials

In the world of video production, B-roll is a powerful tool that can elevate your client testimonials to new heights. When used thoughtfully and strategically, it adds depth, engagement, and professionalism to your videos. By following the tips and techniques outlined in this guide, you can create client testimonials that leave a lasting impression on your audience.

As a full-service video company, St. Louis Video Studio has worked with businesses of all sizes in the St. Louis area. We are experts at working with firms of all types. With extensive experience in both studio and location video production, our team is well-versed in all aspects of video production. Whether you need compelling client testimonials or any other video production service, we can customize our visual productions to meet your specific needs. Contact us today to discuss how we can help with your internal and external communications through the power of video.

314-913-5626

stlouisvideostudio@gmail.com

Studio Video Production Best Practices

In the ever-evolving world of corporate branding and business marketing, video content has emerged as a powerful tool for engaging audiences and conveying messages effectively. It’s no secret that high-quality video production can make a significant impact on your marketing efforts. Whether you’re looking to create promotional videos, corporate presentations, product demos, or any other type of video content, understanding the best practices for studio video production is crucial.

Studio Video Production offers numerous advantages, including consistent lighting, controlled acoustics, and a distraction-free setting.

At St. Louis Video Studio, we’ve spent years honing our craft, working with a diverse range of clients, and producing exceptional video content. In this comprehensive guide, we’ll delve deep into the world of studio video production, sharing our expertise and insights to help you create videos that truly resonate with your target audience.

Understanding the Basics of Studio Video Production

Before we dive into the nitty-gritty details of studio video production, let’s start with the fundamentals. Studio video production involves shooting video content within a controlled indoor environment, typically a dedicated studio space. This approach offers numerous advantages, including consistent lighting, controlled acoustics, and a distraction-free setting.

Studio video production is widely used for a variety of purposes, including:

  • Corporate Videos: These can encompass anything from brand introductions and company culture presentations to training videos and CEO messages.
  • Product Demonstrations: Showcase your products or services in a professional, controlled environment to highlight their features and benefits.
  • Interviews: Conducting interviews with experts or employees can lend authenticity and credibility to your content.
  • Webinars and Livestreams: Engage your audience in real-time through webinars and livestreams, all produced in-studio.

Now that we have a solid foundation, let’s explore the key steps to achieve exceptional studio video production.

Pre-Production Planning

Define Your Goals and Audience

Before you even step into the studio, it’s essential to clearly define your objectives and identify your target audience. What message are you trying to convey, and who are you trying to reach? Having a well-defined strategy in place will guide your entire production process.

Scriptwriting and Storyboarding

Crafting a compelling script and creating a storyboard are crucial pre-production steps. Your script should convey your message concisely and engage your viewers, while a storyboard helps you plan the visual elements of your video, shot by shot.

Casting and Talent

Selecting the right talent for your video is paramount. Whether you’re featuring internal team members, professional actors, or spokespersons, ensure that they align with your brand and can effectively communicate your message.

Setting Up Your Studio

Studio Layout and Design

The layout and design of your studio space play a significant role in the overall look and feel of your video. Consider elements like backdrop, props, and furniture to create a visually appealing set that complements your brand.

Camera Placement and Composition

Position your cameras strategically to capture the best angles and compositions. Experiment with different camera placements to achieve the desired visual impact.

Choosing the Right Equipment

Cameras

Investing in high-quality cameras is non-negotiable for studio video production. Choose cameras that offer good resolution, low noise levels, and the ability to shoot in various formats, depending on your project’s requirements.

Lenses

Different lenses can dramatically alter the look of your video. Wide-angle lenses capture more of the scene, while telephoto lenses create a more focused, intimate look. Select lenses that suit your storytelling style.

Tripods and Stabilization

To maintain steady shots, use tripods and stabilizers. This prevents shaky footage and ensures a professional look.

The Importance of Lighting

Lighting is one of the most critical aspects of studio video production. Proper lighting can make or break your video’s quality.

Three-Point Lighting

Three-point lighting is a standard setup in studio production. It includes the key light, fill light, and backlight. This arrangement provides depth, reduces shadows, and enhances facial features.

Color Temperature

Understanding color temperature is essential. Adjust the color of your lights to match the ambient lighting conditions, ensuring your subjects appear natural and true to life.

Lighting Control

Use lighting modifiers such as softboxes, diffusers, and reflectors to shape and control the quality of light. This helps create the desired mood and atmosphere.

Sound Quality Matters

Sound quality is often underestimated, but it’s equally as important as video quality. Poor audio can ruin an otherwise well-produced video.

Microphones

Invest in quality microphones suited for your project. Options include lavalier microphones for interviews and shotgun microphones for capturing audio from a distance.

Acoustic Treatment

Studio acoustics should be optimized to minimize echo and unwanted noise. Consider acoustic panels and soundproofing to create a controlled audio environment.

Effective Shooting Techniques

Framing and Composition

Pay attention to framing and composition. Use the rule of thirds, leading lines, and other compositional techniques to create visually engaging shots.

Camera Movement

Experiment with camera movement to add dynamism to your video. Techniques like pans, tilts, and dolly shots can enhance storytelling.

Focus and Depth of Field

Adjust focus and depth of field to draw attention to specific subjects or elements within your frame. This adds visual interest and directs the viewer’s gaze.

Post-Production Magic

Post-production is where your video truly comes to life.

Video Editing

Edit your footage to remove mistakes, add graphics, incorporate music, and create a seamless narrative flow. Software like Adobe Premiere Pro or Final Cut Pro can be powerful tools in the editing process.

Color Correction and Grading

Enhance the visual aesthetics of your video through color correction and grading. Achieve a consistent look and feel that aligns with your brand.

Sound Editing

Clean up and enhance audio in post-production. Remove background noise, balance audio levels, and add music and sound effects as needed.

Distribution and Marketing

Once your video is ready, it’s time to share it with the world. Effective distribution and marketing strategies are essential to maximize your video’s impact.

Video Hosting Platforms

Consider hosting your video on platforms like YouTube, Vimeo, or Wistia, depending on your target audience and goals. These platforms offer built-in analytics and sharing options.

Social Media Promotion

Leverage social media channels to promote your video. Craft compelling captions, use appropriate hashtags, and engage with your audience to generate buzz.

Email Marketing

Include video content in your email marketing campaigns. Videos can significantly increase click-through rates and engagement.

The St. Louis Video Studio Advantage

At St. Louis Video Studio, we understand the intricacies of studio video production better than anyone. Our experienced team has produced hundreds of

studio video productions for a wide range of successful businesses in the St. Louis area. We take pride in our commitment to delivering top-notch video content that meets and exceeds our clients’ expectations.

Our Expertise

With years of experience in the industry, we have honed our skills to perfection. Our team of videographers, directors, scriptwriters, and editors work seamlessly together to bring your vision to life. We are well-versed in the latest industry trends and technologies, ensuring that your videos are not only current but also future-proofed.

State-of-the-Art Facilities

Our studio in St. Louis boasts state-of-the-art facilities, including cutting-edge camera equipment, lighting setups, and sound recording systems. Our studio space is meticulously designed to cater to various production needs, offering the flexibility to create diverse video content.

Customized Solutions

We understand that each project is unique, and that’s why we offer tailored solutions to meet your specific requirements. Whether you need a corporate video, product demonstration, or a creative promotional piece, we have the expertise to deliver exceptional results.

Streamlined Production Process

Our streamlined production process ensures that your project runs smoothly from concept to completion. We take care of all aspects of production, including pre-production planning, filming, editing, and post-production, so you can focus on your core business.

Attention to Detail

Details matter in video production, and our team is meticulous in every aspect of the process. From perfecting the lighting and sound to crafting engaging scripts and storyboards, we leave no stone unturned to create a polished final product.

Cost-Effective Solutions

We understand the importance of staying within budget without compromising on quality. Our cost-effective solutions are designed to provide the best value for your investment, ensuring that you get the most out of your video marketing efforts.

Exceptional Customer Service

Customer satisfaction is at the heart of everything we do. We work closely with you throughout the entire process, keeping you informed and involved at every stage. Your feedback is invaluable, and we are dedicated to making sure your vision is realized.

Proven Track Record

Our portfolio speaks for itself. Over the years, we have had the privilege of working with a diverse range of clients, from startups to established corporations. Our videos have helped our clients engage their target audiences, drive conversions, and achieve their marketing goals.

Your Video Production Partner

When you choose St. Louis Video Studio as your video production partner, you’re not just hiring a service – you’re gaining a creative collaborator dedicated to your success. We are committed to helping you enhance your corporate branding and business marketing through the power of video.

In conclusion, studio video production is a multifaceted process that requires careful planning, attention to detail, and a commitment to quality. Whether you’re new to video production or looking to elevate your existing efforts, following the best practices outlined in this guide can make a significant difference in the impact of your videos.

At St. Louis Video Studio, we have the experience, expertise, and resources to take your video projects to the next level. Our team is passionate about helping businesses like yours leverage the power of video to connect with your audience, convey your message effectively, and achieve your marketing objectives.

As a professional video studio, St. Louis Video Studio has produced hundreds of studio video productions for all types of successful businesses in the St. Louis area. We invite you to explore our portfolio and get in touch with us to discuss how we can collaborate on your next video project. Whether you need a corporate video, a promotional video, or any other type of video content, we’re here to help you shine in the world of corporate branding and business marketing.

314-913-5626

stlouisvideostudio@gmail.com

Guide to Producing PSA Videos

Welcome to St. Louis Video Studio, your trusted partner in creating compelling and impactful PSA (Public Service Announcement) videos. With our years of experience in the field of commercial video and photography, we understand the power of PSA videos in conveying important messages and driving social change. In this comprehensive guide, we’ll walk you through the essential steps and considerations for producing effective PSA videos that resonate with your target audience and leave a lasting impact.

PSA – A vital tool for fostering a sense of responsibility and unity.

Understanding the Importance of PSA Videos

PSA videos are a dynamic medium for raising awareness about social issues, promoting charitable causes, and advocating positive change. These videos serve as a bridge between organizations and the community, making them a vital tool for fostering a sense of responsibility and unity.

Step 1: Define Your Message and Goals

Every successful PSA video begins with a clear and concise message. Define the core issue you want to address and outline the goals you aim to achieve through your video. Whether it’s raising awareness, encouraging donations, or promoting volunteerism, a well-defined message will guide the entire production process.

Step 2: Know Your Audience

Understanding your target audience is crucial for crafting a message that resonates. Research their preferences, interests, and demographics to create content that captures their attention and motivates them to take action.

Step 3: Develop a Compelling Storyline

PSA videos are most effective when they tell a compelling story. Create a narrative that engages emotions, connects with the audience on a personal level, and conveys the urgency of the issue. Consider using real-life testimonials, relatable scenarios, or emotional appeals to drive your message home.

Step 4: Scriptwriting and Storyboarding

A well-crafted script is the backbone of any successful PSA video. Collaborate with experienced scriptwriters to develop a concise and impactful script that effectively communicates your message. Once the script is finalized, create a storyboard to visualize the flow of the video and plan the shots accordingly.

Step 5: Pre-production Planning

Before you start filming, ensure all logistics are in place. Secure locations, gather props, and assemble your production team. This is also the time to decide on the visual style, tone, and mood that best align with your message.

Step 6: Lights, Camera, Action!

Filming is where your vision comes to life. Capture high-quality visuals and audio, paying attention to lighting, composition, and sound. Collaborate closely with your team to ensure smooth coordination and seamless execution.

Step 7: Editing and Post-production

Post-production is where the magic happens. Edit your footage, add graphics, animations, and music to enhance the emotional impact of your PSA video. Strive for a polished and professional look that captures and holds the viewer’s attention.

Step 8: Test and Refine

Before releasing your PSA video to the public, gather feedback from a diverse group of individuals. Make necessary revisions to ensure your message is clear, relatable, and persuasive.

Step 9: Distribution and Promotion

Once your PSA video is finalized, it’s time to share it with the world. Utilize social media platforms, your organization’s website, and relevant community channels to reach your target audience. Engage with viewers, encourage shares, and foster conversations around the topic.

Step 10: Measure Impact and Adapt

Monitor the performance of your PSA video by tracking metrics such as views, engagement, and conversions. Use this data to assess the effectiveness of your message and make informed decisions for future campaigns.

How St. Louis Video Studio Can Elevate Your PSA Campaign

At St. Louis Video Studio, we take pride in being a full-service commercial video and photography company based in St. Louis. Our extensive experience and expertise in multimedia productions uniquely position us to meet your branding and business marketing communication needs. We have successfully partnered with numerous businesses and organizations, both large and small, to create impactful PSA videos that drive meaningful change.

As professional videographers and photographers, we understand the intricacies of storytelling, visual composition, and emotional resonance. Our team is well-versed in all aspects of video and photography production, from conceptualization and scriptwriting to filming, editing, and post-production. We bring creativity, technical excellence, and a deep commitment to our craft to every project we undertake.

Over the years, we have had the privilege of producing PSA videos for a wide range of causes and campaigns. Our work has helped amplify the voices of organizations striving to make a positive impact in the St. Louis region. By collaborating with St. Louis Video Studio, you are tapping into a wealth of experience and creativity that will elevate your PSA campaign and drive results.

In conclusion, PSA videos are a powerful medium for spreading awareness, driving change, and fostering community engagement. With the right approach and the support of a dedicated team like St. Louis Video Studio, your PSA video can become a catalyst for positive transformation. Let us help you create a compelling PSA video that resonates with your audience and contributes to a better tomorrow.

Contact us today to discuss how St. Louis Video Studio can partner with you to create impactful PSA videos that leave a lasting impression. Together, we can make a difference.

As professional videographers and photographers, St. Louis Video Studio has shot for hundreds of PSA’s for all types of large and small businesses and organizations in the St. Louis region.

314-913-5626

stlouisvideostudio@gmail.com

Crafting Authentic Testimonial Videos: Key Questions for Capturing Customer Experiences

by St. Louis Video Studio

In the world of marketing, one of the most powerful tools at your disposal is the testimonial video. Testimonials provide social proof and establish credibility for your brand, giving potential customers a glimpse into the positive experiences of others who have already used your products or services. These videos can be a game-changer for your business, but creating authentic and compelling testimonial videos requires careful planning and execution.

Harness the power of testimonial videos to enhance your branding and business marketing communications.

At St. Louis Video Studio, we understand the importance of testimonial videos and have helped numerous businesses in St. Louis and beyond create impactful visual content. As a full-service commercial photography and video production company, we specialize in crafting high-quality testimonial videos that resonate with your target audience and drive results. With our expertise and state-of-the-art facilities, we can help you capture the essence of your customers’ experiences and showcase them in a way that enhances your branding and business marketing communications.

The Power of Testimonial Videos

Testimonial videos are an invaluable asset in your marketing toolkit for several reasons. Firstly, they offer an authentic and relatable perspective on your products or services. Potential customers are more likely to trust the opinions and experiences of their peers rather than the claims made by a company. By featuring real people sharing their genuine thoughts and feelings, testimonial videos create a sense of trust and credibility.

Moreover, testimonial videos provide an opportunity to showcase the tangible benefits and real-world impact your offerings have had on customers’ lives. They allow viewers to see how your products or services have solved specific problems, improved efficiency, or enhanced the overall experience. This emotional connection is crucial in building brand loyalty and encouraging potential customers to take the desired action.

Key Questions for Capturing Authentic Experiences

Crafting compelling testimonial videos requires careful planning and skillful interviewing. Here are some key questions to consider when capturing customer experiences:

1. What problem were you facing before using our product/service?

Understanding the initial pain point or challenge your customer faced sets the stage for their journey and creates a relatable narrative for viewers.

2. How did our product/service address your specific needs?

Focus on the specific features, benefits, or unique selling points of your offerings that resonated with the customer. This helps highlight the value your business brings to the table.

3. What results have you achieved since using our product/service?

Capture the tangible outcomes and measurable results your customer experienced. This could include increased revenue, improved efficiency, saved time, or enhanced satisfaction.

4. How has our product/service made a difference in your life or business?

Encourage your customer to share personal anecdotes or stories that demonstrate the positive impact your offerings have had. These emotional connections are highly effective in engaging viewers and building trust.

5. Would you recommend our product/service to others, and why?

This question acts as a powerful call to action within the testimonial video. Hearing a satisfied customer explicitly recommend your product or service can be a persuasive factor for potential customers on the fence.

Enhancing Testimonial Videos with B-roll and Drone Footage

To create visually captivating testimonial videos, it’s important to supplement the interview footage with relevant b-roll shots. B-roll refers to additional footage that complements the main interview and helps visually illustrate the customer’s story.

At St. Louis Video Studio, we excel in capturing and incorporating high-quality b-roll footage that enhances the overall impact of your testimonial videos. Whether it’s showcasing your product in action, capturing behind-the-scenes footage of your service in operation, or highlighting your team’s expertise, we ensure that the visuals align seamlessly with the narrative.

Additionally, our company offers drone services to take your testimonial videos to new heights. Aerial shots captured by drones can add a fresh and dynamic perspective to your videos, providing a visually stunning view of your business location, facilities, or outdoor activities. Our experienced drone operators are skilled in capturing cinematic shots that add production value and elevate the storytelling of your testimonial videos.

St. Louis Video Studio: Your Partner in Branding and Business Marketing Communications

As an experienced multimedia production company based in St. Louis, St. Louis Video Studio is committed to helping businesses like yours succeed in their branding and marketing efforts. We understand the power of testimonial videos and the impact they can have on your target audience. With our expertise in video production and photography, we can guide you through the entire process of creating authentic and compelling testimonial videos that resonate with your customers.

Our state-of-the-art facilities are equipped with the latest technology and equipment, ensuring that your testimonial videos are of the highest quality. From professional lighting and sound setup to high-resolution cameras and editing suites, we have the resources to bring your vision to life. Our skilled team of videographers, photographers, and editors work collaboratively with you to capture and showcase the essence of your customers’ experiences in a visually engaging and emotionally impactful manner.

Whether you are a small local business or a large corporation, we tailor our services to meet your unique needs and budget. We take the time to understand your brand, target audience, and marketing goals to deliver testimonial videos that align with your overall marketing strategy. Our attention to detail, creativity, and dedication to excellence sets us apart as a trusted partner in helping you effectively communicate your brand message and drive business growth.

Get Started with St. Louis Video Studio Today!

If you’re ready to harness the power of testimonial videos to enhance your branding and business marketing communications, St. Louis Video Studio is here to help. Our team of experienced professionals is passionate about storytelling and creating impactful visual content. We are dedicated to understanding your business and capturing the authentic experiences of your customers.

Contact us today to discuss your testimonial video project and learn more about our comprehensive video production services. As experienced multimedia creators, St. Louis Video Studio has successfully produced numerous interview and testimonial video productions, and we look forward to bringing your vision to life.

314-913-5626

stlouisvideostudio@gmail.com

Maximizing Your Space: Tips for Setting Up a Small Video Studio

In today’s digital age, video content has become a powerful tool for businesses and individuals to communicate their messages effectively. Whether you’re a content creator, a small business owner, or a marketer, having a dedicated video studio can significantly enhance your production quality and brand presence. However, setting up a video studio in a small space can be a challenging task. In this article, we will provide you with expert tips on how to maximize your space and create an efficient small video studio.

Once your small video studio is set up, it’s important to test the equipment, lighting, and audio quality before starting your actual production.

1. Define Your Goals and Plan Ahead

Before diving into the setup process, it’s crucial to define your goals and determine what kind of videos you’ll be producing. Are you focusing on interviews, product demonstrations, or creative storytelling? Understanding your objectives will help you make informed decisions about equipment and layout.

Once you’ve defined your goals, create a detailed plan for your studio. Consider the dimensions of your space, the equipment you’ll need, and the layout that works best for your specific requirements. Planning ahead will save you time, money, and headaches in the long run.

2. Choose the Right Location

When dealing with limited space, choosing the right location for your video studio is paramount. Look for a spot with good natural lighting and minimal noise disturbances. A space near a window can provide ample natural light, reducing the need for additional lighting equipment.

Additionally, consider the acoustics of the room. Spaces with hard surfaces can create echoes and unwanted audio reflections. To mitigate this, add soundproofing materials like foam panels or curtains to absorb excess sound and improve audio quality.

3. Optimize Lighting

Lighting is one of the most critical factors in creating high-quality videos. In a small video studio, maximizing the available light is essential. Here are some tips to optimize lighting in your small space:

  • Utilize natural light: Position your shooting area near a window to make the most of natural light. Keep in mind that the intensity and quality of natural light can change throughout the day, so plan your shooting schedule accordingly.
  • Invest in lighting equipment: Supplement natural light with artificial lighting to maintain consistent illumination. LED panels or softboxes are affordable and versatile lighting options for small spaces.
  • Use reflectors and diffusers: Reflectors bounce light back onto the subject, filling in shadows, while diffusers soften harsh light. These inexpensive tools can significantly improve the quality of your videos.

4. Consider Backgrounds and Set Design

The background and set design play a crucial role in creating a visually appealing video. In a small studio, you need to be strategic in utilizing the limited space effectively. Here are some tips for background and set design in a small video studio:

  • Keep it simple: Avoid cluttered backgrounds that can distract viewers from your main subject. Opt for solid colors or simple patterns that complement your branding.
  • Create depth: Use depth and perspective techniques to make your small space appear larger. Experiment with different camera angles and depth of field to add visual interest.
  • Portable backdrops: Invest in portable backdrop systems that can be easily set up and removed. This allows you to switch backgrounds quickly, depending on the type of video you’re producing.

5. Use Space-Saving Equipment

In a small video studio, every inch of space matters. Choosing compact and space-saving equipment is crucial to maximize your available area. Consider the following:

  • Camera and tripod: Select a compact camera with excellent video capabilities to save space. A tripod with a small footprint will provide stability without occupying too much floor space.
  • Foldable equipment: Look for collapsible light stands, reflectors, and diffusers that can be easily folded and stored when not in use.
  • Wall-mounted equipment: Opt for wall-mounted or ceiling-mounted equipment such as lights, microphones, and monitors. This frees up valuable floor space and keeps your studio clutter-free.
  • Multifunctional furniture: Use furniture that serves multiple purposes. For example, a desk can double as a workstation and storage space for your equipment, or a bookshelf can store props and accessories while also acting as a backdrop.
  • Wire management: Keep your cables organized and out of the way. Consider using cable management solutions such as cable clips, velcro straps, or cable sleeves to avoid a messy and hazardous setup.

6. Efficient Storage Solutions

Effective storage solutions are essential to maintain a well-organized and functional small video studio. Here are some ideas to optimize your storage space:

  • Shelving units: Install sturdy shelves to store equipment, props, and accessories. Adjustable shelves allow you to customize the height according to your needs.
  • Carts and rolling racks: Invest in carts or rolling racks to store frequently used equipment, allowing for easy access and mobility. This is particularly useful if your studio serves multiple purposes or needs to be moved around.
  • Vertical storage: Make use of vertical space by installing hooks, pegboards, or wall-mounted racks to hang and store items such as cables, headphones, and smaller equipment.

7. Soundproofing and Acoustic Treatment

In a small video studio, soundproofing and acoustic treatment are crucial to ensure professional audio quality. Here are some tips for soundproofing and acoustic treatment:

  • Seal gaps and cracks: Inspect the room for any gaps or cracks where sound can leak. Use weatherstripping or acoustic sealant to seal them and prevent external noise from entering your recordings.
  • Add sound-absorbing materials: Install sound-absorbing panels or acoustic foam on the walls to reduce echoes and unwanted reflections. Place a thick rug or carpet on the floor to further improve sound quality.
  • Isolate noisy equipment: If you have equipment that generates noise, such as air conditioning units or computer fans, try to isolate them or use soundproof enclosures to minimize their impact on your recordings.

8. Optimizing Post-Production Workflow

Efficient post-production workflow is essential for small video studios to maximize productivity and deliver high-quality content. Consider the following tips:

  • Invest in a fast computer: A powerful computer with sufficient processing power and RAM will ensure smooth video editing and rendering processes.
  • Use external storage: External hard drives or network-attached storage (NAS) devices provide additional storage space for your video files, keeping your computer’s storage uncluttered.
  • Organize your files: Create a clear folder structure to organize your video files, project files, and assets. Naming conventions and tagging systems can help you locate files quickly and avoid confusion.
  • Streamline your editing process: Learn keyboard shortcuts and utilize video editing software features that can speed up your editing process. Consider creating templates or presets for common tasks or effects to save time.

9. Test and Iterate

Once your small video studio is set up, it’s important to test the equipment, lighting, and audio quality before starting your actual production. Make adjustments as needed and iterate on your setup to achieve the best results.

Experiment with different camera angles, lighting setups, and background options to find what works best for your specific content and style. Don’t be afraid to make changes and improvements along the way.

Conclusion

Setting up a small video studio may come with its challenges, but with careful planning and optimization, you can create a highly functional and efficient space. By defining your goals, optimizing lighting and sound, utilizing space-saving

314-913-5626

stlouisvideostudio@gmail.com

Teleprompter Coaching for a CEO or Executive

When it comes to producing an effective video, the words matter just as much as the visuals. When it comes to speaking on camera, one of the best ways to ensure that your message is clear and concise is by using a teleprompter. But how do you coach a CEO or executive through an on-camera teleprompter read? Let’s take a closer look at the best practices for coaching someone through this process.

Preparing Your Executive

The first step in coaching your executive through an on-camera teleprompter read is to make sure they are adequately prepared. This means giving them a thorough run-through of the script and taking time to answer any questions they may have.

During the preparation phase, you need to help your executive understand why this video is being produced, what purpose it serves in their company’s marketing strategy, and how it will be distributed. This will give them a better understanding of the context of the video and help them deliver the message more effectively.

It’s also important to make sure your executive has plenty of time to practice reading from the teleprompter before shooting day. The teleprompter can be a bit intimidating for first-timers, and the more practice they have, the more comfortable they’ll feel on the day of filming.

It’s also helpful to provide them with some tips for making their on-camera performance more natural and engaging. For example, encourage them to speak at a steady pace (too fast or too slow can be distracting) and remind them not to lick their lips or make other unnecessary facial expressions while delivering their lines. It’s also important that they consistently maintain eye contact with the camera lens—not with the teleprompter itself—so that viewers don’t feel like they’re getting lectured by someone who isn’t looking directly at them.

Filming Day Tips

On shooting day, make sure you arrive early so that everyone can get settled and comfortable before cameras start rolling. During filming, it’s important that all distractions are minimized (turn off cell phones!) so that your executive can focus on delivering their lines in an authentic way without worrying about anything else going on around them.

Once filming starts, you should be ready with cues if needed and be prepared for multiple takes if needed – especially if your executive is having trouble remembering lines or feeling uncomfortable with certain portions of the script. Don’t be afraid to take breaks and give your executive some time to collect themselves and regroup.

It’s also important to keep an eye on the teleprompter during filming. Sometimes the scrolling speed can be too fast or too slow, and you may need to make adjustments on the fly to keep things running smoothly.

Conclusion

Coaching a CEO or executive through an on-camera teleprompter read can be challenging, but it doesn’t have to be intimidating! With proper preparation and plenty of practice runs beforehand, you can help ensure that your executive delivers their message clearly and confidently during filming.

Remember to provide context for the video, give them tips for a natural performance, and minimize distractions on shooting day. By following these tips and tricks, you’ll have no trouble helping your executives deliver successful videos every time!

If you need more information or guidance on this subject, don’t hesitate to contact us today for a complimentary consultation.

314-913-5626

stlouisvideostudio@gmail.com

The Importance of Consistency in Product and Service Photography.

In today’s world where most businesses operate digitally, it’s important to create a visual appeal that stands out from the crowd. One of the most important elements in showcasing what a company has to offer is product and service photography. However, it’s not just about snapping a few pictures; consistency in product and service photography is crucial for creating a cohesive brand image and building trust with customers.

By maintaining a consistent visual identity, businesses can create a unique and recognizable brand that stands out from the competition.

The impact of consistent product and service photography on branding

Consistent product and service photography helps businesses create a unique and recognizable brand identity. It’s not just about capturing the products or services beautifully but also about presenting them consistently across all platforms. By maintaining a consistent look and feel, businesses can create a brand image that customers can easily recognize and remember. This consistency is vital, especially when customers are exposed to a multitude of brands and products every day.

Consistency in product and service photography also helps businesses communicate their values and professionalism. By presenting their products and services in the best possible light, businesses can show their customers that they care about attention to detail, quality, and overall customer experience. This can help increase customer trust and loyalty, leading to repeat business and positive word-of-mouth marketing.

How consistent photography can improve customer perception and trust

Consistency in product and service photography can improve customer perception and trust in several ways. Firstly, it helps customers understand the products or services better. By presenting products or services consistently, businesses can ensure that customers are seeing the most accurate and high-quality representation of their offerings.

Secondly, consistent photography can help customers remember a business. When customers see a consistent visual identity across different platforms, it registers in their minds as a unique and recognizable brand. This can help businesses stand out from the competition and increase brand recall.

Lastly, consistent photography can improve customer trust. When customers see that a business takes their brand image seriously and presents their products or services consistently, it communicates a sense of professionalism and reliability. This can help customers feel more confident in their purchasing decisions and may lead to increased sales and customer loyalty.

Tips for maintaining consistency in product and service photography

Maintaining consistency in product and service photography is not an easy task, but there are several tips that businesses can follow to ensure they are presenting a cohesive brand image.

Firstly, businesses should create a visual style guide that outlines the guidelines for their product and service photography. This guide should include information about color schemes, lighting, composition, and any other visual elements that contribute to the brand’s identity.

Secondly, businesses should use the same equipment and settings for their photography sessions. This will help ensure that the images are consistent in terms of lighting, color, and overall quality.

Thirdly, businesses should use the same editing software and techniques for all of their images. This will help ensure that the images have a consistent look and feel, even if they were taken at different times or locations.

Lastly, businesses should train their photographers or hire a professional photographer who understands the brand’s visual identity and can maintain consistency in their work.

The role of color, lighting, and composition in consistent photography

Color, lighting, and composition are essential elements in creating consistent product and service photography.

Color is an important aspect of a brand’s visual identity and can help create a sense of emotion or mood in the images. Businesses should choose a color scheme that aligns with their brand values and use it consistently across all platforms.

Lighting is also crucial in product and service photography. It can affect the overall mood of the images and can make products look more appealing. Consistency in lighting can help create a cohesive look and feel across all images.

Composition is the arrangement of visual elements in an image. It can help direct the viewer’s attention and create a sense of balance and harmony. Consistent composition can help create a recognizable brand identity and ensure that all images are visually appealing.

The benefits of using a professional photographer for consistent imagery

While it’s possible to take product and service images in-house, using a professional photographer can provide several benefits.

Firstly, professional photographers have the skills and equipment to create high-quality images. This can help ensure that the images are consistent in terms of lighting, color, and overall quality.

Secondly, professional photographers have experience in creating visually appealing images that align with a brand’s identity. They can help businesses create a unique and recognizable visual identity that stands out from the competition.

Lastly, professional photographers can save businesses time and money by creating a library of high-quality images that can be used across all platforms. This can help businesses maintain consistency in their visual identity and save resources in the long run.

Examples of brands that have successfully implemented consistent photography

Several brands have successfully implemented consistent photography in their marketing strategies.

One example is Apple, which is known for its consistent and high-quality product photography. Apple’s product images are always shot against a white background with consistent lighting, highlighting the product’s design and features. This consistency has helped create a premium and recognizable brand identity.

Another example is Nike, which uses consistent product and lifestyle photography across all platforms. Nike’s images are always visually appealing and showcase the brand’s values of athleticism, performance, and innovation. This consistency has helped build a strong brand identity and has contributed to the brand’s success.

Best practices for using consistent photography on social media and marketing materials

Consistent photography is essential for social media and marketing materials. Here are some best practices businesses can follow to ensure their photography is consistent across all platforms.

Firstly, businesses should use the same visual style guide for all platforms. This will help ensure that the images are consistent in terms of color, lighting, and composition.

Secondly, businesses should use the same editing software and techniques for all images. This will help ensure that the images have a consistent look and feel across all platforms.

Lastly, businesses should use the same hashtags and captions for all images. This will help create a cohesive message across all platforms and improve brand recall.

Common mistakes to avoid when trying to maintain consistency in photography

Maintaining consistency in product and service photography is not easy, and businesses may make mistakes along the way. Here are some common mistakes to avoid.

Firstly, businesses should avoid using different equipment or settings for different photography sessions. This can lead to inconsistency in lighting, color, and overall quality.

Secondly, businesses should avoid using different editing techniques or software for different images. This can result in inconsistency in the images’ overall look and feel.

Lastly, businesses should avoid using images that do not align with their brand’s visual identity. This can confuse customers and lead to a weaker brand identity.

Conclusion emphasizing the importance of consistent photography in building a strong brand identity

In conclusion, consistent product and service photography is essential for building a strong brand identity and improving customer perception and trust. By maintaining a consistent visual identity, businesses can create a unique and recognizable brand that stands out from the competition. This consistency can translate to increased sales and customer loyalty. By following the tips and best practices outlined in this article, businesses can maintain consistency in their product and service photography and create a strong brand identity that resonates with their customers.

One Size Doesn’t Fit All: Factors to Consider in Determining Video Length.

In today’s digital age, video content has become an essential part of any successful marketing strategy. Video content is a powerful tool that can help brands to engage with their audience and tell compelling stories. However, as a content creator, have you ever found yourself wondering how long your videos should be to attract and retain your audience’s attention? The truth is, one size doesn’t fit all when it comes to video length. There are various factors to consider when determining the ideal video length for your specific target audience and marketing objectives. In this article, we will explore some of these critical factors and provide you with valuable insights to help you create videos that not only capture your audience’s attention but also keep them engaged from start to finish. So, let’s dive in and discover the secrets to creating successful video content that resonates with your audience.

Why video length matters in digital marketing

Video content has become a critical component of digital marketing strategies. The right video can help brands to build trust with their audience, increase engagement, and ultimately drive conversions. However, the length of your video can have a significant impact on its success. The length of your video can affect your audience’s attention span, engagement, and overall perception of your brand.

Studies have shown that the average attention span of an adult is around eight seconds. This means that you have a limited amount of time to capture your audience’s attention and keep them engaged. Therefore, it is essential to consider the length of your video when creating content for your target audience.

In addition, the length of your video can affect how your audience perceives your brand. If your video is too long, it can be seen as boring or uninteresting, and your audience may lose interest. On the other hand, if your video is too short, it may not provide enough information to your audience, and they may not take your brand or message seriously.

Therefore, it is important to consider the factors that influence video length to create successful video content that resonates with your audience.

Understanding your target audience

One of the most critical factors to consider when determining the ideal video length is your target audience. Your audience’s age, gender, interests, and preferences can significantly impact how long they are willing to watch your video.

For example, younger audiences tend to have a shorter attention span and prefer shorter videos, while older audiences may prefer longer videos with more in-depth information.

It is also essential to consider your audience’s viewing habits. Are they more likely to watch videos on their mobile devices or on their desktops? Are they likely to watch your videos during their lunch break or in the evening after work? These factors can influence the ideal length of your video and help you to create content that resonates with your audience.

The purpose and objective of your video

Another critical factor to consider when determining the ideal video length is the purpose and objective of your video. Are you creating a video to promote a product, educate your audience, or entertain them?

If you are creating a video to promote a product, you may need to provide more in-depth information to convince your audience to make a purchase. This may require a longer video that provides a detailed overview of your product’s features and benefits.

On the other hand, if you are creating a video to entertain your audience, a shorter video may be more appropriate. Shorter videos can be more engaging and have a higher chance of being shared on social media, increasing your brand’s reach.

The platform and context of your video

The platform and context of your video can also affect the ideal length of your video. Are you creating a video for YouTube, Instagram, Facebook, or another social media platform?

Different platforms have different requirements and constraints when it comes to video length. For example, Instagram allows videos of up to 60 seconds, while YouTube has no limit on video length.

It is also essential to consider the context in which your video will be viewed. Are your audience members likely to watch your video while on the go or in a more relaxed setting? This can influence the length of your video and the type of content you include.

Camera operator, producer and talent at our studio green screen videotaping.

The type of video content you are creating

The type of video content you are creating can also impact the ideal length of your video. Are you creating a tutorial video, a product review, or a brand awareness video?

Tutorials and product reviews may require more in-depth information, which may require a longer video. On the other hand, brand awareness videos may be more effective with shorter videos that capture your audience’s attention quickly.

It is also essential to consider the tone and style of your video. Are you creating a serious and informative video or a fun and entertaining video? This can impact the length of your video and the type of content you include.
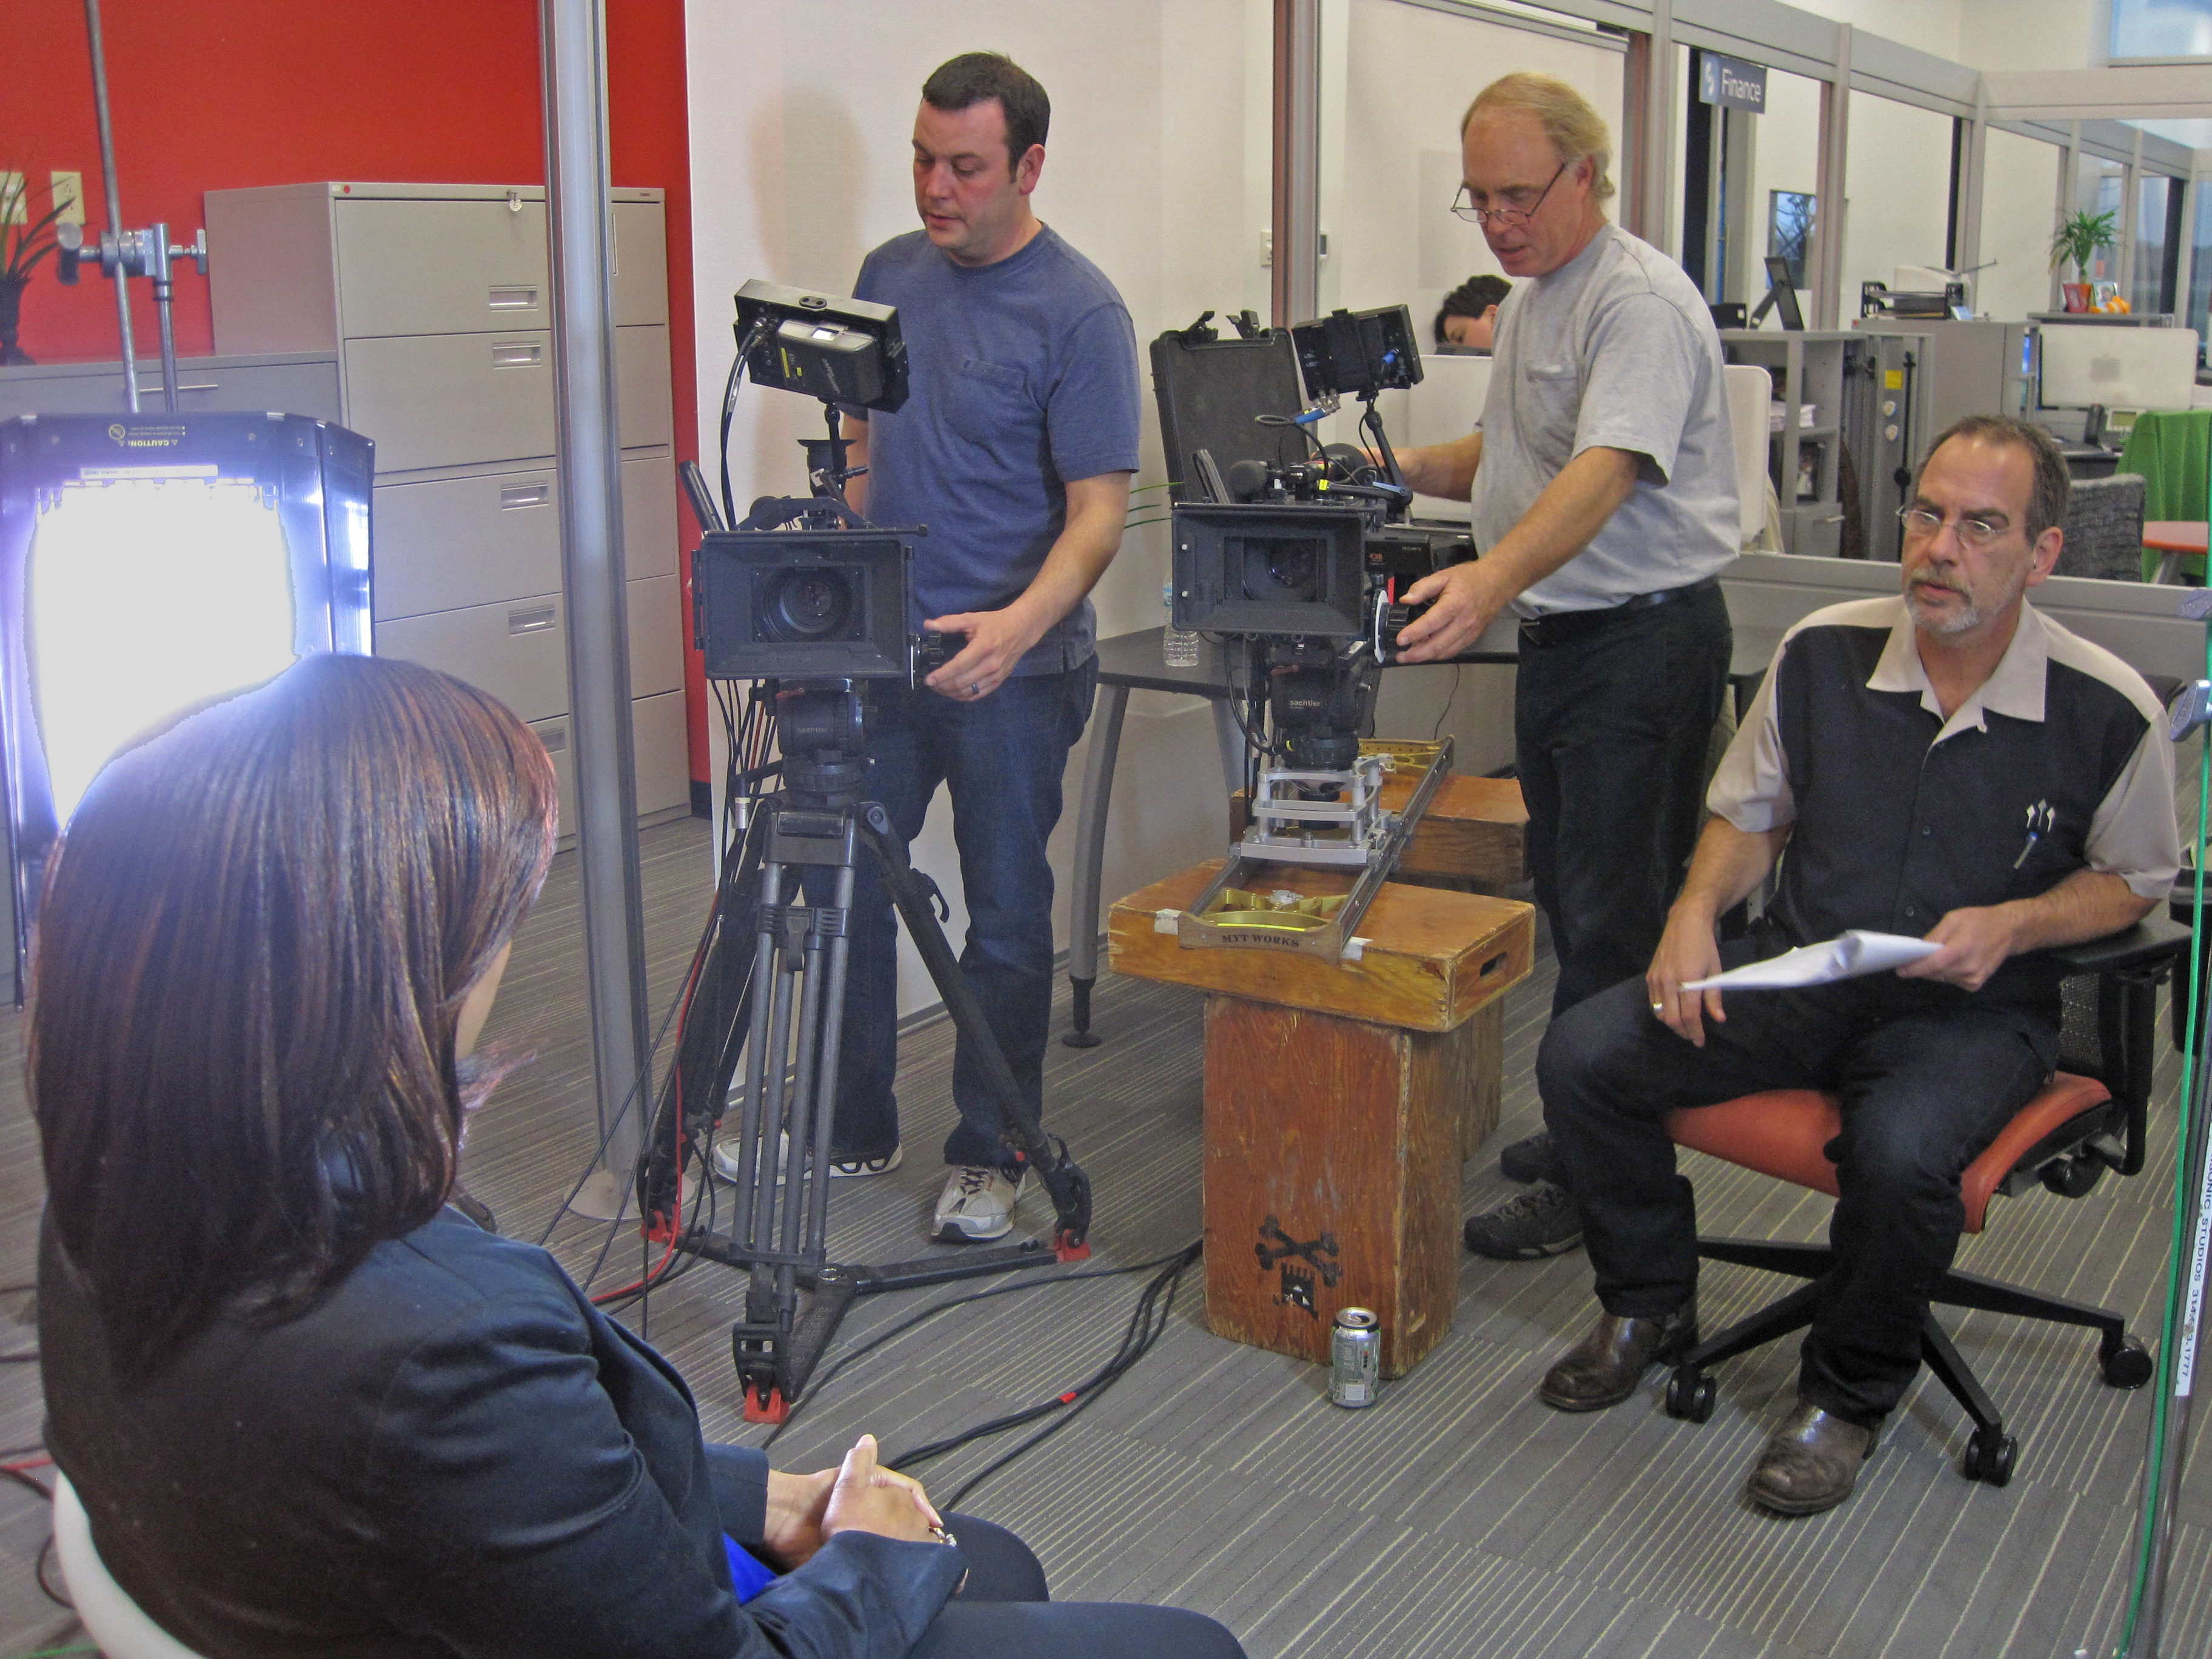
The role of storytelling in video length

Storytelling is an essential component of successful video content. A well-crafted story can capture your audience’s attention and keep them engaged from start to finish.

However, the length of your story can significantly impact your video’s success. If your story is too long, your audience may lose interest or become bored. On the other hand, if your story is too short, it may not provide enough information or emotional impact to resonate with your audience.

Therefore, it is essential to consider the length of your story when creating video content. Your story should be concise, engaging, and provide enough information to keep your audience interested.

The impact of attention span on video length

As mentioned earlier, the average attention span of an adult is around eight seconds. This means that you have a limited amount of time to capture your audience’s attention and keep them engaged.

Therefore, it is essential to consider the impact of attention span on video length. Your video should be engaging and provide enough information to keep your audience interested, but not so long that they lose interest.

Studies have shown that the ideal video length for most audiences is between two and three minutes. However, this can vary depending on your target audience and marketing objectives.

Best practices for determining video length

To determine the ideal video length for your brand and audience, consider the following best practices:

  1. Understand your target audience and their viewing habits
  2. Determine the purpose and objective of your video
  3. Consider the platform and context of your video
  4. Tailor your video length to the type of content you are creating
  5. Craft a compelling story that captures your audience’s attention
  6. Keep your video length concise and engaging.

By following these best practices, you can create video content that resonates with your audience and achieves your marketing objectives.

Case studies of successful video content with varying lengths

To illustrate the impact of video length on success, let’s look at some case studies of successful video content with varying lengths:

  1. Dollar Shave Club – Two-Minute Video

Dollar Shave Club’s two-minute video went viral and helped the brand to establish itself as a major player in the grooming industry. The video features the company’s founder, Michael Dubin, explaining the benefits of their subscription service in a humorous and engaging way.

The video’s length was perfect for the brand’s target audience and the platform it was shared on. It provided enough information to convince viewers to sign up for the subscription service while keeping them engaged with its humorous tone.

  1. Nike – 60-Second Video

Nike’s 60-second video, “Dream Crazy,” features former NFL quarterback Colin Kaepernick and other prominent athletes encouraging viewers to dream big and pursue their goals. The video’s length was ideal for the brand’s target audience and the message it was trying to convey.

The video’s emotional impact and powerful message resonated with viewers, and it quickly went viral, increasing Nike’s brand awareness and reach.

  1. Apple – 90-Second Video

Apple’s 90-second video, “Welcome Home,” features singer FKA Twigs dancing through an apartment that comes to life thanks to the brand’s HomePod speaker. The video’s length was perfect for the brand’s target audience and the platform it was shared on.

The video’s engaging and visually stunning content kept viewers interested and showcased the HomePod speaker’s features and benefits.

Conclusion: Finding the right video length for your brand and audience

In conclusion, video length is a critical factor to consider when creating successful video content. One size doesn’t fit all when it comes to video length, and there are various factors to consider when determining the ideal length for your brand and audience.

Understanding your target audience, the purpose and objective of your video, the platform and context of your video, the type of video content you are creating, the role of storytelling, and the impact of attention span are all critical factors to consider when determining the ideal video length.

By following best practices for determining video length and looking at case studies of successful video content, you can create engaging, informative, and emotionally impactful videos that resonate with your audience and achieve your marketing objectives. So, what are you waiting for? Start creating video content that captures your audience’s attention and keeps them engaged from start to finish.

Mike Haller 314-913-5626 stlouisvideostudio@gmail.com

Commercial Video Studio Recording and Editing with Non-Professional Talent.

Ready to set up a commercial video recording studio with non-professional talent? You’re in the right place! This article will guide you through all the necessary steps for creating high quality, professional videos without breaking your budget. Learn how to get your project off the ground and running quickly, efficiently, and effectively.

Last minute changes are typical when it comes to video recording with non professionals.

Working with amateur actors can be a challenge, as they often lack the proper training, discipline and experience that professional talent bring to the table. Despite this, every now and again it’s necessary to work with non-professionals – that’s where our guide comes in!

We’ll walk you through the basics of working in a commercial video studio and show you how to get the most out of working with non-professional talent. We’ll cover factors like:

  • Equipment selection
  • Audio considerations
  • Lighting options
  • Camera angles
  • Tips for guiding your performers towards delivering their best performance.

We’ll also demonstrate techniques for editing your footage quickly and efficiently so you can maximize production value when creating content for web use or TV broadcast. With our guide in hand you’re sure to create great results when filming with non-pros!

What is a Commercial Video Studio?

A commercial video studio provides professional-level, high-quality recording and editing services for clients who require a more polished approach to their video production. These studios are typically found in production facilities that specialize in producing videos for television advertisements, promotional campaigns, internet content, and more. A commercial video studio may contain a variety of digital equipment—including cameras and editing suites—that are designed to capture the highest quality audio and visual products possible. The technicians working in these facilities have a great deal of experience with both hardware and software systems, allowing them to provide top-notch recording and editing services to clients.

When utilizing a commercial video studio, non-professional talent can be utilized alongside experienced professionals to create high-quality videos. Non-professional talent is especially beneficial when mood or emotion is needed that can’t be obtained with strictly professional actors or voiceover artists. This allows for further creative possibilities when it comes to producing an impactful video product. Additionally, the typical costs associated with shooting in these types of facilities can be lower than hiring professional talent alone because you don’t have to pay for their time on set or on location when shooting at the studio. Professional guidance from studio technicians can also provide valuable insight into making sure your project is as successful as possible—including accurate sound mixing, scene arrangement/blocking guidance, editing advice, displaying motion graphics accurately onscreen during recordings if necessary; everything one needs to make sure their project is well executed before it wraps production!

Benefits of Recording and Editing with Professional Talent

When it comes to video production, there is a wide range of options available to clients. Depending on their objectives and budget, they may opt for professional talent or non-professional talent.

Benefits of recording with professional talent include the following:

  • Professional actors have experience in the industry and therefore possess the necessary skills to deliver a quality performance.
  • Professional actors bring a higher level of professionalism that can help set a studio apart from competitors.
  • Professional actors are committed to their work 24/7, which allows them to provide the maximum level of production value for each project.
  • They can also be more efficient in their delivery as compared to non-professional talent who may take longer because they are less experienced with performing in front of a camera and need more time to practice and master acting techniques.

Benefits of editing with professional talent include:

  • Professional editors have an eye for detail that can help improve the overall quality of the video.
  • They are able create compelling visuals faster then their amateur counterparts due to their ability to process information quicker and understand how each scene works together within an edit.
  • Some editors specialize in certain genres such as sports and music which can bring unique visual styles into your project.
  • Lastly, they know how long certain types of shots need be so that the flow of the video feels natural all while maintaining your intended branding message throughout its entirety.

Challenges of Recording and Editing with Non-Professional Talent

Recording and editing with non-professional talent can pose unique challenges for commercial video production studios. The talent being used may not be experienced in the studio environment, which can lead to difficulties with sound and camera synchronization and aspects of performance management. Additionally, the lack of professionalism from inexperienced actors may slow down or lengthen the recording process.

Furthermore, inexperienced actors will generally require more direction from the directors throughout the recording, particularly when it comes to their performance as it relates to pacing and timing. This could potentially have a bearing on potential editing opportunities down the line as editors may have to adapt their approach depending on the raw footage they are presented with.

In terms of an optimal rendering of a project that uses non-professional actors, directors and producers should:

  • Create a strong creative environment during pre-production so that expectations are wholly communicated with each actor.
  • Give extended attention during both re-recording activities as well as offering coaching support while reviewing dailies to ensure sound delivery is up to par when working with novice talent.

Tips for Working with Non-Professional Talent

Working with non-professional talent can seem intimidating, but with the right approach, you can make sure that you end up with a great video or commercial. There are a few tips that come in really useful when working with non-professional talent in your video studio.

  • One of the most important aspects of working successfully with non-professional talent is communication. You will want to explain in detail what you will be doing and what is expected of them prior to filming even if it seems redundant. Make sure they know where to stand, when to move and how long you plan on recording for. It is also wise to make certain that any discussion about pay is settled prior to the shoot so that any surprise costs don’t occur during filming. Be patient with your talent and let them experiment, providing feedback as needed so they can best perform their role within the video or commercial.
  • Another tip when working with non-professional talent is comfortability. Consider their rehearsal time as an opportunity where they can settle into their roles and feel more secure going into shooting day. Establishing rapport before filming goes a long way! Setting up a friendly production environment without heavy stress helps everyone perform better during the filmmaking process and through post-production editing stages too.
  • Finally, it’s important to ensure accuracy within the script if possible! This means that if your client wants an exact phrase used during shooting make sure it’s incorporated accurately into rehearsals beforehand so there are no surprises on set or further along in post-production efforts!
Recording non-professional talent on a studio set.

Equipment and Software Needed for Commercial Video Studio Recording and Editing

Once you have determined the type of commercial videos you’d like to create and the software and hardware devices you will use, it is important to understand what equipment and software are needed for commercial video studio recording and editing with non-professional talent. Here is a brief overview of the essential items needed for a successful commercial video project.

Hardware:

  • Camera: Whether filming with a DSLR or point-and-shoot camera, be sure to purchase an appropriate model that will work in collaboration with your specific video format.
  • Computer: A powerful computer system is essential for post-production, editing, and rendering. Depending on the software utilized and complexity of the project, you should determine if a desktop or laptop system is best suited for your needs.
  • Microphones: Mics can range from simple lavaliers to boom mics that pick up audio details unobtainable using other methods such as high fidelity audio capture capabilities. It is important to decide which will be most effective before shopping around.

Software:

  • Recording Software: Utilizing the right recording software can be critical for capturing pristine audio tracks. Be sure to research samples of varied applications before settling on one for final production purposes.
  • Video Editing Software: Professional editors use variety of packages depending on the type work in which they specialize or reflect their own personal aesthetic preferences such as Adobe Premiere Pro or Final Cut Pro X. Different tools will produce different results so understanding features within offered package options prior purchase can save time avoid program learning curve delays later within post production stages.
  • Graphics & Animation Programs: If specific graphics integration within show segments desired more advanced user graphic animation applications such as Adobe After Effects must consider usage case scenarios prior selection costs fees. Specialized set backgrounds titles end slides need consider implementation planned timeline based upon budget dictations contracts timelines detailed clearly ensure proper deadlines met avoid any problems later during playback distribution manners.

Best Practices for Working with Non-Professional Talent

When recording and editing video with non-professional actors and personalities, it is important to keep in mind that not everyone is going to be a professional performer. It is important to be organized, patient and understanding, so the production process runs smoothly for all involved. Here are some tips for working with nonprofessional talent in a commercial video studio:

  • Manage Expectations: Before production begins, explain what you need from the talent and let them know exactly what to expect. Give clear instructions on how to act and where to look when on camera, as well as providing direction during practice runs.
  • Keep it Engaging: While prepping your talent for their part in filming, it’s important to make the process engaging. Take extra time while blocking and rehearsing the scene, provide cues throughout that create natural pauses or breaks in action that can help keep energy levels up throughout filming.
  • Use Visuals Before Words: When communicating how something should be done or how you want your talent to act/react/pose on camera don’t rely solely on verbal communication – instead use visuals such as hand gestures or mimicry of scenes/slides/staging so they can really understand what’s required of them before doing a take.
  • Be Flexible: Last minute changes are typical when it comes to video recording with non professionals – remain flexible by coming up with alternate solutions that still achieves the desired goal ie rephrasing dialogues or incorporating different acting styles if needed. Make sure that everyone feels heard within the creative process so none of them feel left out in this shared experience because having an emotional connection can help instill confidence beforehand as well during post production.

Conclusively, there is no single optimal approach to recording and editing a video project in a commercial video studio for working with non-professional talent. Each project will have its own unique requirements based on the particular context and goals of the project. However, it is possible to identify some common principles that can help guide the process, such as:

  • Keeping color levels consistent
  • Establishing clear communication between collaborators
  • Maintaining adequate separation between microphones

When working with non-professional talent, it is also important to ensure that everyone involved feels comfortable and confident in their respective roles throughout the recording process. Following these core principles can help ensure that the end result is a successful video production.

Rob Haller 314-604-6544

stlouisvideostudio@gmail.com