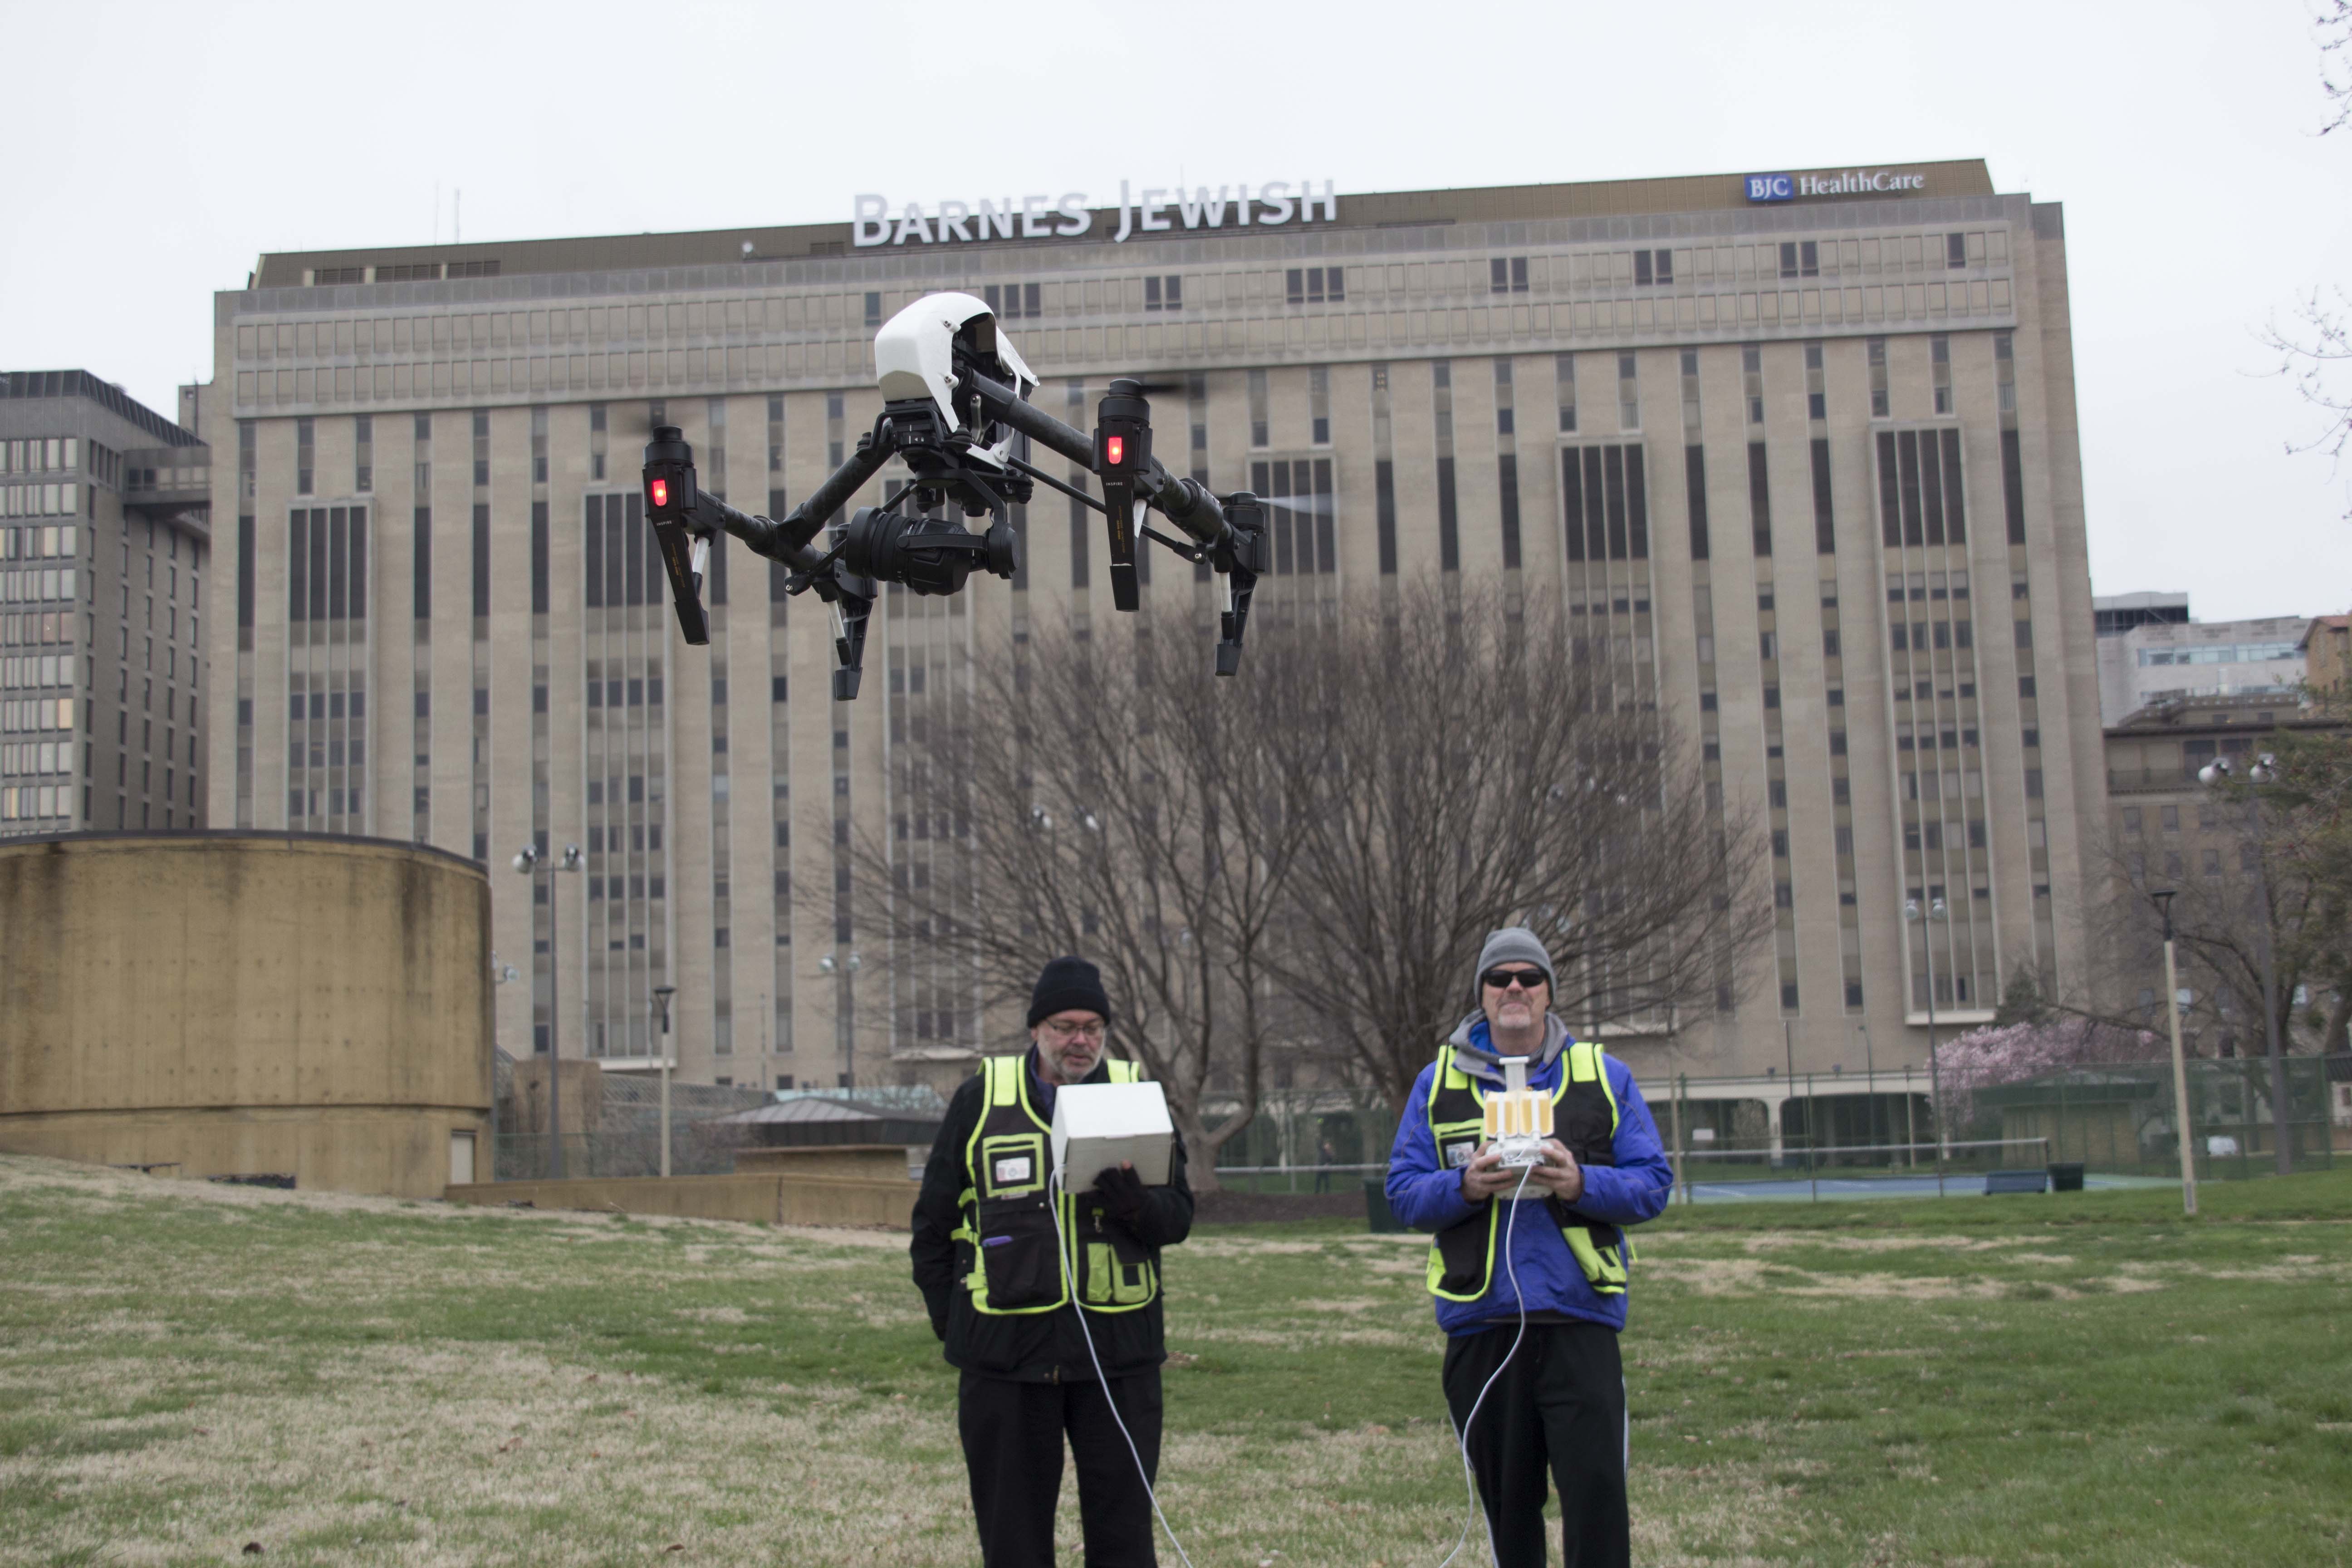
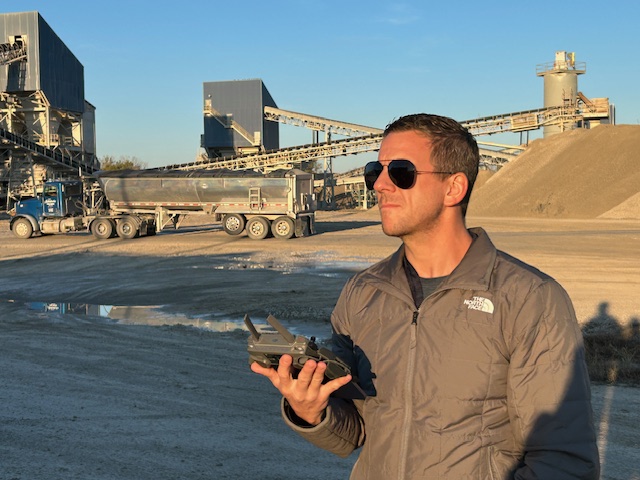
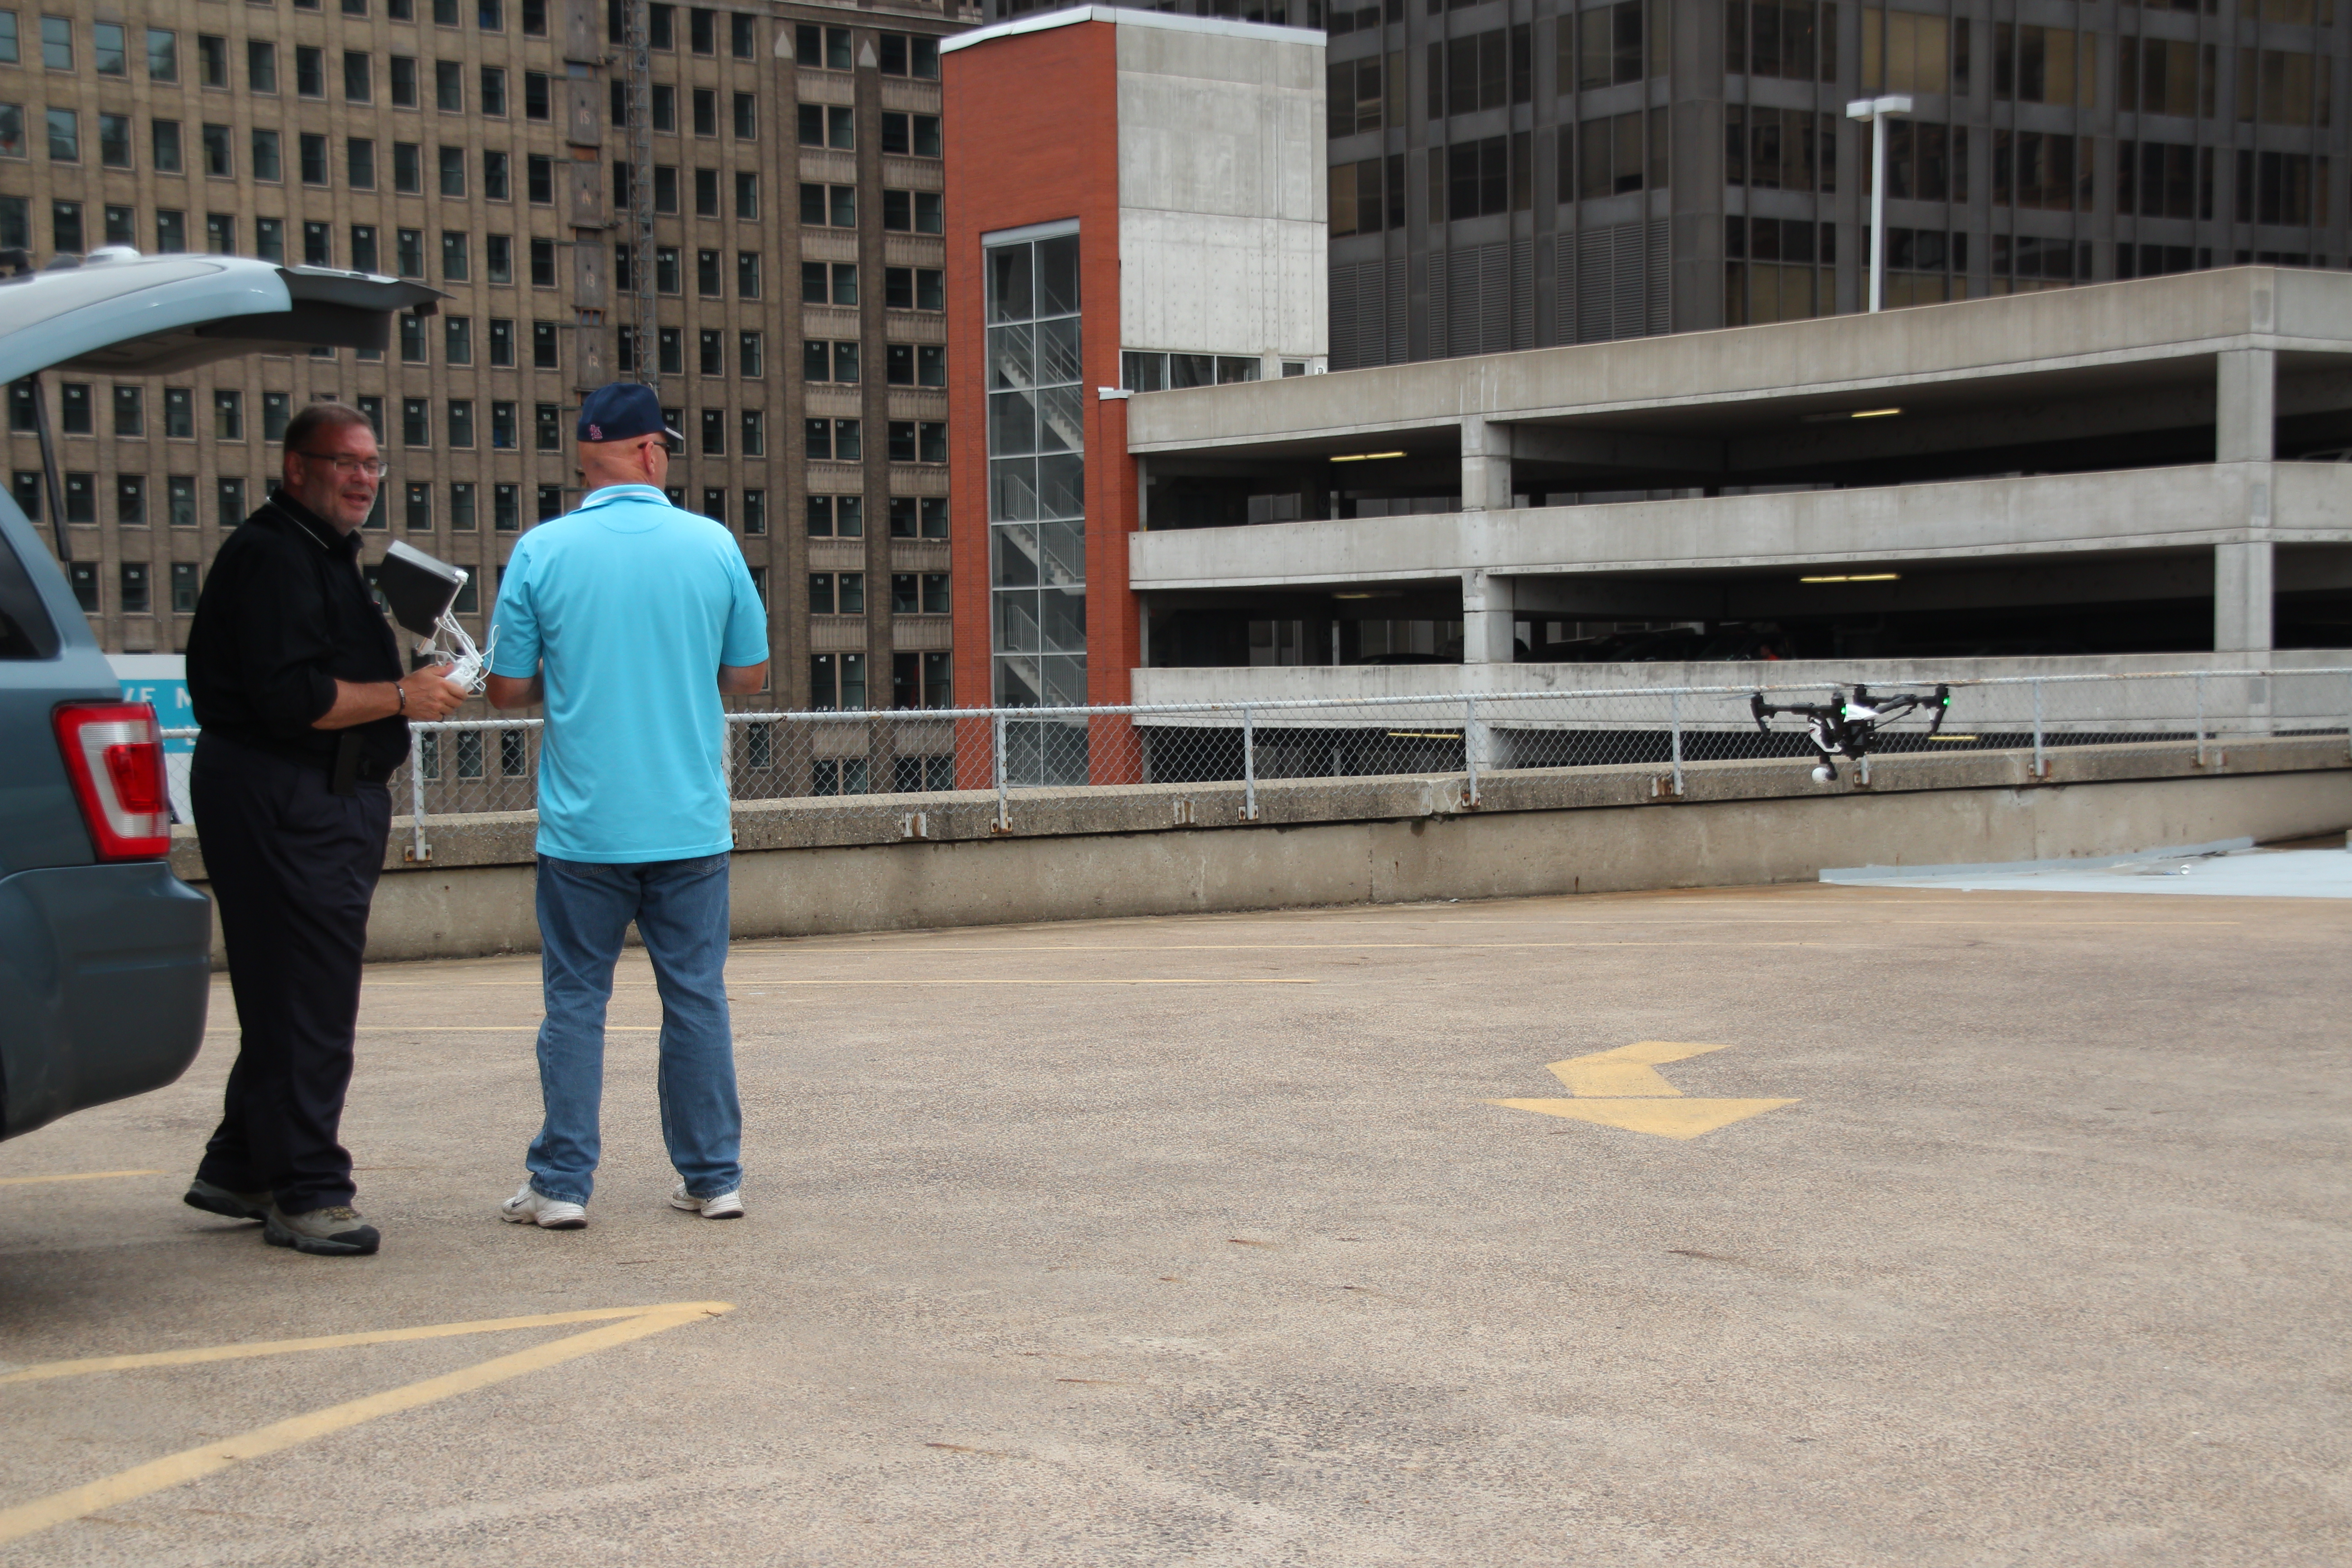
For businesses, agencies, municipalities, contractors, developers, and organizations, hiring a licensed drone pilot is not just a technical preference. It is a professional requirement.
Commercial drone operations involve airspace rules, FAA requirements, weather evaluation, flight restrictions, property considerations, safety planning, and liability concerns. A licensed drone pilot understands how to evaluate whether a flight can be performed safely and legally. That includes checking airspace, assessing site conditions, identifying obstacles, maintaining visual line of sight, understanding altitude restrictions, and making sound decisions before and during flight.
An experienced drone pilot also knows when not to fly. Wind, rain, low visibility, nearby airports, power lines, heavy pedestrian traffic, reflective surfaces, active construction equipment, and tight urban environments can all affect the safety and success of a drone operation.
For decision makers, this matters because drone footage is often captured around valuable property, active business operations, employees, customers, vehicles, equipment, and public spaces. A professional pilot reduces risk while increasing the chances of capturing footage that is technically clean, visually strong, and usable in the final production.
The Importance of Insurance and Professional Accountability
Insurance is another key consideration when selecting a drone production provider. Commercial drone work can involve flying near buildings, rooftops, signage, vehicles, industrial equipment, construction zones, event venues, and large groups of people. Even when flights are carefully planned, professional accountability matters.
An insured drone production company gives businesses and agencies greater confidence that the project is being handled responsibly. It also reflects a professional approach to risk management. Drone work should not be treated casually, especially when the footage is being created for a business, institution, construction firm, real estate developer, healthcare organization, manufacturer, school, or public-facing campaign.
St Louis Video Studio understands that commercial clients need more than impressive-looking aerial shots. They need a production partner who respects safety, protects the client’s reputation, and understands the professional standards required on business and agency assignments.
Simple Aerial Projects Still Require Experience
Many drone projects appear simple on the surface. A company may need an exterior shot of its building. A real estate team may need aerial views of a property. A contractor may need progress documentation. A marketing department may want a few aerial clips to add production value to a corporate video.
Even these straightforward assignments benefit from experience.
A skilled drone crew considers the best time of day, sun angle, shadows, wind direction, property access, flight path, background distractions, camera movement, framing, and how the footage will be edited. A simple exterior shot can be elevated by using the right approach, speed, altitude, and reveal. A building can look more substantial with the correct angle. A property can be made easier to understand with a thoughtful combination of wide shots, approaches, orbits, and detail views.
The goal is not to fly randomly and hope for something attractive. The goal is to capture purposeful footage that supports the message.
For example, an aerial establishing shot may be used in a website video, a social media campaign, a sales presentation, a recruiting piece, a trade show loop, or a corporate overview. When the footage is captured professionally from the beginning, it can be reused across multiple platforms and campaigns.
Advanced Drone Projects Require Technical Skill and Planning
Some aerial assignments require more than standard drone footage. Advanced projects may involve complex flight environments, technical imaging, data capture, mapping, inspection support, or specialized production techniques.
These projects can include:
Indoor FPV drone fly-throughs
Infrared thermal drone imaging
Orthomosaic mapping
LiDAR capture
Construction progress documentation
Commercial roof inspection support
Industrial site imaging
Large property surveys
Facility overview videos
Event aerial coverage
Real estate and development documentation
Campus, hospital, school, and corporate location videos
B-roll acquisition for larger productions
Advanced aerial projects demand a production team that understands both drone operation and the broader purpose of the imagery. The footage may need to support marketing, planning, documentation, safety review, engineering coordination, stakeholder updates, investor presentations, recruitment, public relations, or internal communications.
This is where St Louis Video Studio’s full-service production experience becomes valuable. We understand how aerial visuals fit into a larger communication strategy.
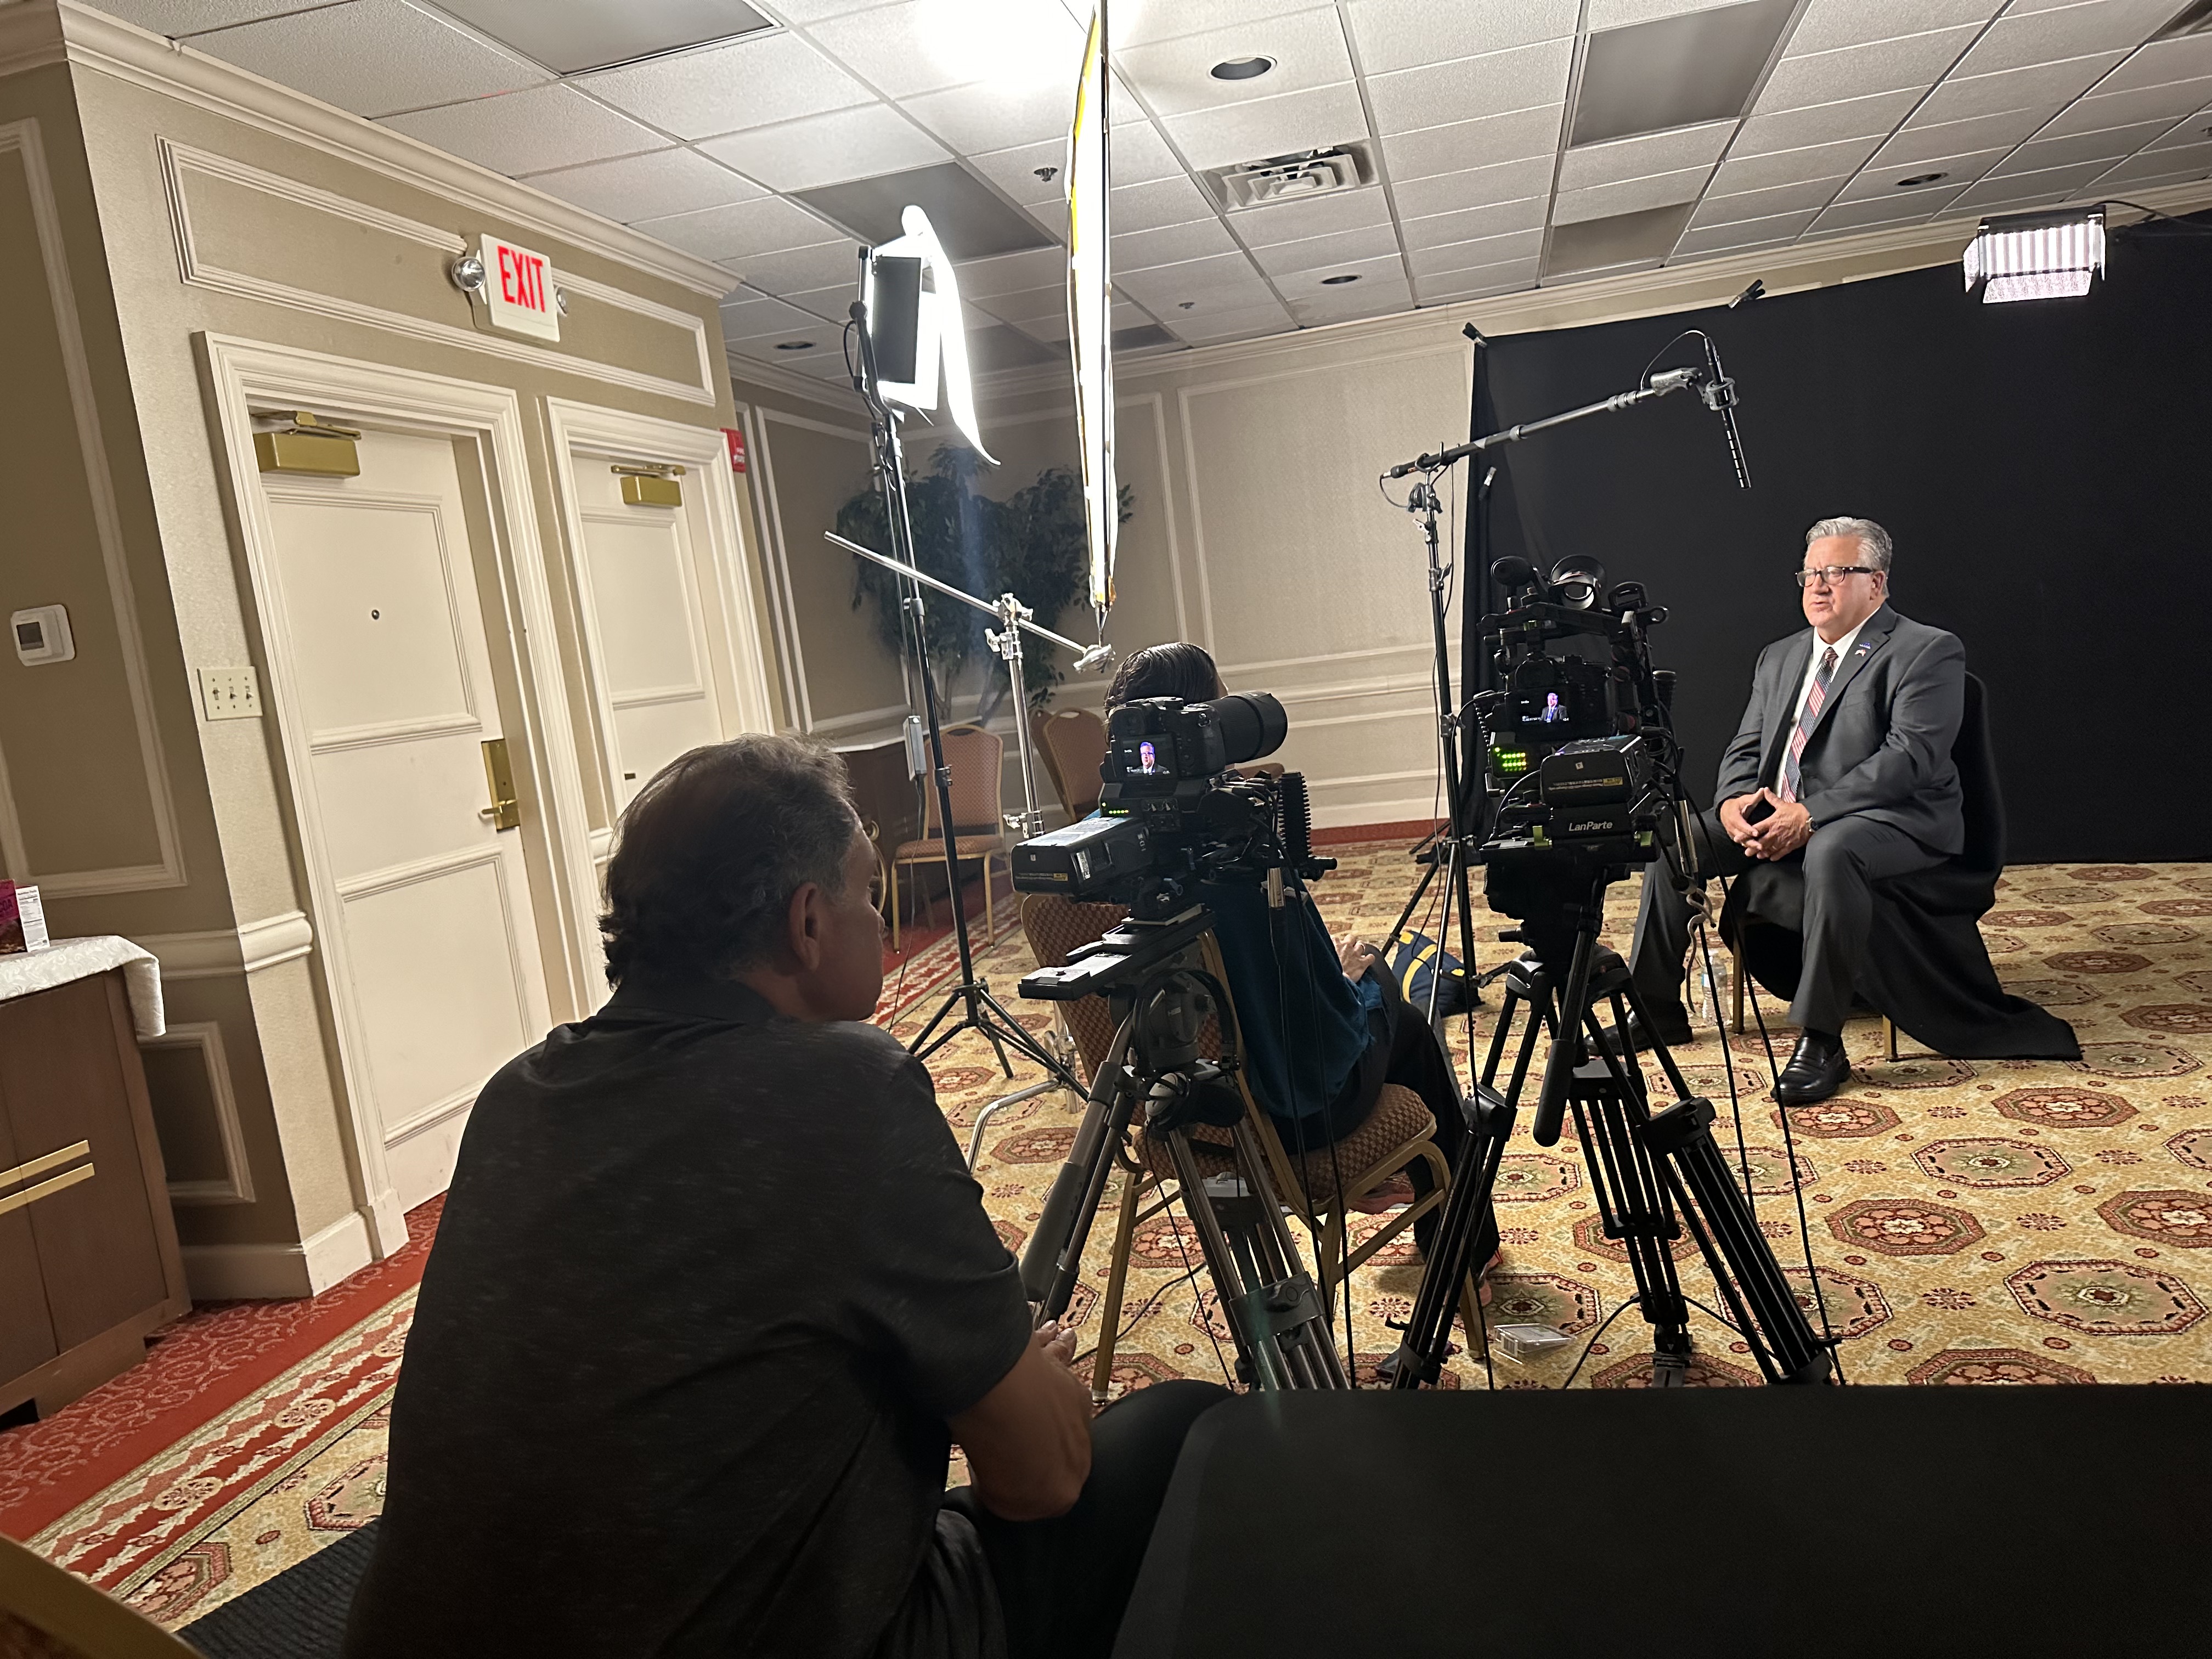
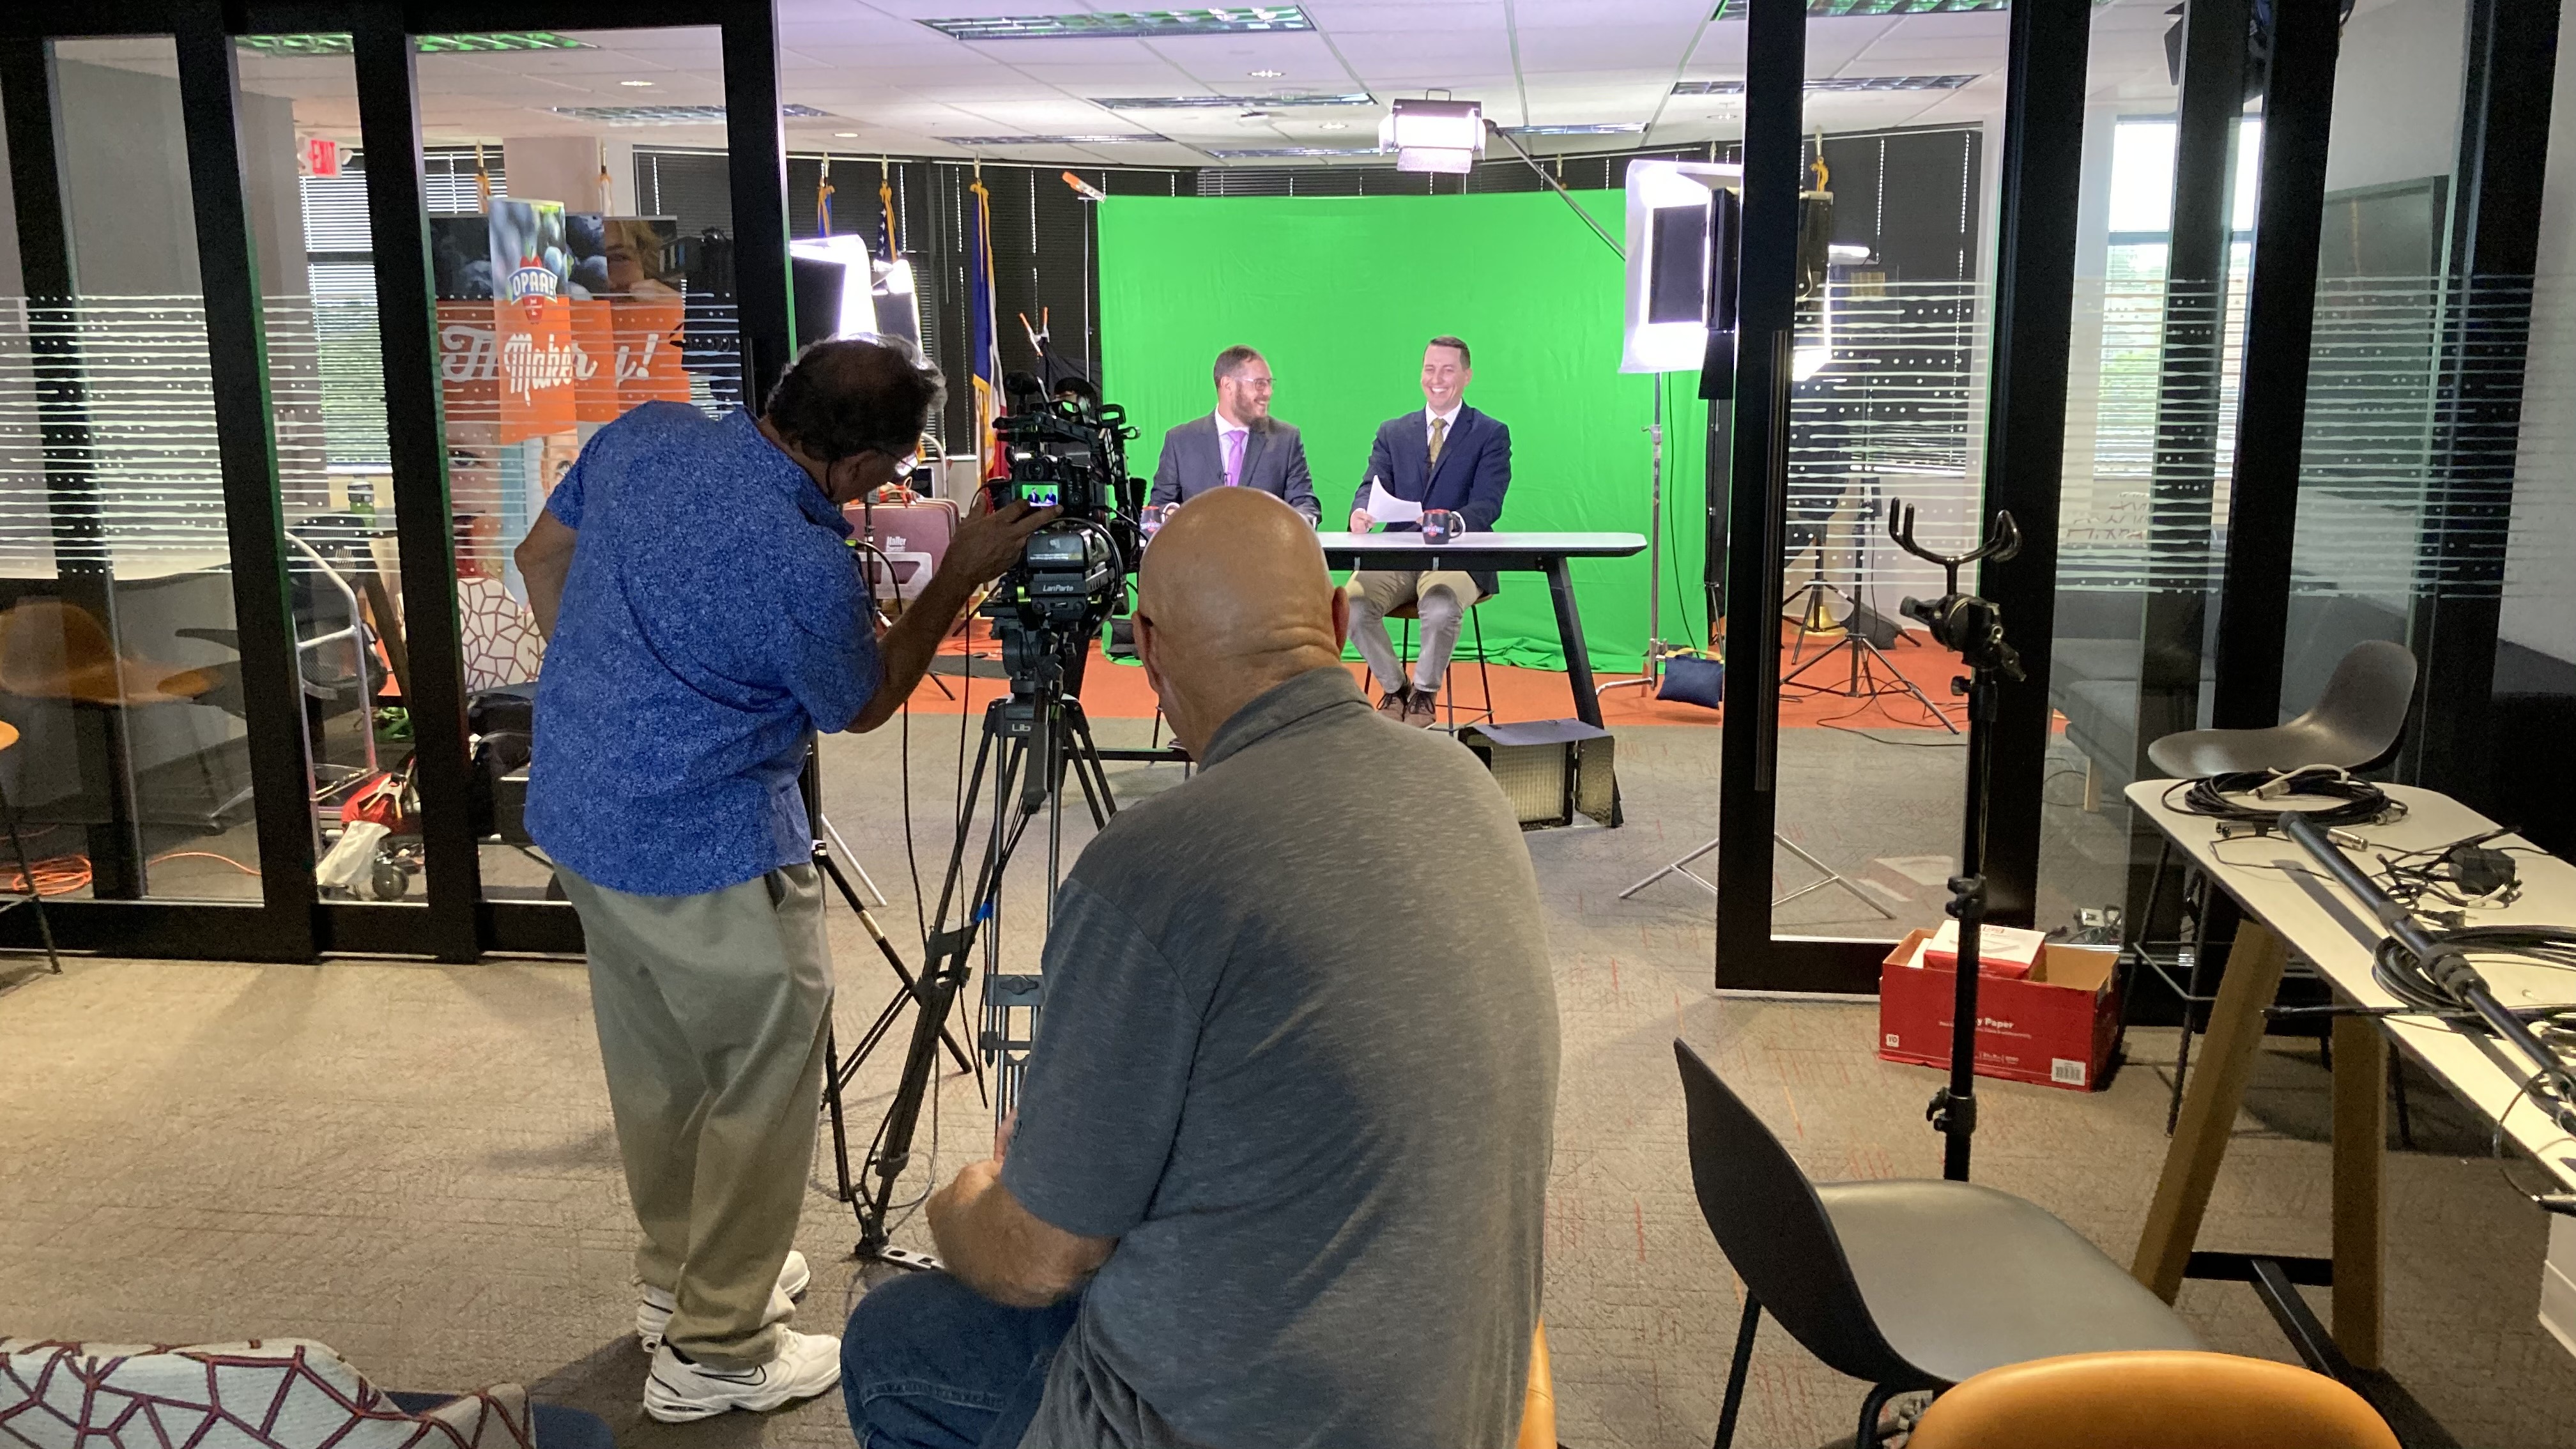
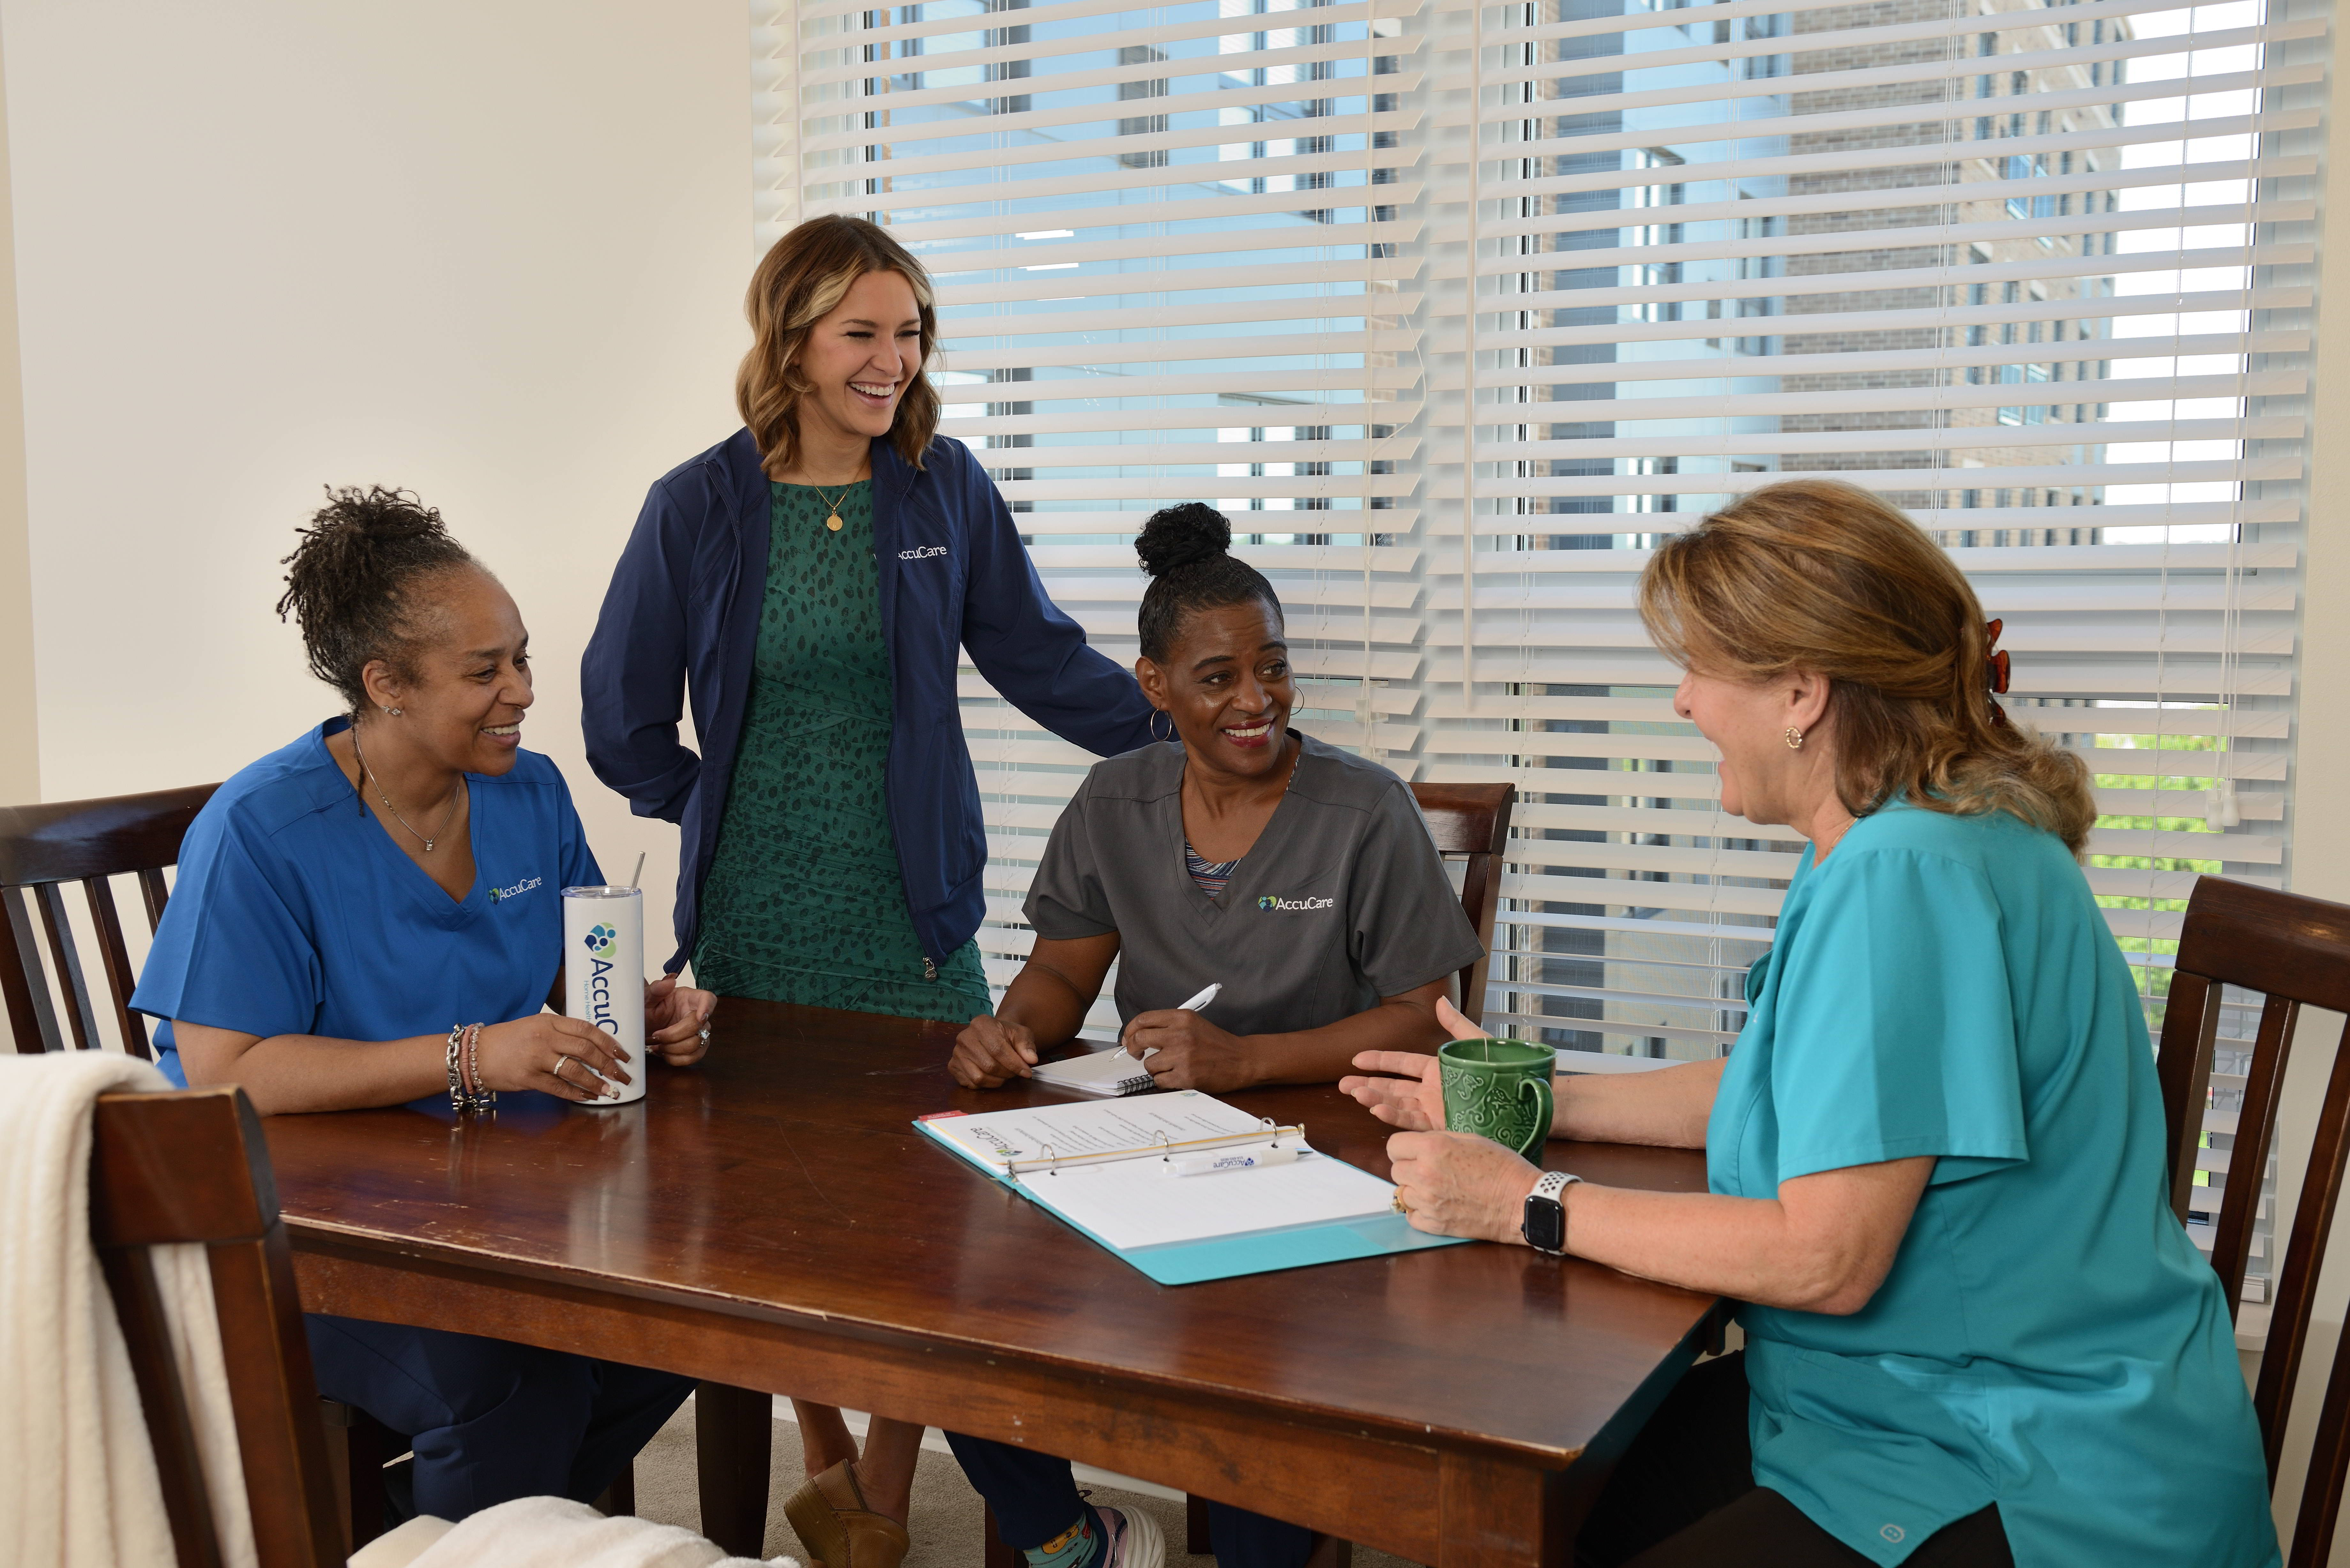
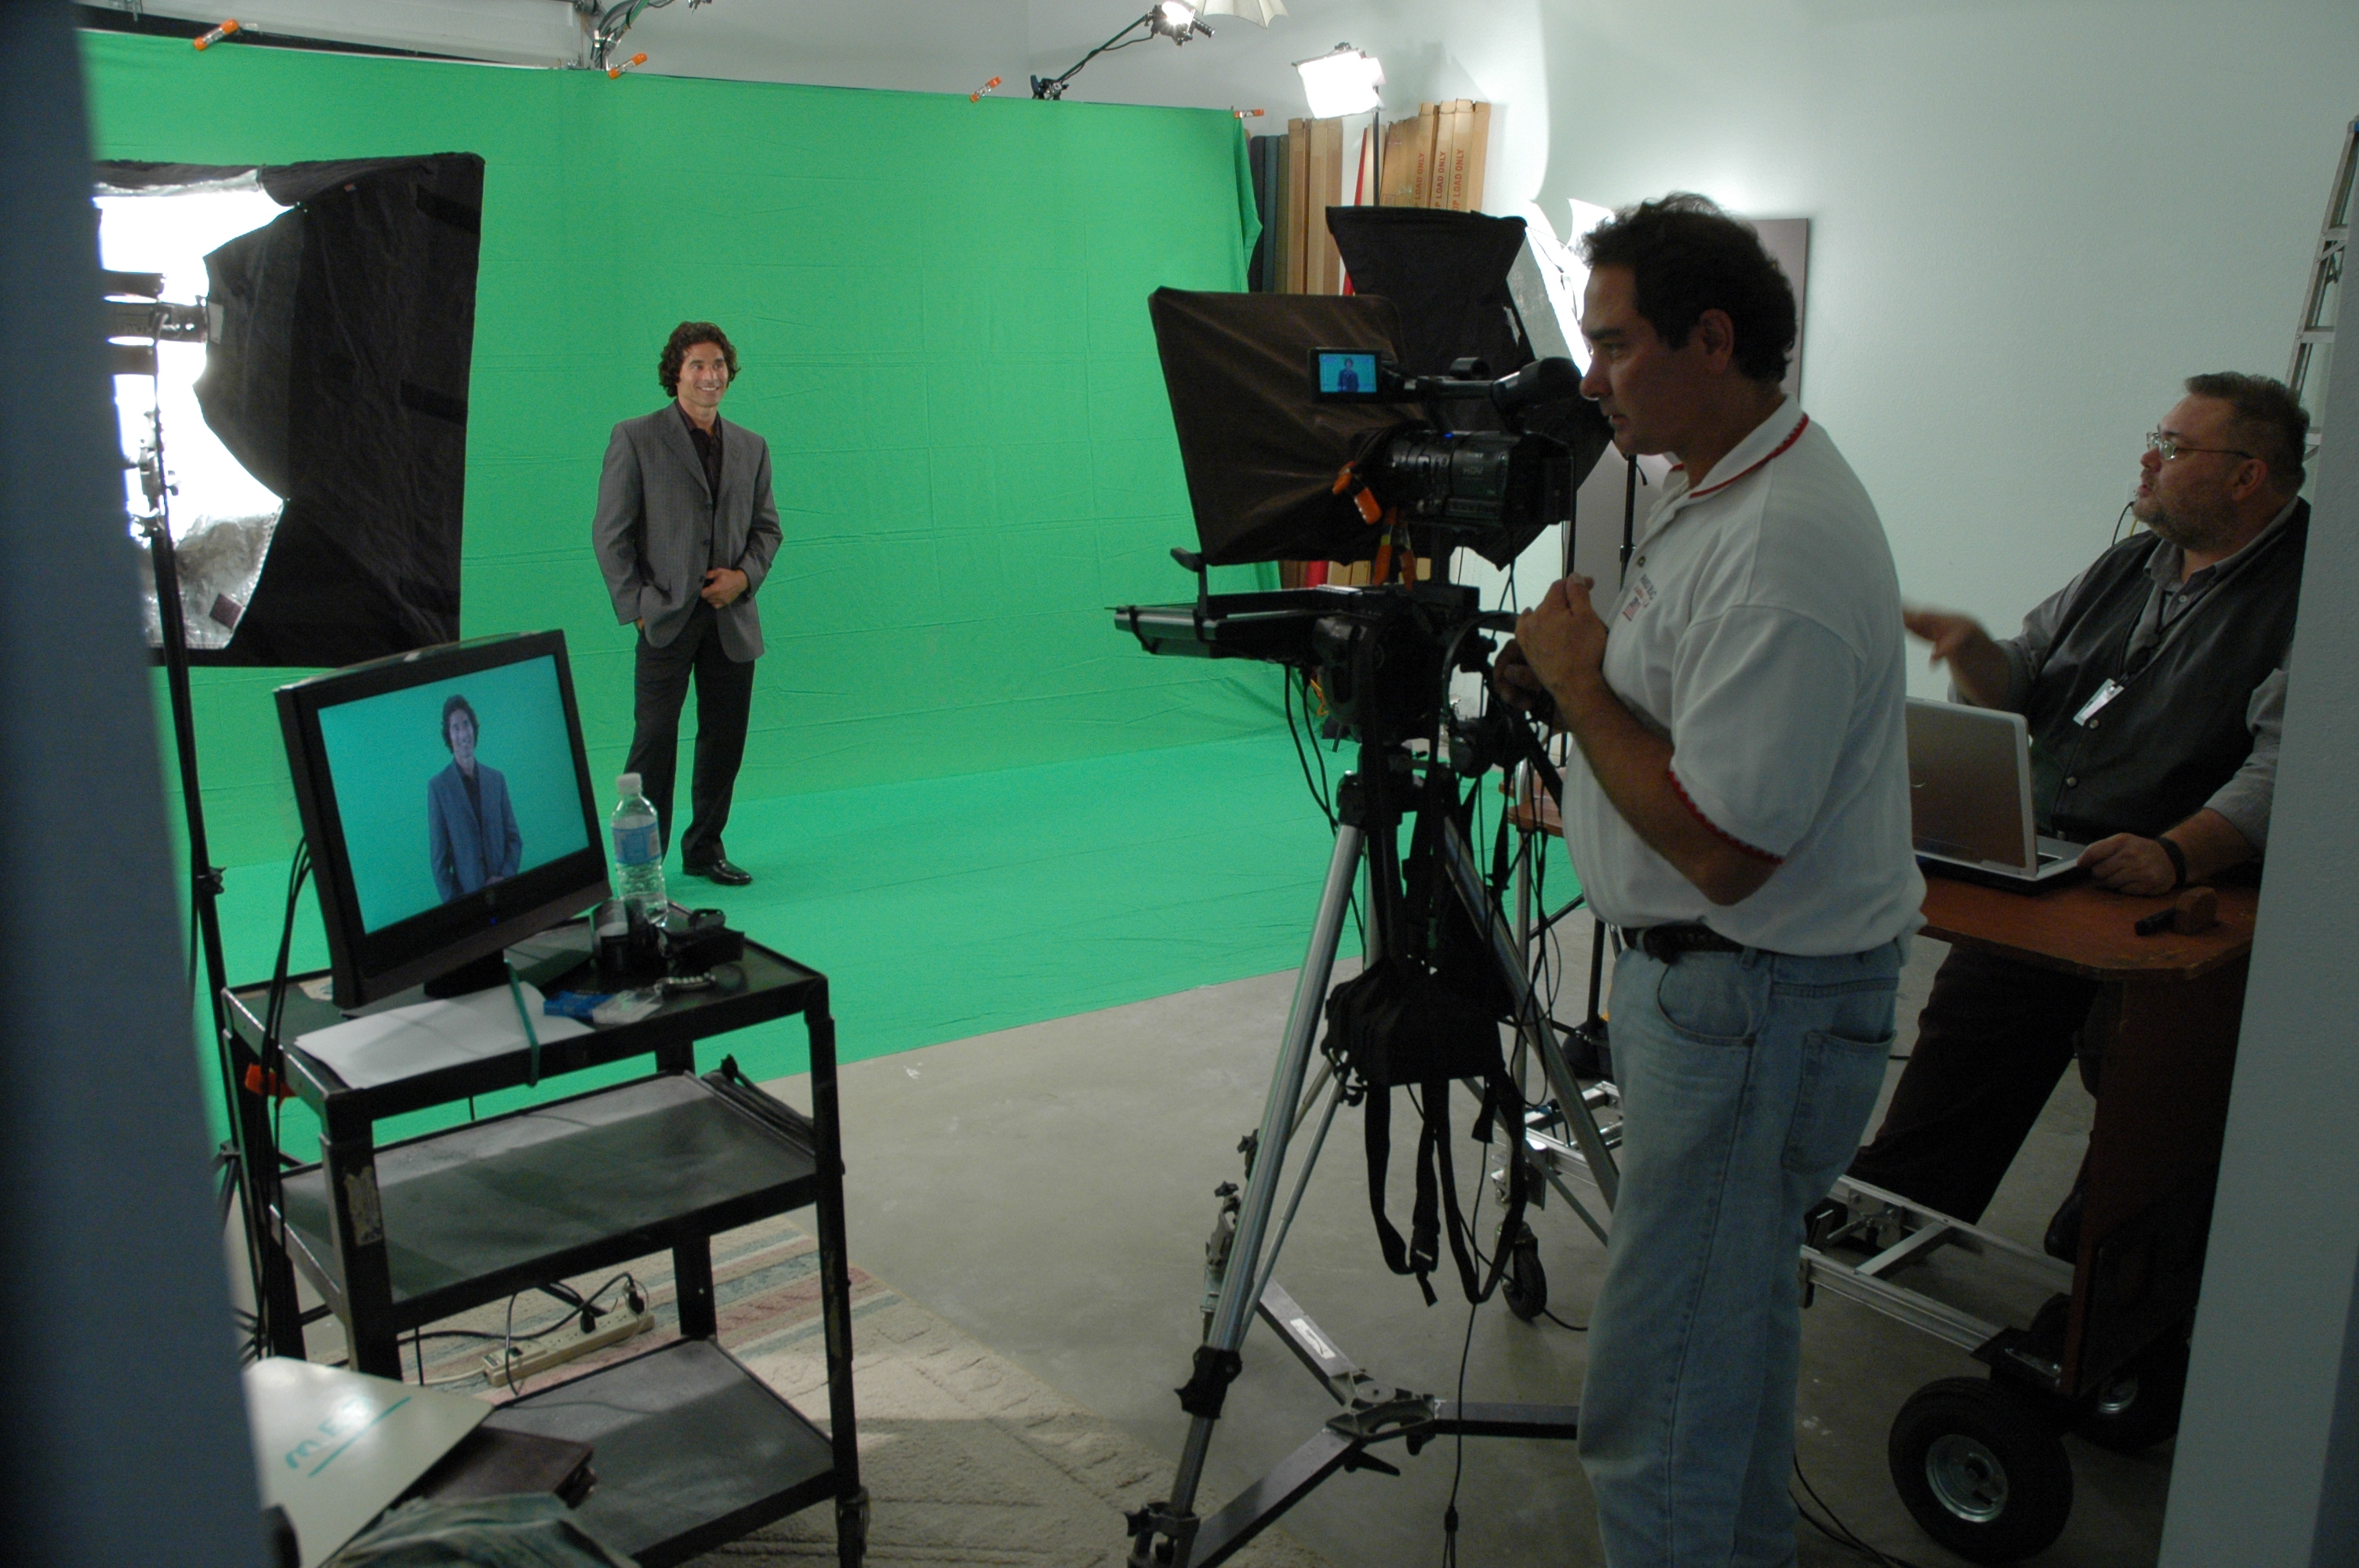
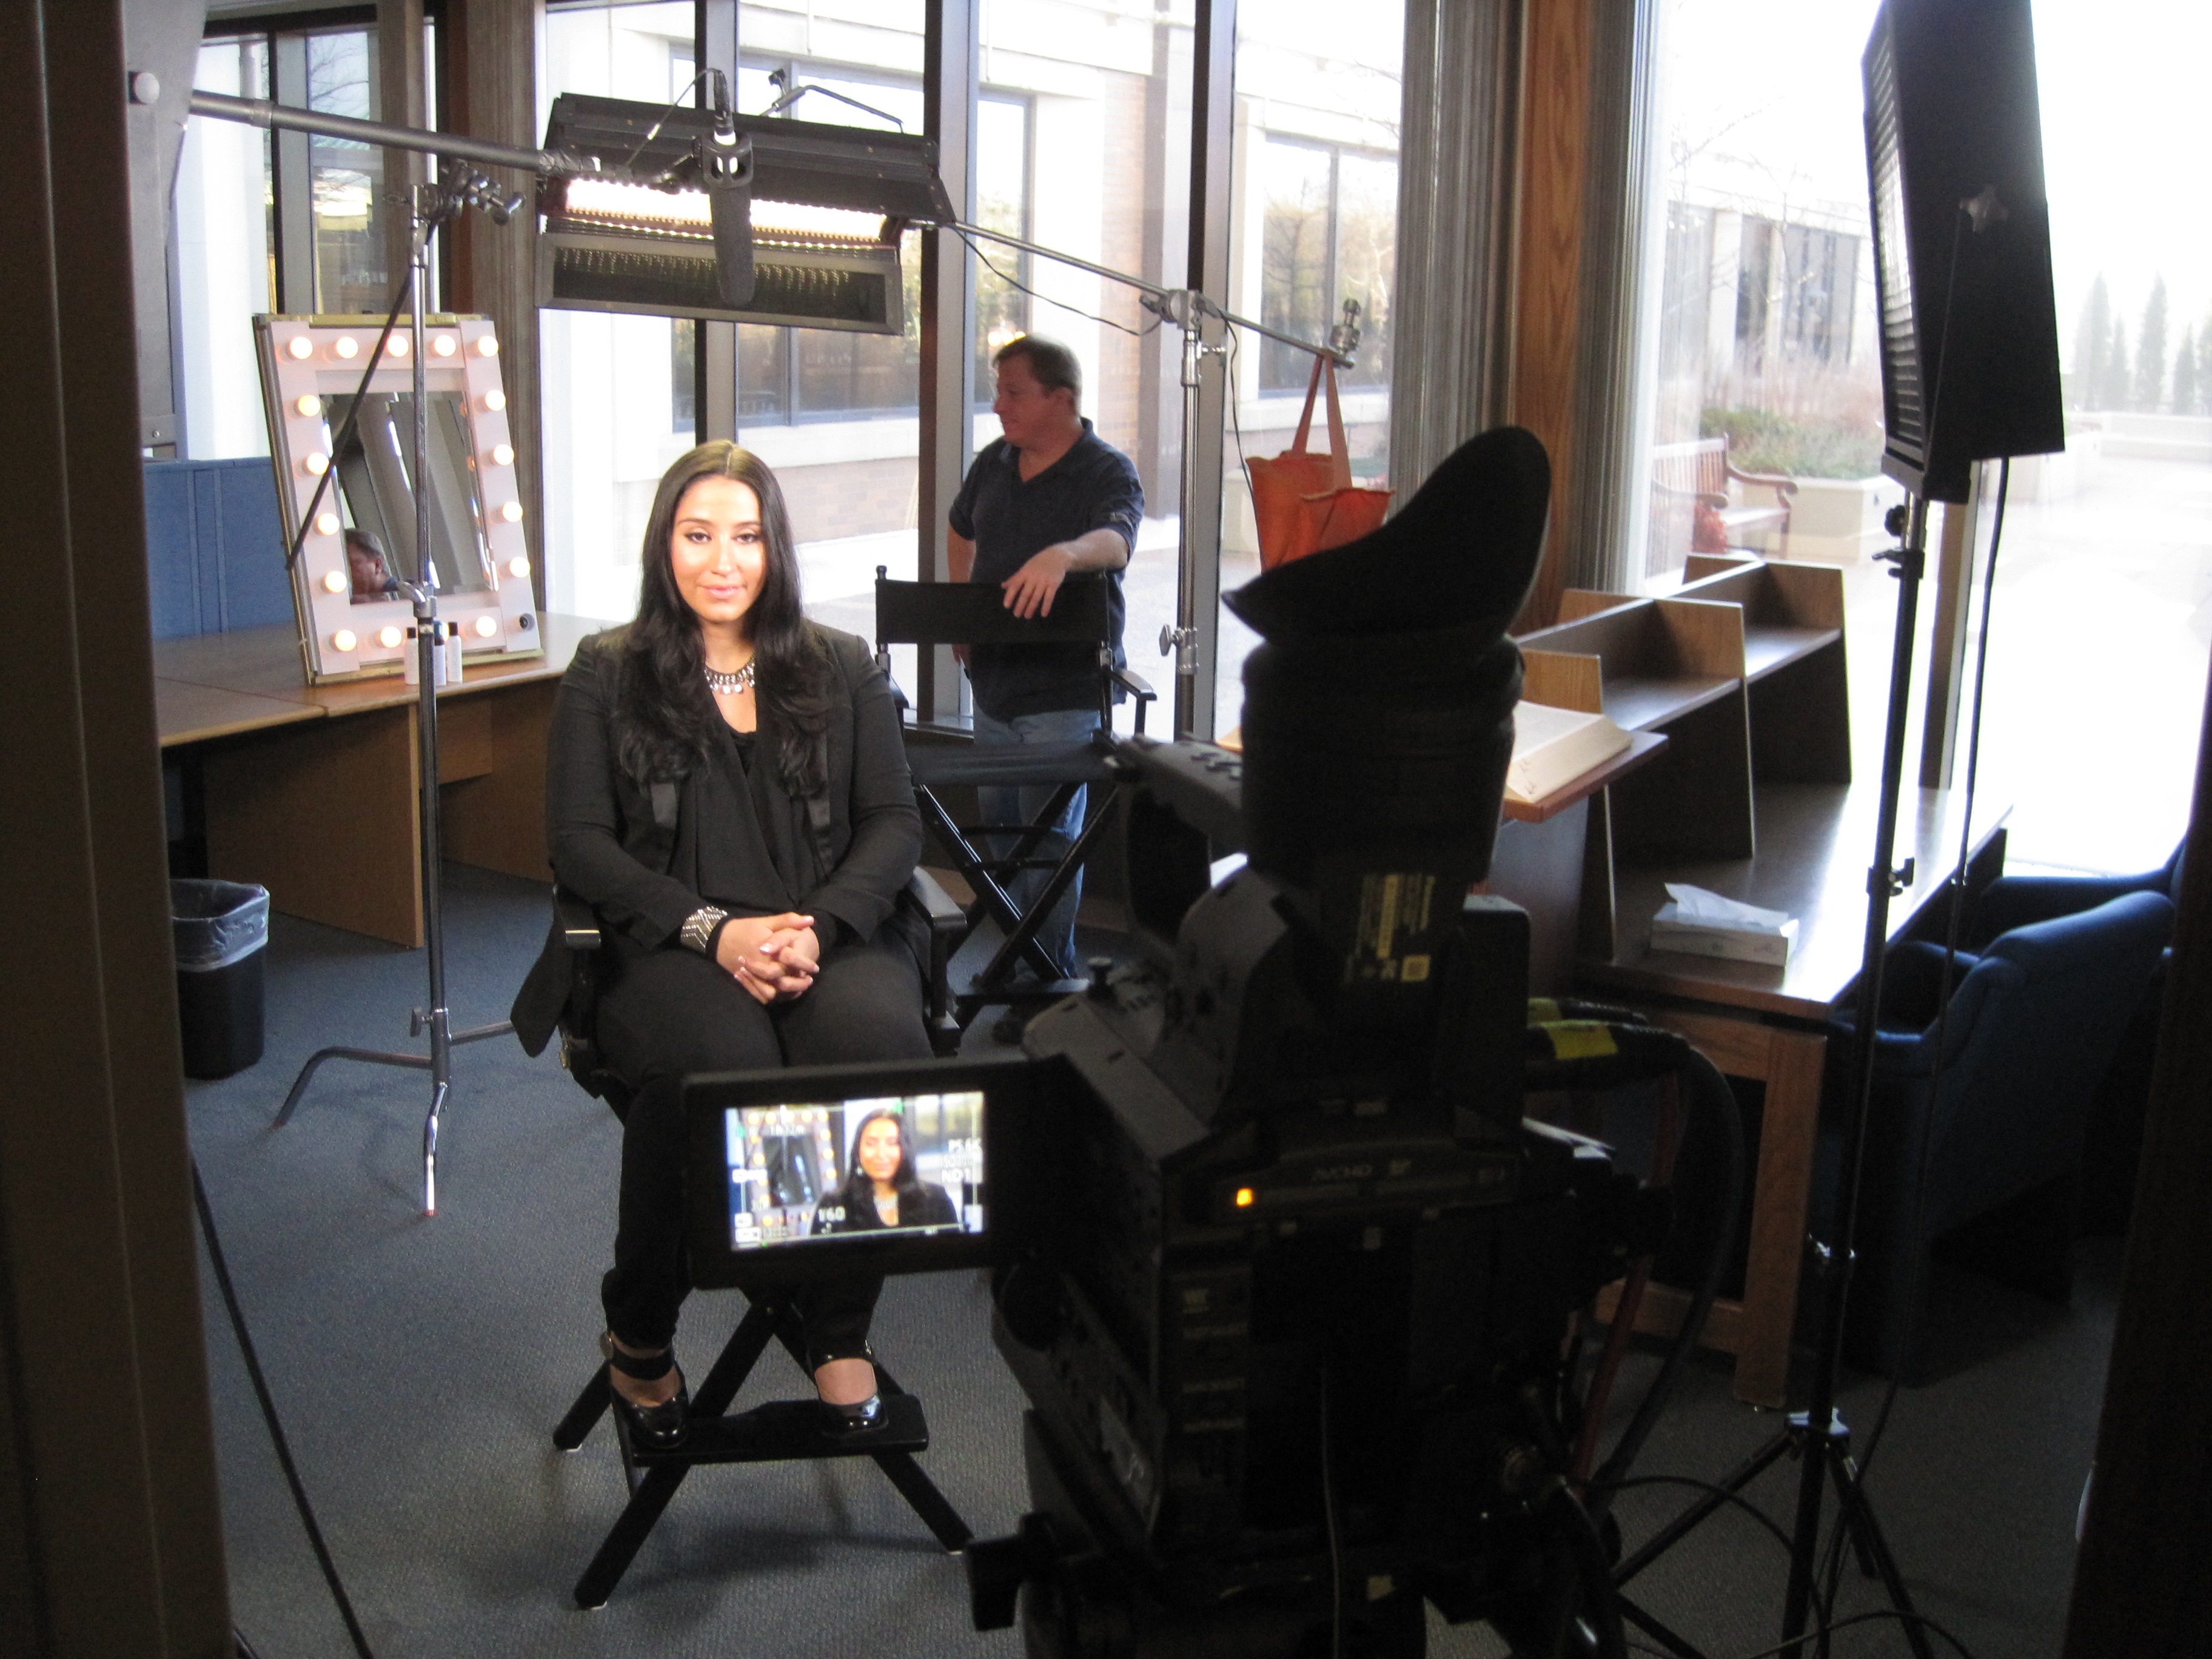
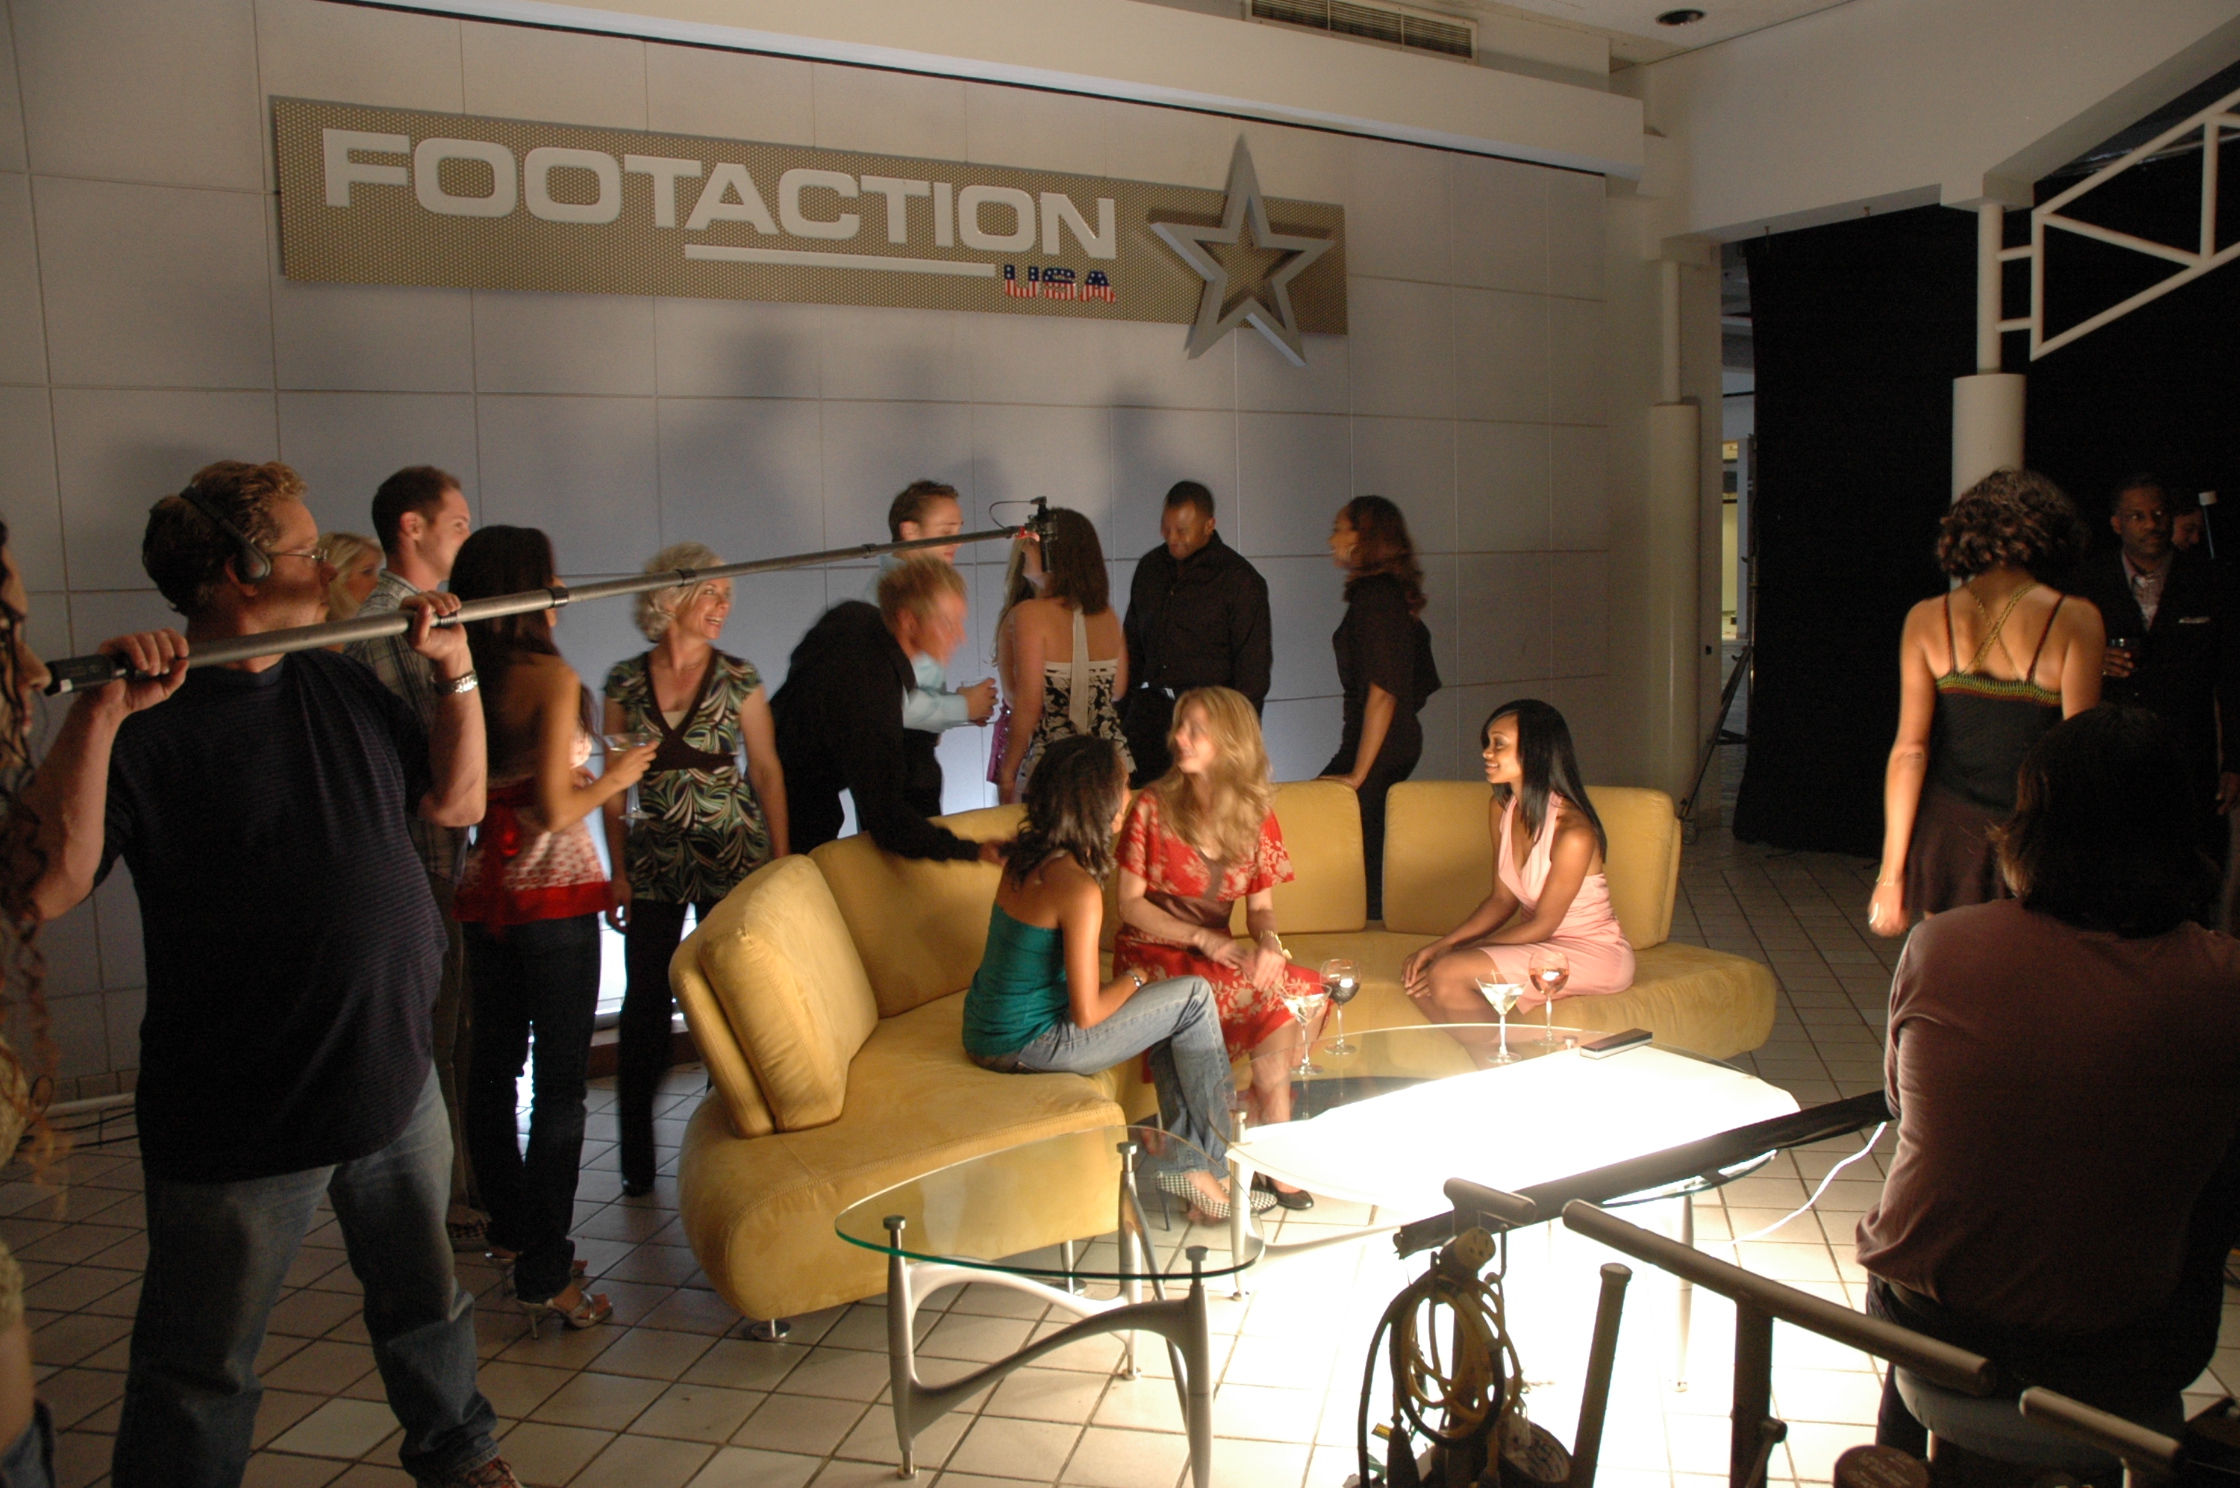
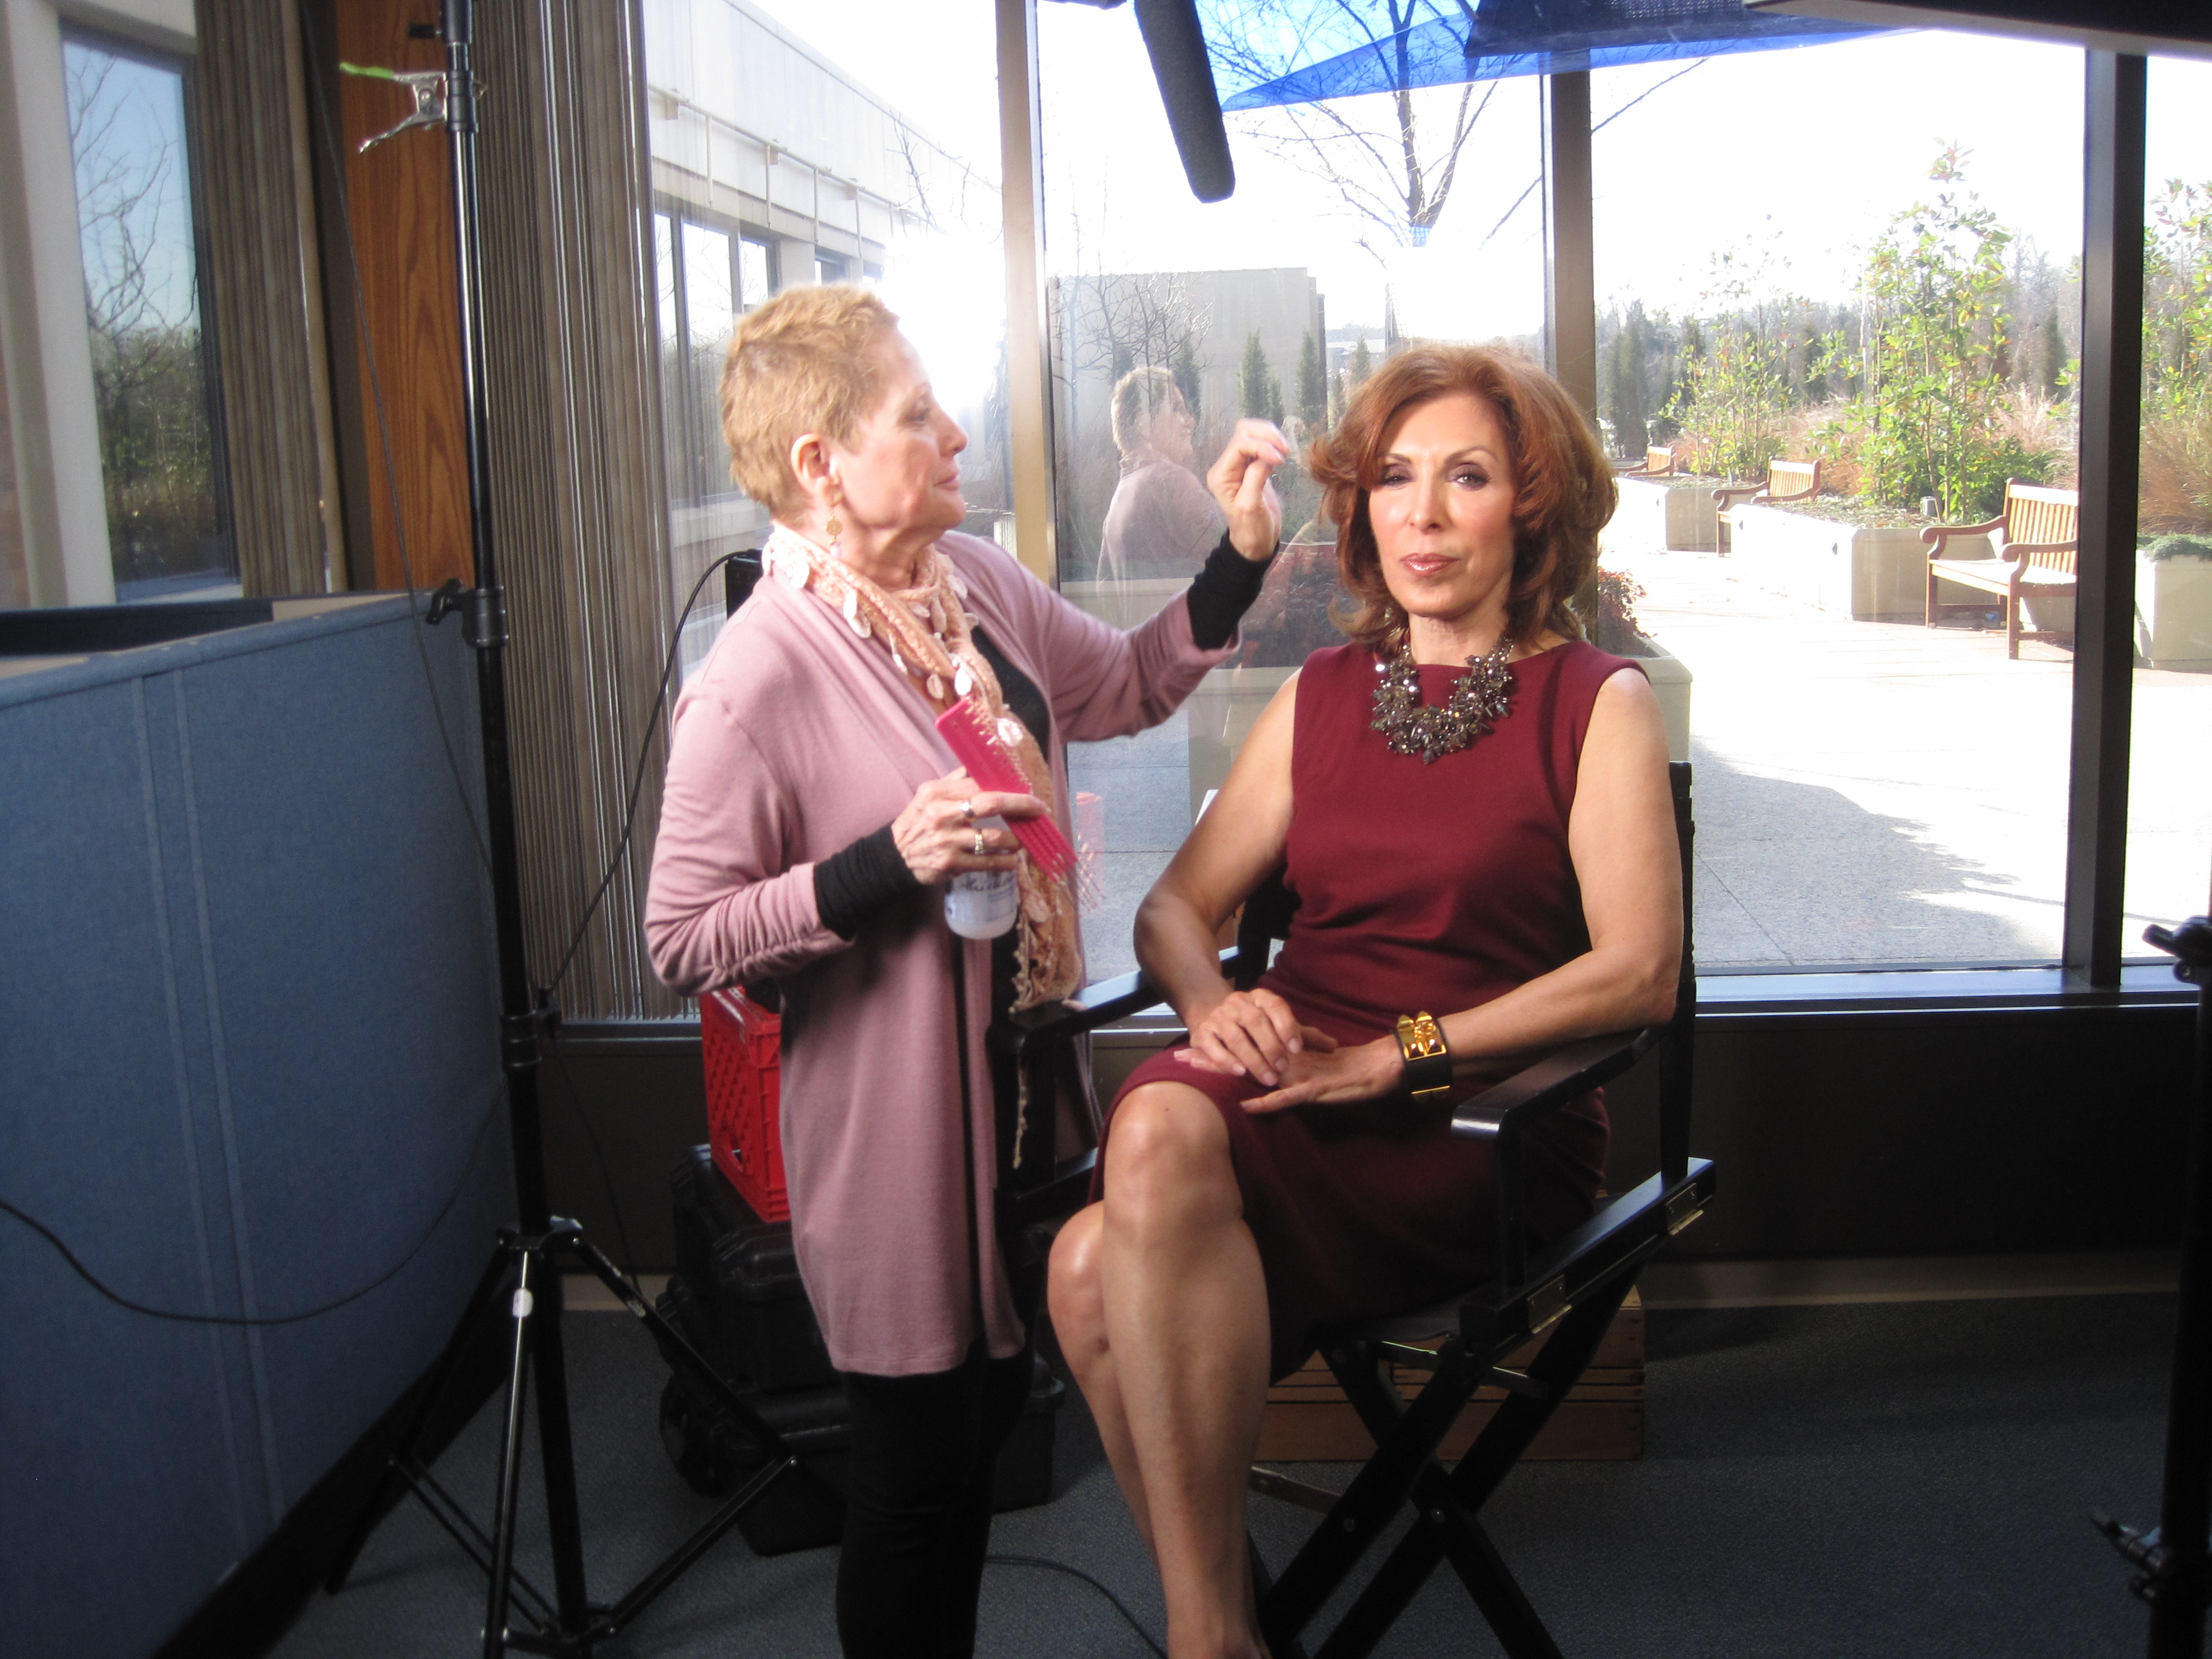
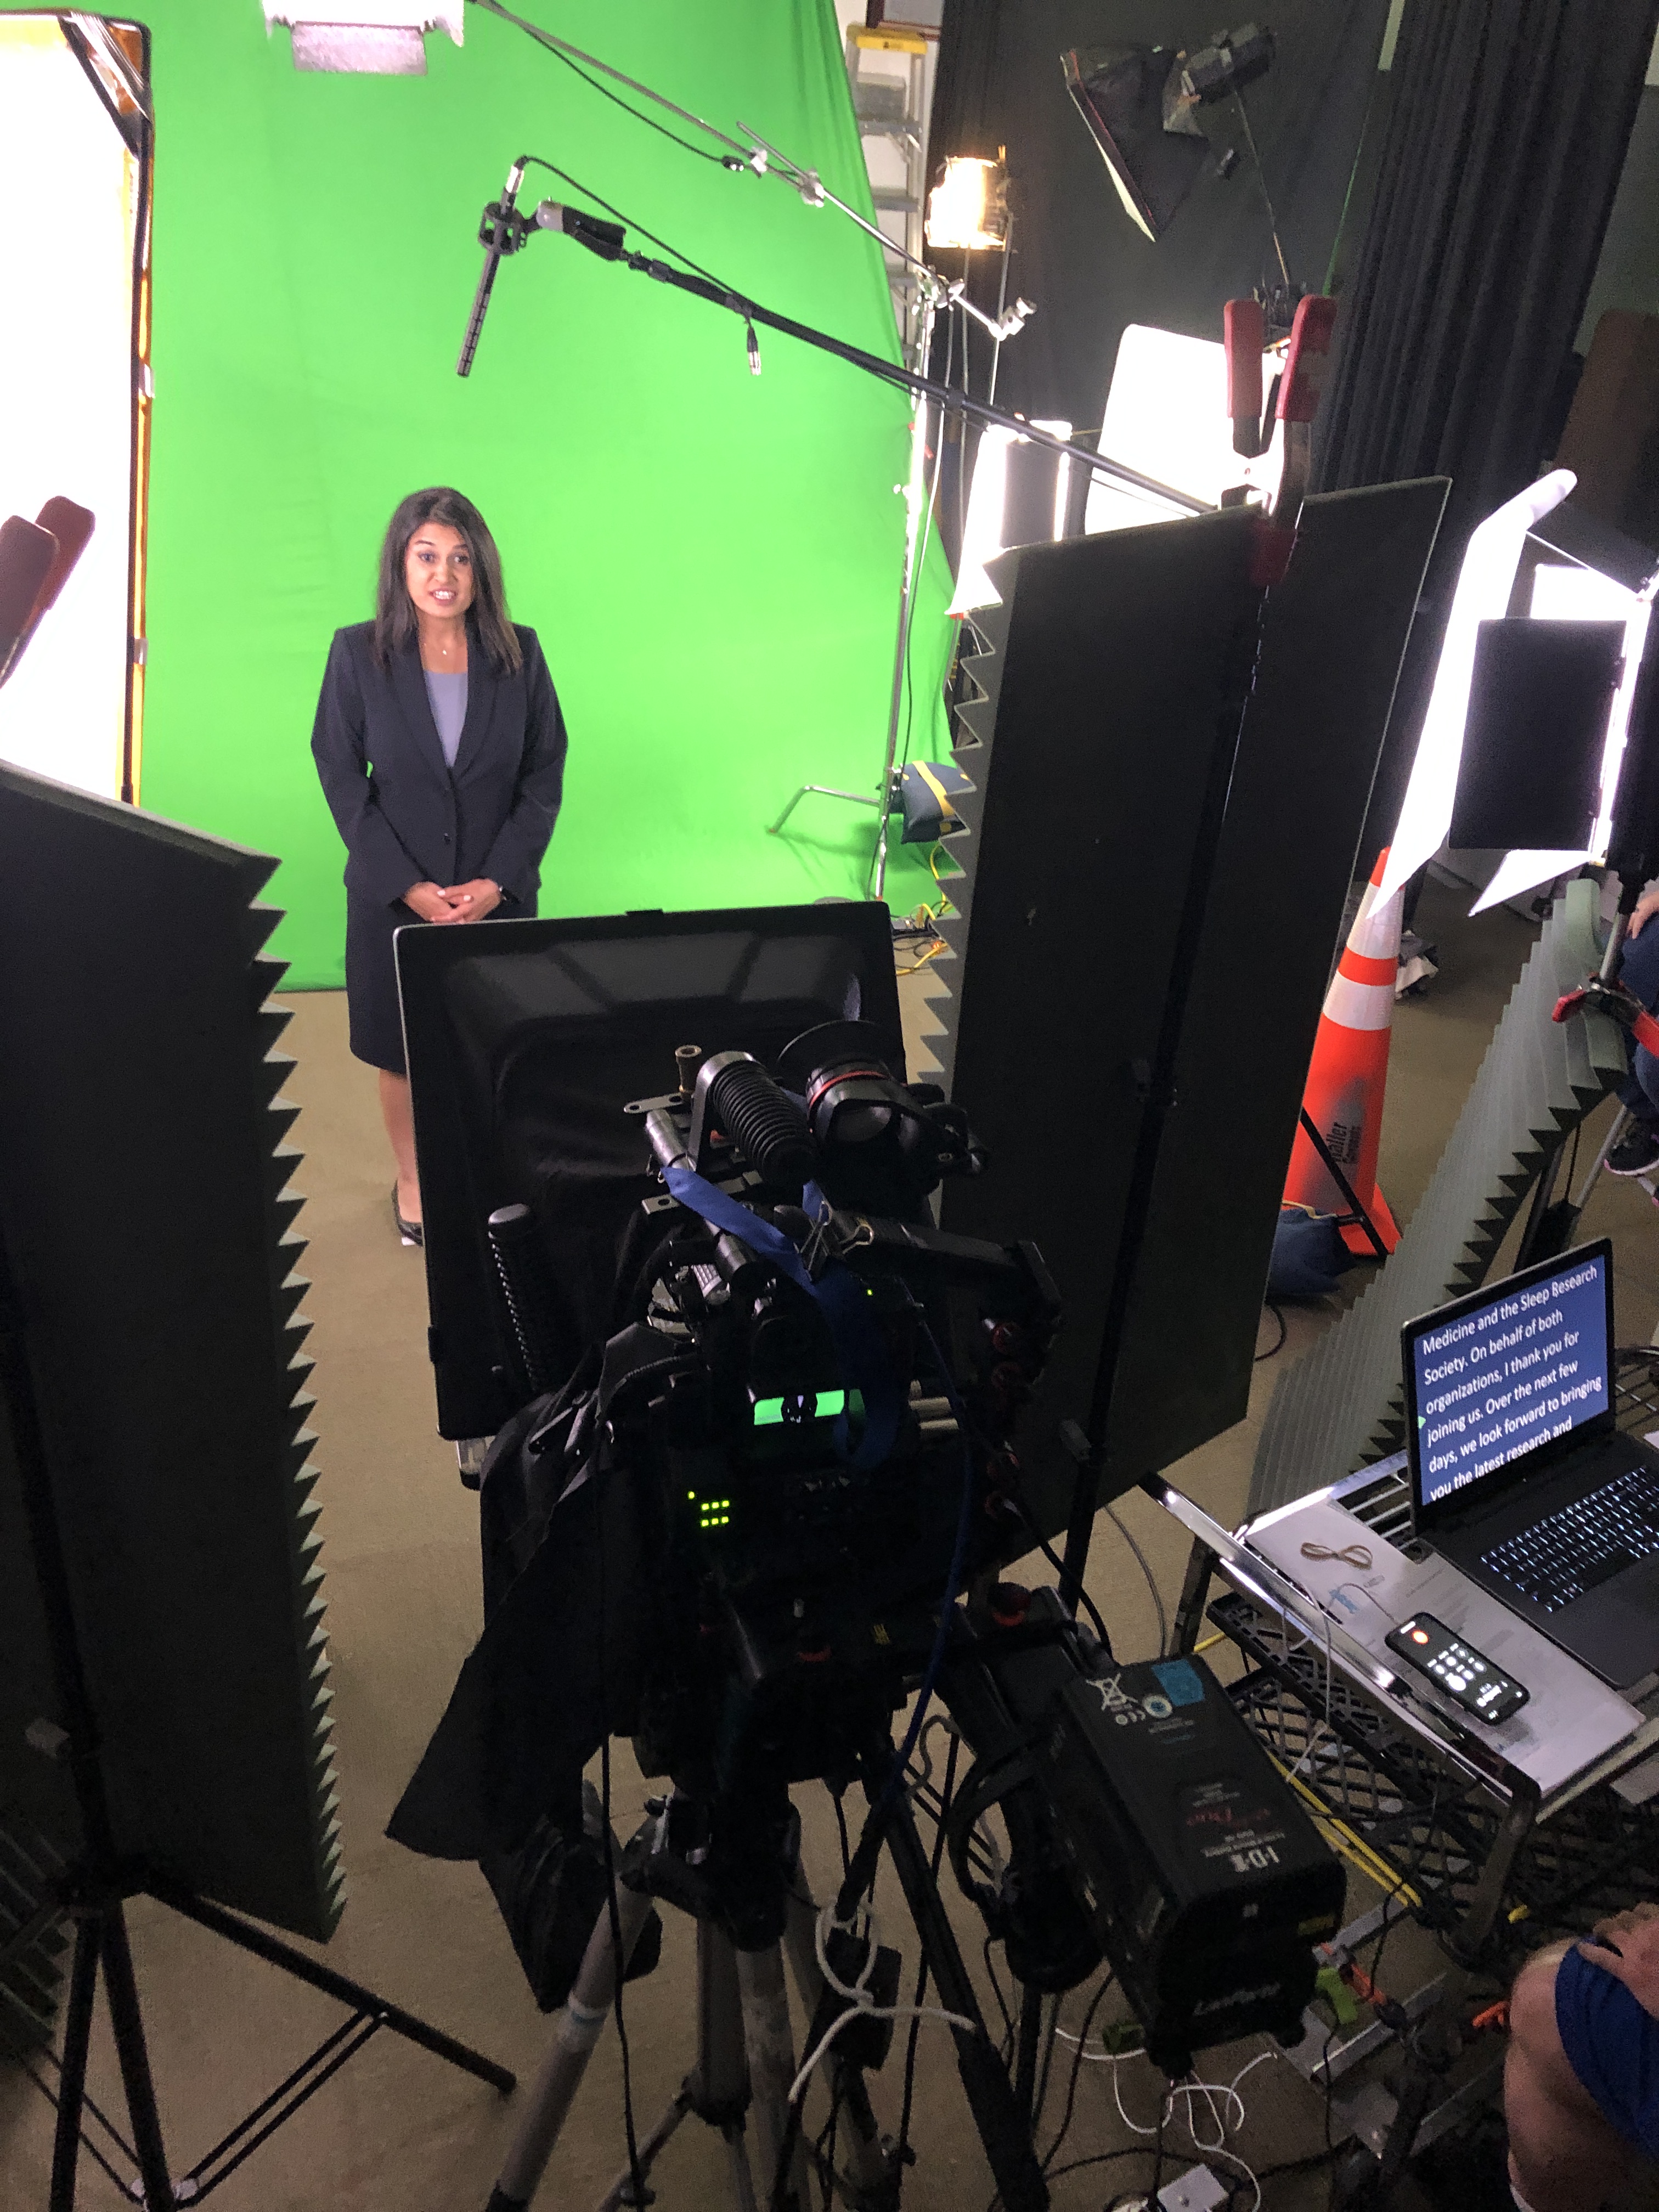
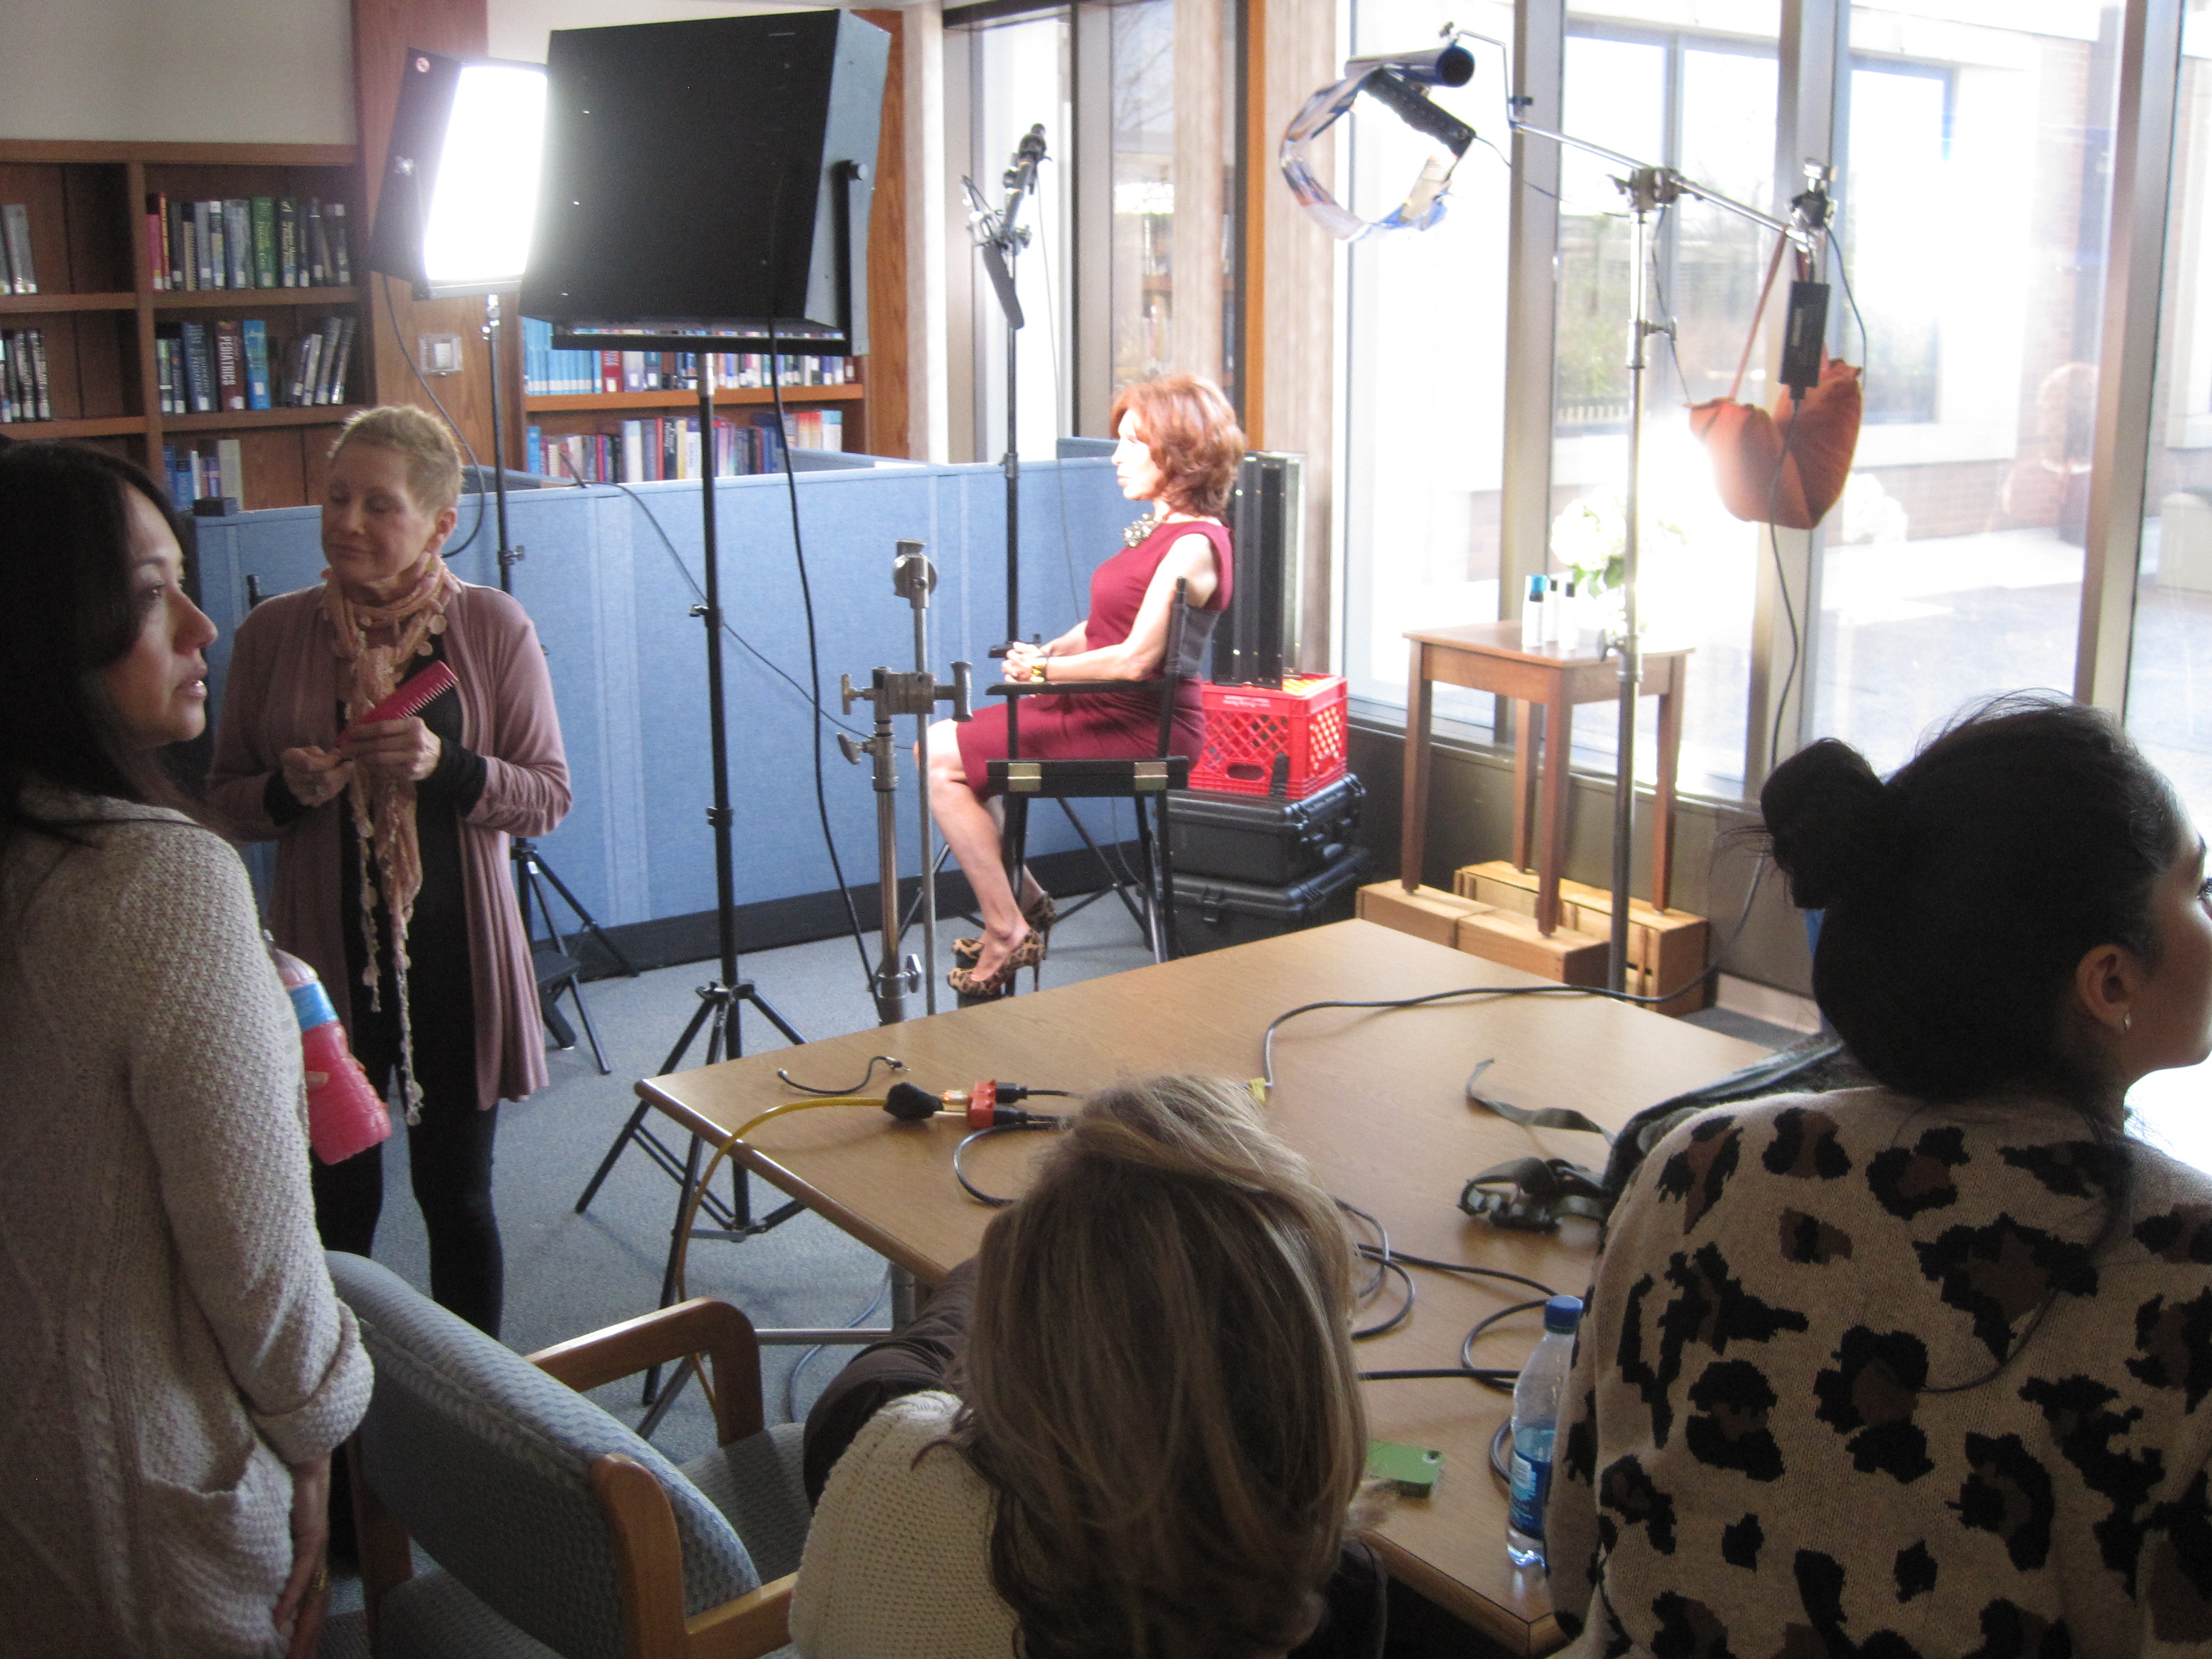
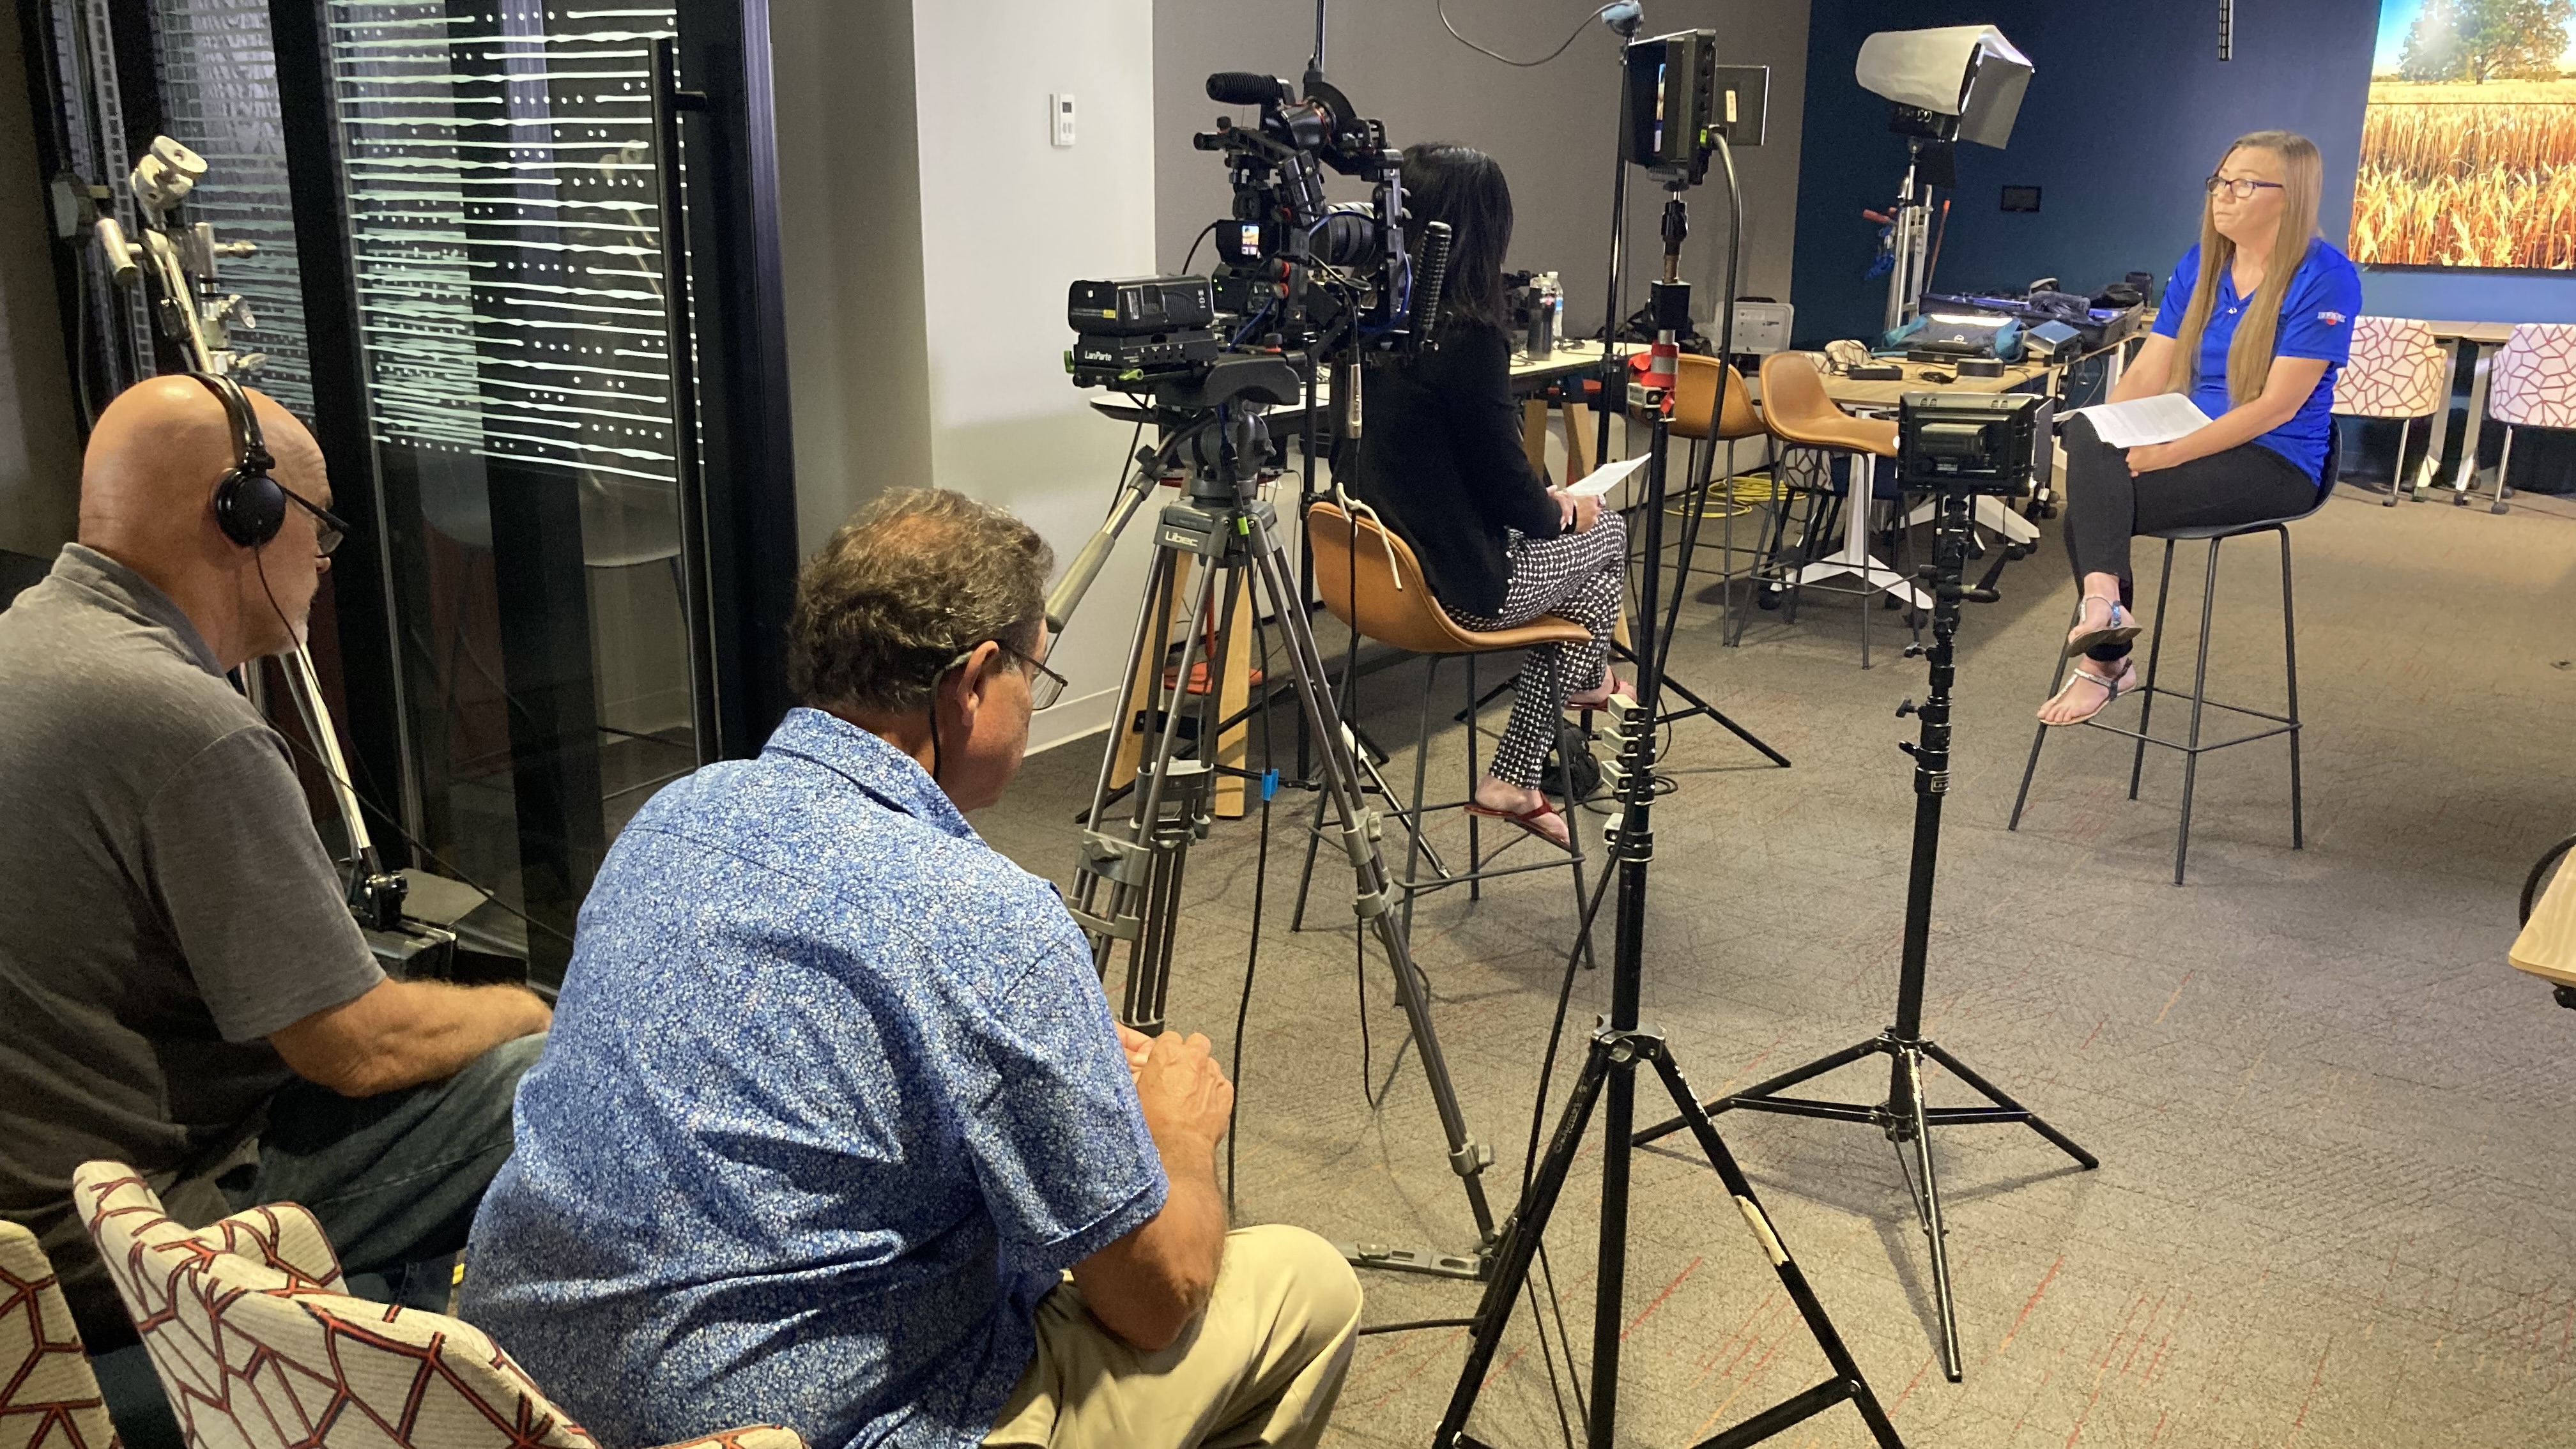
In today’s crowded media environment, businesses need more than generic video content. They need communication tools that are polished, strategic, and flexible enough to support websites, campaigns, sales efforts, recruiting, internal communications, and long-term brand development. That is why professionally produced video interviews paired with purposeful b-roll remain one of the most effective formats for organizations that want to communicate clearly and build credibility.
For companies, agencies, institutions, and organizations in the St. Louis area, interview-based video can capture authentic voices, real expertise, and meaningful stories. But the real strength of the format comes from combining those interviews with the right supporting visuals. B-roll is what turns a talking head into a compelling narrative. It adds proof, energy, pacing, context, and polish. When the production is handled by experienced specialists, the final result feels intentional, engaging, and highly usable across many platforms.
For decision makers overseeing photography, marketing, branding, and video production, understanding the value of strong interview production and b-roll acquisition is essential when planning media that needs to perform.
Why Video Interviews Continue to Be So Effective
Video interviews remain one of the strongest tools in commercial production because they allow businesses to communicate through real people instead of abstract claims. Whether the speaker is a company leader, employee, client, physician, educator, engineer, technician, or subject matter expert, the interview gives the message authenticity. It creates a direct human connection that audiences respond to.
Businesses use video interviews for many purposes. Some want to explain their company story or brand position. Others want to highlight expertise, showcase customer relationships, recruit employees, communicate internal initiatives, or support public-facing campaigns. In many cases, the interview becomes the foundation of the entire production because it establishes the message, shapes the tone, and guides the overall structure of the edit.
An interview on its own, however, is rarely enough. Even the strongest speaker benefits from visuals that help the audience see what is being discussed. That is where b-roll becomes critical.
What B-Roll Adds to the Story
B-roll is far more than supplemental footage. It is one of the key elements that determines whether a finished video feels polished and persuasive or static and forgettable.
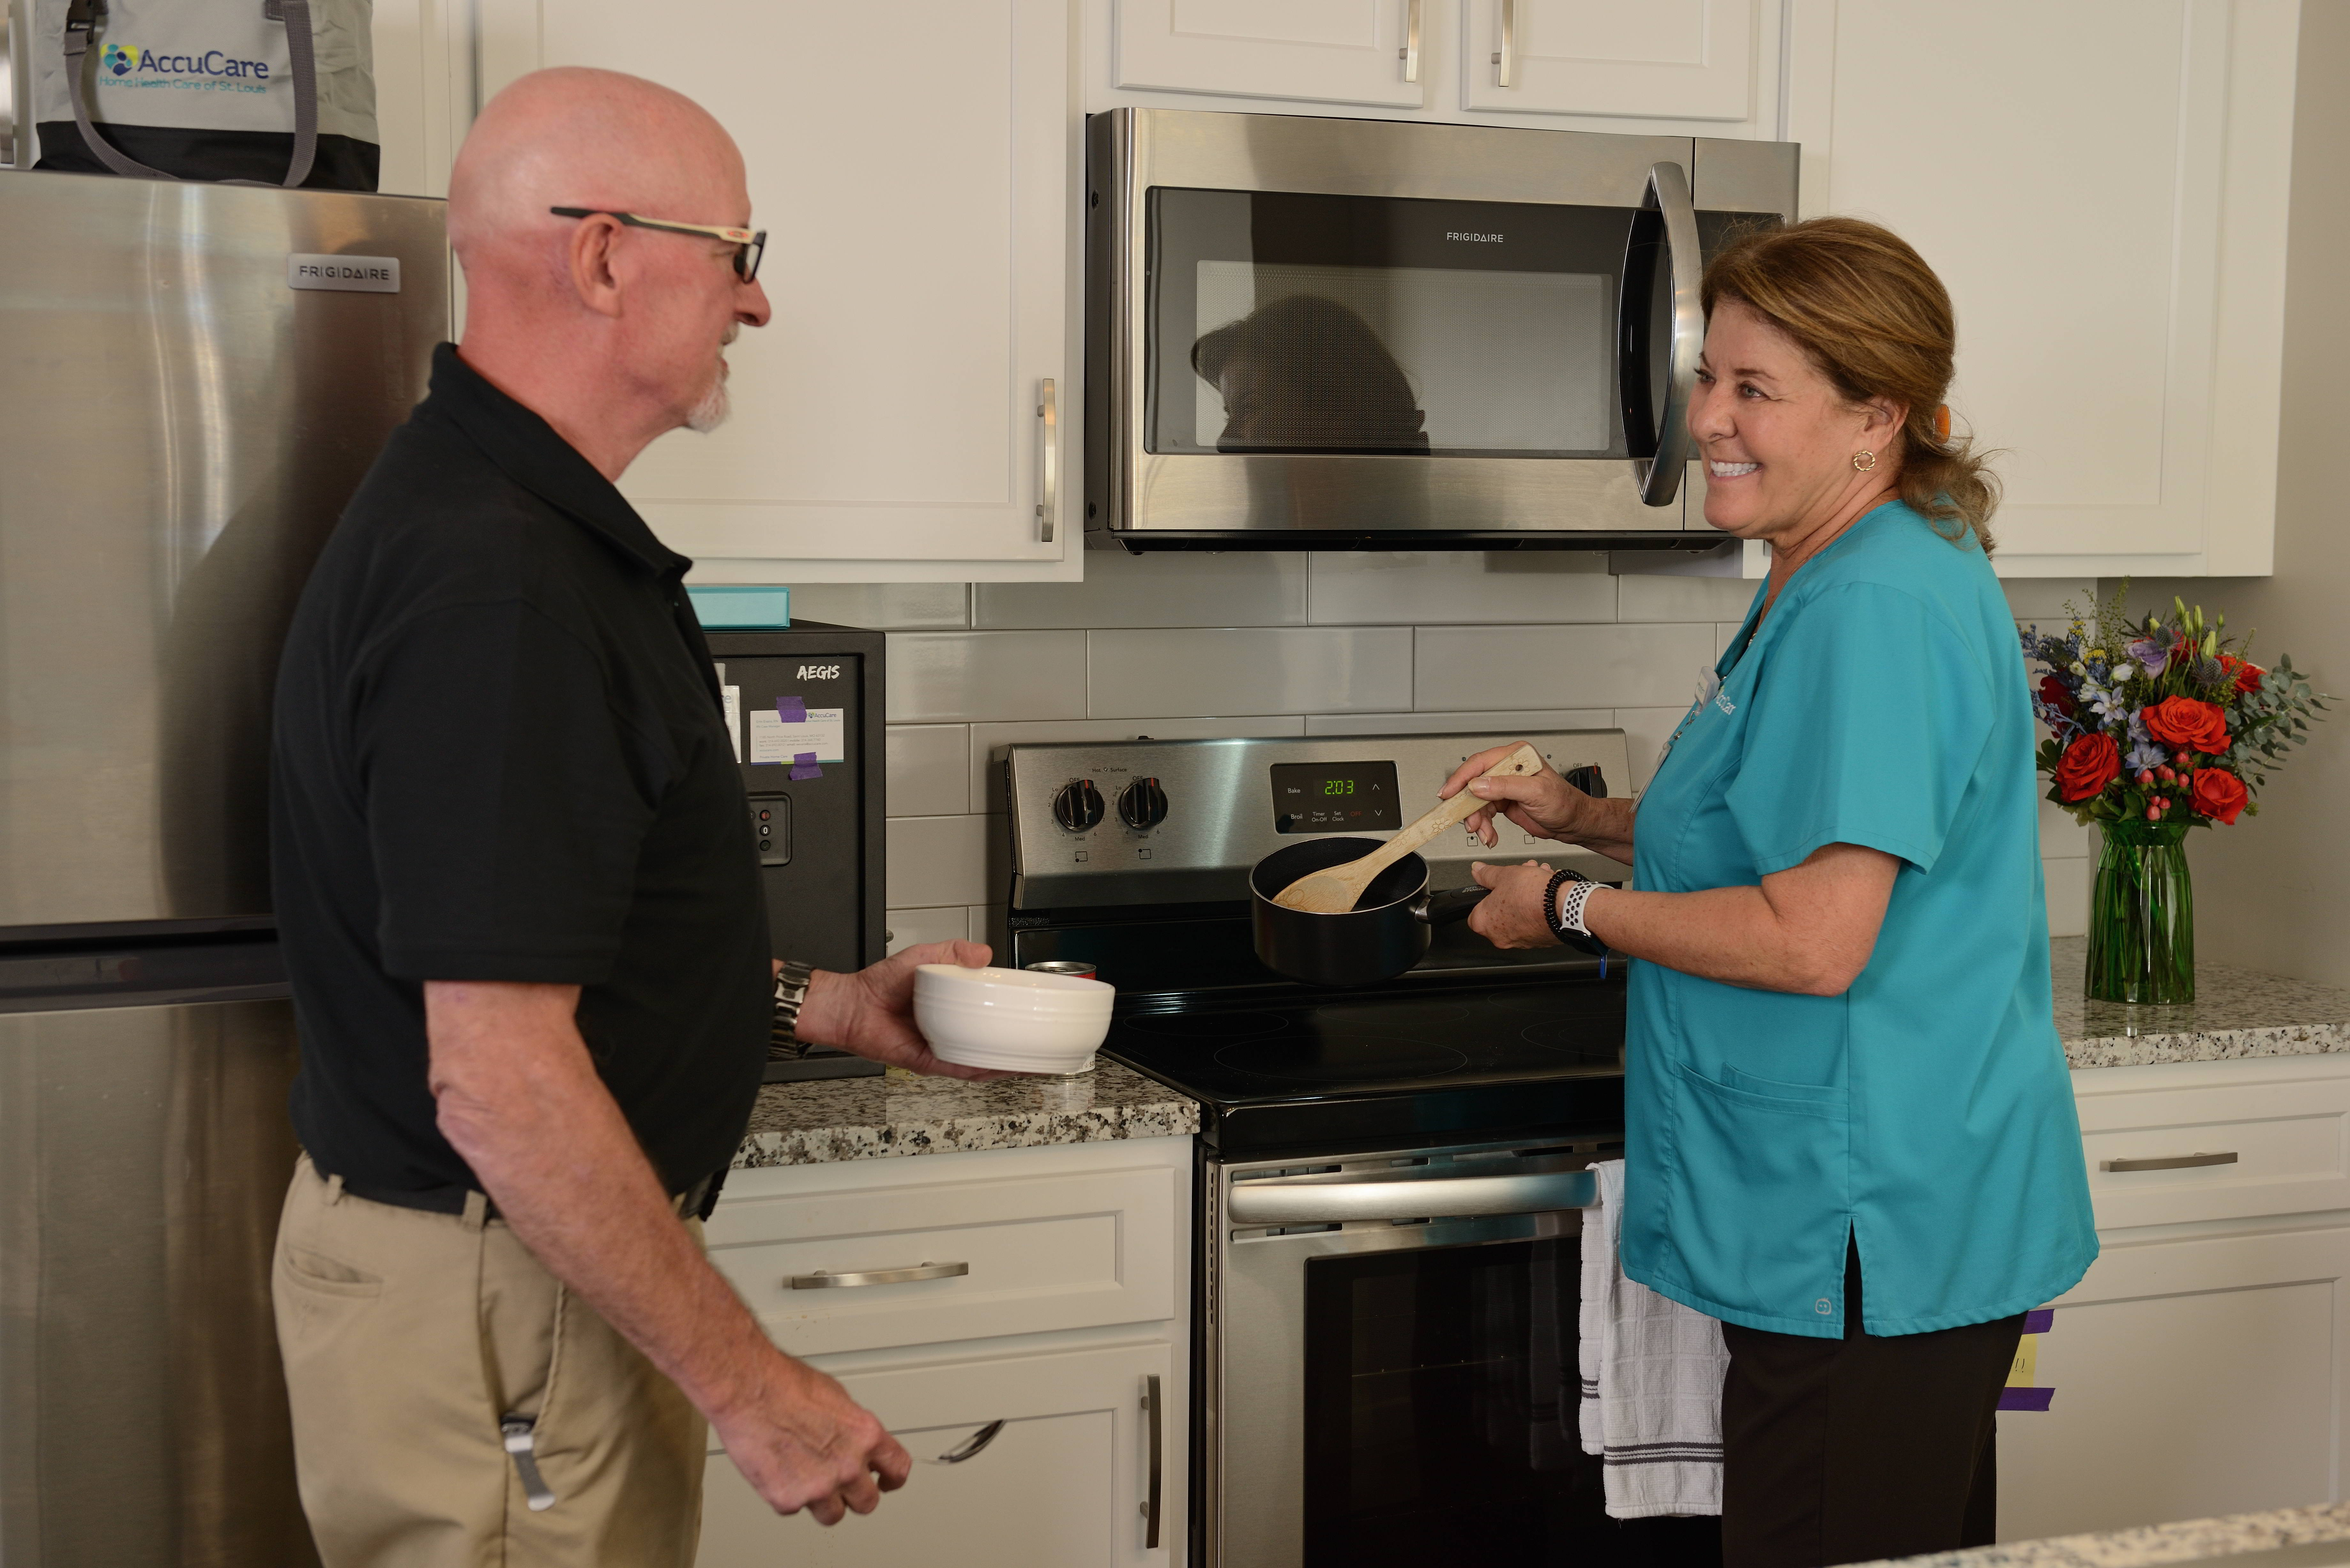
The right b-roll illustrates ideas, supports statements, and gives viewers visual evidence of what the speaker is describing. It can include your team at work, your products, your facility, customer interaction, process details, branded spaces, environmental footage, equipment, workflow, architecture, action shots, drone coverage, and visual textures that enhance the story.
Good b-roll serves several important roles.
It helps viewers understand and retain information by showing what the interview is talking about.
It improves pacing by breaking up long stretches of dialogue with visual variety.
It helps the edit flow more smoothly by covering transitions, restructuring sound bites, and hiding cuts.
It raises production value by making the final video feel more cinematic, composed, and visually intentional.
It increases the return on a production day because the same footage can often be repurposed into shorter edits, social content, web assets, and internal media.
Businesses that underestimate b-roll often end up with a weaker final product. Businesses that plan for it properly usually end up with video content that works harder and lasts longer.
Why Specialist Experience Matters
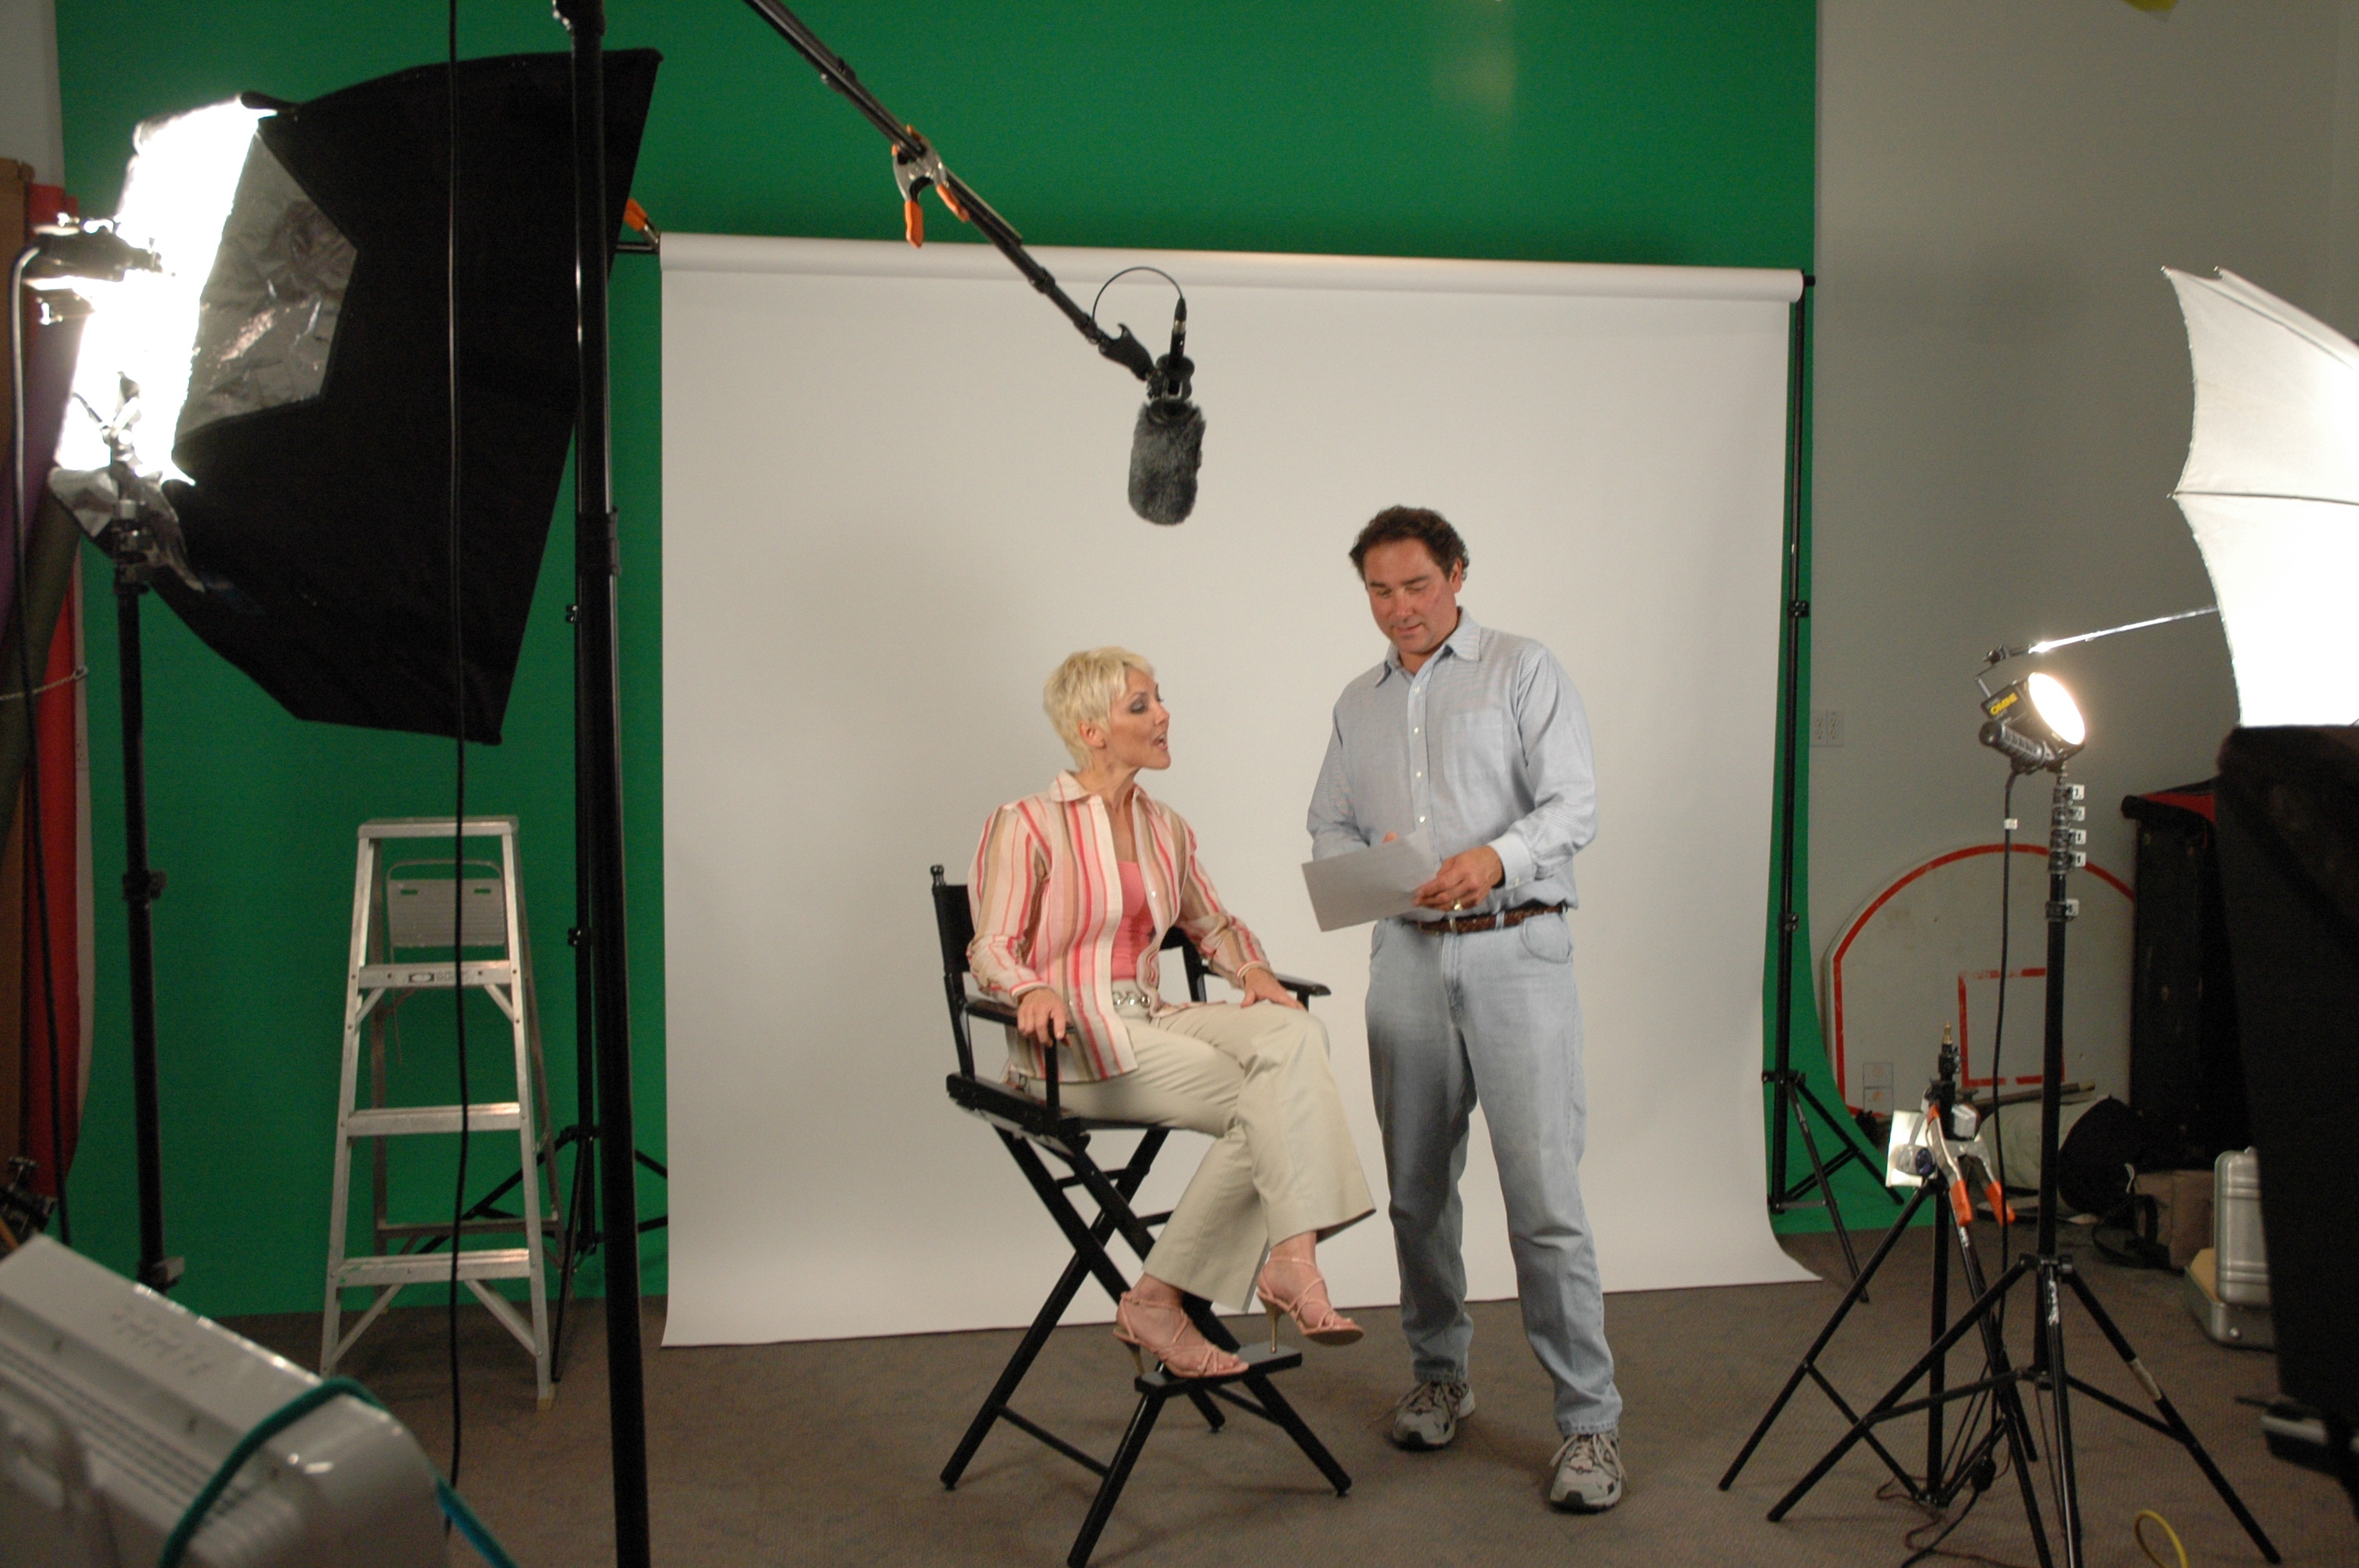
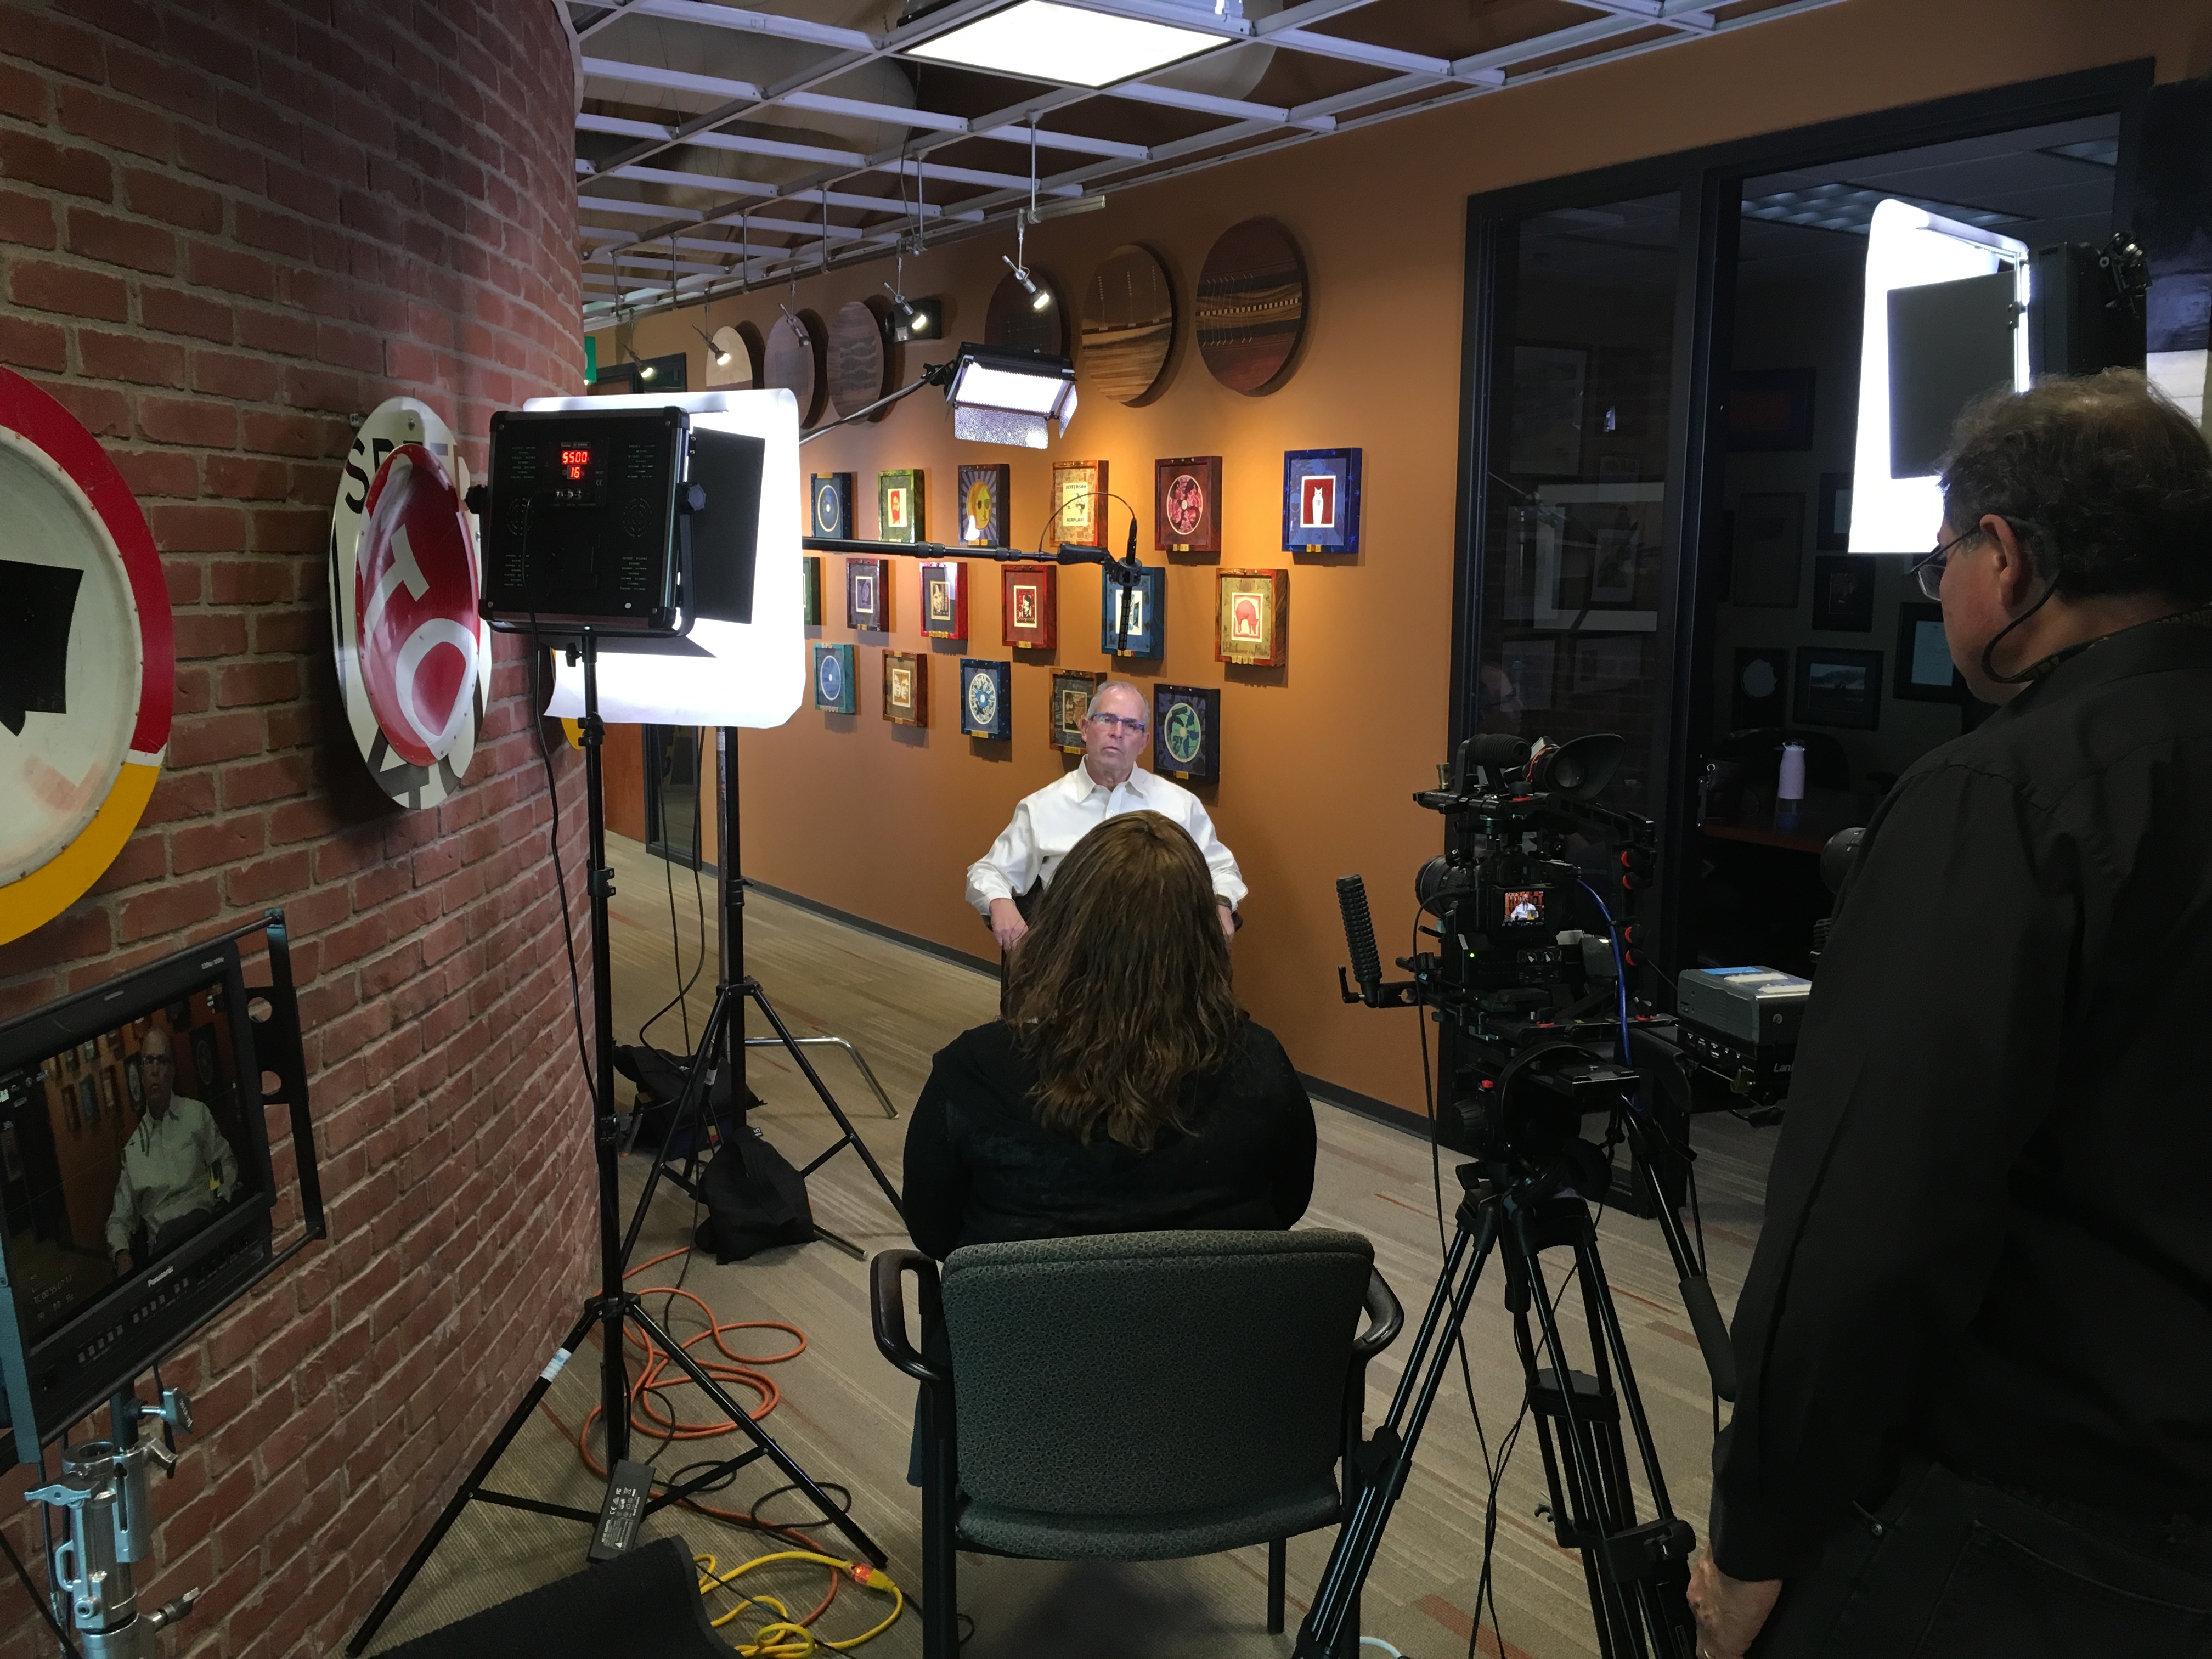
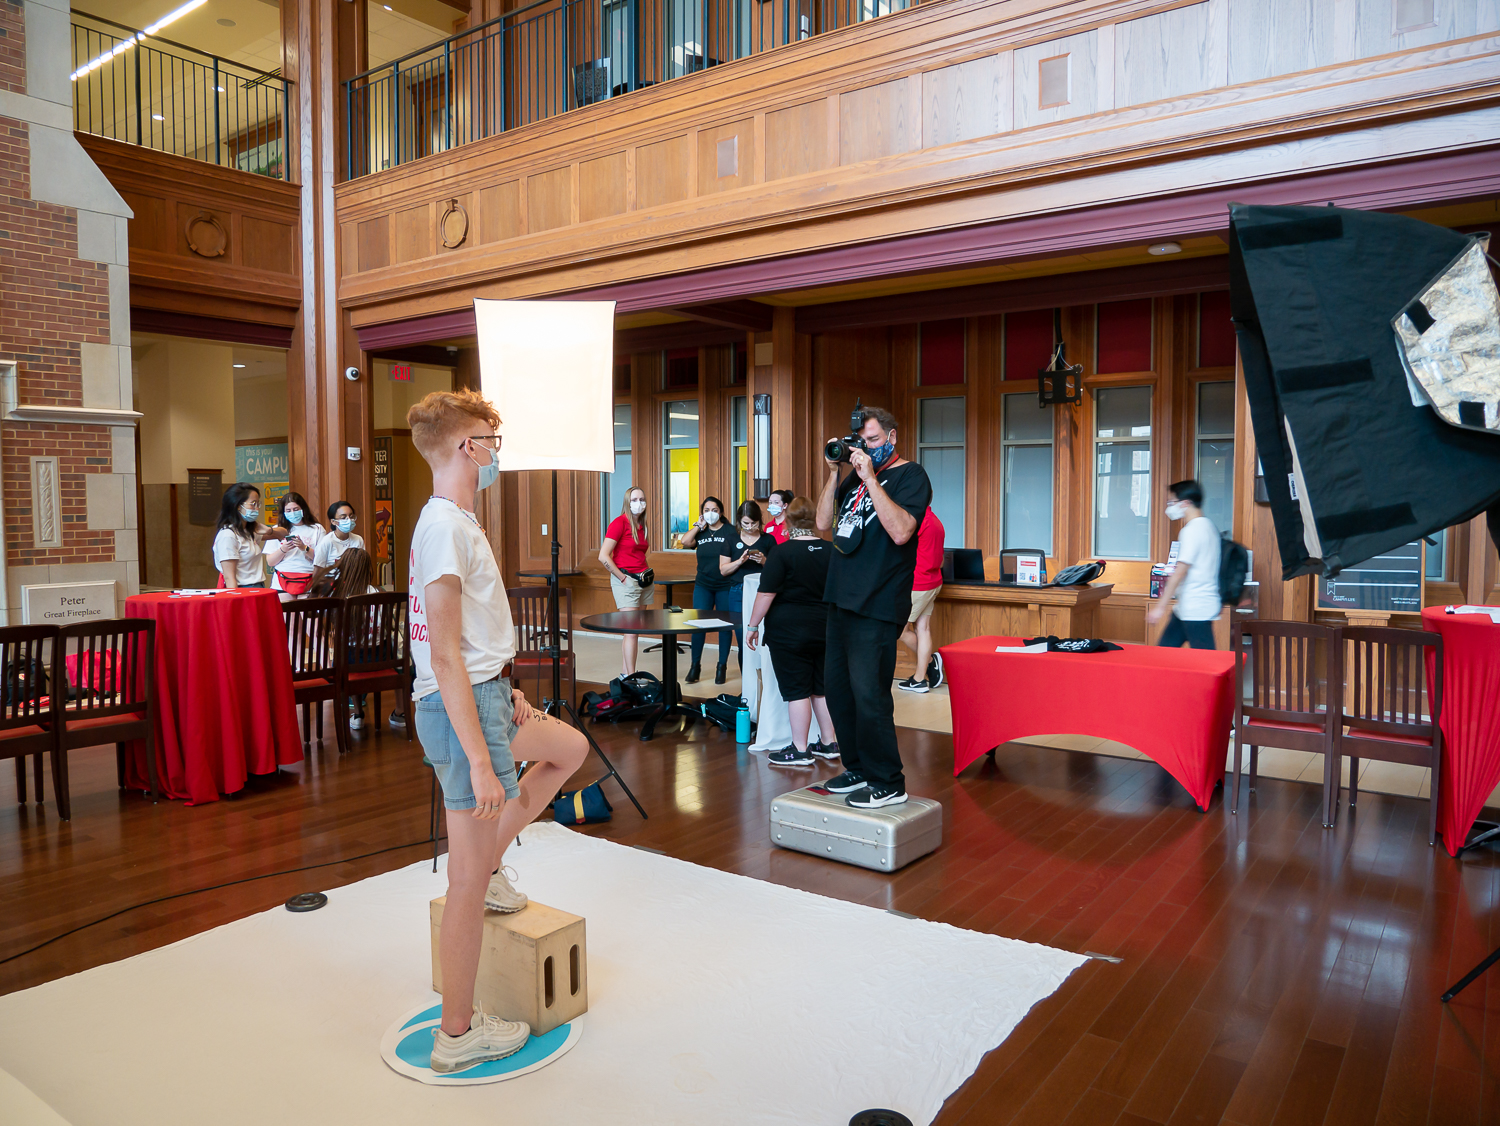
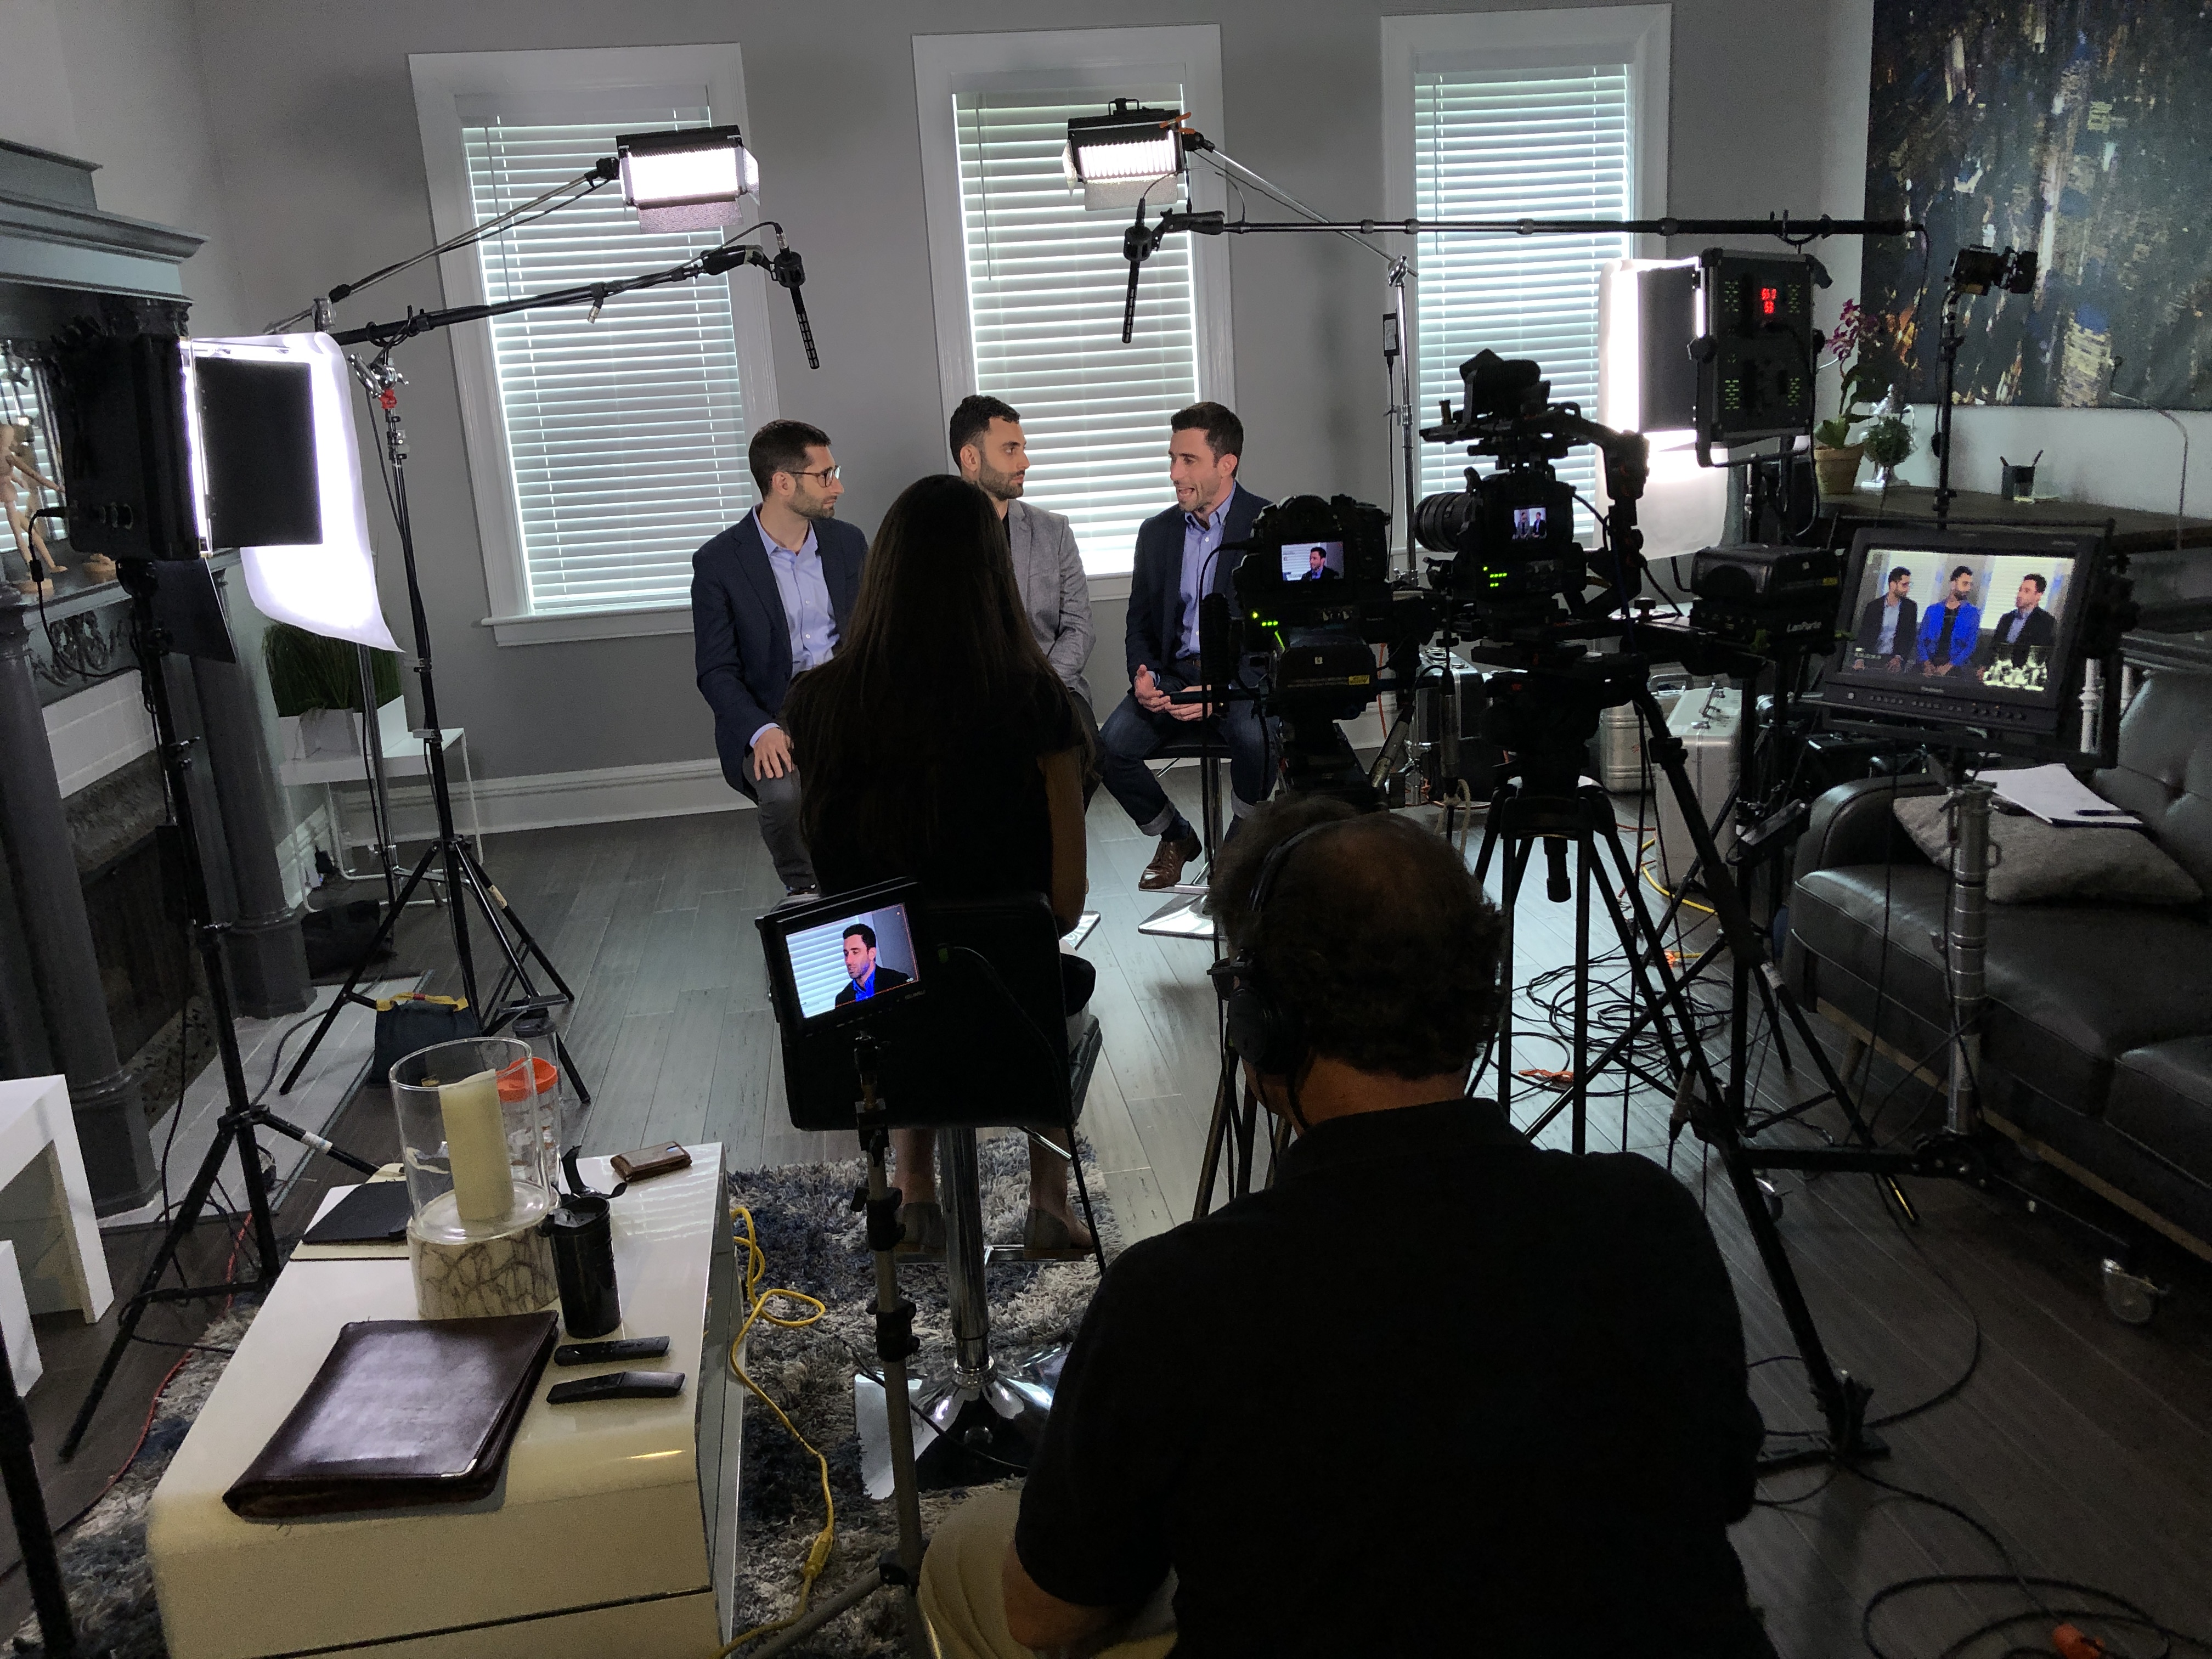
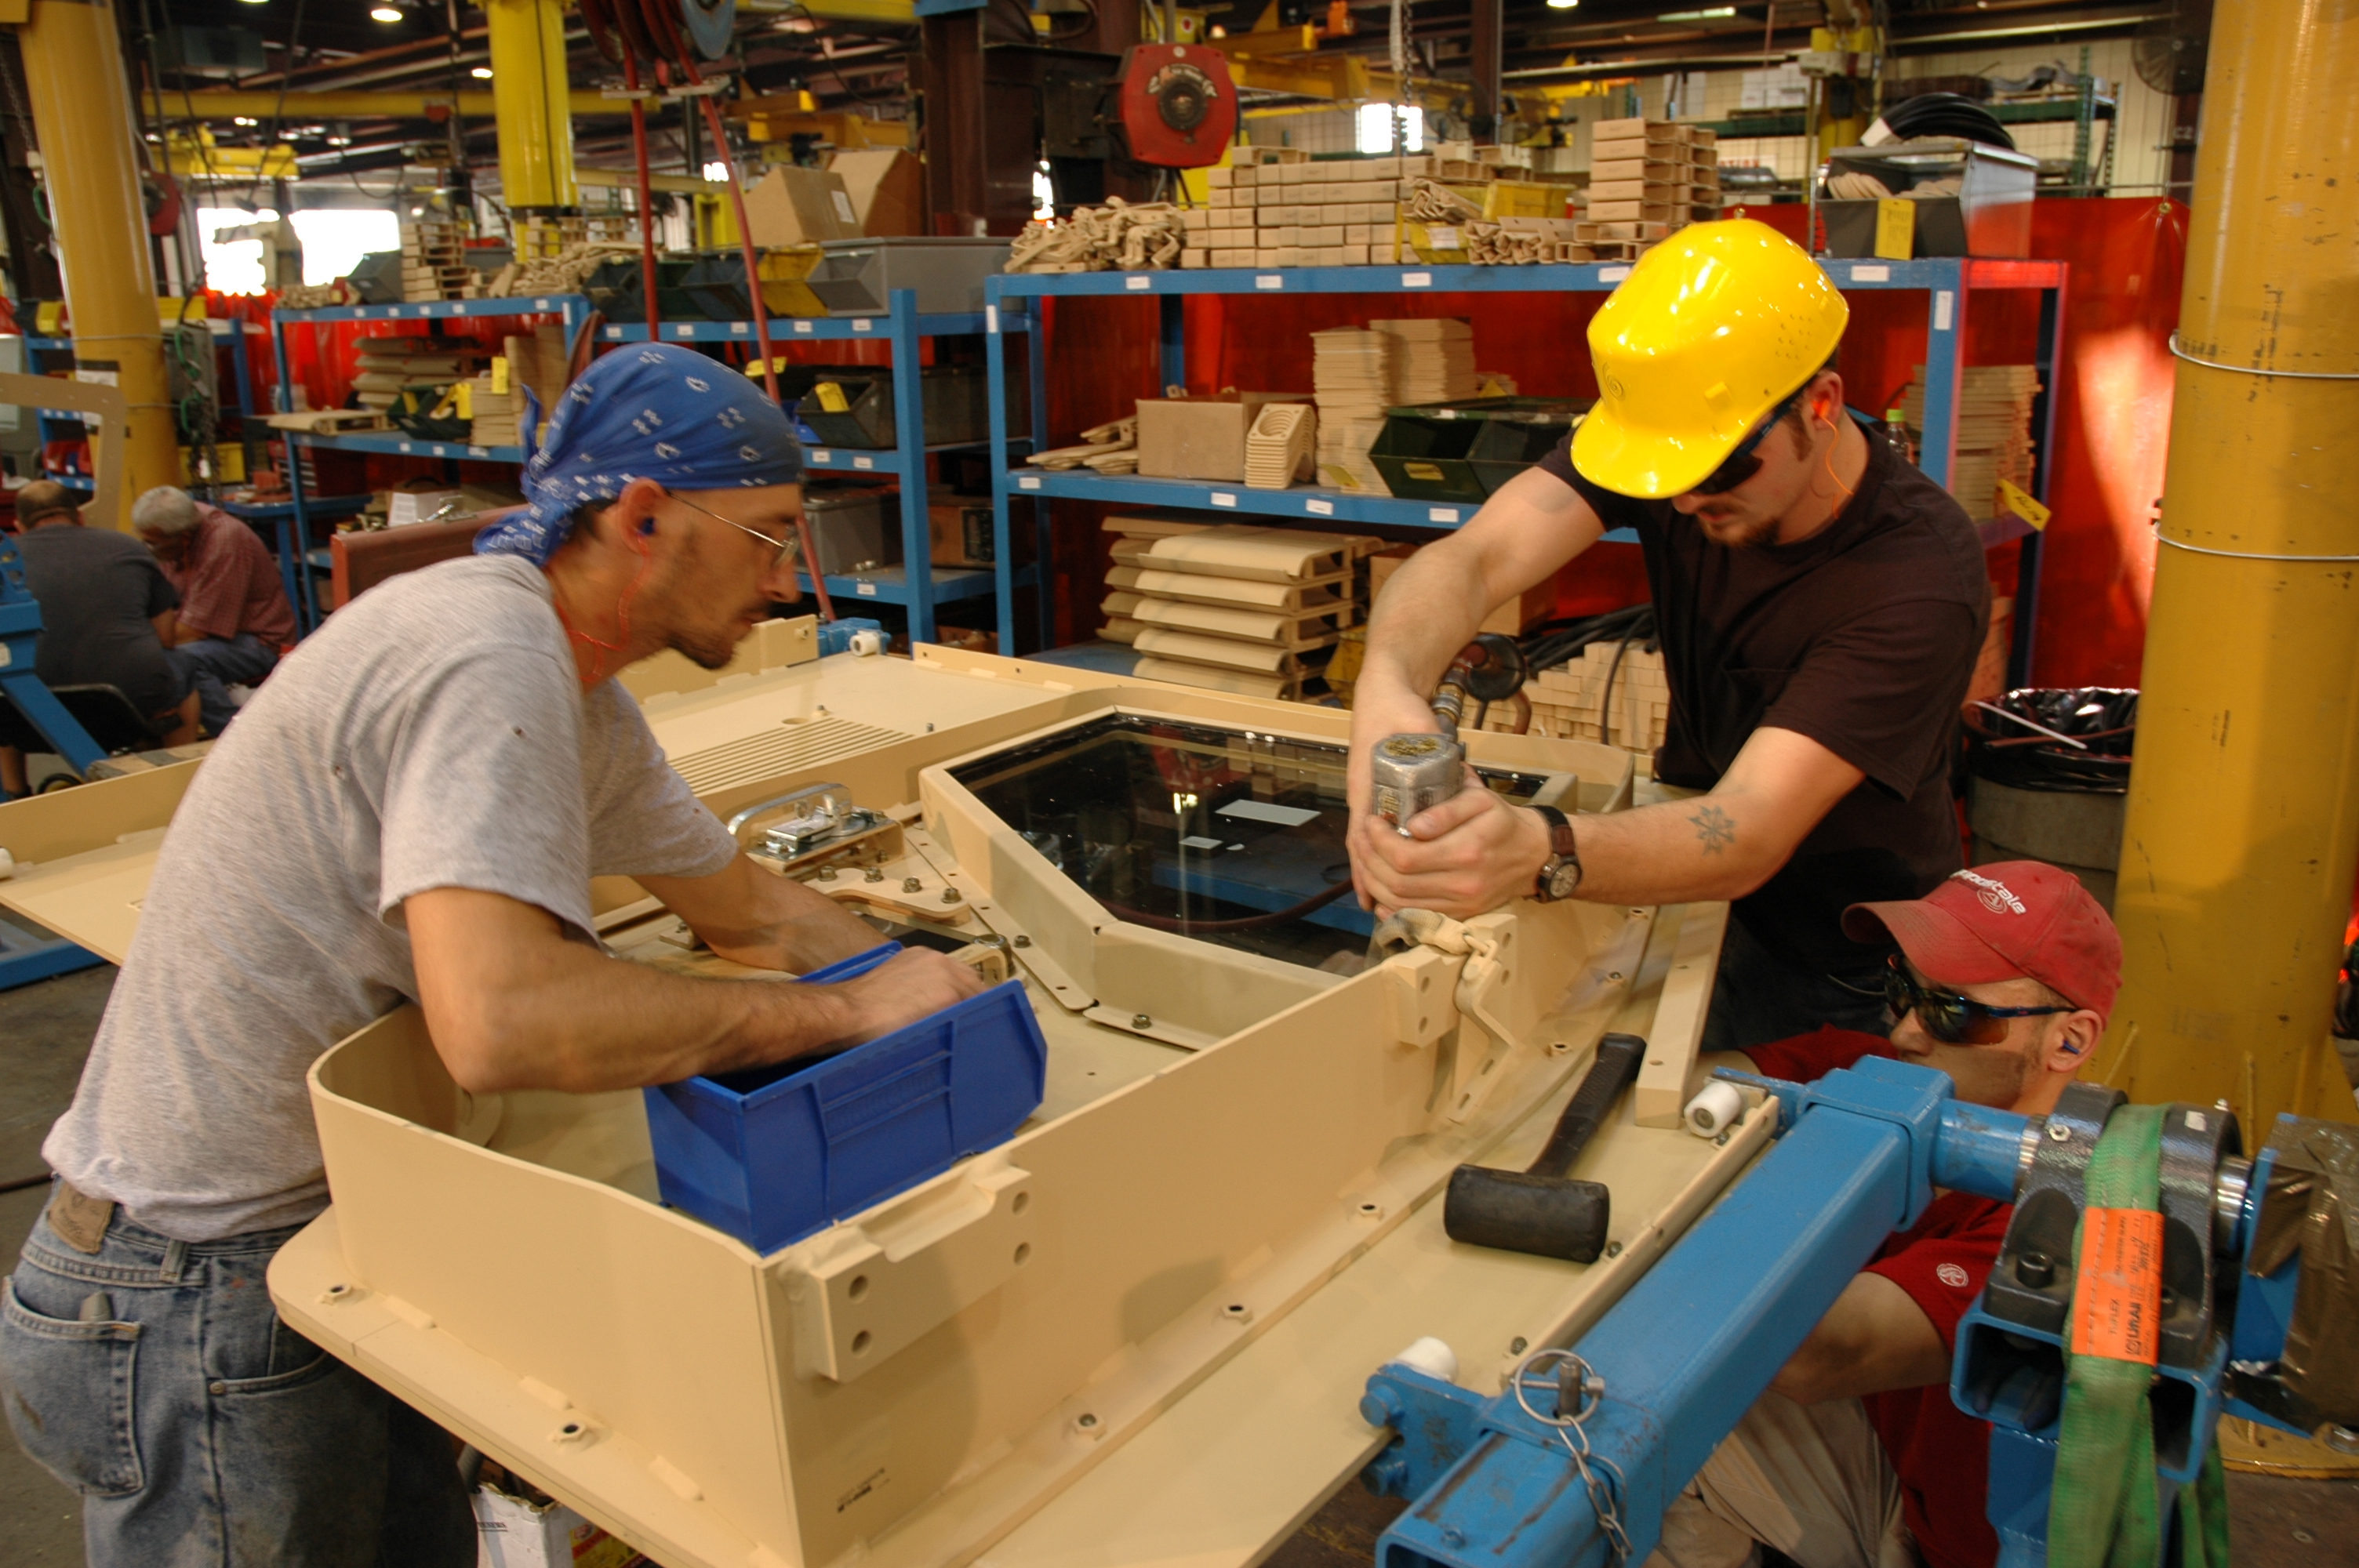
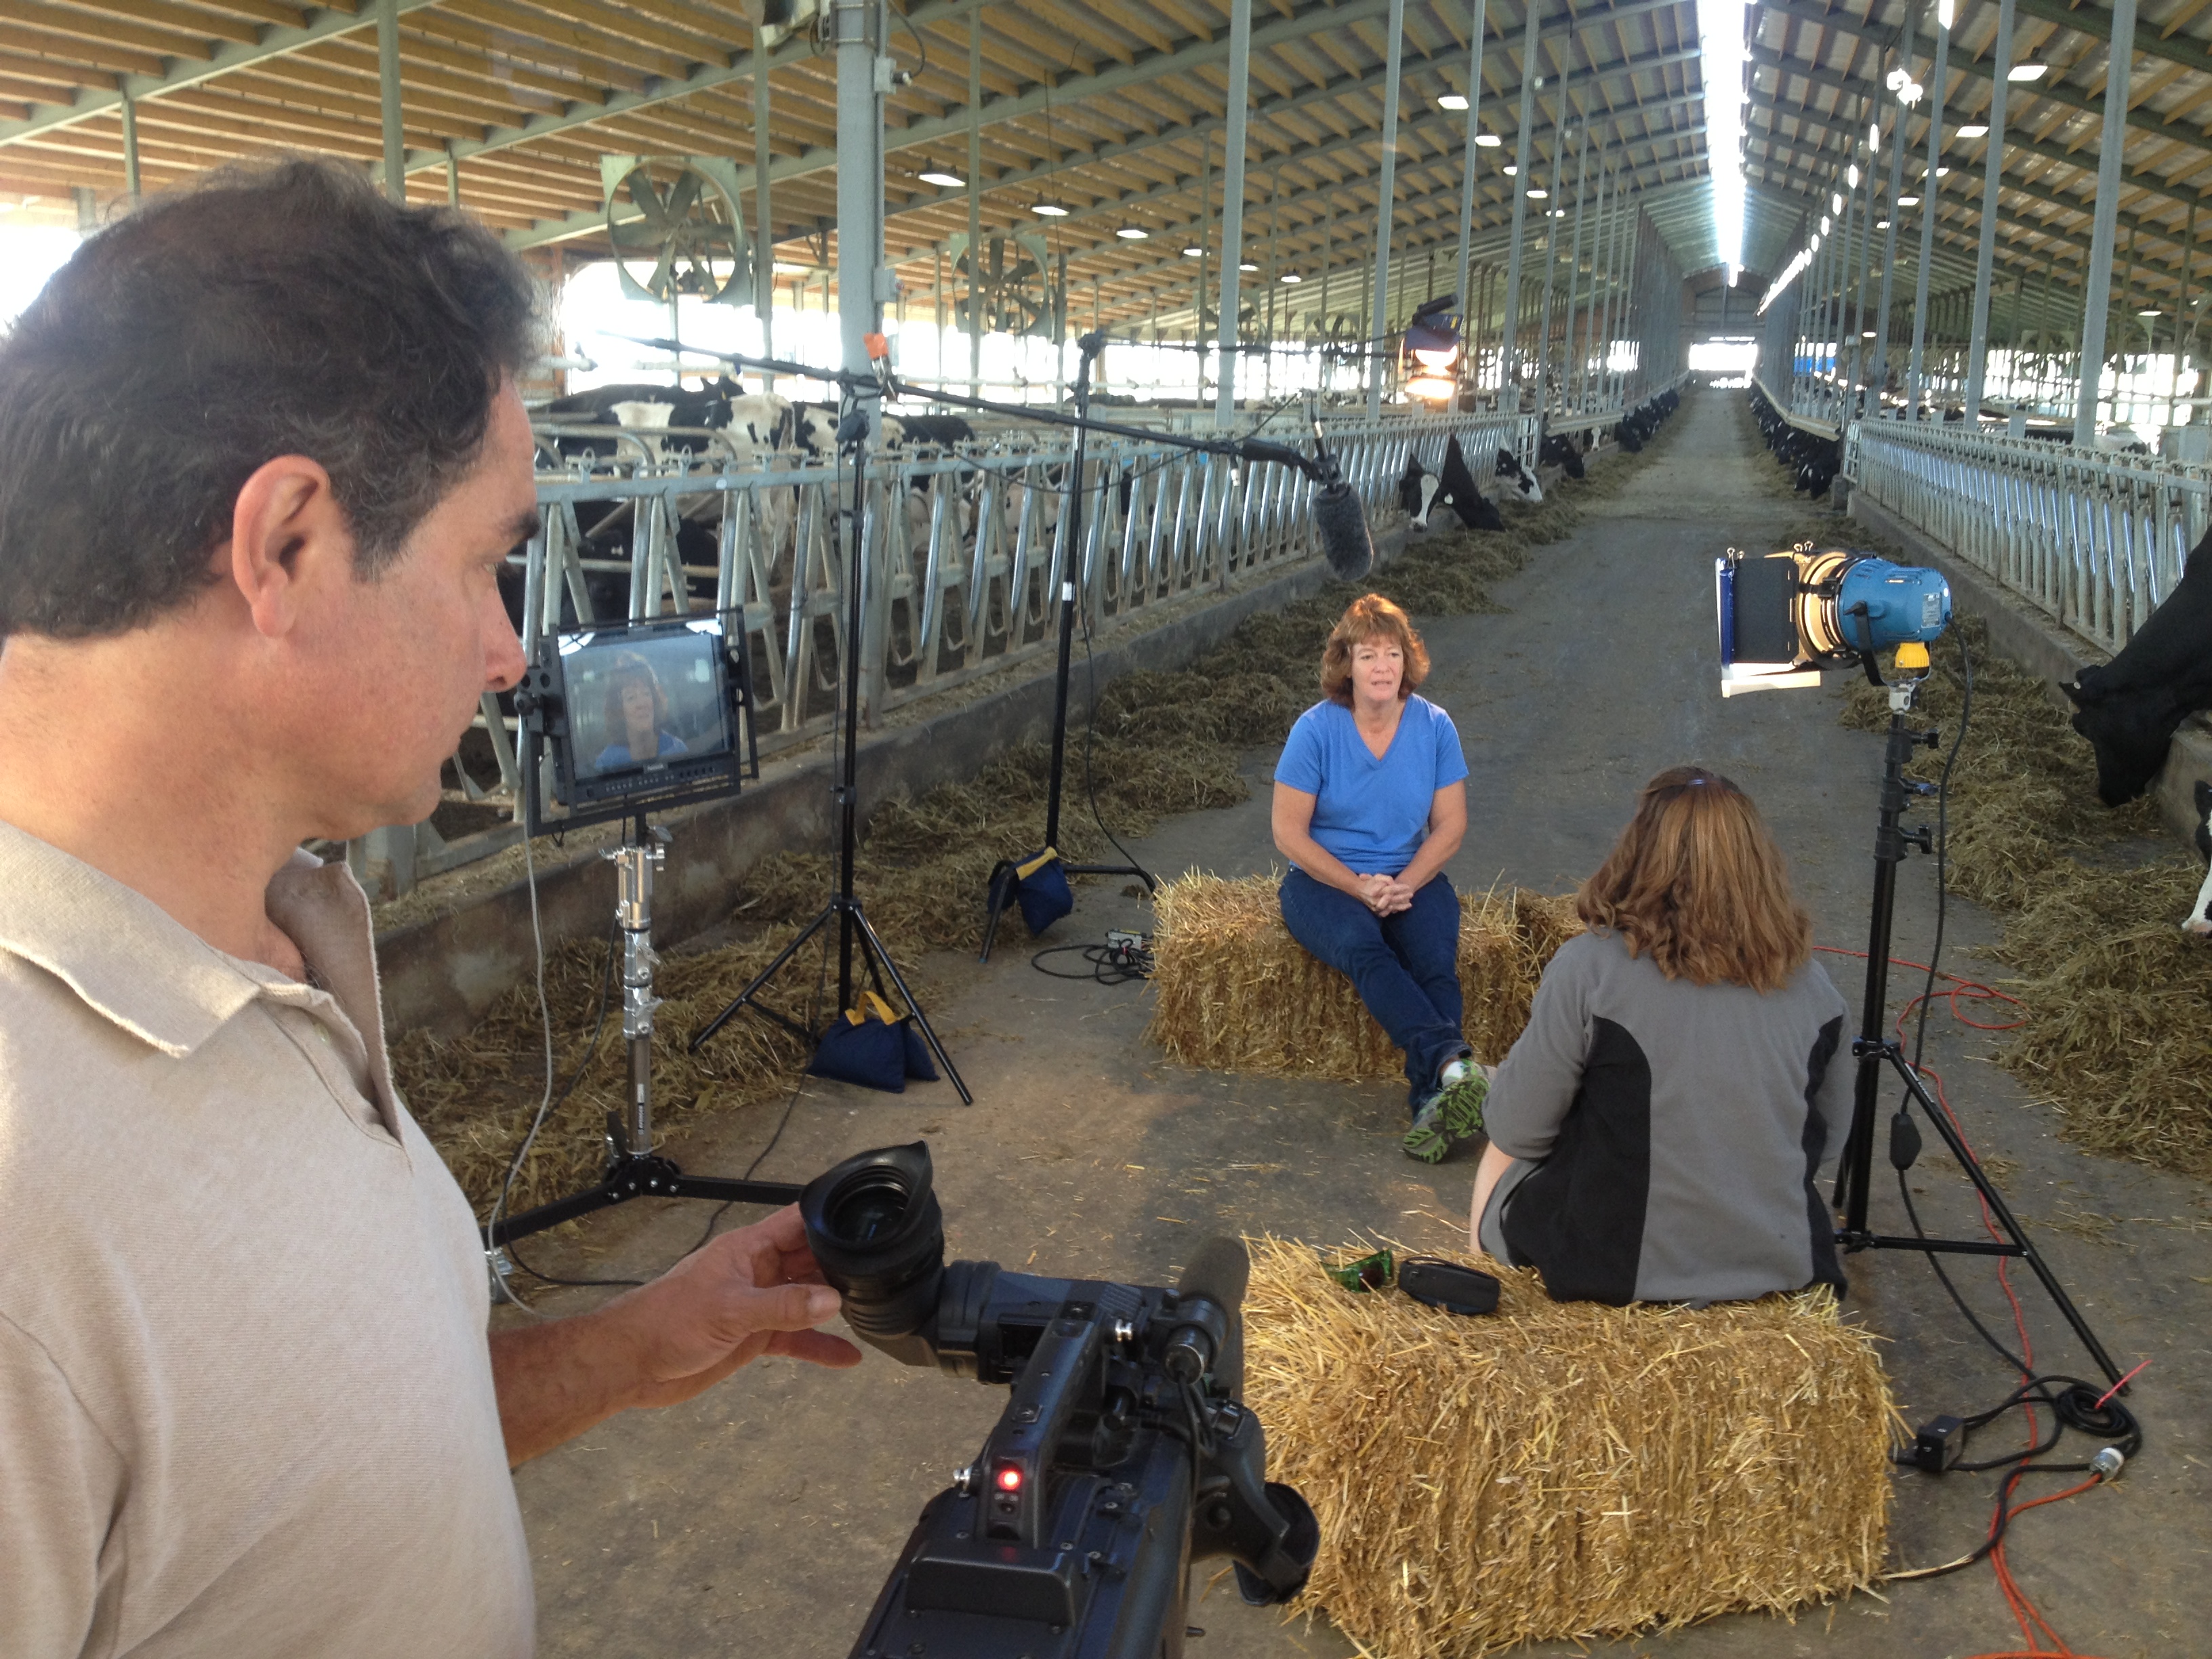
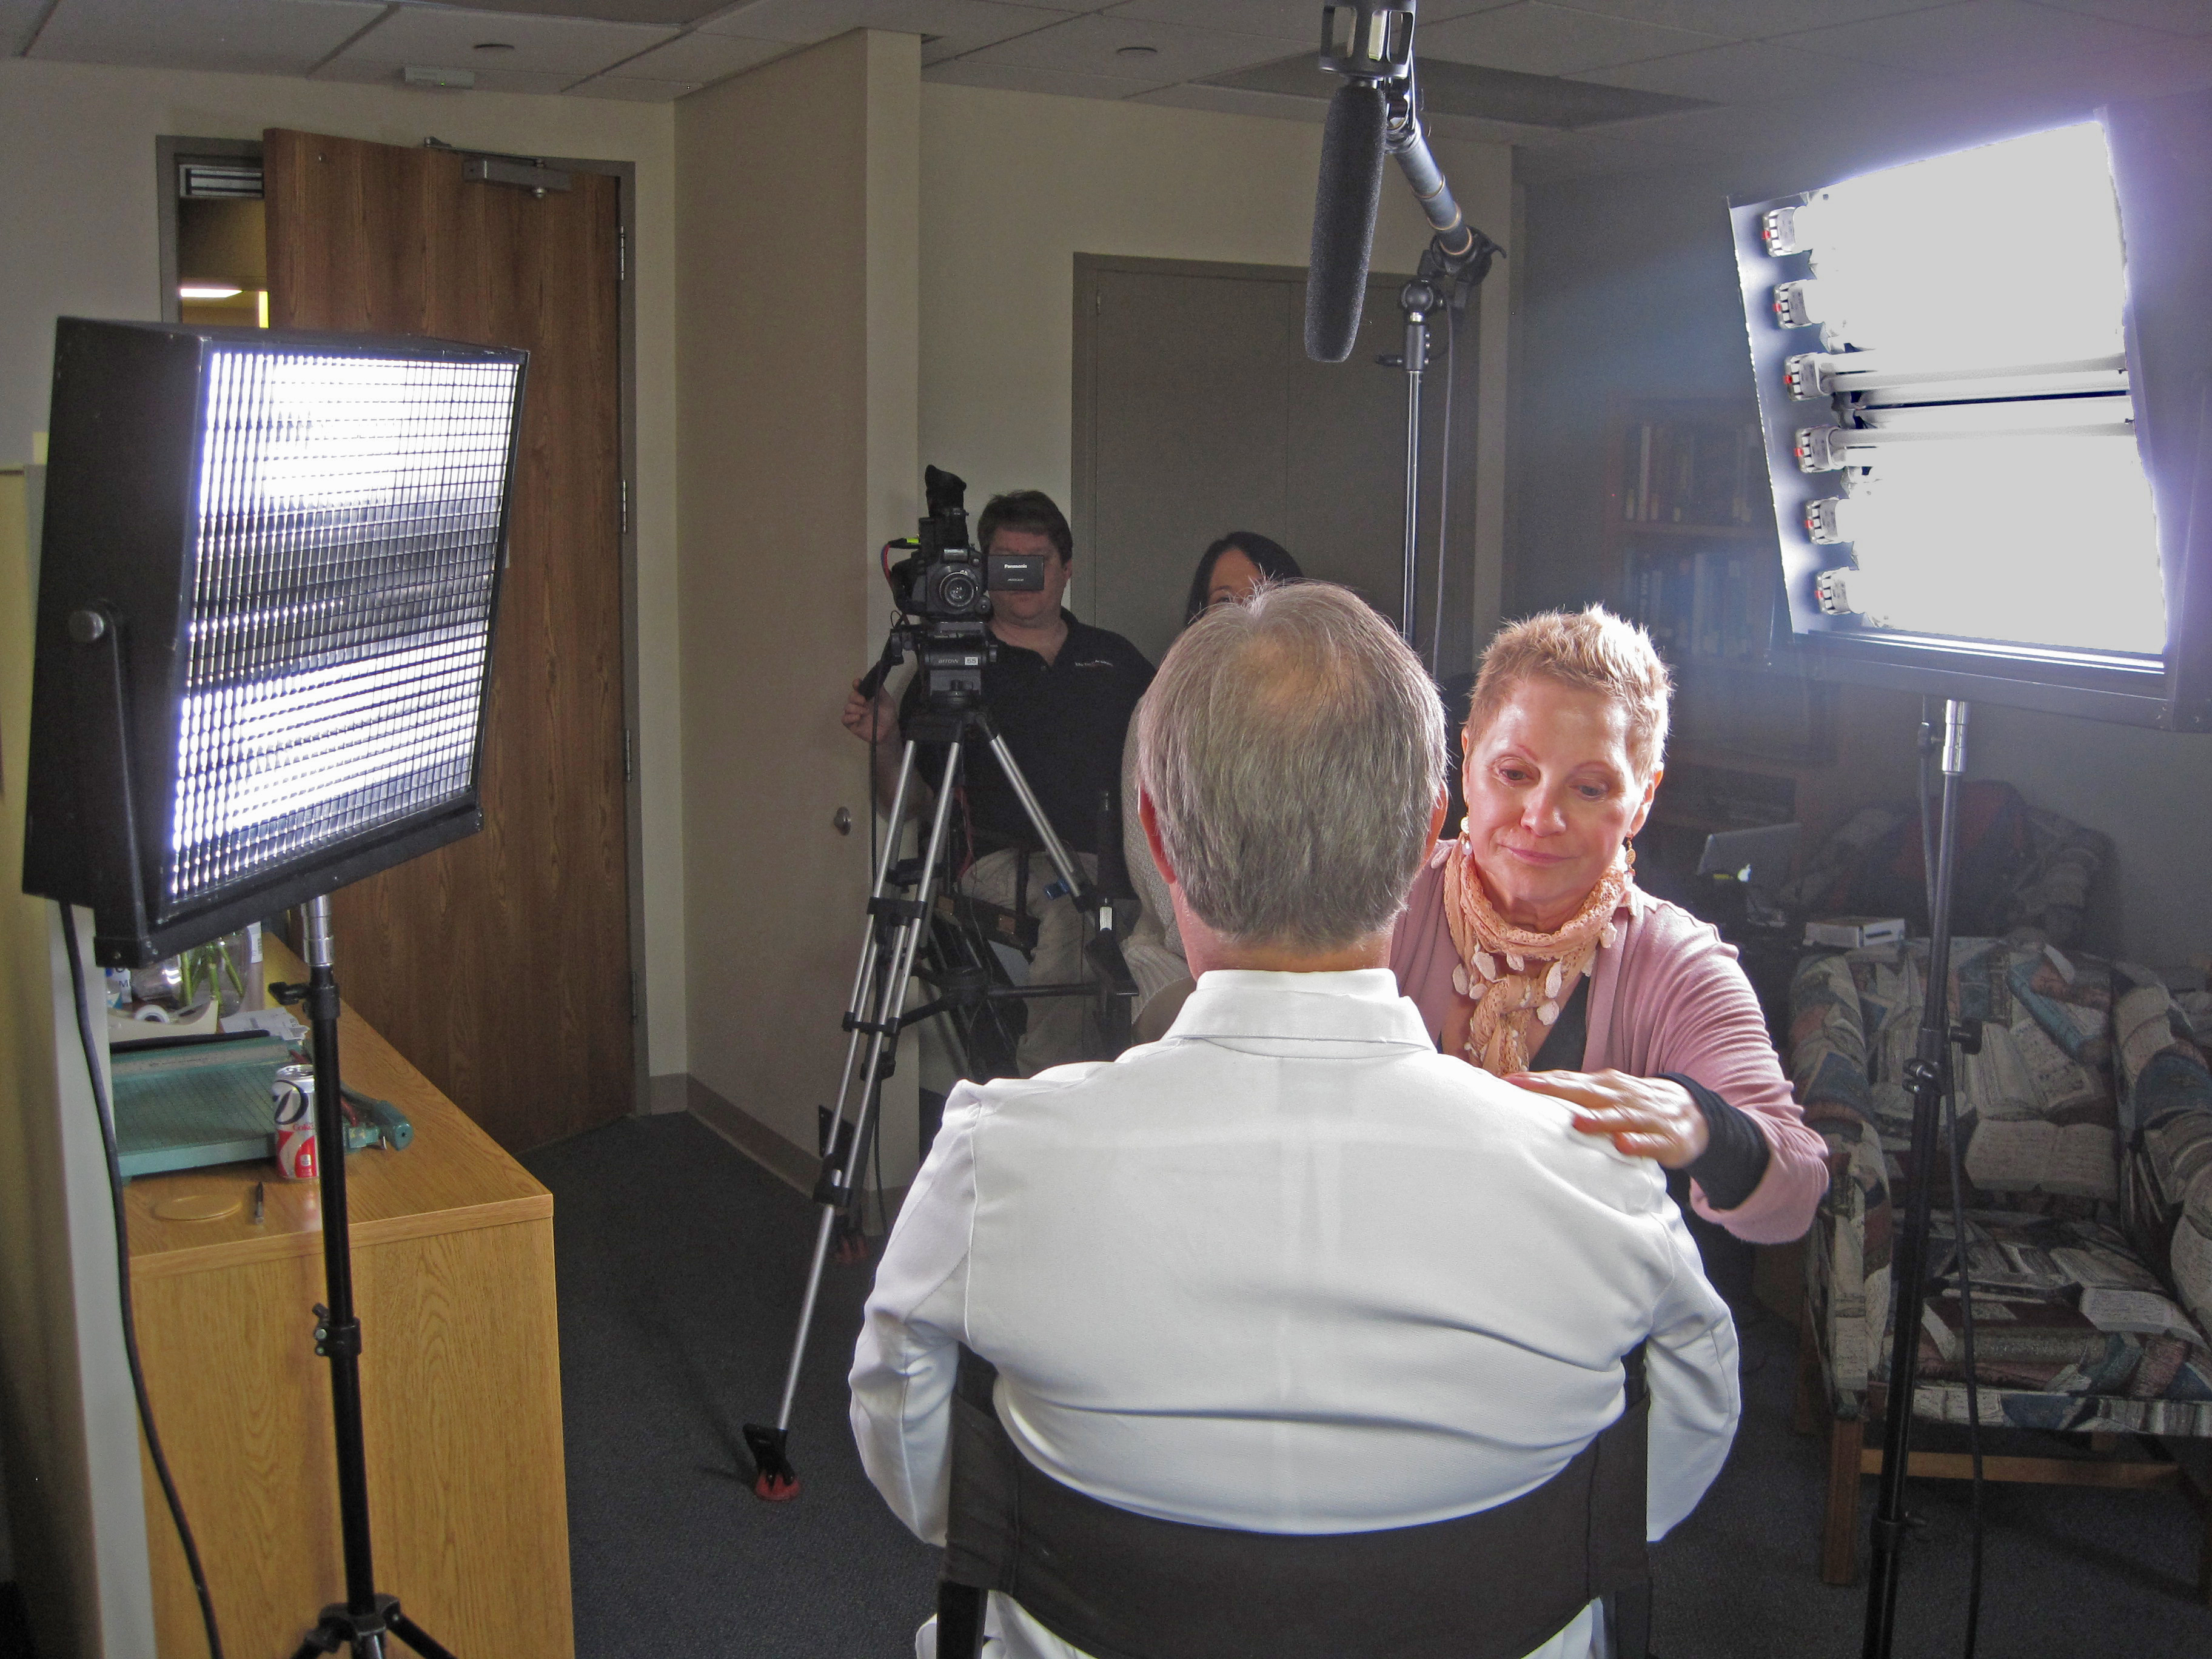
There is a real difference between a crew that occasionally records interviews and a team that specializes in interview-driven productions and b-roll acquisition. Specialists know how to manage everything that affects the quality of the final piece, including subject comfort, lighting, composition, sound, pacing, background selection, and visual continuity.
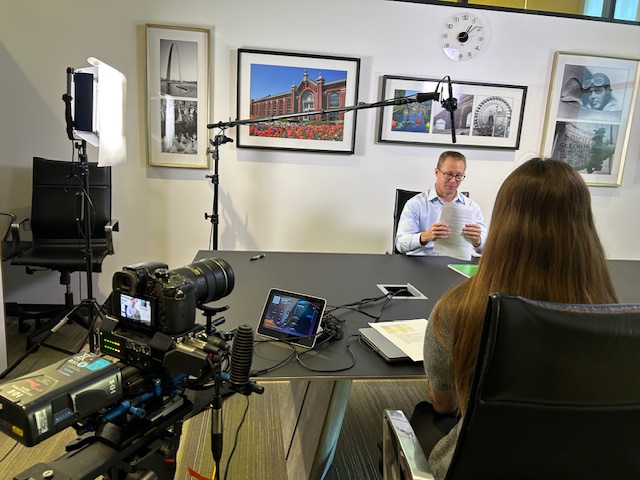
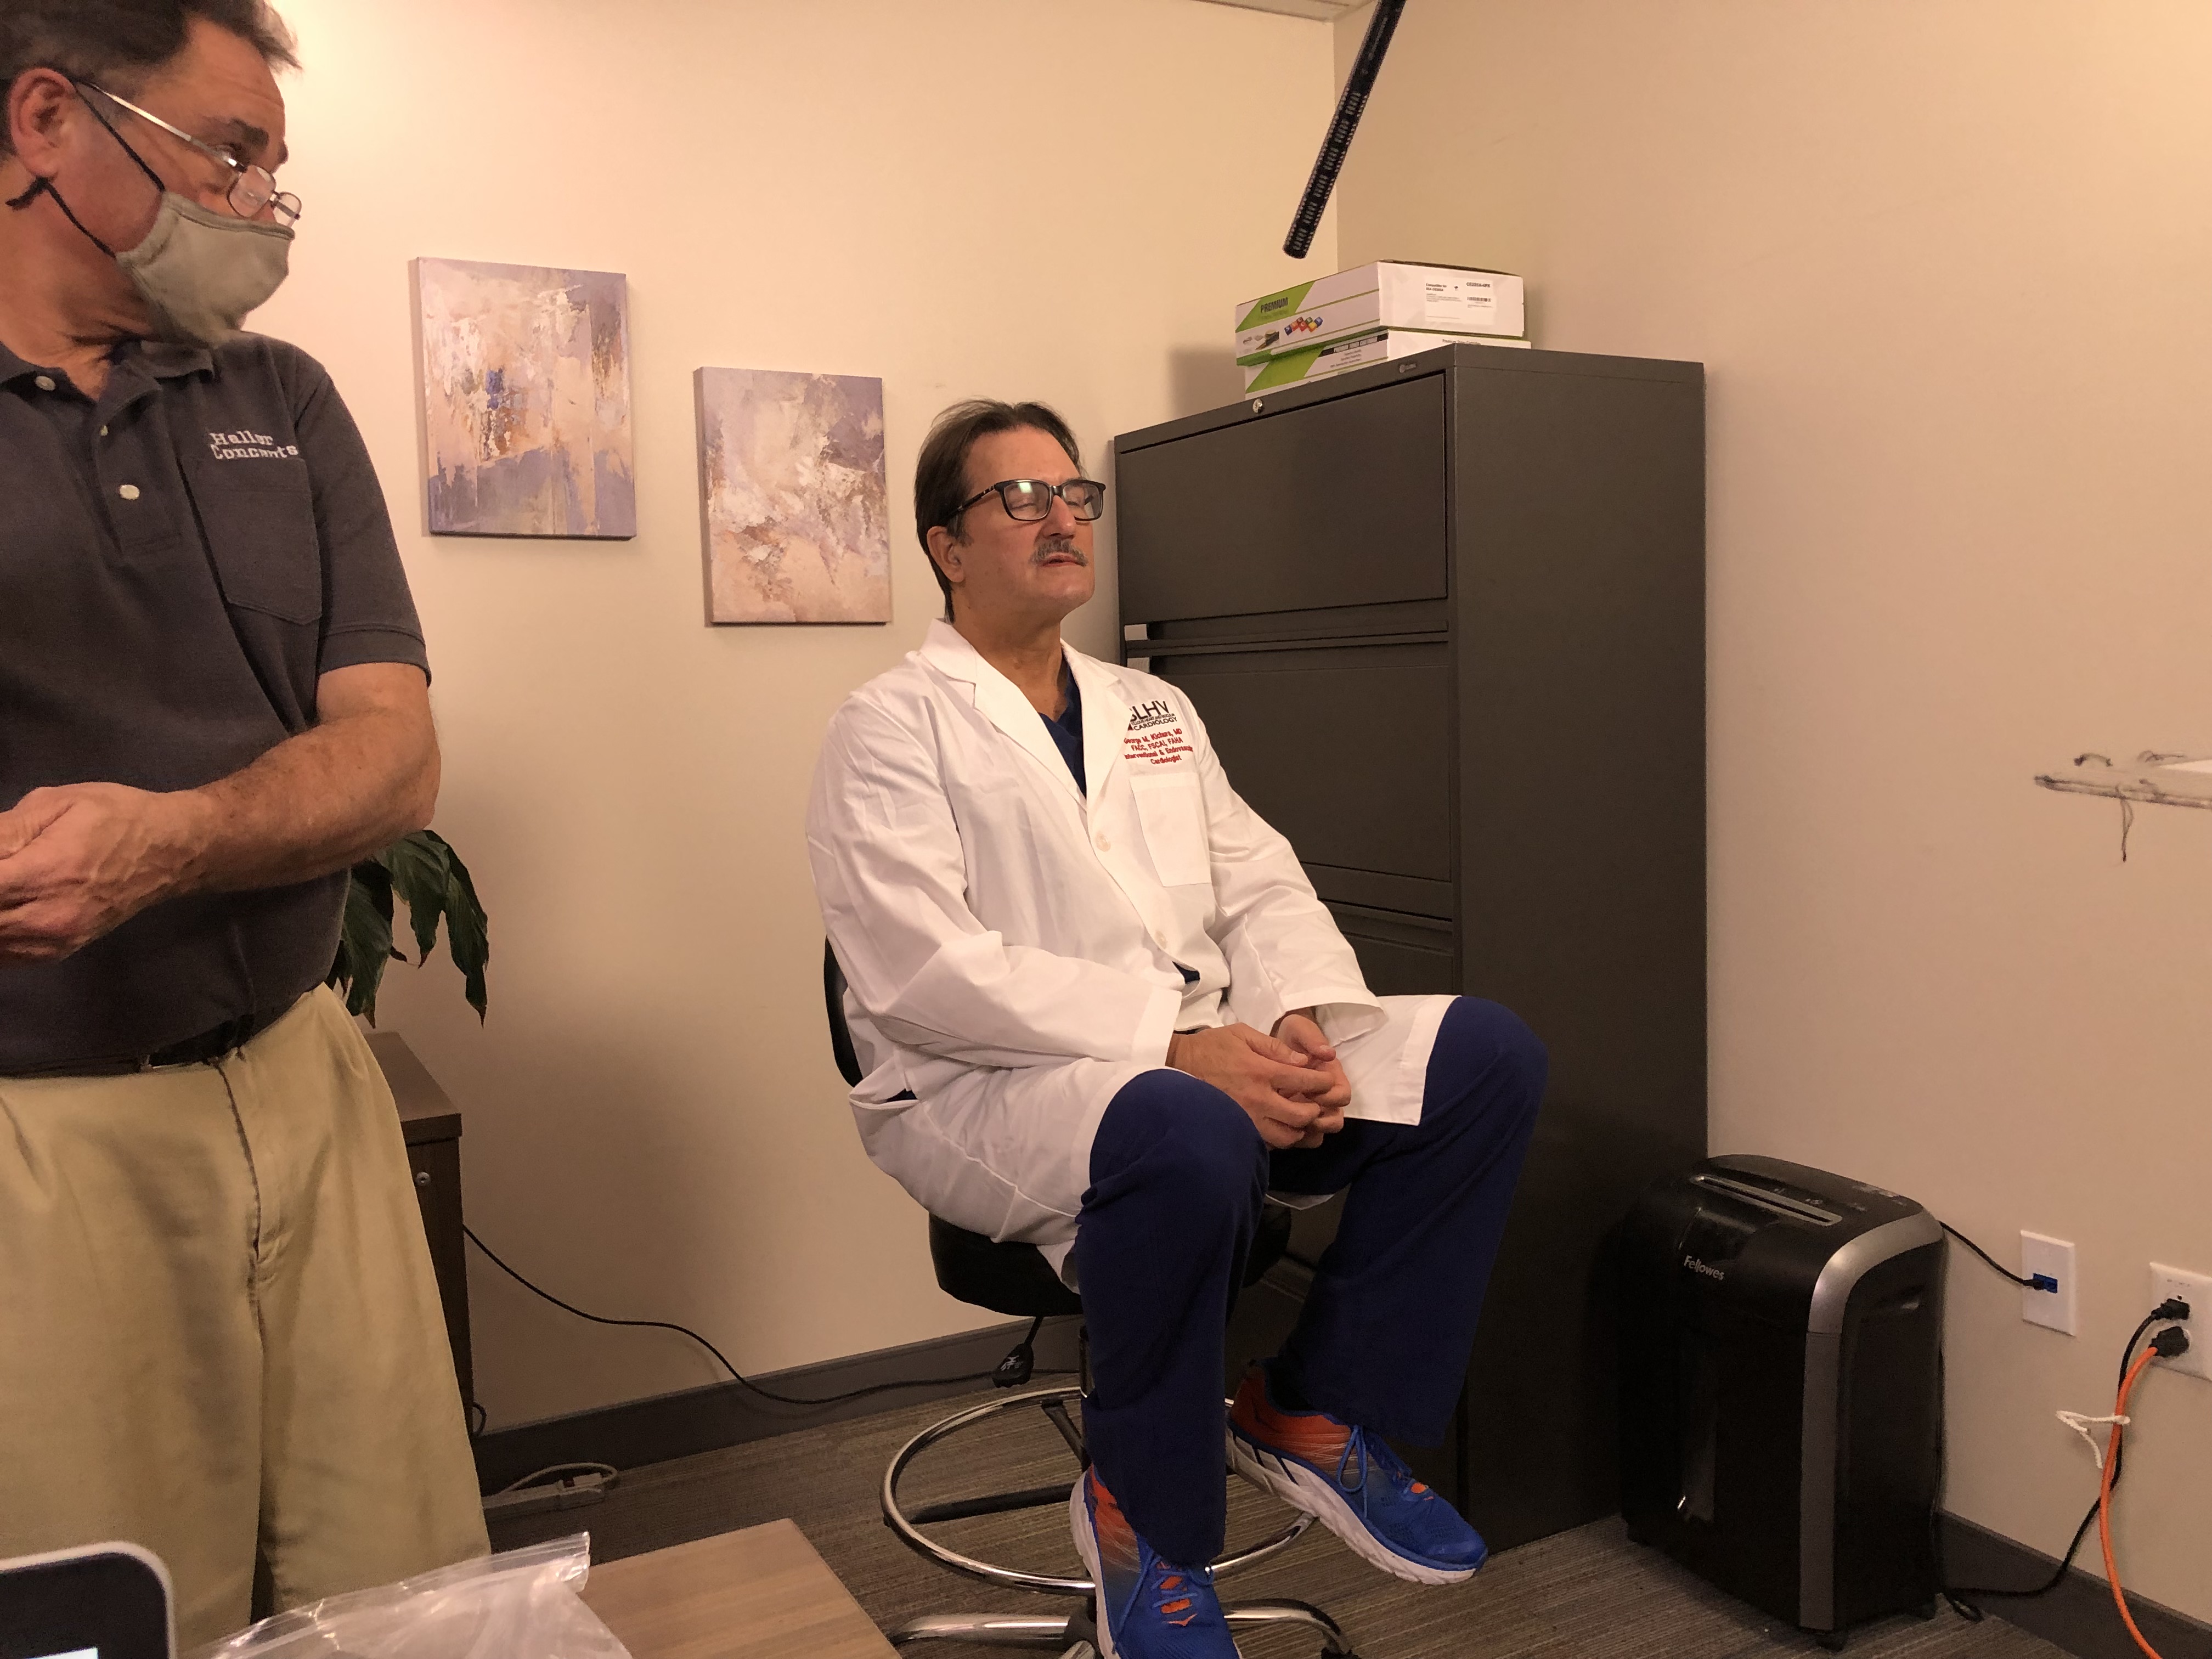
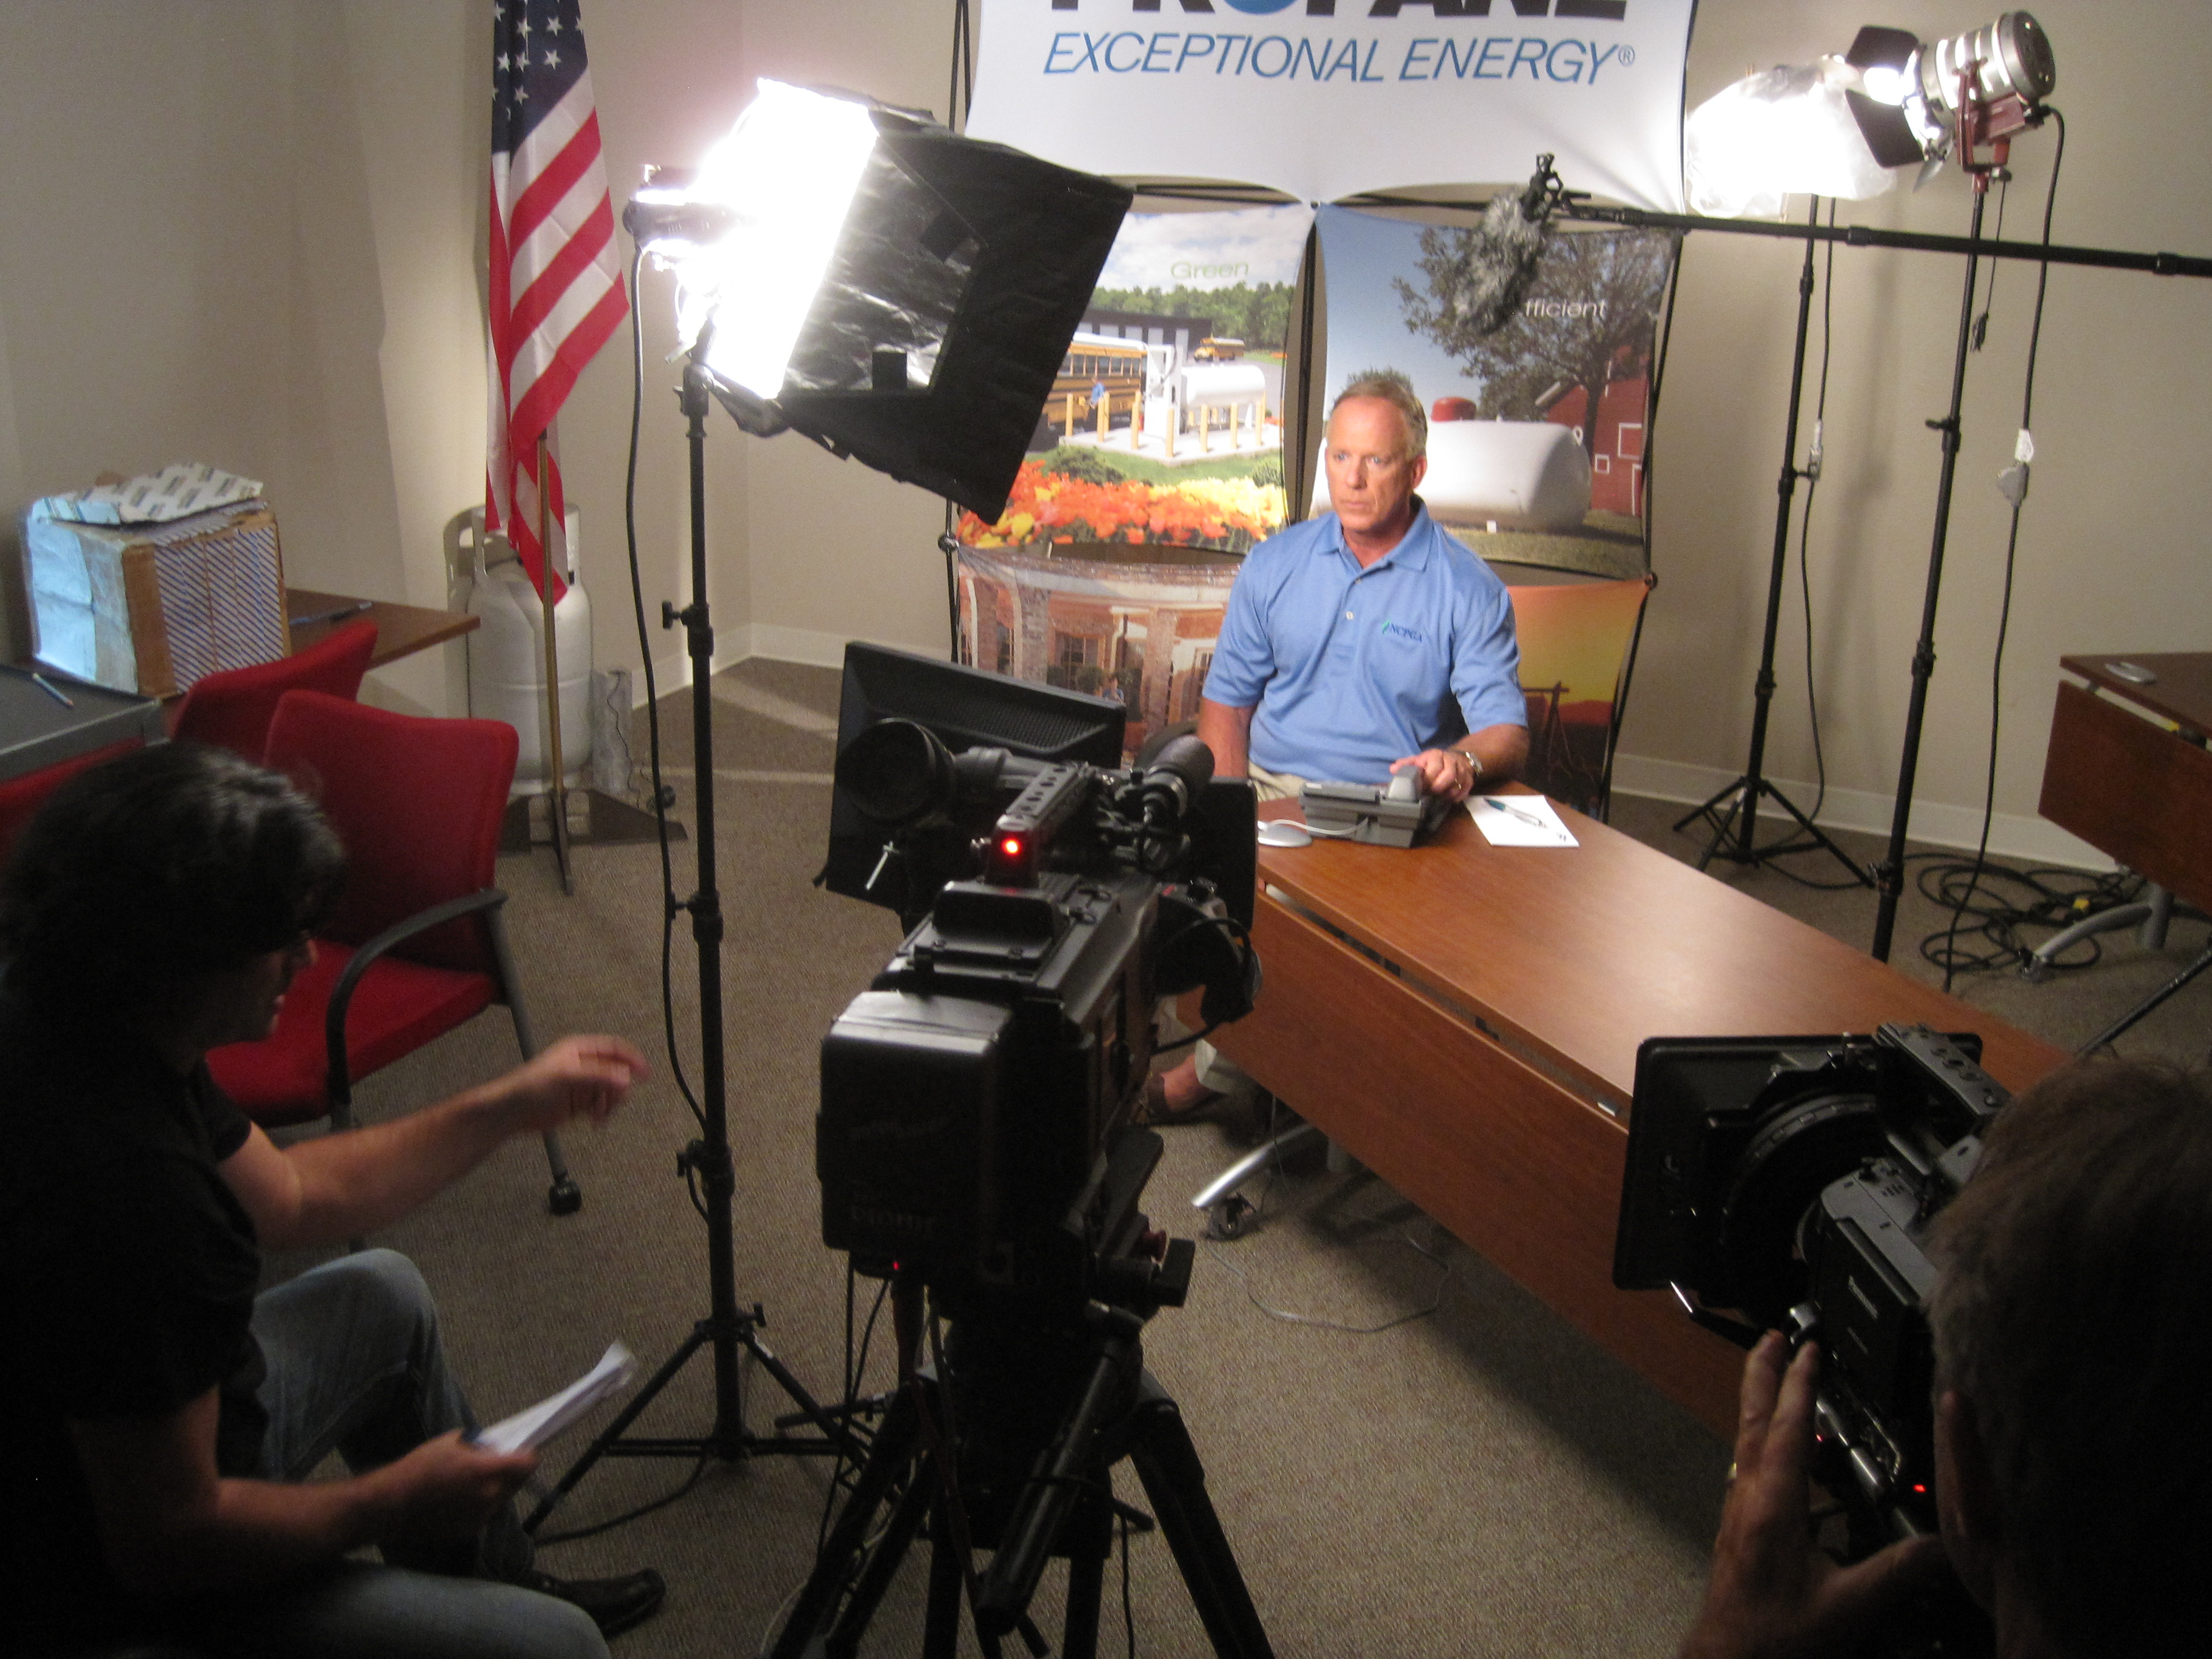
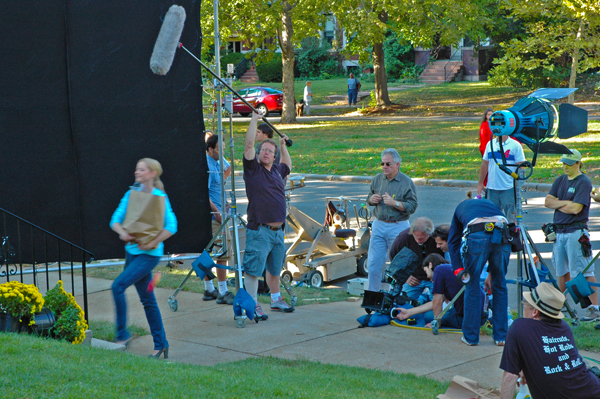
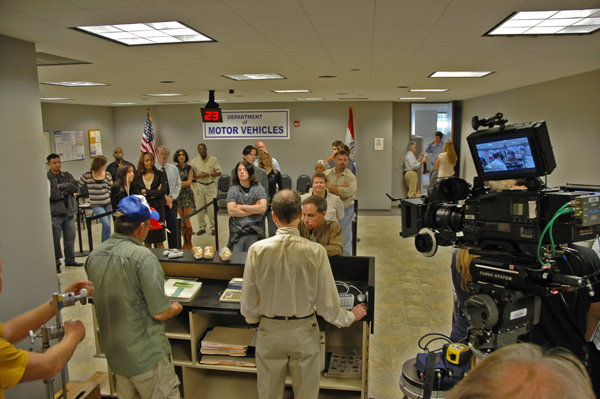
That experience matters even more when productions take place in real working environments rather than controlled studio sets. Offices, conference rooms, warehouses, schools, medical spaces, manufacturing facilities, retail environments, and active job sites all present unique challenges. Lighting may be uneven. Sound may be inconsistent. Schedules may be tight. Operations may still need to continue during the shoot.
An experienced production team understands how to work within those conditions while still delivering strong results. They know how to shape a room, simplify a setup, minimize disruptions, and gather the right footage efficiently. Most importantly, they know how to think ahead to the edit while they are still on location.
Building a Better Business Interview
A successful interview is not accidental. It is the result of planning, production discipline, and knowing how to guide both the subject and the environment.
Start With the Communication Goal
The first step is understanding the purpose of the piece. Is the video meant to drive leads, strengthen trust, explain services, attract talent, support sales, or document a story? The answer affects every production choice that follows, from interview questions to visual style.
Without a clear objective, interviews can sound generic and the production can drift away from the real business need.
Choose the Right Voice
The best on-camera subject is not always the most senior person in the organization. Sometimes it is a founder or executive. Sometimes it is a customer, project manager, technician, or long-time employee. The goal is to feature the person best equipped to speak clearly and credibly about the subject.
The strongest interview subjects are not necessarily performers. They are people with experience, clarity, and authenticity.
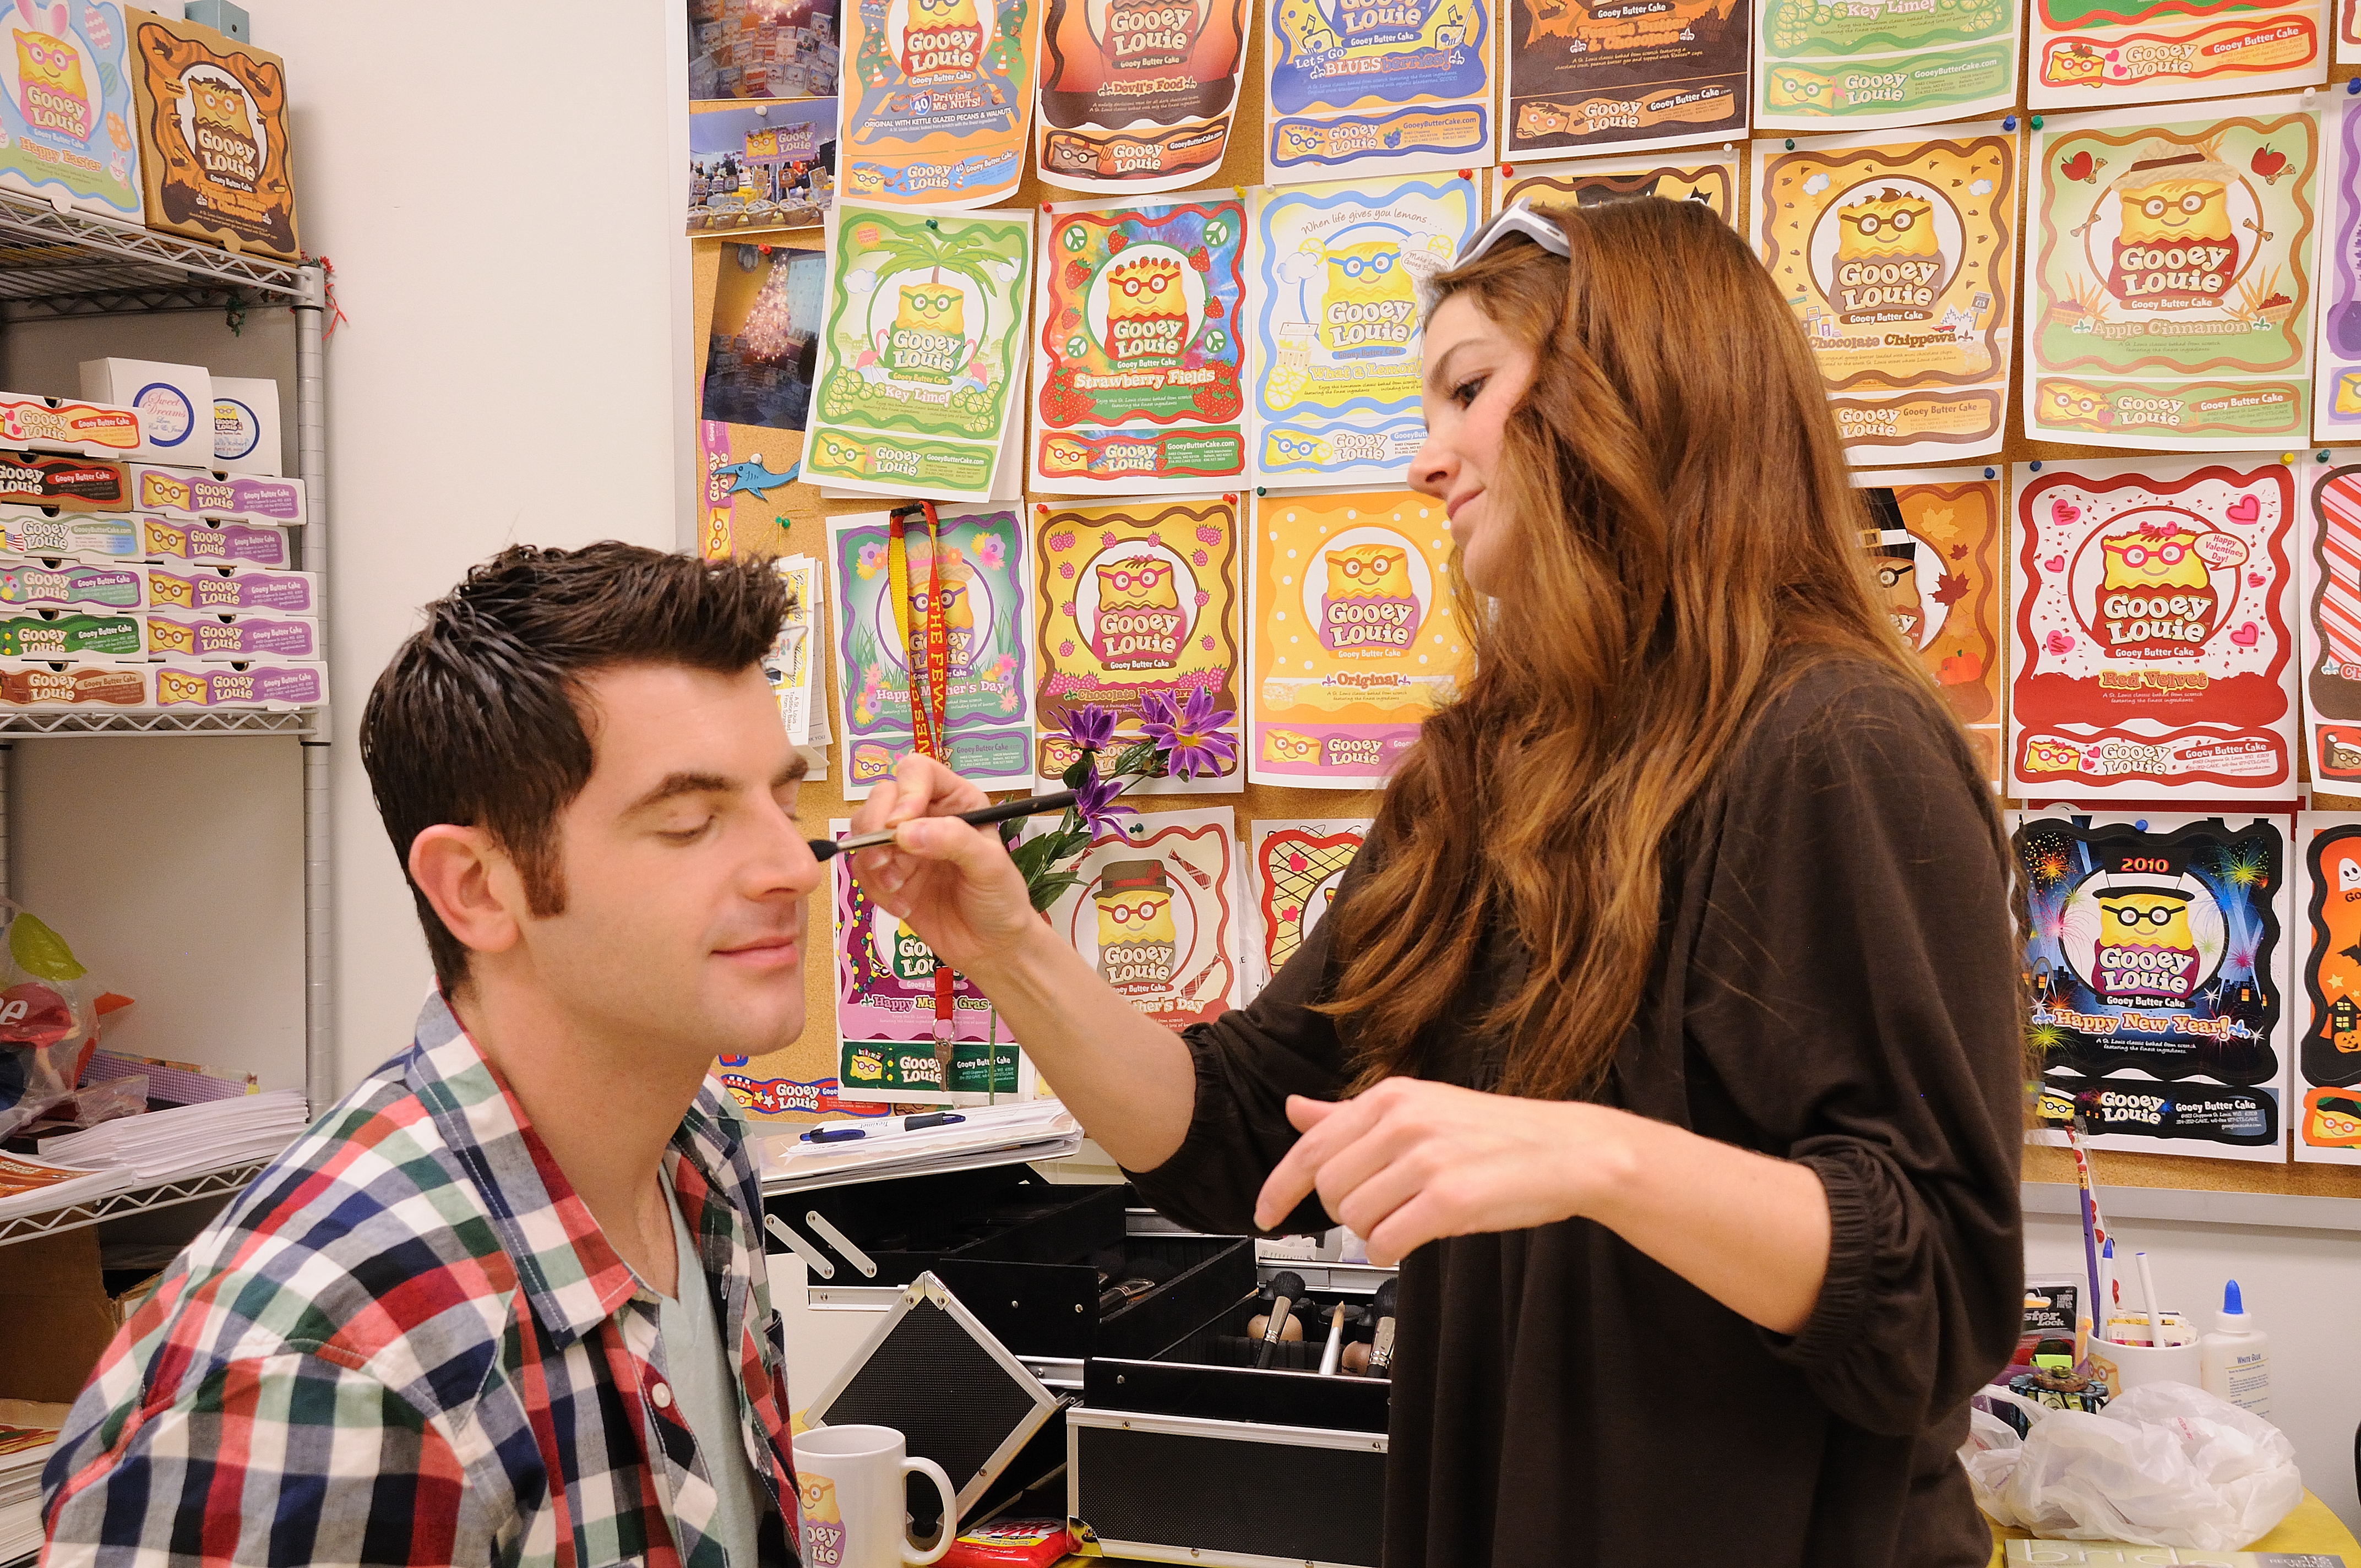
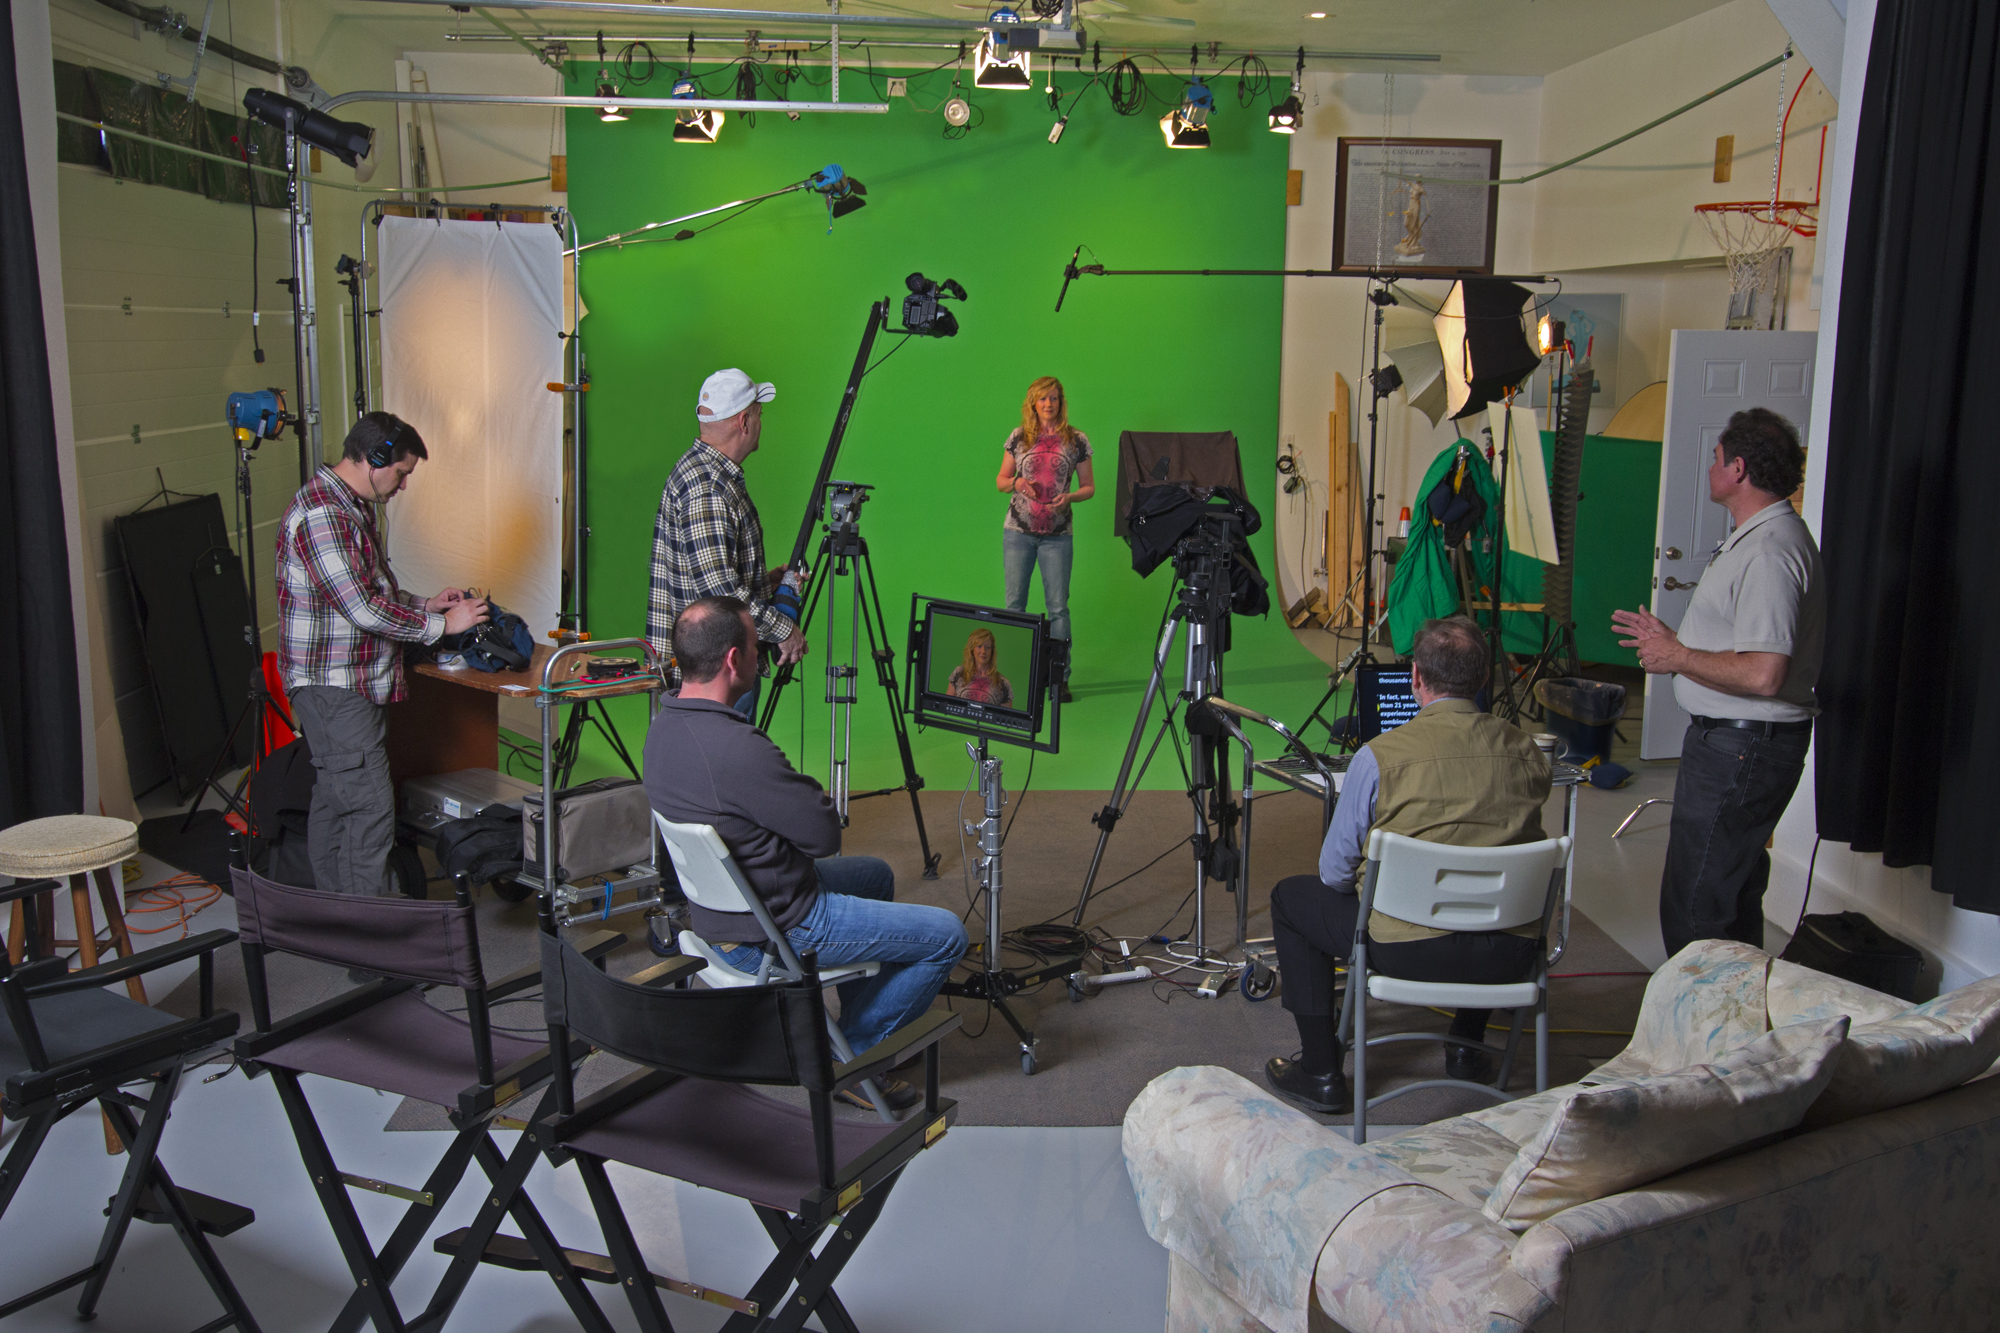
Create a Comfortable On-Camera Setting
People speak more naturally when the production environment is organized and calm. Camera placement, lighting, background composition, audio setup, and crew demeanor all influence how confident the subject feels. A good team knows how to create a setting that looks professional without making the subject feel overwhelmed.
Ask Questions That Produce Usable Answers
Strong interviews depend on strong prompting. Questions must encourage natural, complete, self-contained responses that can work in the final edit. This requires more than handing someone a list of prompts. It requires listening carefully, following up when needed, and guiding the conversation toward clear and useful statements.
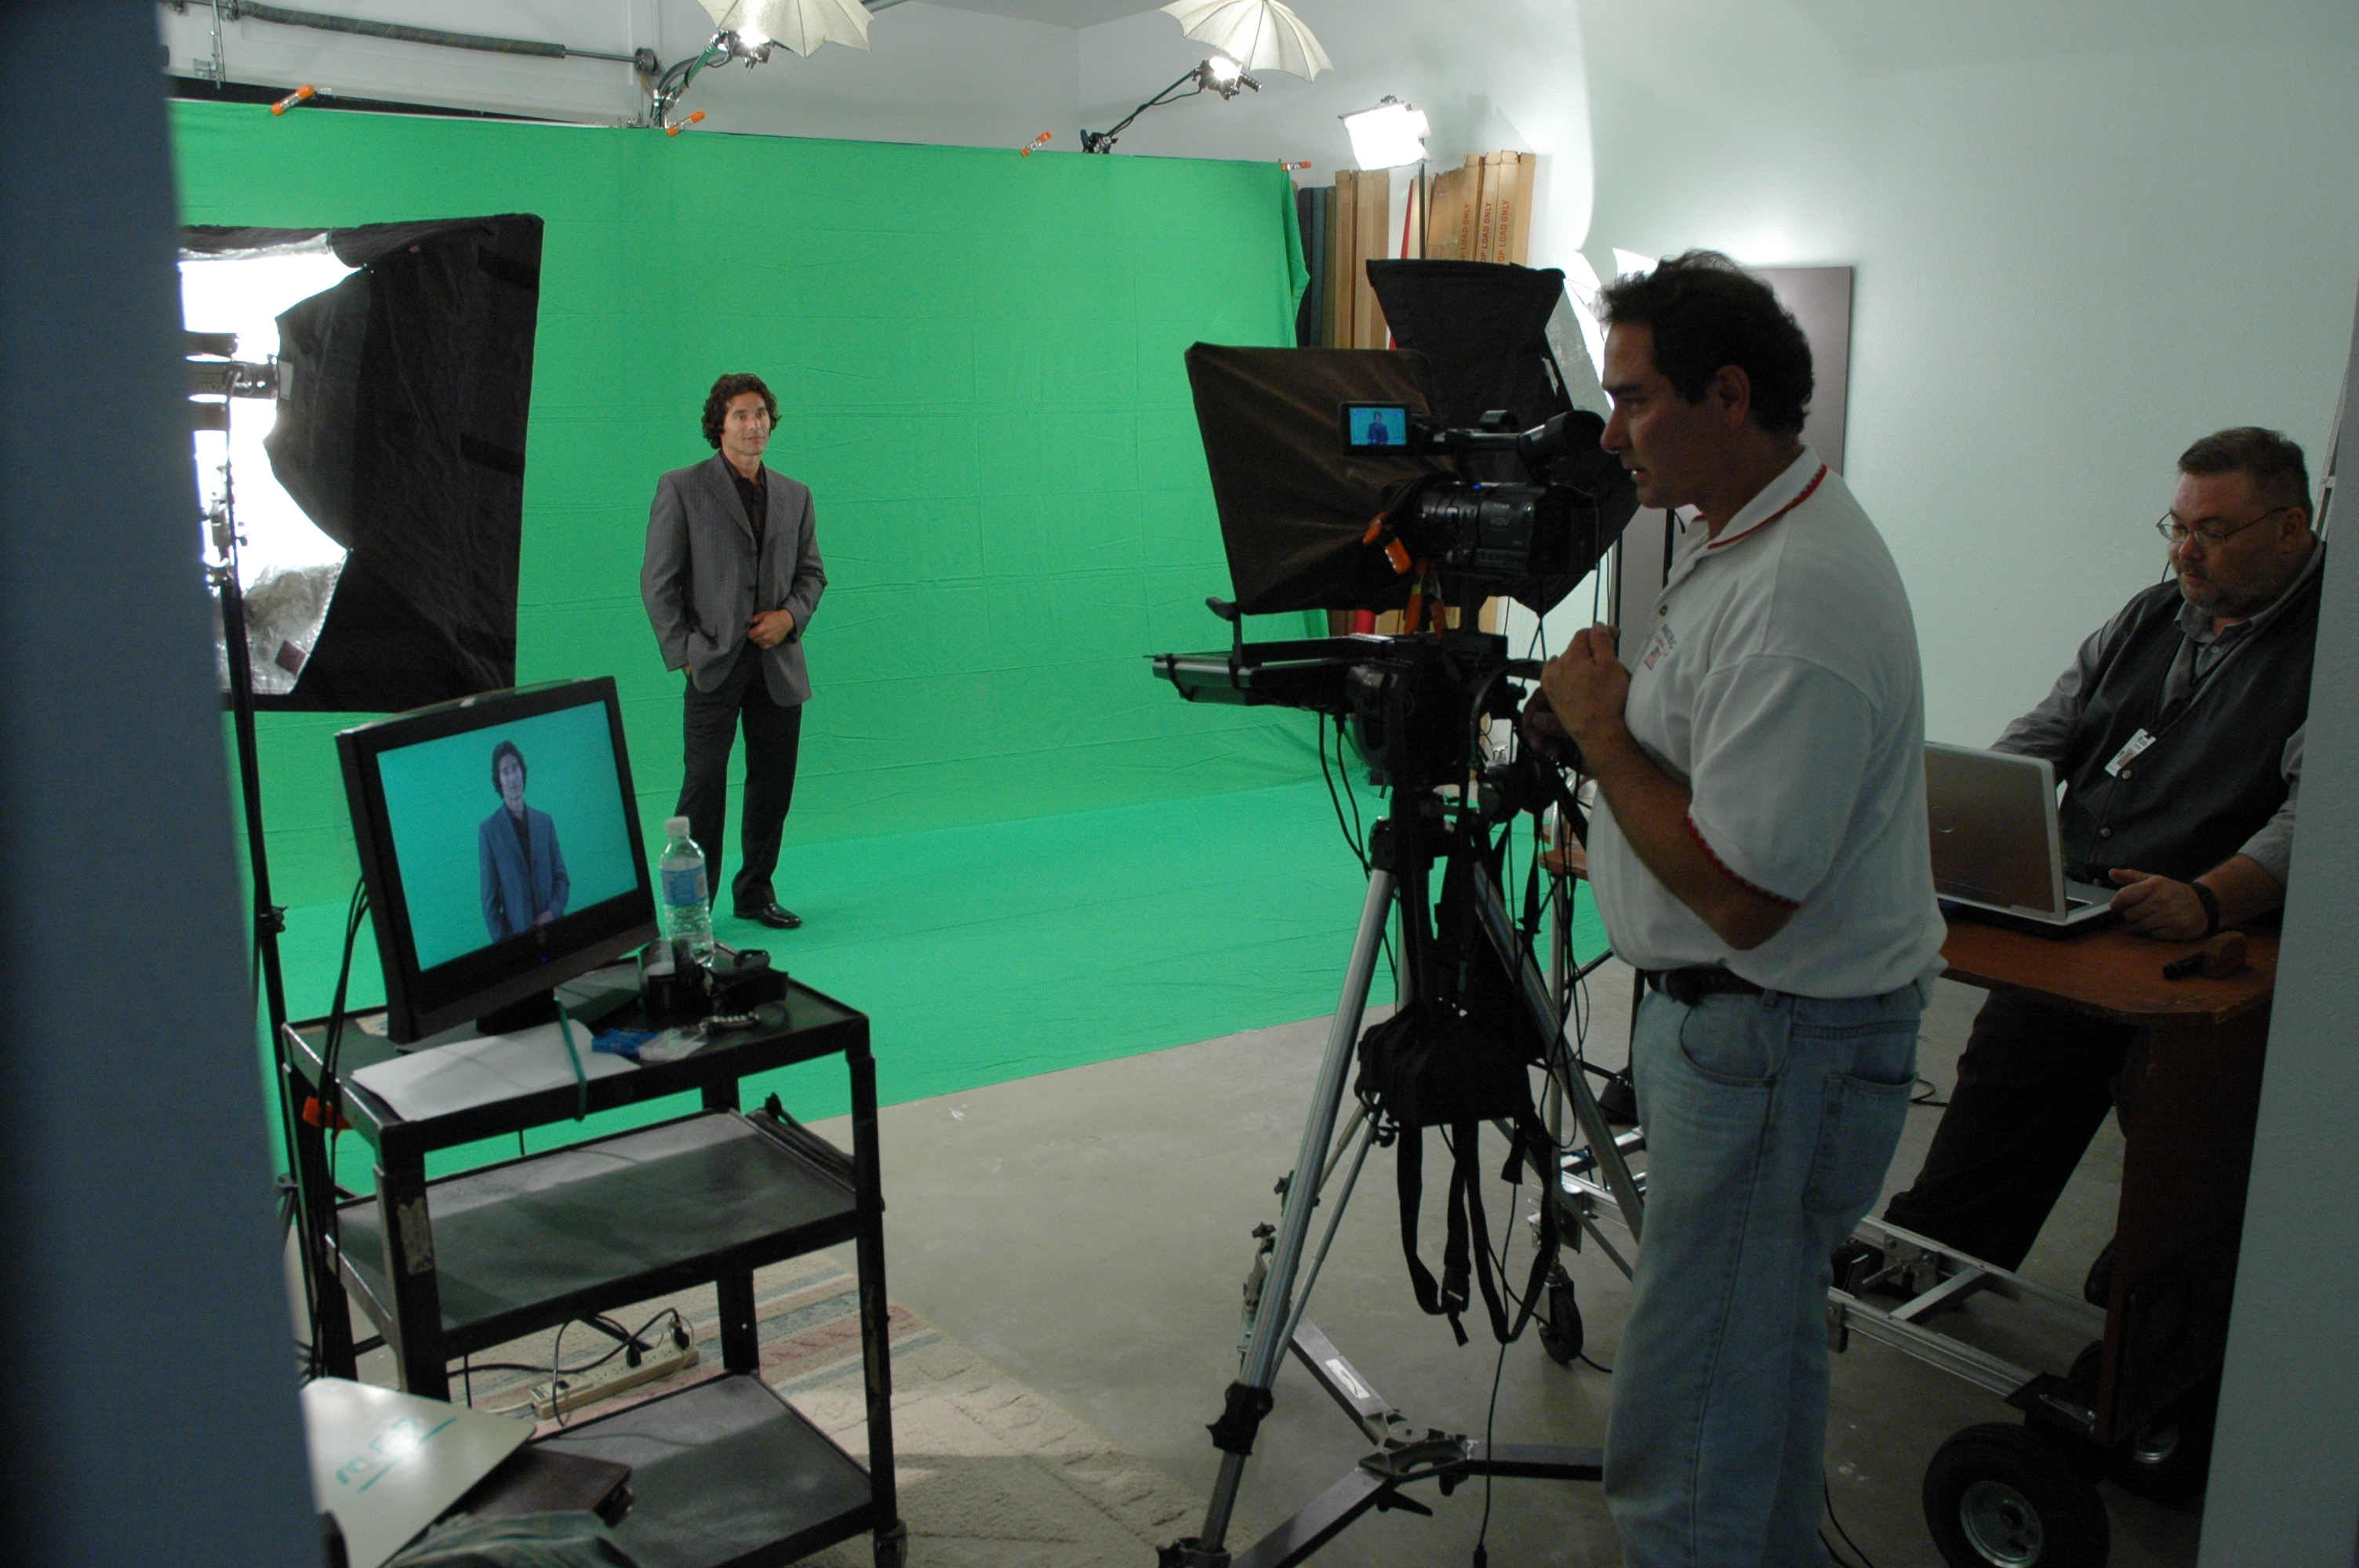
Shoot With the Edit in Mind
Professionals do not only record what is happening in the room. They capture what the editor will need later. That includes alternate framing when appropriate, audio support, room tone, reaction moments, and enough visual flexibility to shape the final sequence with confidence.
What Great B-Roll Looks Like
Strong b-roll is deliberate. It is gathered with purpose, not as an afterthought.
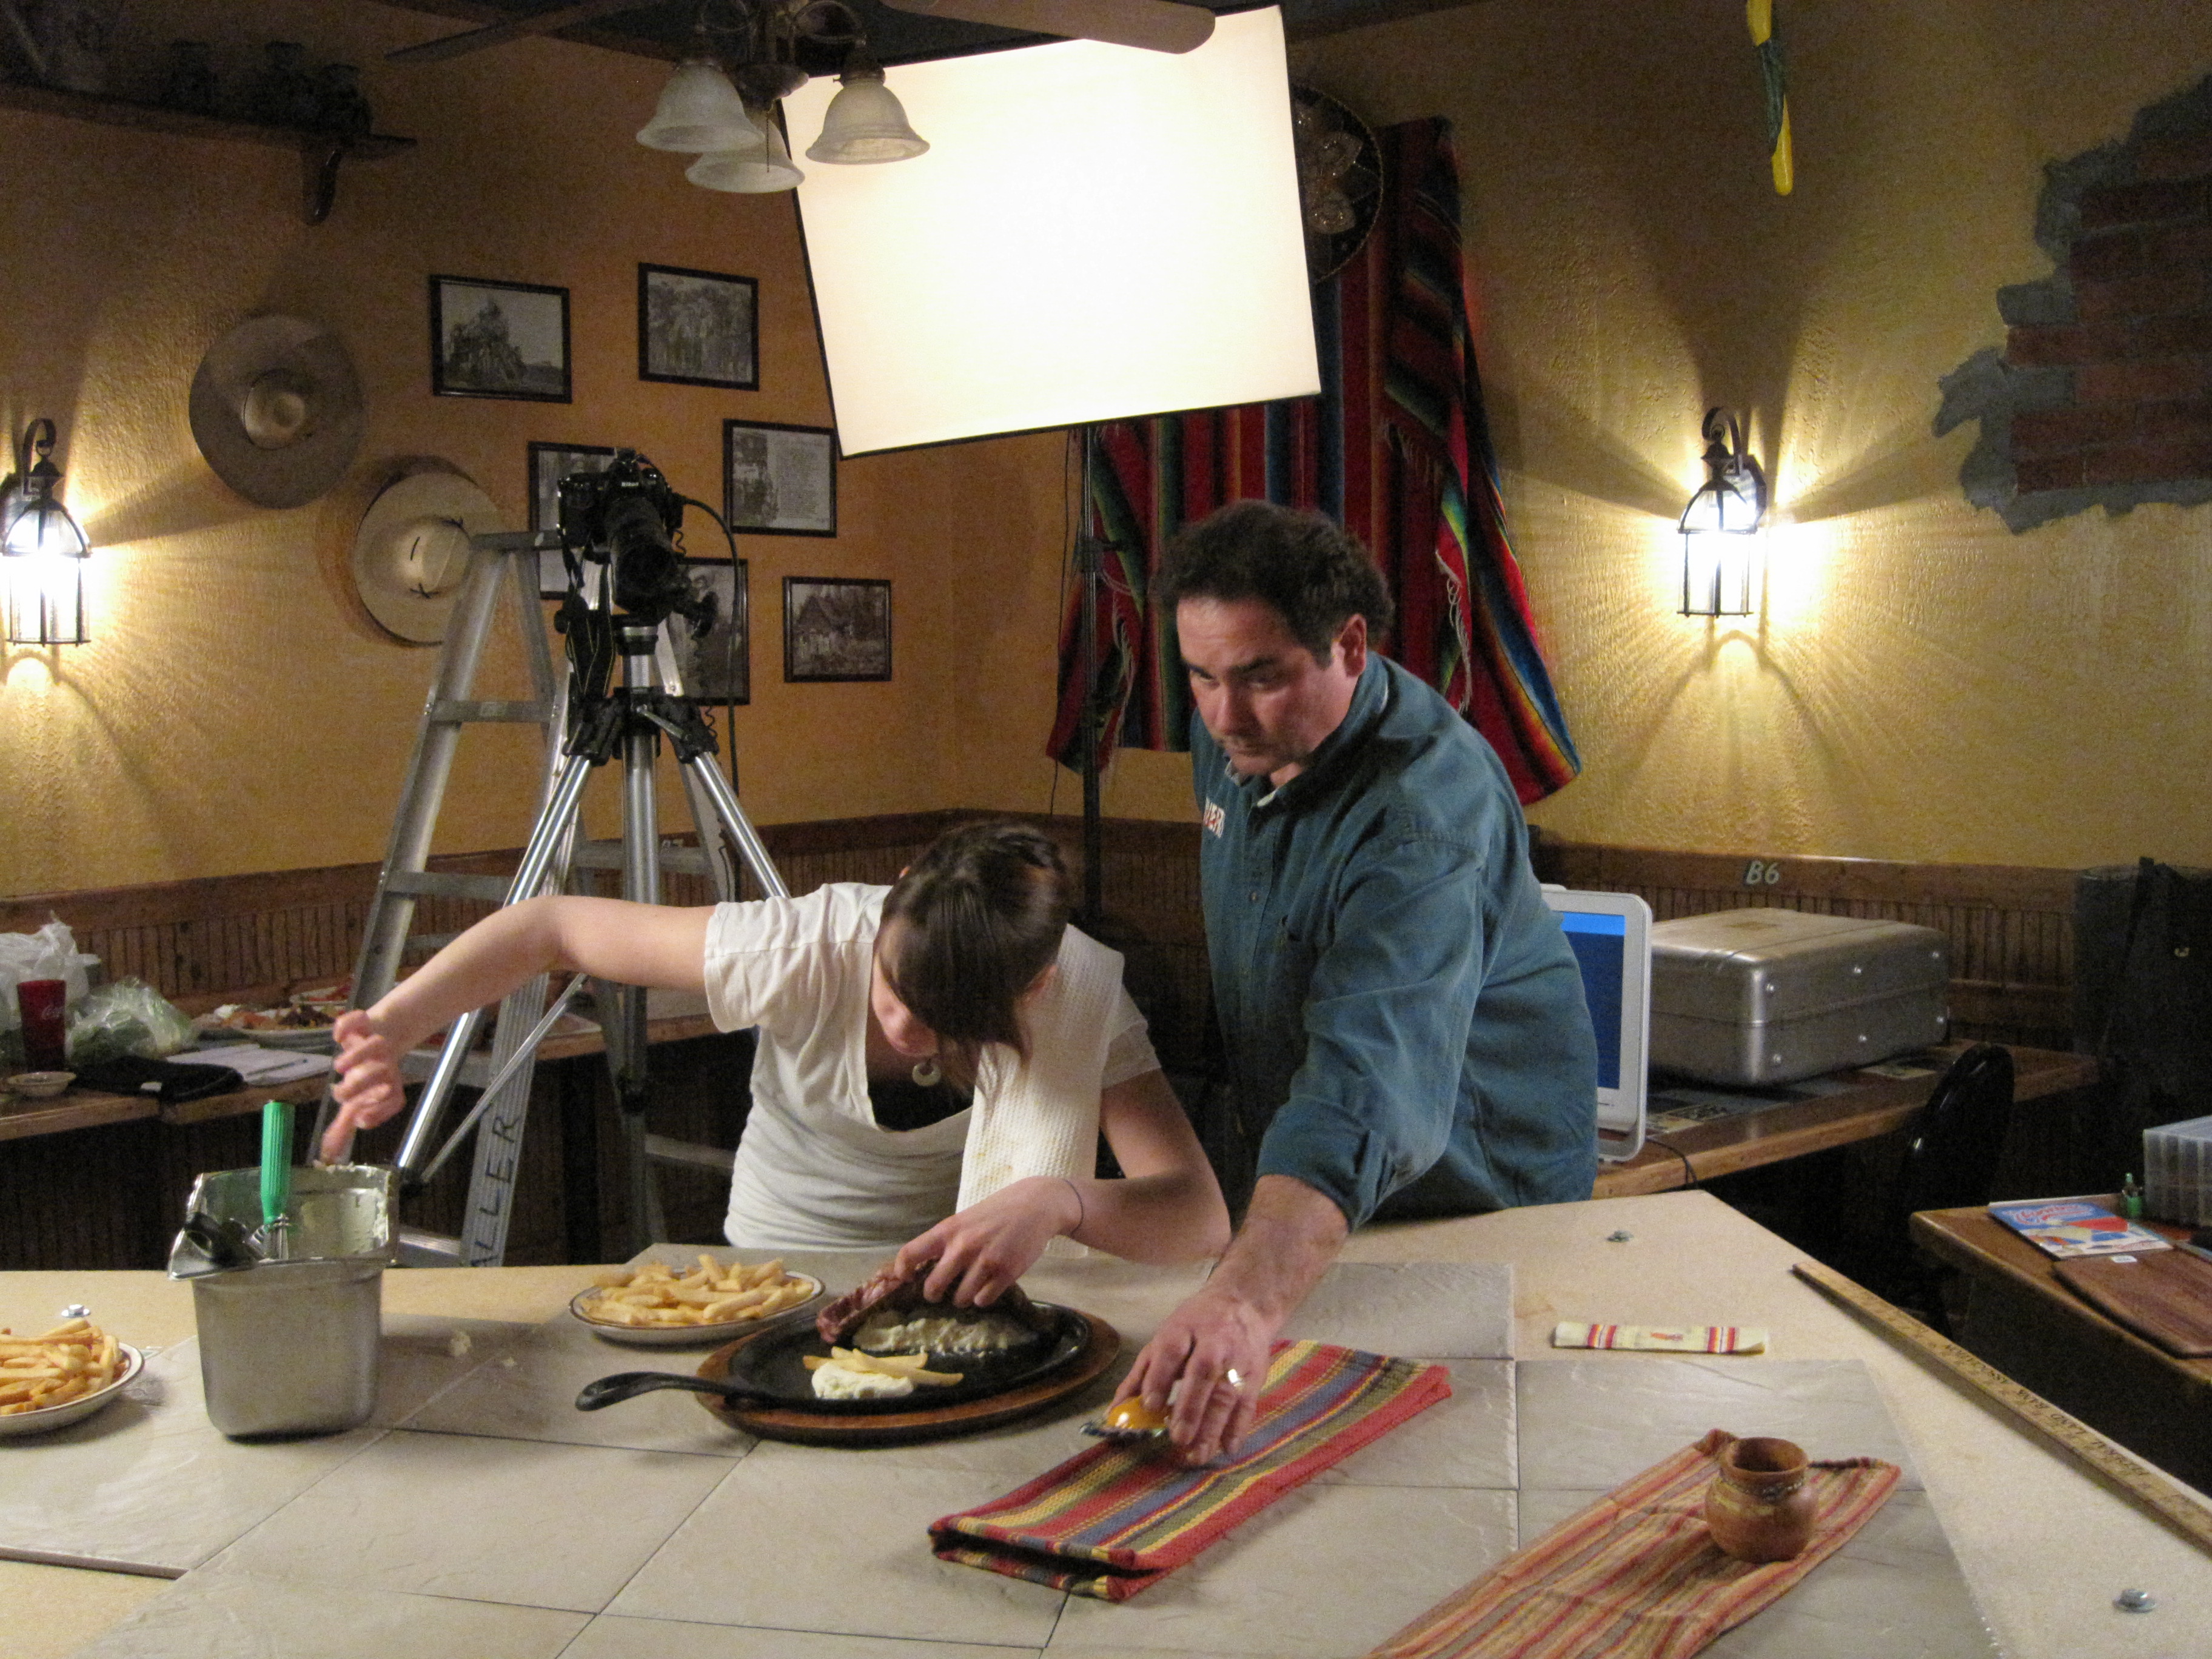
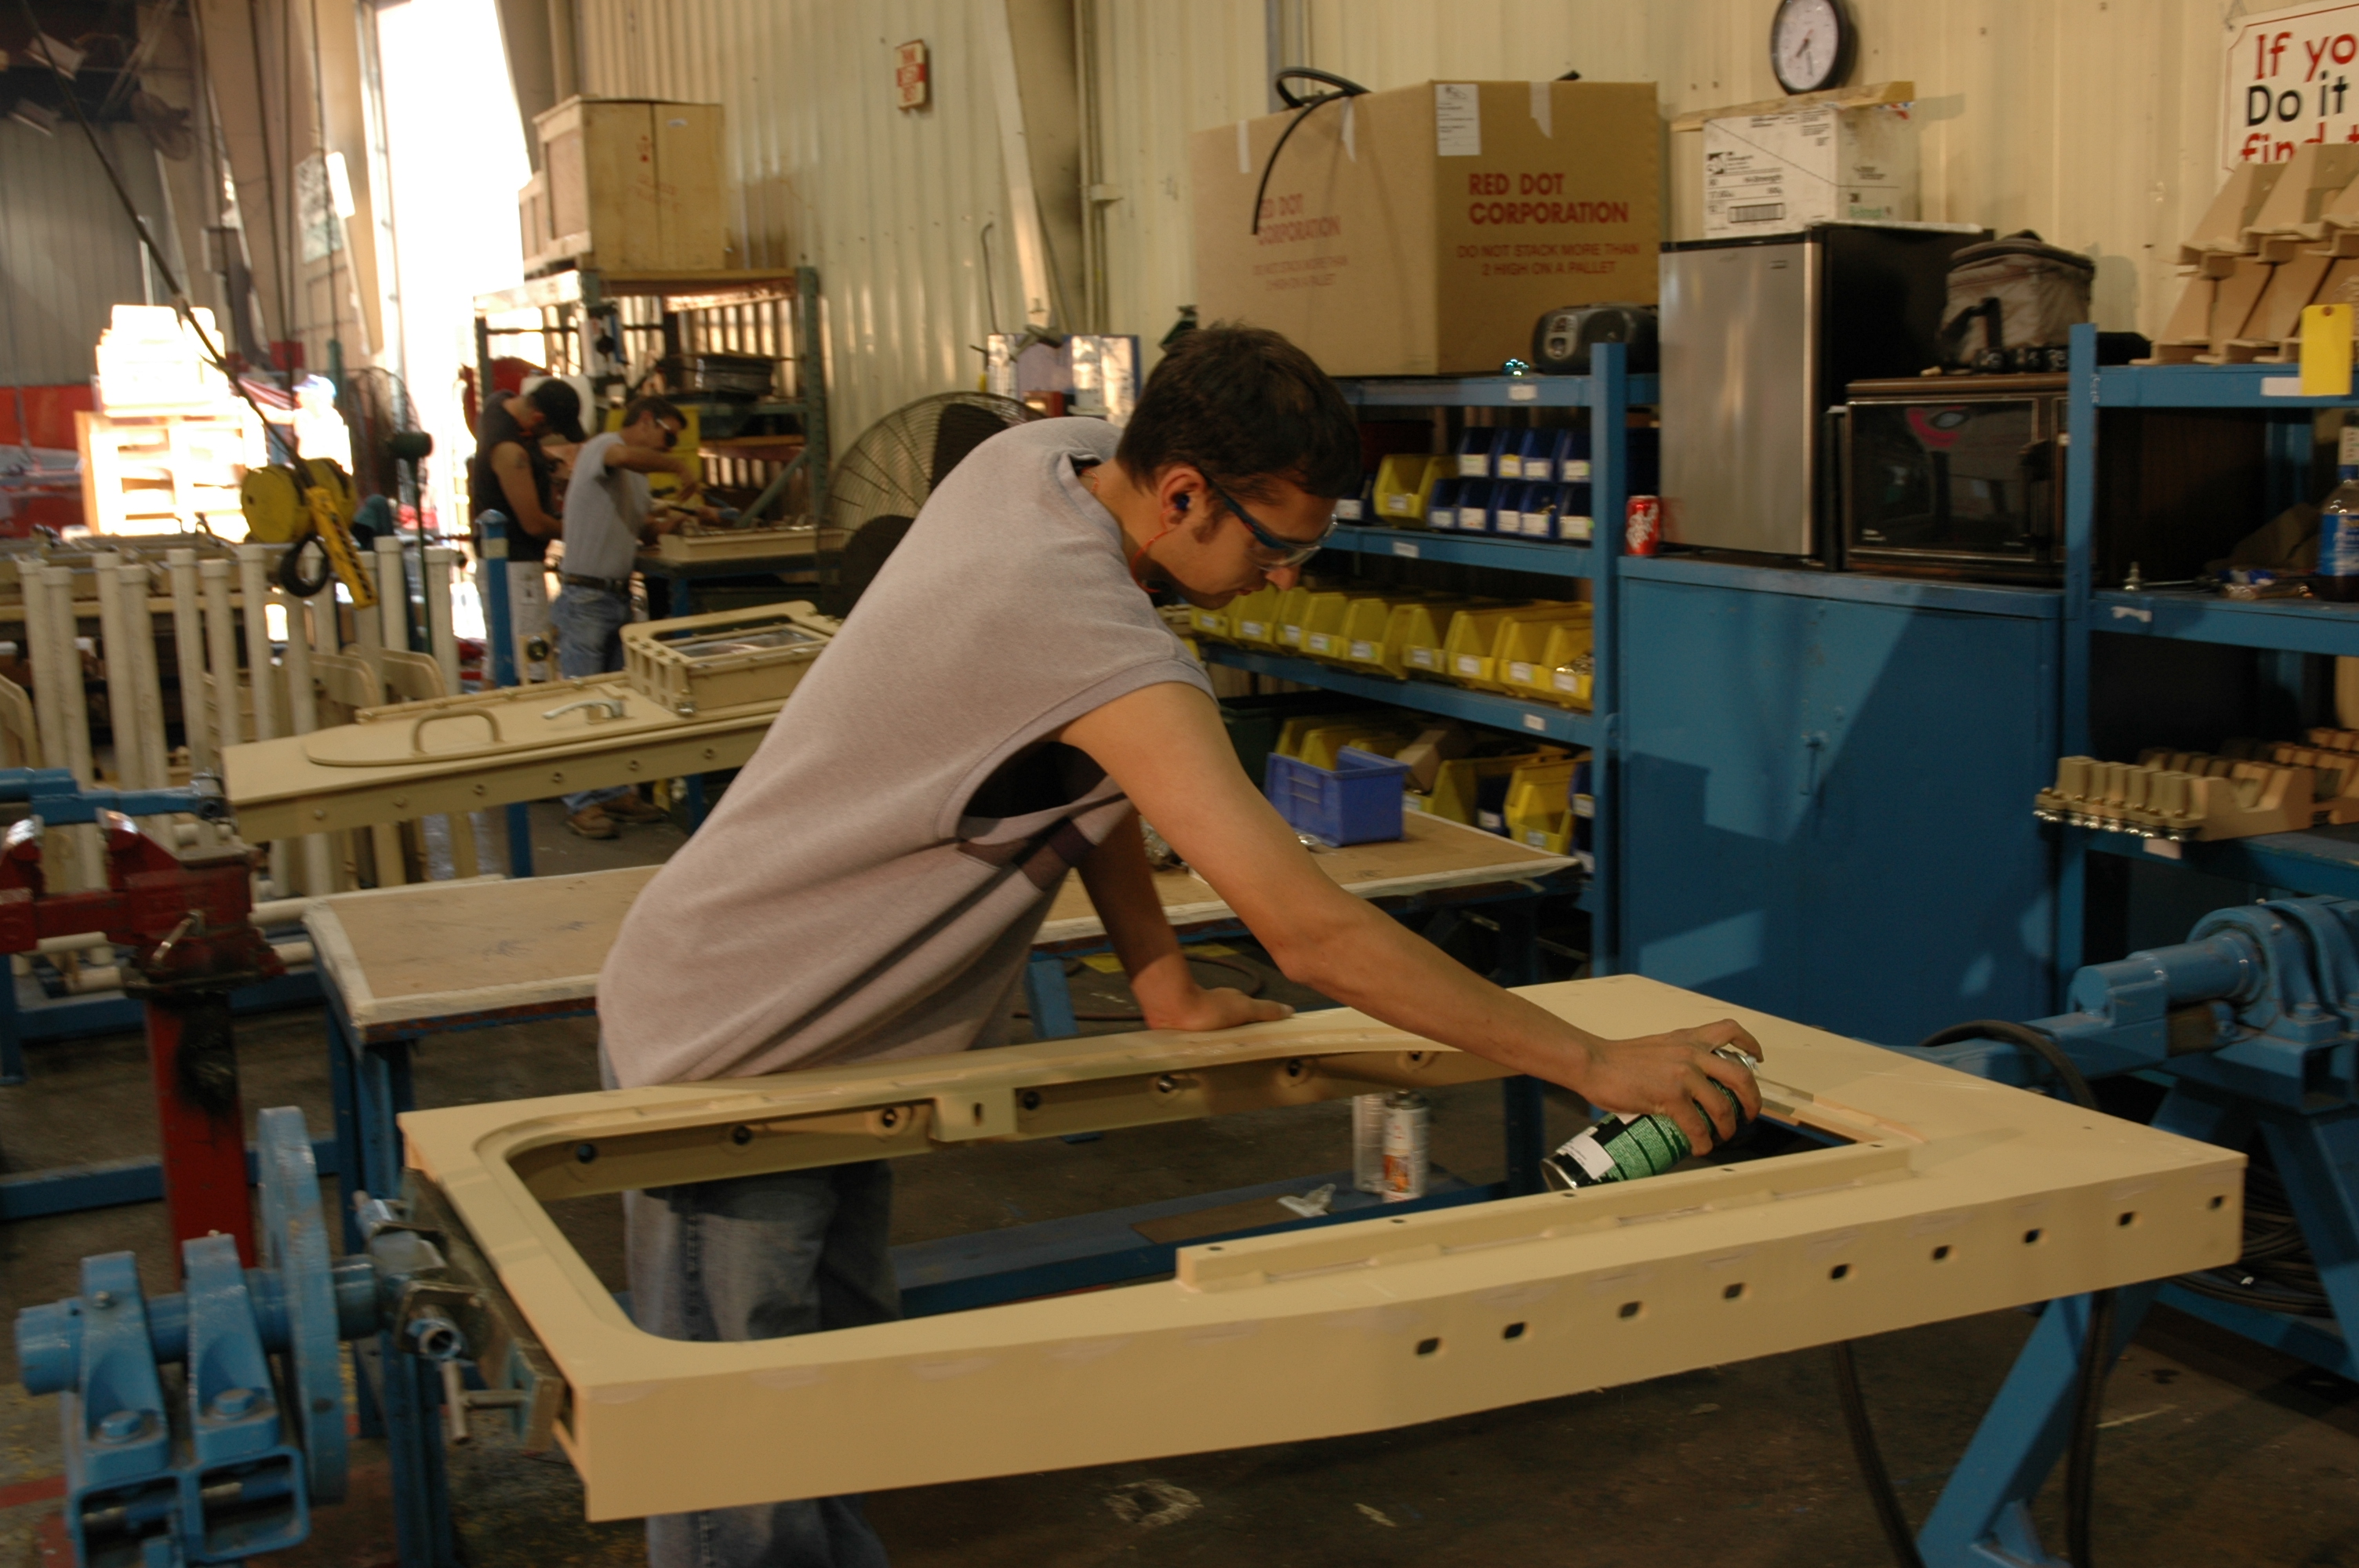
That means understanding what visuals will make the message stronger. A company talking about precision should show precision. A company talking about culture should show people and environment. A business emphasizing customer care should show real interaction and workflow. A facility-focused piece should capture both wide establishing views and detailed process shots.
Experienced b-roll specialists look for layers. They capture broad environmental footage, medium action, and tight detail. They look for movement, process, human interaction, tools, surfaces, brand identifiers, and real moments that give the edit texture and authority.
That variety matters. It makes the finished piece more dynamic, gives editors more flexibility, and supports repurposing across multiple final assets.
Common Uses for Interview and B-Roll Productions
This style of production works across many industries because it is adaptable and efficient.
Professional service firms use interview-driven videos to communicate expertise and build trust.
Manufacturers use them to show process, operations, quality control, and company capability.
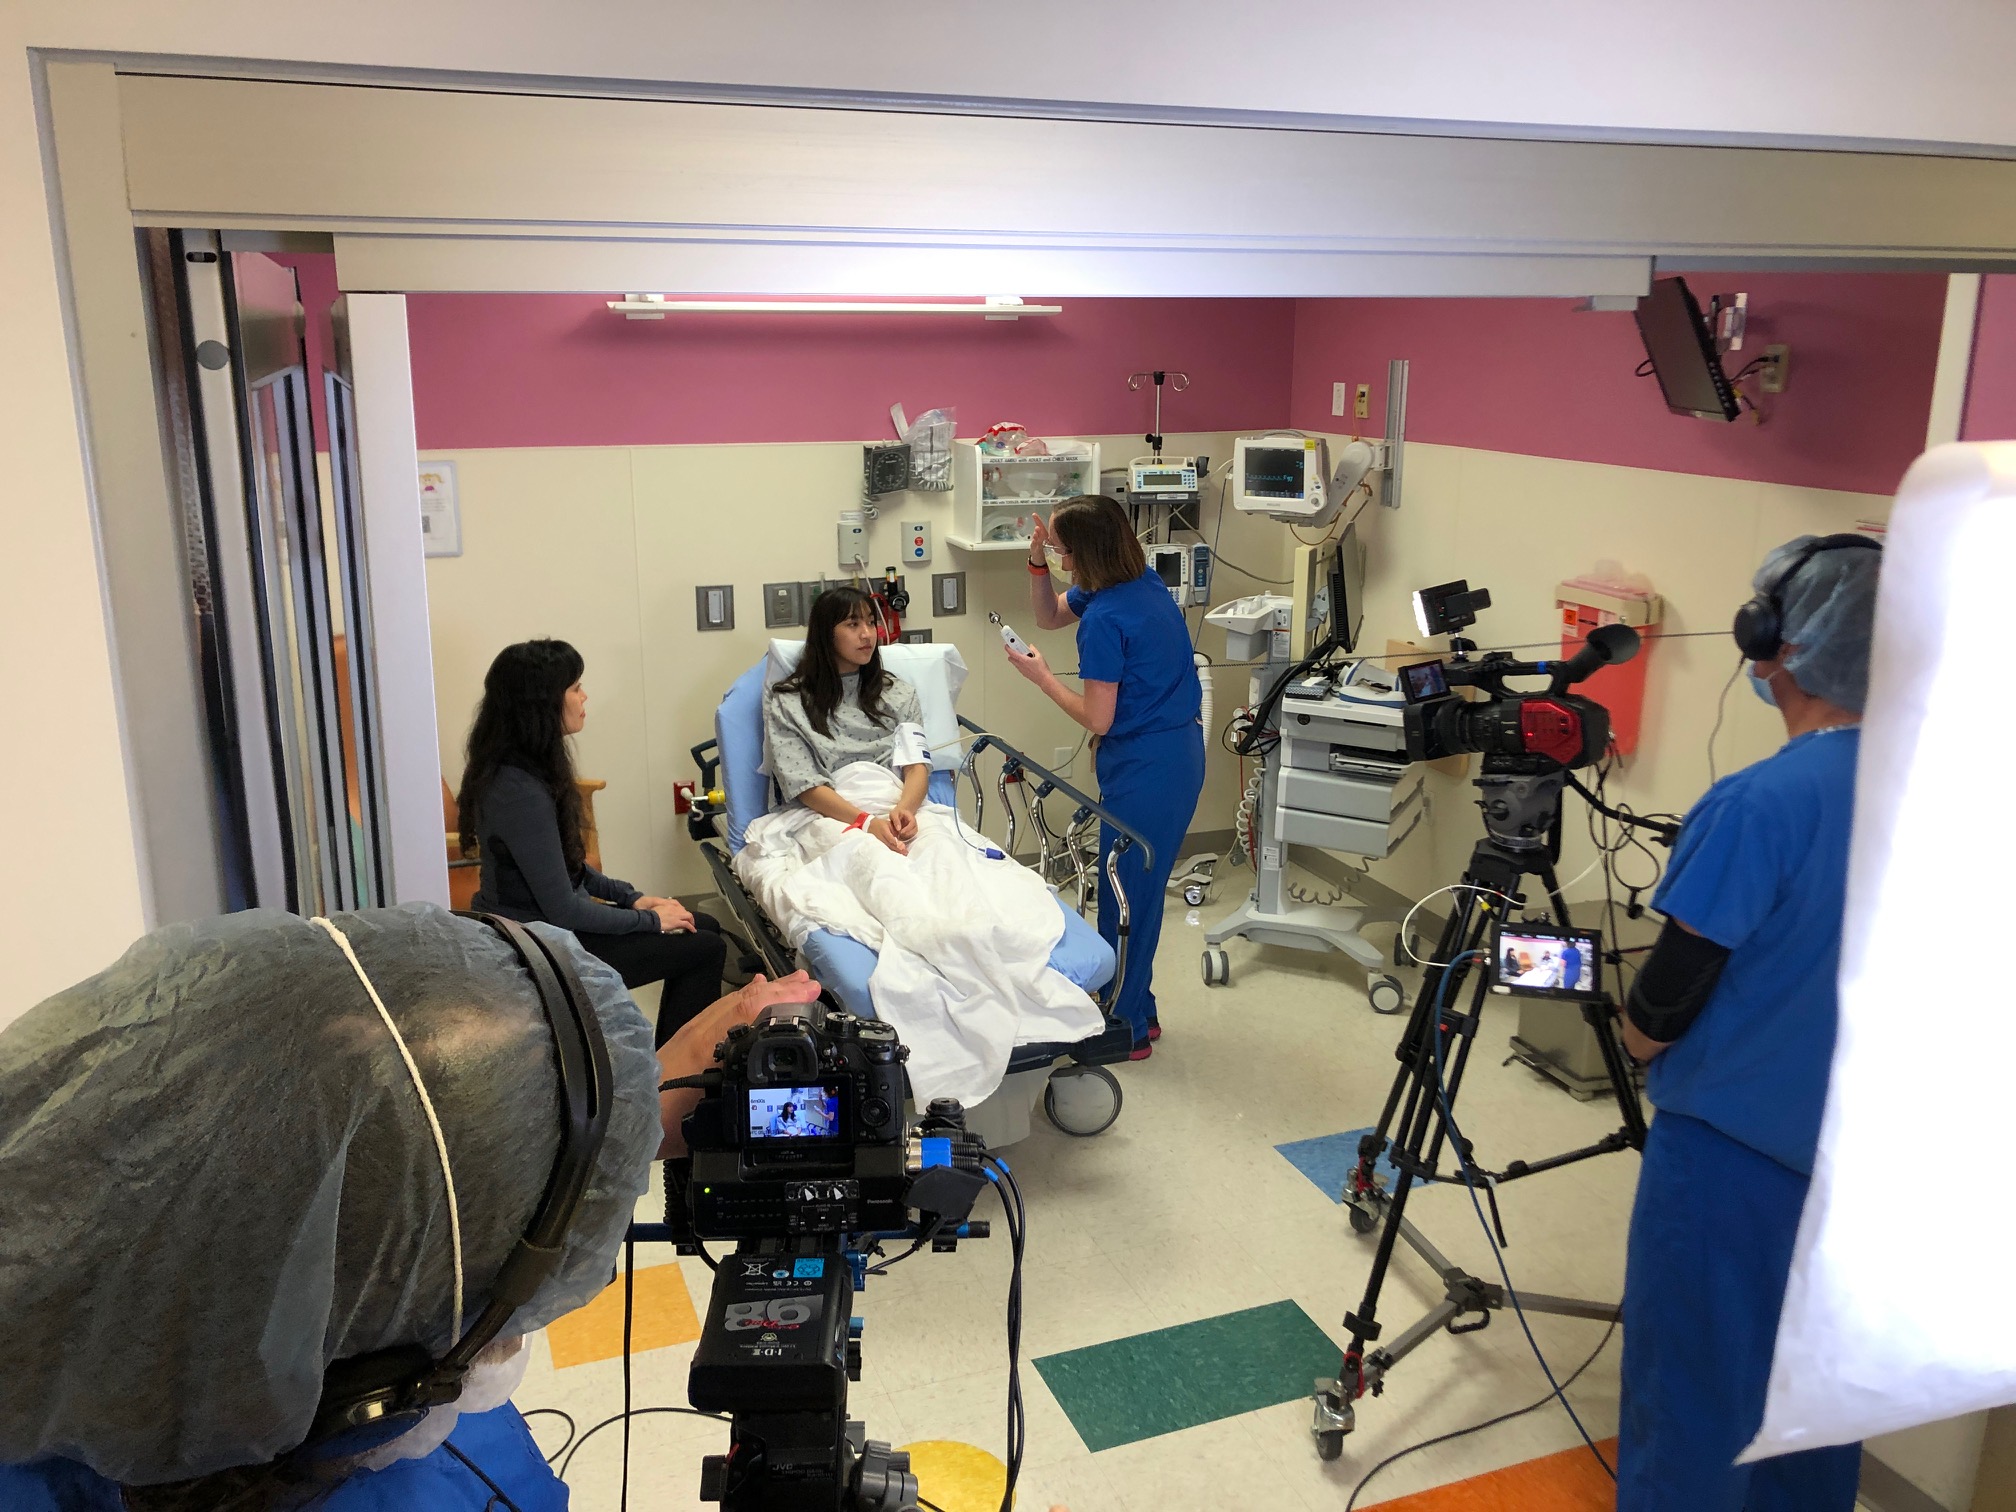
Healthcare organizations use them to explain patient care, introduce leadership, and support recruitment.
Schools, colleges, and nonprofits use them to tell mission-driven stories, attract support, and communicate impact.
Construction, real estate, and development firms use interviews and supporting visuals to show projects, people, scale, and momentum.
Marketing agencies often rely on this format because one well-planned shoot can generate a wide range of deliverables for a client.
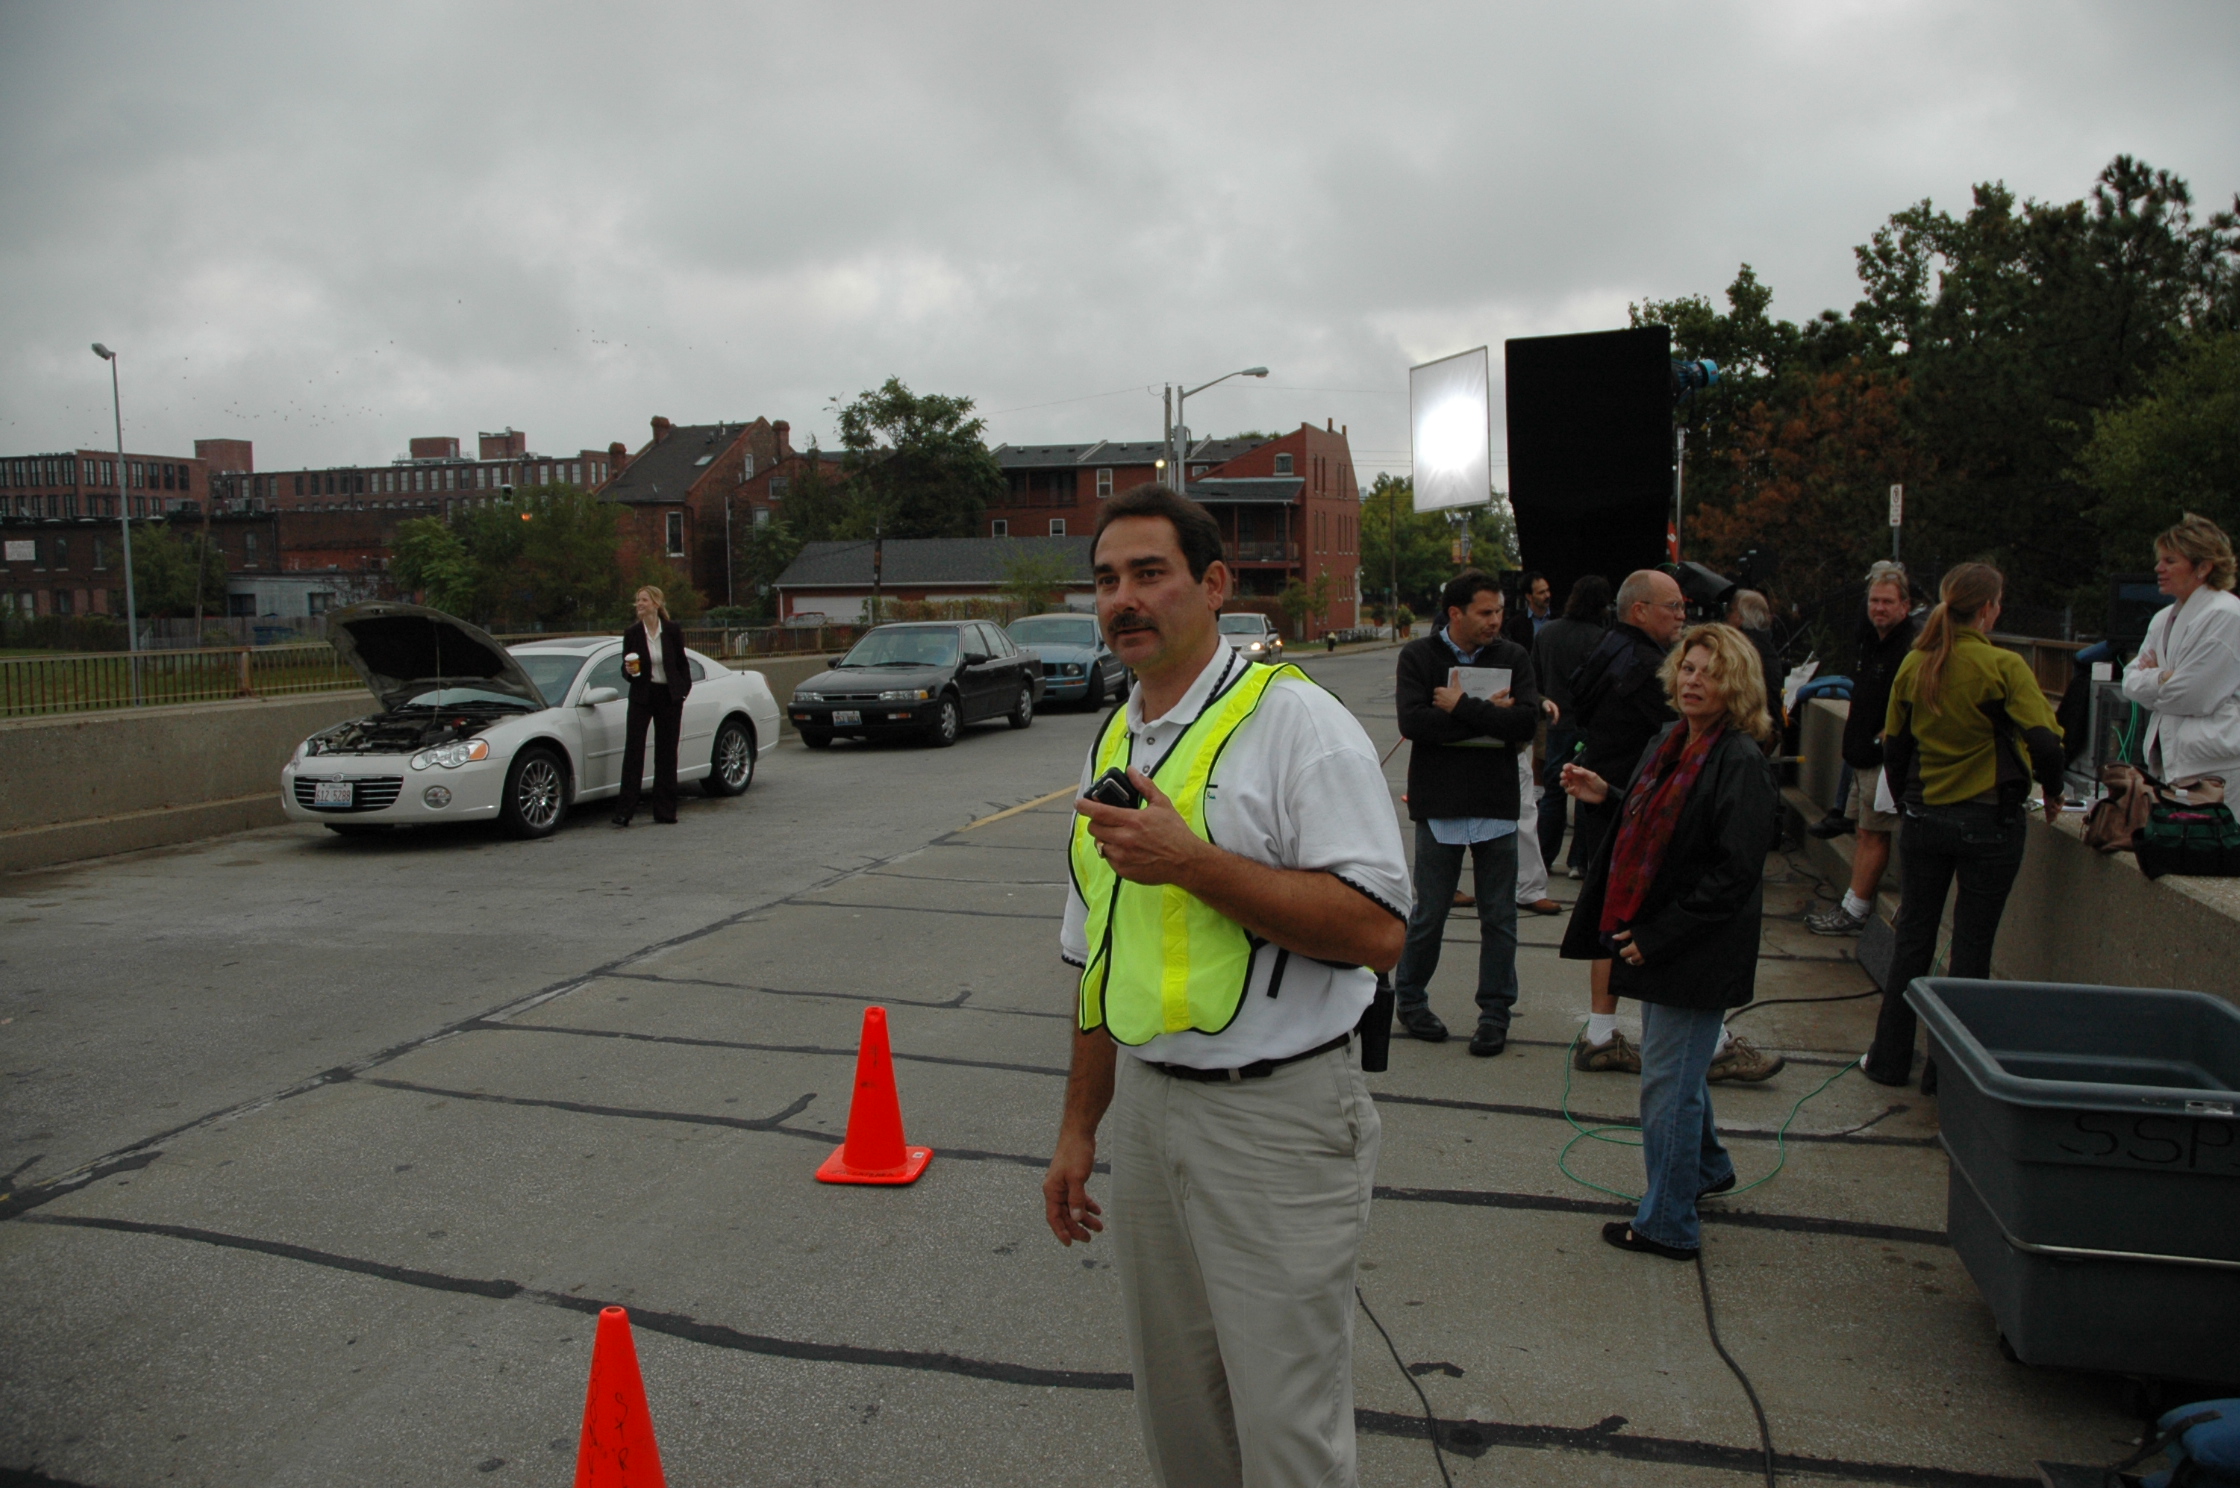
The Role of Location in Strong Productions
In many business productions, location contributes as much to the final look as the interview itself. The right setting adds credibility, visual character, and contextual depth. But location decisions should be based on more than appearance alone.
An experienced team evaluates locations for sound, light, access, room size, visual distractions, power availability, scheduling demands, and how well the space supports the intended message. A conference room, executive office, production floor, lab, rooftop, warehouse, storefront, or exterior entrance can all play an important role when chosen thoughtfully.
That is why location scouting remains such an important part of professional media planning. It helps identify the spaces that will look strong on camera while also allowing the crew to work efficiently and avoid avoidable problems during production.
Why Audio Quality Is Non-Negotiable
Many clients understandably focus first on the visuals, but interviews depend just as heavily on clean sound. A beautifully lit interview can still fail if the audio is noisy, thin, hollow, or inconsistent.
Professional interview production requires careful attention to microphones, ambient sound, room acoustics, monitoring, and environmental control. Office hum, HVAC systems, foot traffic, machinery, and outside noise all have the potential to undermine an otherwise strong shoot.
For interview-based content, audio quality is part of brand quality. If the subject is hard to hear or unpleasant to listen to, the message loses authority.
How Drone and Advanced Capture Services Expand Possibilities
Today’s most effective production companies offer more than traditional ground-based video coverage. When appropriate, drone services can add both visual impact and practical value.
Aerial footage can establish property scale, location context, access, and architectural presence. Specialized FPV drones can move dynamically through interior spaces to create immersive footage that would be difficult to capture any other way. For certain facilities, showrooms, industrial spaces, and branded environments, indoor FPV flights can add a memorable and highly modern visual layer to the final production.
Other specialized drone services can also support business and industrial needs in different ways. Infrared thermal imaging can assist with visual analysis and inspection-related projects. Orthomosaics can provide accurate site mapping and large-area overhead views. LiDAR can support advanced documentation and spatial data collection where precision is important.
When these services are integrated into a broader interview and b-roll production, the result is a much more complete media package.
Repurposing Is Where Production Efficiency Increases
One of the biggest advantages of a well-planned interview and b-roll shoot is how much usable content can come from it. Businesses that think strategically about production are rarely creating only one final video. They are building a media library.
A single shoot can support a main brand or campaign video, short social edits, executive clips, recruiting content, customer stories, trade show visuals, website media, internal communications, and still frames for marketing collateral.
That is why experienced planning matters so much. If the team understands the repurposing goals before the shoot, they can capture a wider variety of framing, subject matter, motion, and visual detail. That gives the business more flexibility later and extends the value of the production investment.
What Businesses Should Look For in a Production Partner
Choosing the right production company requires more than reviewing a demo reel. Decision makers should look for a team that understands both production craft and business communication.
They should be able to make interview subjects comfortable.
They should know how to light real spaces and record clean sound.
They should think strategically about b-roll, not just gather random footage.
They should understand how to work efficiently within active business environments.
They should know how to produce assets that can serve multiple channels and long-term brand use.
They should be able to support photography, video, drone work, editing, and post-production within one coordinated process.
The strongest production partner is not simply a crew with cameras. It is a team that understands story structure, brand presentation, and how to make each shoot day more productive.
Experience Still Makes the Difference
Technology is more available than ever, but access to cameras and software does not replace experience. The quality of interview production still depends on judgment, preparation, adaptability, and editorial thinking. It takes experience to know how to frame a subject, shape a location, ask better questions, anticipate visual needs, and gather footage that will support a strong final edit.
That experience becomes especially important when representing a business publicly. Organizations need media that reflects their professionalism, supports their goals, and can be used confidently across marketing and communications channels.
Final Thoughts
Video interviews and b-roll remain one of the smartest and most versatile content structures available to modern businesses. Interviews deliver the message. B-roll gives that message life, context, and momentum. Together, they allow organizations to communicate with more clarity, authority, and visual strength.
For businesses, agencies, and organizations in the St. Louis area, working with a team that understands both sides of that equation can lead to stronger productions and better long-term results.
Since 1982, St Louis Video Studio has worked with many businesses, marketing firms, and creative agencies in the St. Louis area for their marketing photography and video. St Louis Video Studio is a full-service professional commercial photography and video production company with the right equipment and creative crew service experience for successful image acquisition. We offer full-service studio and location video and photography, as well as editing, post-production, and licensed drone services. St Louis Video Studio can customize productions for diverse media requirements, and repurposing your photography and video branding to gain more traction is one of our specialties. We are well-versed in all file types, media styles, and accompanying software, and we use the latest Artificial Intelligence tools across our media services. Our private studio lighting and visual setup are ideal for small productions and interview scenes, and our studio is large enough to incorporate props to round out your set. We support every aspect of production, from setting up a private, custom interview studio to supplying professional sound and camera operators and the right equipment, ensuring your next video production is seamless and successful. We are also location scouting and b-roll specialists, can fly specialized FPV drones indoors, and offer additional drone services including infrared thermal, orthomosaics, and LiDAR.
As decision-makers in photography, marketing, and video production, you are constantly seeking innovative tools to gain a competitive edge and make more informed strategic choices. In today’s data-driven landscape, advanced drone technology, specifically equipped with LIDAR and Thermal imaging sensors, has emerged as a game-changer across numerous industries, providing unparalleled visual and structural information.
LIDAR Drones: Creating Precise 3D Worlds
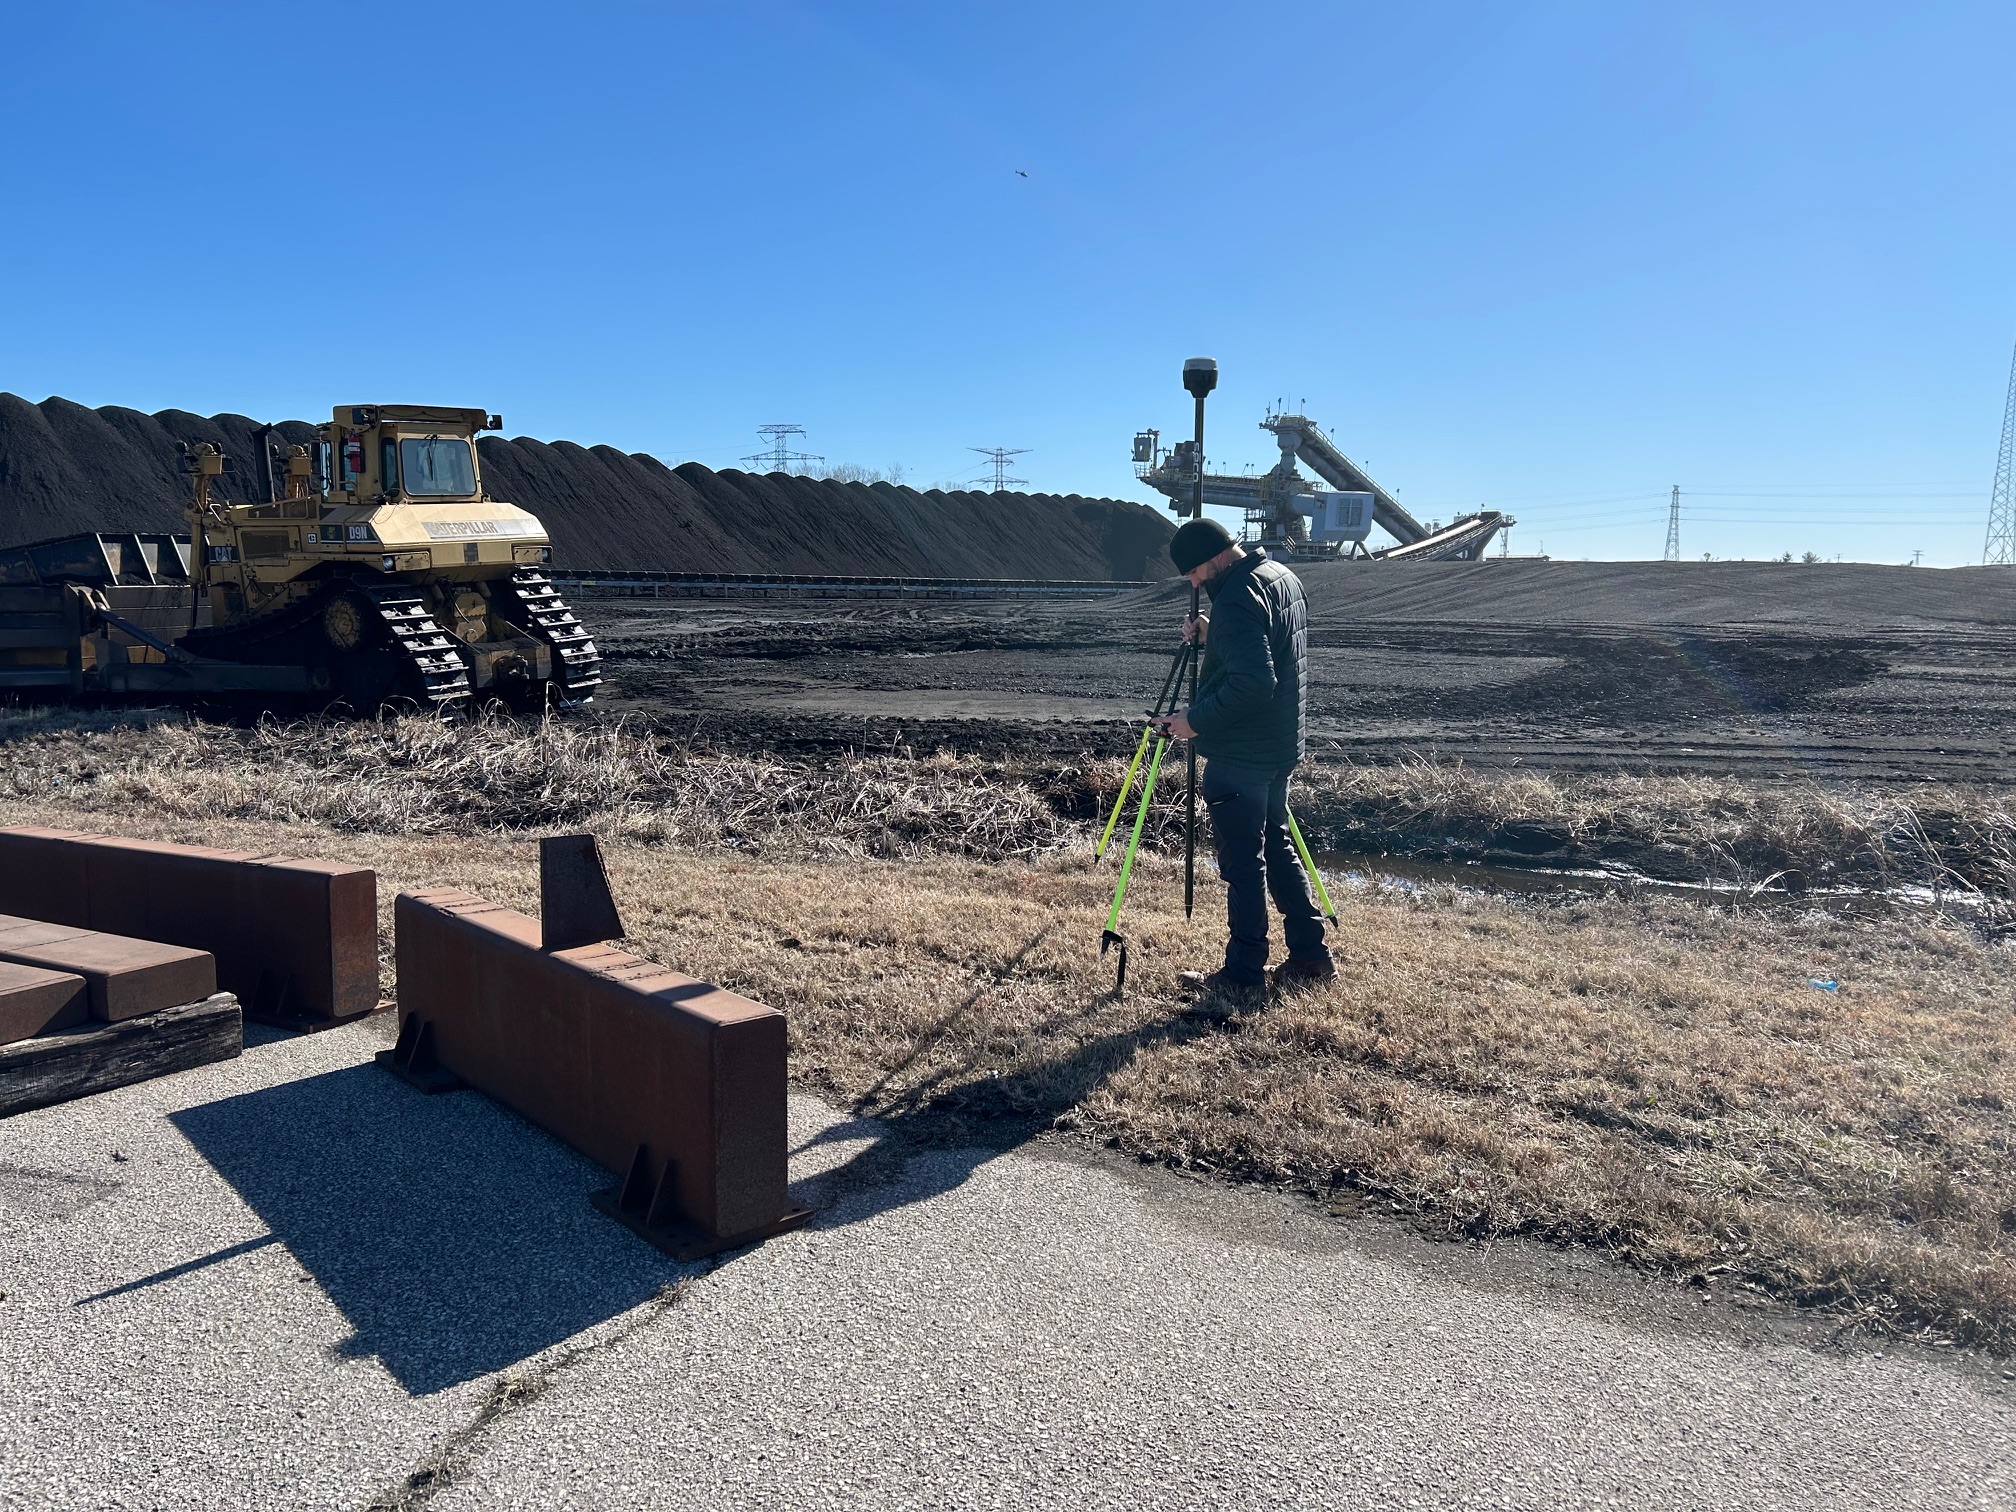
LIDAR, an acronym for Light Detection and Ranging, uses rapid laser pulses to map the environment in three dimensions. While conventional aerial photography captures a visual representation, LIDAR creates a dense “point cloud” that accurately measures distances and shapes. For businesses, this translates to incredibly precise topographic maps, detailed 3D models of infrastructure, and accurate volumetric calculations for stockpiles or construction materials.
Imagine being able to survey vast or challenging terrains in a fraction of the time and cost compared to traditional ground methods. LIDAR can penetrate vegetation, revealing the true ground surface, which is invaluable for pre-construction planning, flood modeling, and forestry management. For infrastructure maintenance, LIDAR scans can detect subtle structural changes over time, allowing for proactive repairs and enhanced safety protocols.
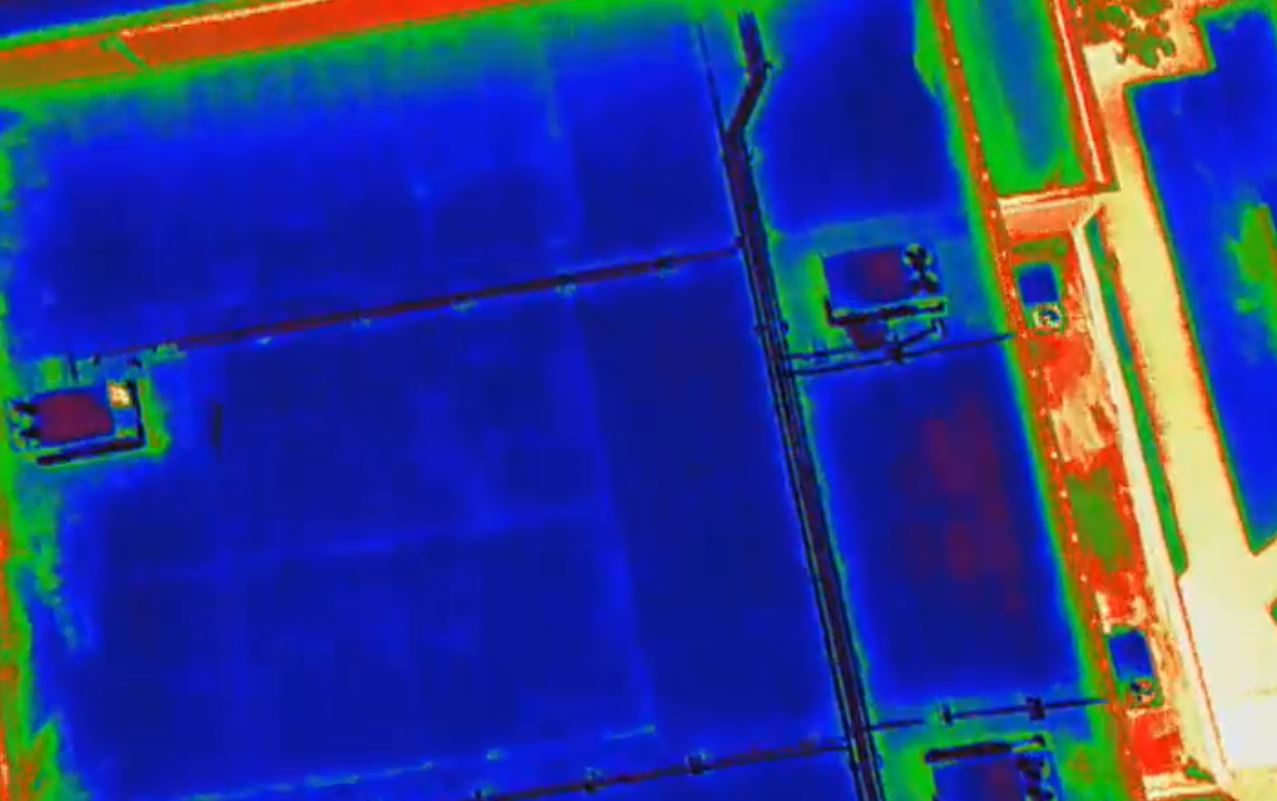
Thermal Imaging Drones: Seeing Heat Signatures
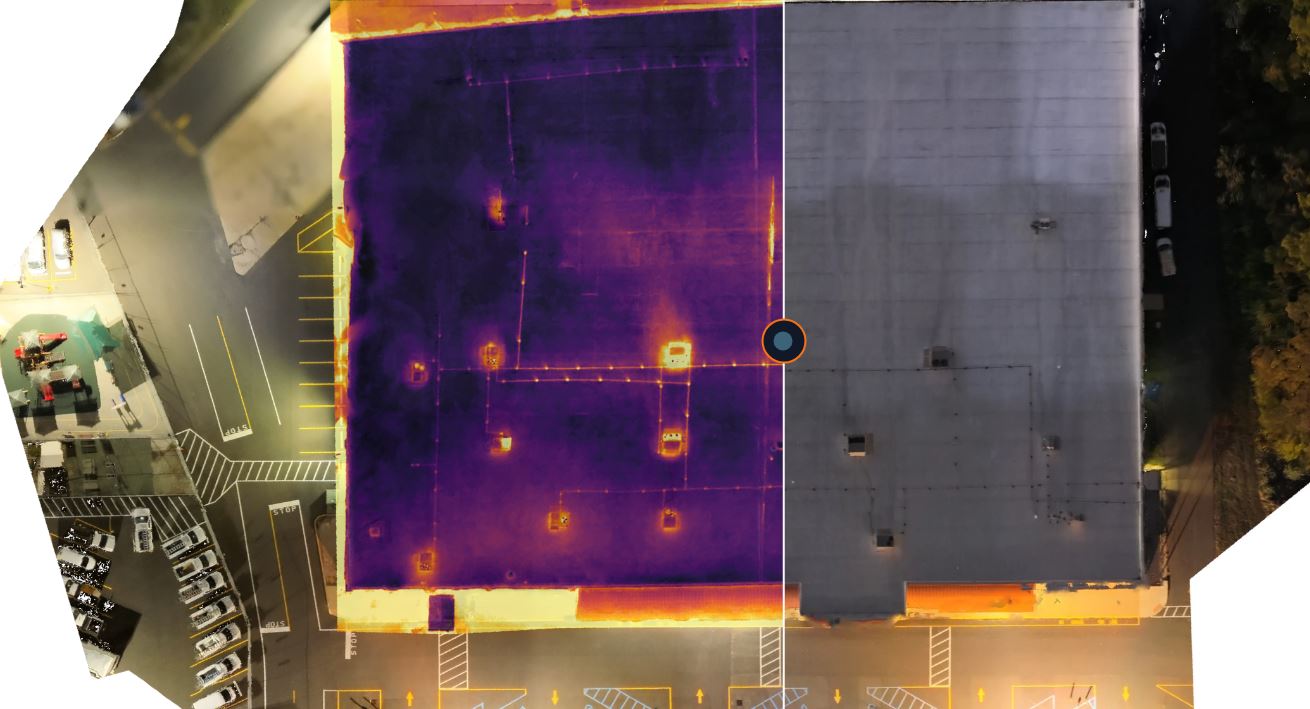
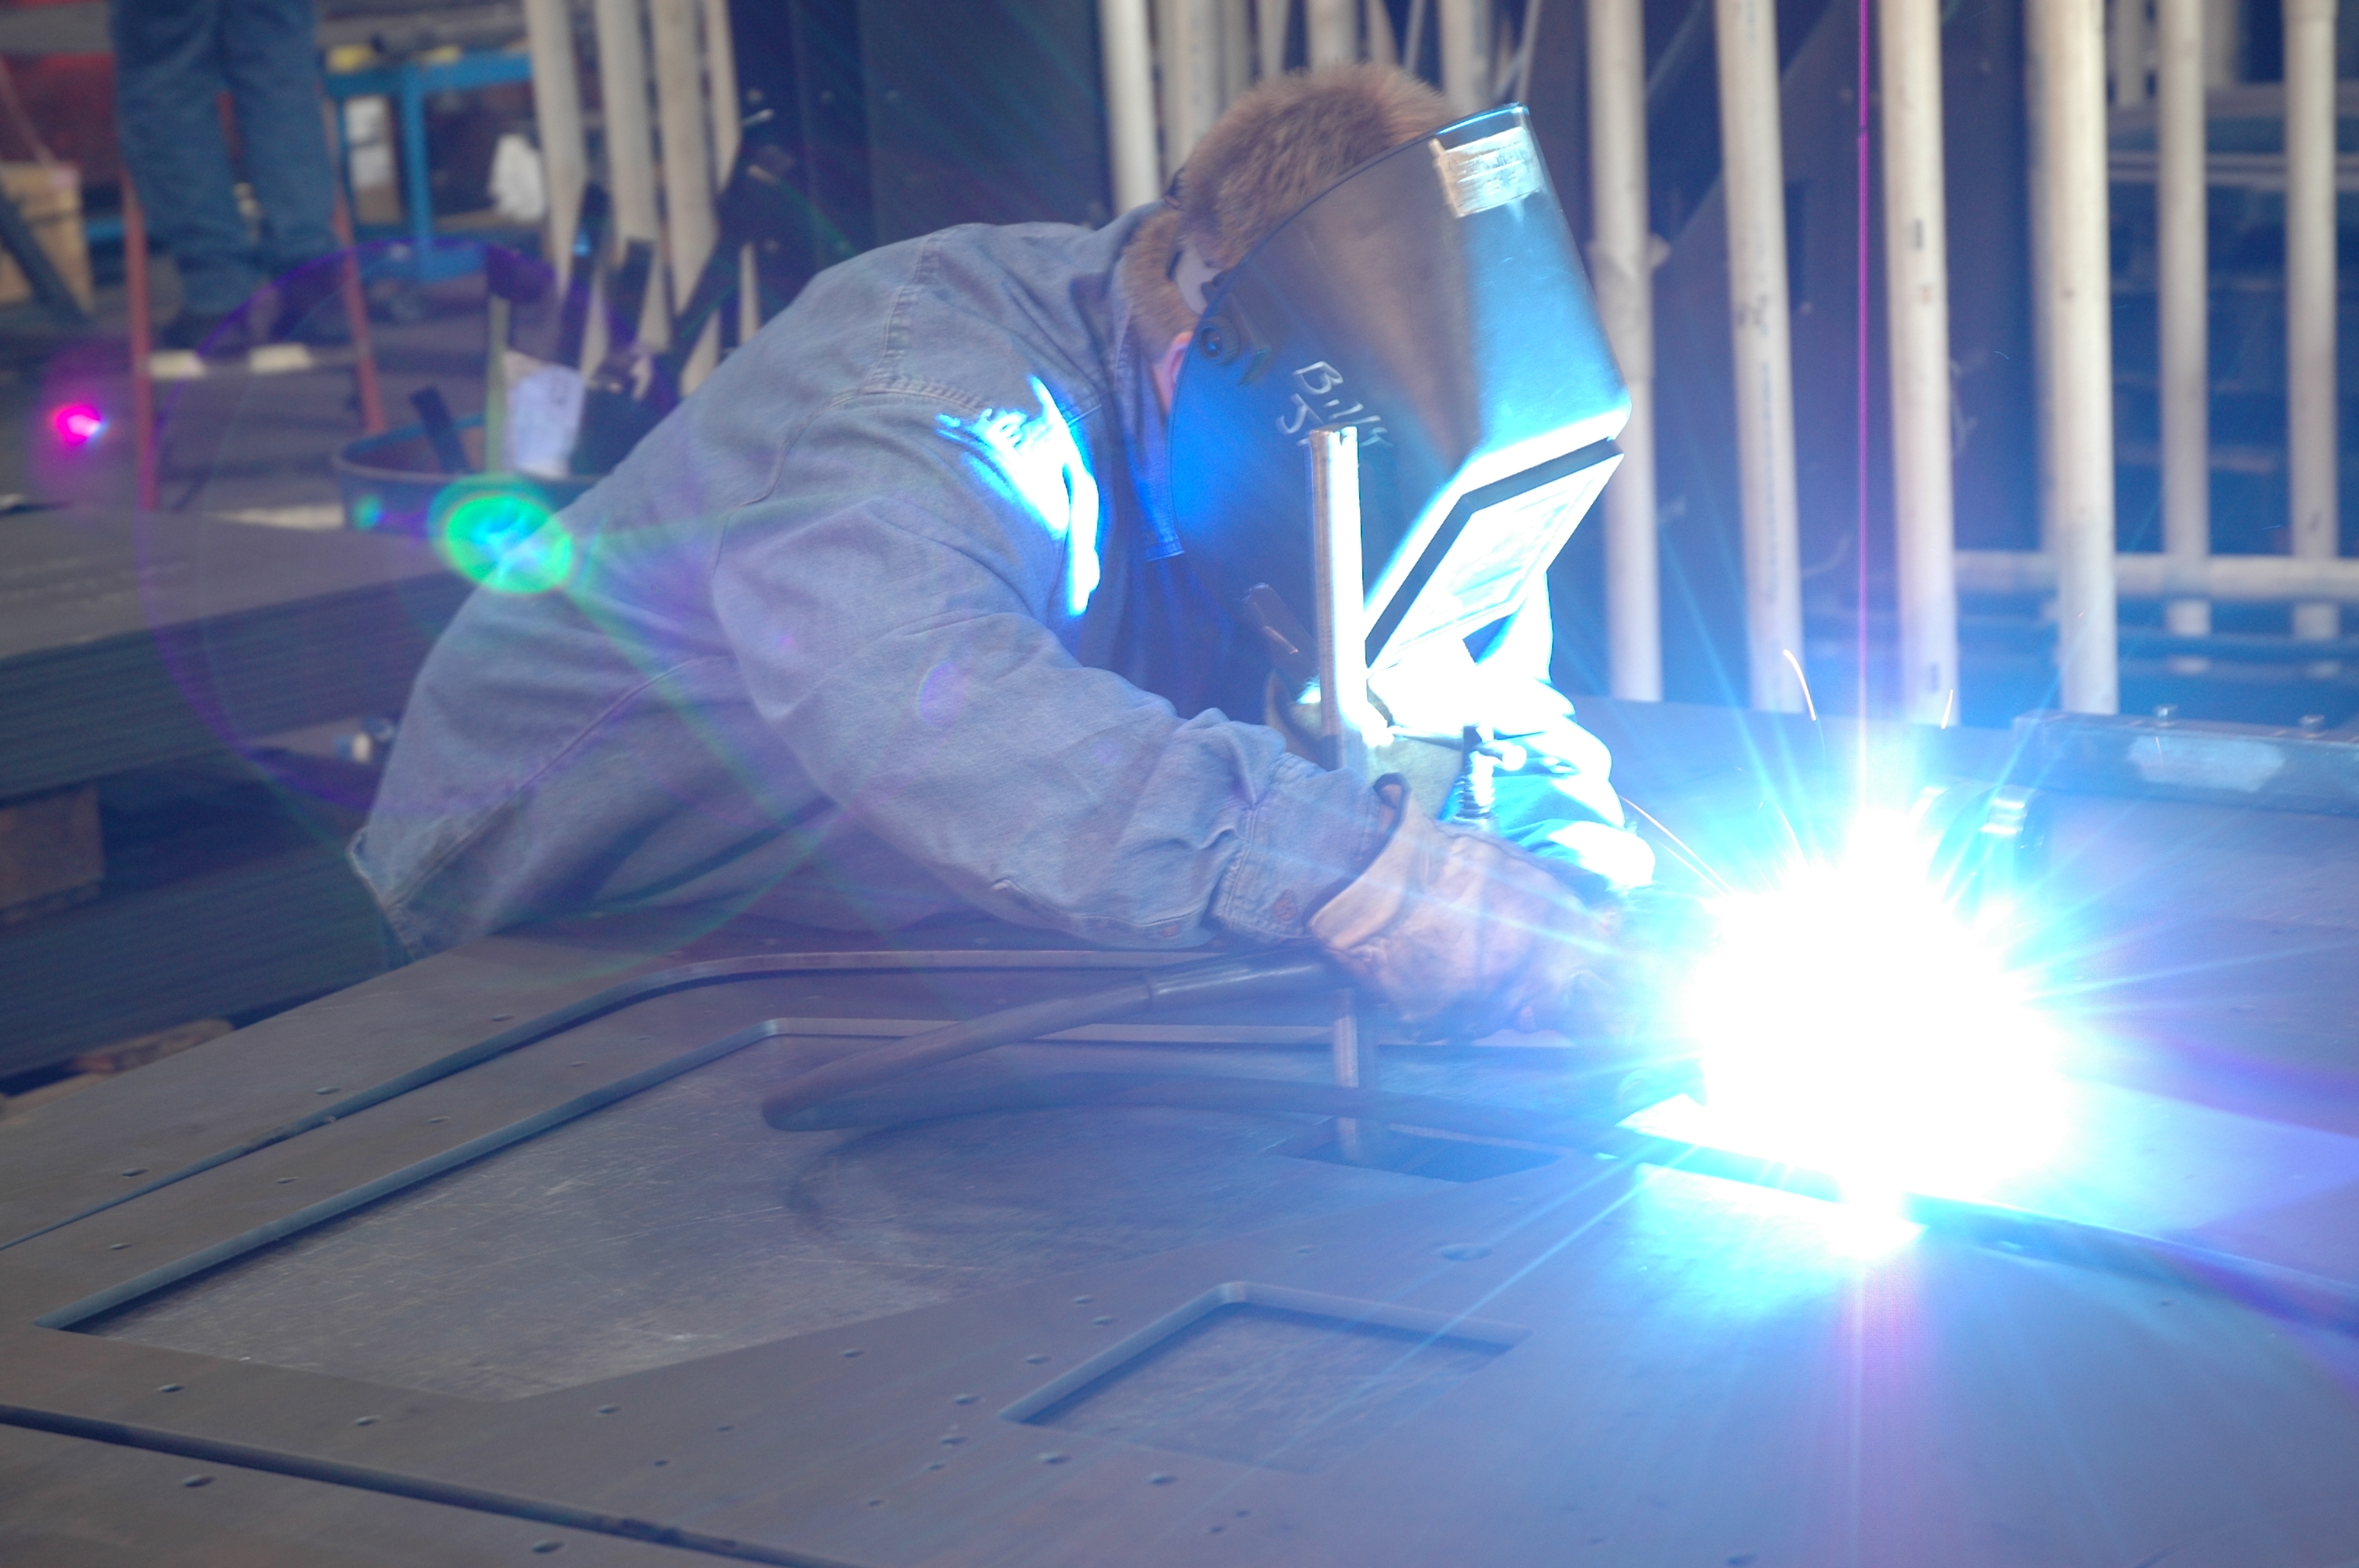
Complementing LIDAR’s structural data, thermal imaging sensors on drones detect heat radiation, not just visible light. This technology visualizes temperature variations across surfaces, revealing hidden issues invisible to the naked eye. Businesses use thermal drones for energy audits, identifying insulation voids, moisture penetration in roofing, or heat loss from buildings.
In industrial settings, thermal inspections can pinpoint overheating electrical components, leaking pipelines, or failing mechanical systems, preventing costly downtime and potential hazards. Thermal drones are also critical for solar panel maintenance, quickly identifying malfunctioning cells. Beyond inspections, they enhance security operations and search and rescue efforts by detecting heat signatures in diverse environments.
Integrating Data for Actionable Insights
The true power lies in the synergistic use of LIDAR and thermal data. Imagine overlaying thermal temperature information onto a precise 3D model generated by LIDAR. This comprehensive perspective enables you to not only visualize the structure but also immediately understand its thermal characteristics. This combined data empowers decision-makers to optimize energy usage, prioritize maintenance, ensure safety compliance, and streamline operations with unprecedented clarity.
St. Louis Video Studio: Your Expert Partner for Advanced Drone Solutions
Unlocking these sophisticated insights requires more than just advanced technology; it demands a seasoned partner with deep expertise, the right equipment, and a creative, capable crew. As a long-standing fixture in the St. Louis production community since 1982, St. Louis Video Studio has evolved alongside technology, positioning itself as a premier full-service professional commercial photography and video production company.
We understand successful image acquisition involves more than just launching a drone. It requires experienced pilots, high-resolution sensors, and meticulous planning to ensure accurate data capture. Our licensed drone operators (including specialized drone services for St Louis Video Studio) have worked with many businesses, marketing firms, and creative agencies in the St. Louis area, delivering high-impact visual data and compelling content across diverse applications. Our capabilities even extend indoors, as we can fly our specialized drones indoors to capture unique perspectives within large facilities, warehouses, or even during complex indoor events, providing invaluable data and stunning visuals where conventional access is limited.
Beyond our aerial expertise, we provide full-service studio and location video and photography. Our private studio lighting and visual setup is perfect for small productions and interview scenes, meticulously supporting every aspect of your production—from setting up a private, custom interview studio to supplying professional sound and camera operators, as well as providing the right equipment—ensuring your next video production is seamless and successful. Our studio is large enough to incorporate props to round out your set, should your vision require more elaborate staging.
Data acquisition is only part of the equation. We offer comprehensive editing, post-production, and full-service media capabilities, ensuring that the raw imagery and information are transformed into compelling narratives, clear visual guides, or precise actionable reports. We use the latest in Artificial Intelligence for all our media services, enhancing efficiency and visual quality throughout the entire process. Our creative crew is well-versed in handling diverse file types and styles of media and proficient with accompanying software, guaranteeing seamless integration with your existing platforms or marketing initiatives.
We excel not only at creating new, high-impact content but also in customizing productions for diverse media requirements and skillfully repurposing your existing photography and video branding to ensure your visual identity consistently gains more traction across all channels. Our dedication to your success extends to supporting every aspect of your production, from the initial concept to the final, polished deliverable.
So, whether you’re looking to gain critical structural data, improve energy efficiency, enhance safety protocols, or simply elevate your brand through sophisticated visuals captured from above (or even indoors!), St. Louis Video Studio has the experience (since 1982), technology, and dedicated crew to make it happen successfully. Contact us today to discuss how LIDAR and thermal drone technology, backed by our comprehensive professional services, can empower your next project.
Decision makers don’t usually have a “video problem” or a “photo problem.” You have a throughput problem: more channels, faster timelines, tighter approvals, more internal stakeholders, and a constant need to refresh creative without restarting from zero.
An economical video and photography studio isn’t the one with the lowest day rate. It’s the one that reliably delivers usable, on-brand assets with minimal reshoots, predictable production time, and a post workflow designed for repurposing—so each shoot generates value across web, social, sales enablement, internal comms, recruiting, PR, and paid campaigns.
Below is how to think about economical production like an operator, not a shopper.
“Economical” doesn’t mean “cheap”—it means engineered efficiency
If you’ve ever paid for a “low-cost” shoot that required:
multiple revisions because messaging wasn’t locked,
preventable audio issues,
inconsistent lighting across interviews,
missing coverage that forced a pickup day,
or deliverables that didn’t match your platform needs…
…you already know the real cost is waste.
Economical production is designed to eliminate waste in four areas:
Pre-production clarity (the fastest way to cut cost without cutting quality)
On-set efficiency (less downtime, fewer surprises, more coverage per hour)
When the edit is structured, you reduce the number of review cycles and protect timelines—especially with multiple stakeholders.
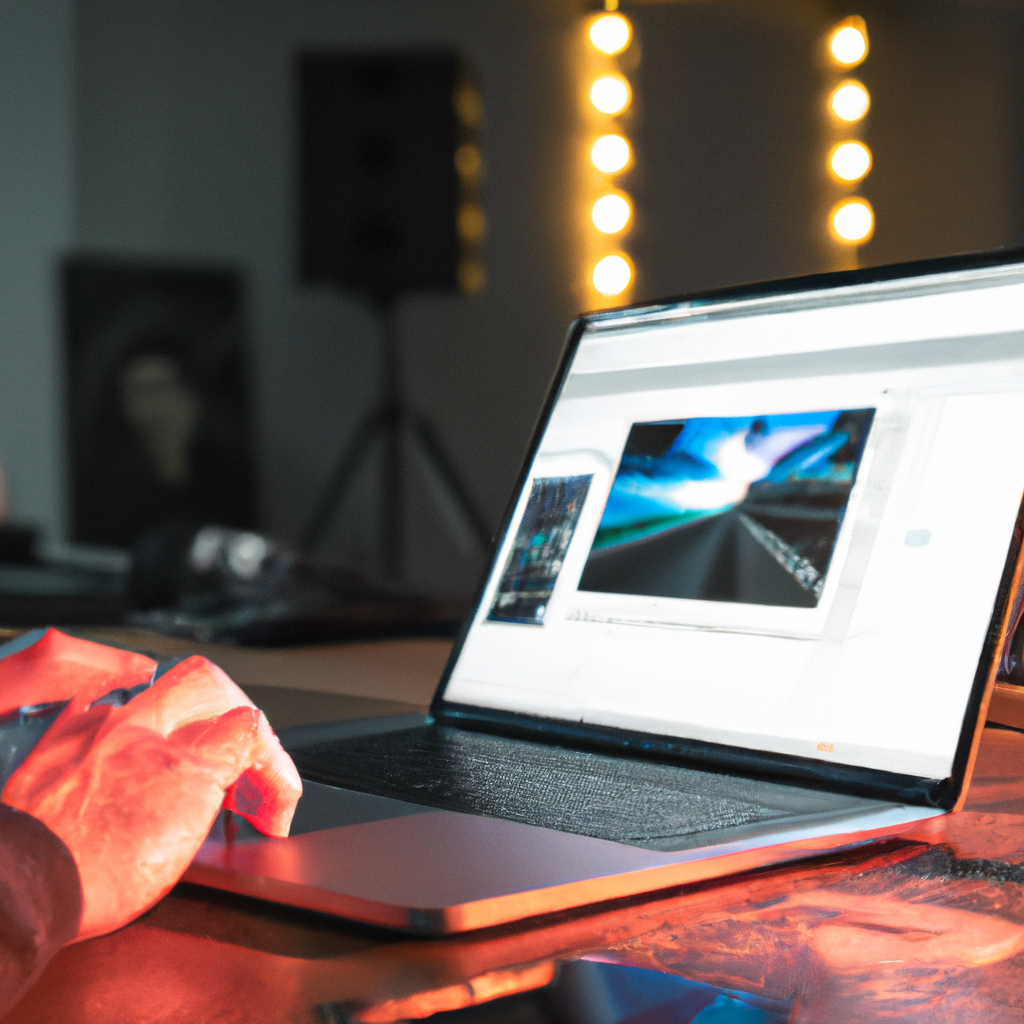
AI as a cost-and-speed amplifier (when used correctly)
AI can absolutely make production more economical—but only when it’s used to accelerate real work (not create chaos).
High-impact, practical uses include:
transcript-based editing and faster selects,
caption workflows and versioning,
searchability across archives (find the right quote fast),
noise reduction and cleanup (when applied surgically),
metadata tagging for repurposing.
The key is restraint: AI should reduce friction while keeping human control over brand voice, legal risk, and story.
Indoor drones: when they help—and when they’re a distraction
Indoor drone work can be powerful for:
facility walk-throughs,
warehouse and operations coverage,
revealing scale and flow,
connecting scenes without hard cuts.
But it has to be executed with safety, planning, and purpose:
flight path design,
risk mitigation around people and equipment,
and shots that integrate into the narrative.
Used well, indoor drone footage can replace more expensive rigging, stabilize movement, and deliver “production value” without production drag.
Deliverables matter: economical means you get exactly what you need, in the right formats
Decision makers don’t want “the video.” You want:
the right versions,
correctly exported,
platform-ready,
and easy to deploy internally.
That includes clarity on:
aspect ratios (16:9, 9:16, 1:1),
compression and bitrate targets,
audio mix needs,
caption formats (burned-in vs sidecar),
still frames and thumbnails,
and a clean handoff for your marketing stack.
When deliverables are planned upfront, you avoid last-minute scramble and re-exports that eat time (and patience).
A quick checklist: how to evaluate an economical studio partner
Ask these questions before you commit:
How do you structure pre-production so we don’t waste shoot time?
How do you design deliverables for repurposing across channels?
What’s your audio plan, and what redundancies do you use?
How do you manage review cycles and feedback consolidation?
Can you maintain a consistent look across multiple shoot days/months?
What’s your approach to versioning (cutdowns, vertical edits, captions)?
How do you handle file formats, handoff, and archival?
A studio that answers these clearly is usually the one that protects your budget and your brand.
Why St Louis Video Studio is built for economical, high-impact production
At St Louis Video Studio, we’ve spent decades refining a production model that’s efficient without cutting corners. As a full-service video and photography production corporation since 1982, we’ve worked with many businesses, marketing firms, and creative agencies in the St. Louis area—so we understand what decision makers need: reliable execution, predictable timelines, and assets that work across platforms.
We’re a full-service professional commercial photography and video production company with the right equipment and creative crew service experience for successful image acquisition. We offer full-service studio and location video and photography, as well as editing, post-production, and licensed drone work. St Louis Video Studio can customize your productions for diverse types of media requirements, and repurposing your photography and video branding to gain more traction is one of our specialties.
We’re well-versed in all file types, media styles, and accompanying software—and we use the latest in Artificial Intelligence across our media services to speed workflows without sacrificing quality. Our private studio lighting and visual setup is ideal for small productions and interview scenes, and our studio is large enough to incorporate props to round out your set. We support every aspect of your production—from setting up a private, custom interview studio to supplying professional sound and camera operators, as well as providing the right equipment—ensuring your next video production is seamless and successful. And yes, we can fly our specialized drones indoors when the shot calls for it.
If your goal is to produce more high-quality content with less waste—without compromising on brand, consistency, or production value—an economical studio partner should feel like a force multiplier. That’s exactly how we operate.
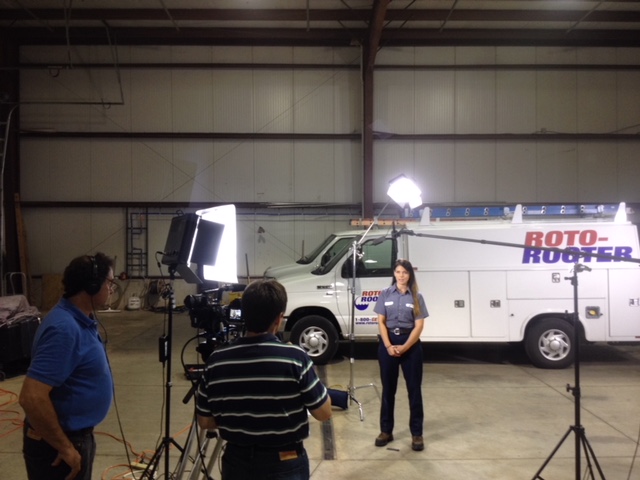
If you run—or market—a service repair business, you already know what customers want before they call: confidence.
They want to know:
Are you legit?
Will you show up?
Will you treat my home or facility with respect?
Will you fix it right the first time?
Will I get surprised by the price?
A polished brand video helps, but the videos that consistently book more repairs often look simpler: real technicians, real jobs, real proof. That’s the core idea behind “Film Your Day”—a practical content approach where you capture your work as it happens and turn it into high-trust marketing that converts.
This isn’t about becoming an influencer. It’s about documenting what you already do—then editing it into videos that reduce hesitation and increase bookings.
Why “Film Your Day” works for repairs
Most service companies compete on similar claims: fast, friendly, affordable, experienced. Your prospects assume everyone says that.
What they can’t easily see is how you operate:
cleanliness and professionalism
diagnostic skill
safety practices
communication style
quality control
tools and process
“Film Your Day” bridges the trust gap. It shows competence in a way a website can’t.
When done well, these videos become:
lead generators (social + local search)
appointment setters (retargeting + landing pages)
objection handlers (sales follow-up)
reputation builders (Google Business Profile content, reviews support)
The 4 video types that book more service repairs
You don’t need dozens of concepts. You need a repeatable set that targets how customers decide.
1) The “Before / After + What We Found” video
Purpose: Prove results and expertise quickly. Length: 20–60 seconds.
quick tech-to-camera line (10 seconds): “Here’s what caused it…”
What not to film
customer faces / private documents / addresses in frame
sensitive security systems without permission
anything that reveals a client’s vulnerabilities (especially commercial facilities)
A professional production partner will help build a simple on-site workflow that’s fast, compliant, and repeatable.
The script that converts: “Problem → Cause → Fix → Proof → Next step”
Service video scripts should be short and structured. Here’s a template that works across trades:
Hook (1 sentence): “If your [unit/system] is doing this… don’t ignore it.” Cause: “In this case, the real issue was [specific cause].” Fix: “We [repair step] and replaced [part] to restore [function].” Proof: “Now you can see [result]—and here’s what we checked to confirm it.” CTA: “If you’re seeing this at your home/facility, call us and we’ll diagnose it before it turns into a bigger repair.”
It’s not sales copy. It’s competent communication.
Editing choices that separate “content” from “bookings”
The difference between views and booked calls is often the edit.
Make it scannable
Decision makers and homeowners watch on phones. Use:
tight pacing (cut dead space)
on-screen keywords (“Cause,” “Fix,” “Result”)
simple captions (not walls of text)
clear audio (no echo, no compressor pumping)
Show proof, not just talking
Use b-roll of the diagnostic step and the verification step. That’s where credibility lives.
Add local trust signals
For repair services, local presence matters. Include:
This is how you scale without constantly “creating new ideas.”
Where these videos make the phone ring
If you want bookings, distribute where intent and trust intersect:
Google Business Profile: post weekly clips; supports local conversion behavior
Service pages: embed the most relevant videos on each service page (HVAC, plumbing, electrical, roofing, etc.)
Retargeting ads: show “before/after” and “what we found” videos to people who visited your site
Sales follow-up: text/email a 30-second proof clip after an estimate
LinkedIn (B2B service repairs): facility managers respond well to process + safety + reliability content
Common mistakes (and quick fixes)
Mistake: Every video is “we’re the best.” Fix: Make videos about customer problems and your process.
Mistake: Too long, too slow. Fix: Lead with the problem/result, then explain.
Mistake: No call to action. Fix: One line: “If you’re seeing this, schedule service.”
Mistake: Footage exists but never gets used. Fix: Batch-edit and publish on a simple cadence (e.g., 2 shorts/week).
Closing: why St. Louis Video Studio is built for “Film Your Day” service content
At St. Louis Video Studio, we’ve worked with businesses, marketing firms, and creative agencies in the St. Louis area since 1982, helping organizations turn real-world operations into professional marketing assets that build trust and drive action.
We’re a full-service professional commercial photography and video production company with the right equipment and creative crew service experience for successful image acquisition. We offer full-service studio and location video and photography, plus editing and post-production, and licensed drone support—including the ability to fly specialized drones indoors when the project calls for it.
St. Louis Video Studio can customize your productions for diverse media requirements, and we specialize in repurposing your photography and video branding so each shoot produces multiple deliverables across platforms. We’re well-versed in all file types, media styles, and the software needed to deliver clean, usable assets for web, social, broadcast, and internal communications. We also use the latest Artificial Intelligence tools to accelerate editing workflows, create fast cutdowns, and help you publish consistently without sacrificing quality.
Our private studio lighting and visual setup is perfect for small productions and interview scenes, and our studio has room for props and set elements to round out your look. We support every aspect of your production—from building a private, custom interview studio to supplying professional sound and camera operators and the right equipment—so your next video production is seamless and successful.
If you want to film your day and turn everyday repairs into consistent bookings, we can help you build a practical video system that captures real proof, edits for trust, and publishes with purpose.
Energy waste rarely announces itself with a flashing red light. Most of the time, it slips out quietly—through a failing roof membrane, leaky windows, uninsulated walls, or aging mechanical systems. By the time a problem becomes visible inside the building, you’ve often already paid for it several times over in wasted energy, moisture damage, and emergency repairs.
Drone-based thermal inspections change that equation. They give you a fast, safe, and visual way to see exactly where your building is losing heat—across an entire facility or campus—without scaffolding, lifts, or guesswork.
For facility managers, building owners, and the marketing and communications teams who support them, this kind of visual data isn’t only a maintenance tool. It’s also powerful storytelling and documentation: proof of due diligence, sustainability efforts, and capital improvement ROI.
Let’s break down how drone inspections help you “fix” building heat loss—practically, safely, and in a way that can be clearly communicated to stakeholders.
What “Building Heat Loss” Really Looks Like in the Real World
Heat loss isn’t a single problem; it’s a cluster of related issues that show up in different ways:
Roofing failures
Wet or saturated insulation under a membrane
Seams and penetrations where warm air escapes
Ponding water that leads to long-term moisture and structural issues
Wall and façade problems
Thermal bridging at structural elements
Missing or compromised insulation in panels or cavities
Failing joints around expansion gaps and cladding
Windows, doors, and openings
Leaky curtain walls and storefront systems
Gaps around overhead doors in loading docks and warehouses
Aging weatherstripping that no longer seals
Mechanical and utility losses
Steam line leaks
Inefficient rooftop units (RTUs) running hot
Poorly insulated piping and ductwork
All of these issues show up as temperature anomalies—areas that are warmer or colder than they should be relative to surrounding surfaces. Thermal cameras mounted on drones capture this delta and translate it into clear, actionable visuals.
Why Traditional Inspections Miss So Much
Conventional building envelope inspections rely heavily on:
Walking the roof with a handheld thermal camera
Lift-based checks of façades
Visual inspections from the ground
Trial-and-error destructive testing
Those methods can work—but they’re:
Slow and labor-heavy
Limited in coverage (you see only what you can safely reach)
Dependent on the inspector’s vantage point and experience
Potentially disruptive to building operations
In large facilities—corporate campuses, industrial plants, logistics hubs, healthcare complexes—it’s easy for problem areas to stay hidden for years simply because no one can see them safely, quickly, and comprehensively.
Drone inspections step over those limitations.
How Drone-Based Thermal Inspections Work
A modern building heat-loss drone survey typically includes two data layers:
Thermal (infrared) imagery – to show temperature anomalies
High-resolution visual imagery – to document physical conditions
Here’s what the process looks like when it’s done professionally:
1. Pre-Planning
Review site constraints (airspace, nearby airports, local restrictions)
Map building footprints, roof levels, obstructions, and critical areas
Coordinate with building management for access, timing, and safety
2. Optimal Timing and Conditions
Thermal inspections depend on contrasts. The best results typically come when:
There’s a clear difference between indoor and outdoor temperatures
The building has gone through a heating or cooling cycle
Direct sunlight and reflective surfaces are managed to avoid false positives
An experienced drone crew plans flight schedules to maximize this contrast and minimize noise in the data.
3. Flight and Data Capture
Using specialized drones equipped with radiometric thermal sensors, the crew:
Flies precise grid patterns over roofs and façades
Captures overlapping thermal stills and/or video
Collects matching high-res visual imagery for context
With the right gear and pilots, an inspection that would take days on lifts can often be captured in a fraction of the time—with no one leaving the ground.
4. Analysis and Interpretation
Raw thermal data is only half the job. The real value comes from:
Comparing thermal images with visual imagery to understand what’s happening at each anomaly (e.g., seam failure, wet insulation, missing insulation, mechanical issue)
Creating maps and reports that align anomalies with real-world locations and roof or building drawings
Flagging priority areas by severity, risk, and likely cause
This is where pairing commercial drone pilots with a seasoned imaging and post-production team pays off. You’re not just getting “cool pictures”—you’re getting usable intelligence.
Where Drone Thermal Inspections Deliver the Biggest Wins
1. Commercial Roofs
Flat and low-slope roofs are a perfect fit for drone thermography. Aerial thermal imagery can reveal:
Wet or saturated insulation
Failing seams, flashings, and penetrations
Heat loss around HVAC curbs, vents, and skylights
Instead of guessing where to core sample or cut, you target the exact spots that show anomalies—reducing destructive testing and focusing repair budgets where they matter.
2. Building Envelopes and Façades
From high-rise office towers to big-box retail, drones can scan façades quickly and safely to detect:
Missing or poorly installed insulation
Thermal bridging at structural elements and anchors
Air leakage around windows, doors, and façade transitions
For owners, this is invaluable evidence when evaluating contractor work, planning façade upgrades, or developing long-term capital budgets.
3. Industrial and Utility Infrastructure
Drone-based thermal imaging is also effective for:
Steam tunnels and pipe runs
Heat exchangers and process equipment
Mechanical rooms and rooftop units (when accessible to line-of-sight)
Being able to capture both thermal and visual data from elevated angles gives maintenance teams an immediate short list of what to address first.
Turning Technical Data into Clear Visual Communication
You’re not just fixing heat loss; you’re also justifying budgets, demonstrating ESG progress, and communicating risk and ROI to non-technical audiences.
That’s where expert video and photography production comes in. Thoughtful post-production can transform your drone capture into:
Executive-ready presentations
Before/after visuals of problem areas and completed repairs
Simple overlays that show thermal anomalies alongside the visible image
Callouts and annotations explaining what each hotspot means
Board and investor updates
Short, narrated explainer videos that walk through issues, solutions, and projected savings
Visual documentation of capital improvements tied to sustainability and resilience goals
Marketing and ESG storytelling
Branded micro-videos and stills demonstrating your commitment to energy efficiency
Visual proof that your organization is proactive about infrastructure health, not reactive
When drone and thermal inspections are paired with a professional studio and post-production team, you’re not just checking boxes—you’re creating a visual asset library that supports operations, compliance, and brand.
Planning a Drone Inspection Program That Actually Pays Off
To get maximum value from building heat-loss inspections, treat them as a structured program, not a one-off event.
Consider:
Baseline Survey
Capture current conditions across roofs, façades, and key mechanical areas
Identify and rank anomalies by risk and cost impact
Targeted Repairs and Upgrades
Use the visuals to guide contractors directly to problem zones
Prioritize “quick win” fixes with strong ROI
Follow-Up and Verification Flights
Confirm completed repairs actually resolved the thermal issues
Build a “before and after” visual record for internal and external stakeholders
Ongoing Monitoring
Schedule periodic inspections (annually or after major weather events)
Track trends over time to anticipate failures before they become critical
When your inspection assets are captured and processed by an experienced imaging partner, each year’s data layers cleanly onto the last. Over time, you build a visual history of the building’s performance that’s hard to dispute—and incredibly valuable.
Why Professional Production Quality Matters
Anyone can buy a drone and a thermal camera. Very few can:
Fly safely and legally in complex environments
Capture usable, consistent images and video that align with inspection goals
Color-grade, annotate, and edit that footage into a coherent story for decision makers
Deliver footage and stills in formats that your engineers, contractors, marketing team, and executives can all use without frustration
That’s the gap a dedicated video studio fills—translating raw technical capture into polished, clear, and versatile visual assets.
Partner with St. Louis Video Studio for Drone Heat-Loss Inspections
St. Louis Video Studio is an experienced, full-service professional commercial photography and video production company with the right equipment and creative crew experience for successful image acquisition—on the ground and in the air.
We offer full-service studio and location video and photography, as well as editing, post-production and licensed drone pilots. St. Louis Video Studio can customize your productions for a wide range of media requirements, from technical inspection documentation to executive briefings and marketing campaigns.
Repurposing your photography and video branding to gain more traction is another specialty. We are well-versed in all file types, styles of media and accompanying software, and we use the latest in Artificial Intelligence for all our media services—from smart noise reduction and image enhancement to AI-assisted editing and content versioning.
Our private studio lighting and visual setup is perfect for small productions and interview scenes, and our studio is large enough to incorporate props to round out your set. We support every aspect of your production—from setting up a private, custom interview studio to supplying professional sound and camera operators, as well as providing the right equipment—ensuring your next video production is seamless and successful.
For inspections that demand unique perspectives, we can even fly our specialized drones indoors where appropriate and safe, capturing views that traditional methods simply cannot reach.
As a full-service video and photography production corporation since 1982, St. Louis Video Studio has worked with many businesses, marketing firms and creative agencies in the St. Louis area for their marketing photography and video. Whether you’re documenting building heat loss, showcasing repairs, or telling a broader story about your organization’s commitment to efficiency and sustainability, we’re ready to help you capture it—and communicate it—clearly.
In today’s fast-paced business landscape, attention spans are shrinking, and the demand for digestible, easily accessible information is at an all-time high. For decision-makers in marketing, video production, and photography services, this presents a unique challenge: how do you deliver essential training and educational content effectively when your audience is time-poor and inundated with information? The answer lies in the strategic repurposing of your valuable long-form training sessions into shorter, more impactful video clips.
Traditional lengthy training videos, while comprehensive, often suffer from diminishing engagement. Learners can become overwhelmed, lose focus, and struggle to retain key information. This is where the “micro-learning” approach, fueled by intelligently segmented video content, truly shines.
Why Shorter is Smarter: The Benefits of Video Micro-Content
Enhanced Engagement and Retention: Shorter videos are less daunting and easier to consume. This leads to higher completion rates and, more importantly, improved information retention. When content is broken down into specific, bite-sized modules, learners can focus on one concept at a time, making it easier to absorb and recall.
On-Demand Accessibility and Flexibility: Imagine your employees needing a quick refresher on a specific procedure. Instead of sifting through an hour-long training video, they can instantly access a two-minute clip that addresses their exact need. This on-demand availability empowers self-directed learning and immediate problem-solving.
Targeted Learning Paths: By segmenting your training, you can create customized learning paths. Different departments or roles may only need specific information from a broader training session. Shorter clips allow you to tailor content precisely, avoiding information overload and increasing relevance.
Versatility in Distribution: Short video clips are incredibly versatile. They can be embedded in internal communication platforms, shared on social media for external outreach, used in email newsletters, or even integrated into interactive learning modules. This expands the reach and utility of your initial investment in training content.
Cost-Effective Updates and Iteration: If a particular policy or procedure changes, it’s far more efficient to update or reshoot a short, specific video clip than to revise an entire long-form production. This agility ensures your training content remains current and accurate with minimal overhead.
SEO and Discoverability: For external-facing educational content, shorter, keyword-rich videos are more likely to rank higher in search results, driving organic traffic and positioning your organization as a thought leader.
The Strategic Approach to Transformation
Converting your extensive training sessions into impactful micro-content isn’t simply about cutting a long video into arbitrary segments. It requires a thoughtful, strategic approach:
Content Audit and Identification of Key Concepts: Begin by meticulously reviewing your existing long-form training. Identify the core learning objectives, key takeaways, and distinct topics that can stand alone as individual video segments. Think about the natural breaks in the information flow.
Scripting for Brevity and Clarity: Even if the original training was unscripted, consider creating concise scripts or outlines for your shorter clips. Each video should have a clear purpose, a defined beginning, middle, and end, and deliver a single, focused message.
Visual Reinforcement: Leverage strong visuals to enhance understanding. This might include on-screen text, graphics, animations, or relevant B-roll footage. Remember, the goal is to convey information efficiently, and visuals are a powerful tool for this.
Professional Editing and Post-Production: The quality of your micro-content reflects on your brand. Professional editing ensures smooth transitions, clear audio, consistent branding, and an overall polished look. This includes color correction, sound design, and the addition of lower thirds or graphics.
Strategic Call to Action (Where Applicable): For external content, consider a subtle call to action. This could be a link to more information, a sign-up form, or an invitation to explore related topics. For internal training, the call to action might be a quick quiz or a link to a relevant resource.
Leveraging AI in Media Production: Modern video production is significantly enhanced by Artificial Intelligence. AI can assist in transcription, content summarization, identifying key moments for segmentation, and even generating initial edits. This streamlines the process of breaking down long videos and optimizing them for various platforms.
By embracing the strategy of converting long training sessions into shorter, purposeful video clips, businesses and organizations can dramatically improve the efficacy of their educational content. It’s an investment that pays dividends in employee engagement, knowledge retention, and the overall professional image of your brand.
St Louis Video Studio and Photography: Your Partner in Image Acquisition Success
At St Louis Video Studio, we understand the critical importance of effective visual communication. As a full-service professional commercial photography and video production company since 1982, we bring unparalleled experience and a creative crew to every project. We are equipped with the right tools and expertise for successful image acquisition, offering full-service studio and location video and photography. Our services extend to comprehensive editing, post-production, and we boast licensed drone pilots for captivating aerial perspectives, including the unique capability to fly our specialized drones indoors.
St Louis Video Studio excels at customizing productions for diverse media requirements. We specialize in repurposing your photography and video branding to gain more traction, ensuring your visual assets work harder for you. Well-versed in all file types, styles of media, and accompanying software, we leverage the latest in Artificial Intelligence for all our media services, optimizing workflows and enhancing creative output.
Our private studio offers the perfect lighting and visual setup for small productions and interview scenes, with ample space to incorporate props and round out your set. We support every aspect of your production—from setting up a private, custom interview studio to supplying professional sound and camera operators, as well as providing the right equipment—ensuring your next video production is seamless and successful. Since 1982, St Louis Video Studio has proudly partnered with numerous businesses, marketing firms, and creative agencies in the St. Louis area, delivering exceptional marketing photography and video solutions.
As seasoned videographers, photographers, and producers at St Louis Video Studio, we’ve guided countless businesses and organizations through the seemingly complex world of video production. We understand that for many decision-makers, the idea of planning a video shoot can conjure images of logistical nightmares, budget overruns, and unexpected complications. However, with a structured approach and clear communication, planning a video shoot can be an efficient, even enjoyable, process that leads to exceptional results.
This post will demystify the planning stages, offering expert insights into how to approach your next video project with confidence and clarity, ensuring a stress-free journey from concept to captivating final product.
The Foundation: Why Meticulous Planning Matters
Think of video production as building a house. You wouldn’t start hammering nails without blueprints. Similarly, a video shoot requires a solid foundation of planning to prevent costly mistakes, wasted time, and creative compromises. Poor planning often leads to:
Scope Creep: The project expands beyond initial agreements, leading to budget and timeline issues.
Miscommunication: Vision discrepancies between client and production team, resulting in dissatisfaction.
Logistical Headaches: Unforeseen location issues, equipment shortages, or scheduling conflicts.
Mediocre Results: Rushed decisions on set compromise the final quality and impact of your message.
Your Stress-Free Planning Blueprint: Key Steps
Step 1: Define Your “Why” and “Who” – The Strategic Core
Before any creative ideas take shape, solidify the strategic purpose of your video.
Clear Objectives: What specific business goal does this video serve? Is it lead generation, brand awareness, employee training, product launch, or something else?
Target Audience: Who are you trying to reach? Understanding their demographics, pain points, and preferences will inform every creative decision.
Key Message: What is the single most important takeaway you want viewers to remember? Keep it concise and impactful.
Call to Action: What do you want viewers to do after watching the video? Visit a website, make a purchase, sign up for a newsletter?
Transparency and realism here are paramount to avoiding stress later.
Establish a Budget Range: Communicate your financial parameters upfront. A professional production company can then advise on what’s achievable within those limits.
Set a Realistic Timeline: Factor in pre-production (planning, scripting, scheduling), production (filming), and post-production (editing, graphics, revisions). Good video takes time.
Contingency Planning: Always build in a buffer for both budget and time to account for unforeseen circumstances (e.g., weather delays, minor script changes).
Step 3: Creative Brief & Concept Development – Aligning Visions
This is where your vision starts to materialize.
Detailed Creative Brief: Provide your production partner with as much information as possible: brand guidelines, competitor examples, preferred styles, tone, and any existing assets.
Concept Presentation: Your production team should present initial concepts, script outlines, and visual references (mood boards, example videos). This is a collaborative phase for feedback and refinement.
Scripting & Storyboarding: Once a concept is approved, a detailed script is developed. For more complex shoots, storyboards or shot lists visually map out each scene, ensuring everyone is on the same page.
Step 4: Logistics & Scheduling – The Nitty-Gritty
This is where the detailed execution plan comes together.
Location Scouting: Identify and secure ideal locations that align with the creative vision and practical requirements. Consider lighting, sound, permits, and accessibility.
Talent Casting (if applicable): Whether professional actors or your own employees, ensure talent is briefed, available, and comfortable with their roles.
Crew & Equipment Allocation: A professional studio will assign the right videographers, photographers, sound technicians, lighting specialists, and the necessary equipment (cameras, drones, specialized lighting) for your specific shoot.
Detailed Production Schedule (Call Sheet): This document is the bible for shoot day, outlining timings, locations, scenes, and contact information for everyone involved. Share it widely.
Step 5: Pre-Production Meeting – Final Checks
A final meeting before the shoot day is crucial to ensure everyone is aligned.
Review Everything: Go over the script, storyboard, schedule, and logistical details one last time with all key stakeholders.
Address Questions: Provide an opportunity for any last-minute questions or concerns from the client or crew.
Contingency Plans: Discuss what-if scenarios (e.g., bad weather for an outdoor shoot) and agreed-upon backup plans.
By meticulously following these steps, you’re not just planning a video shoot; you’re orchestrating a seamless experience designed for success. The result is a high-quality video that achieves your marketing and communication goals, produced without the usual stress and uncertainty.
At St Louis Video Studio, we believe that brilliant video and photography begin with exceptional planning. As a full-service professional commercial photography and video production company since 1982, we bring over four decades of experience to every project. We possess the right equipment and a creative crew with extensive service experience for successful image acquisition. We offer full-service studio and location video and photography, as well as comprehensive editing, post-production, and licensed drone pilots.
St Louis Video Studio can customize your productions for diverse types of media requirements, specializing in repurposing your photography and video branding to gain more traction. We are well-versed in all file types and styles of media and accompanying software, utilizing the latest in Artificial Intelligence for all our media services to ensure cutting-edge results. Our private studio lighting and visual setup is perfect for small productions and interview scenes, large enough to incorporate props to round out your set. We support every aspect of your production—from setting up a private, custom interview studio to supplying professional sound and camera operators, as well as providing the right equipment—ensuring your next video production is seamless and successful. We can even fly our specialized drones indoors for unique perspectives and dynamic shots.
Having worked with numerous businesses, marketing firms, and creative agencies in the St. Louis area, St Louis Video Studio is your trusted partner for marketing photography and video, transforming complex production processes into stress-free, successful ventures.
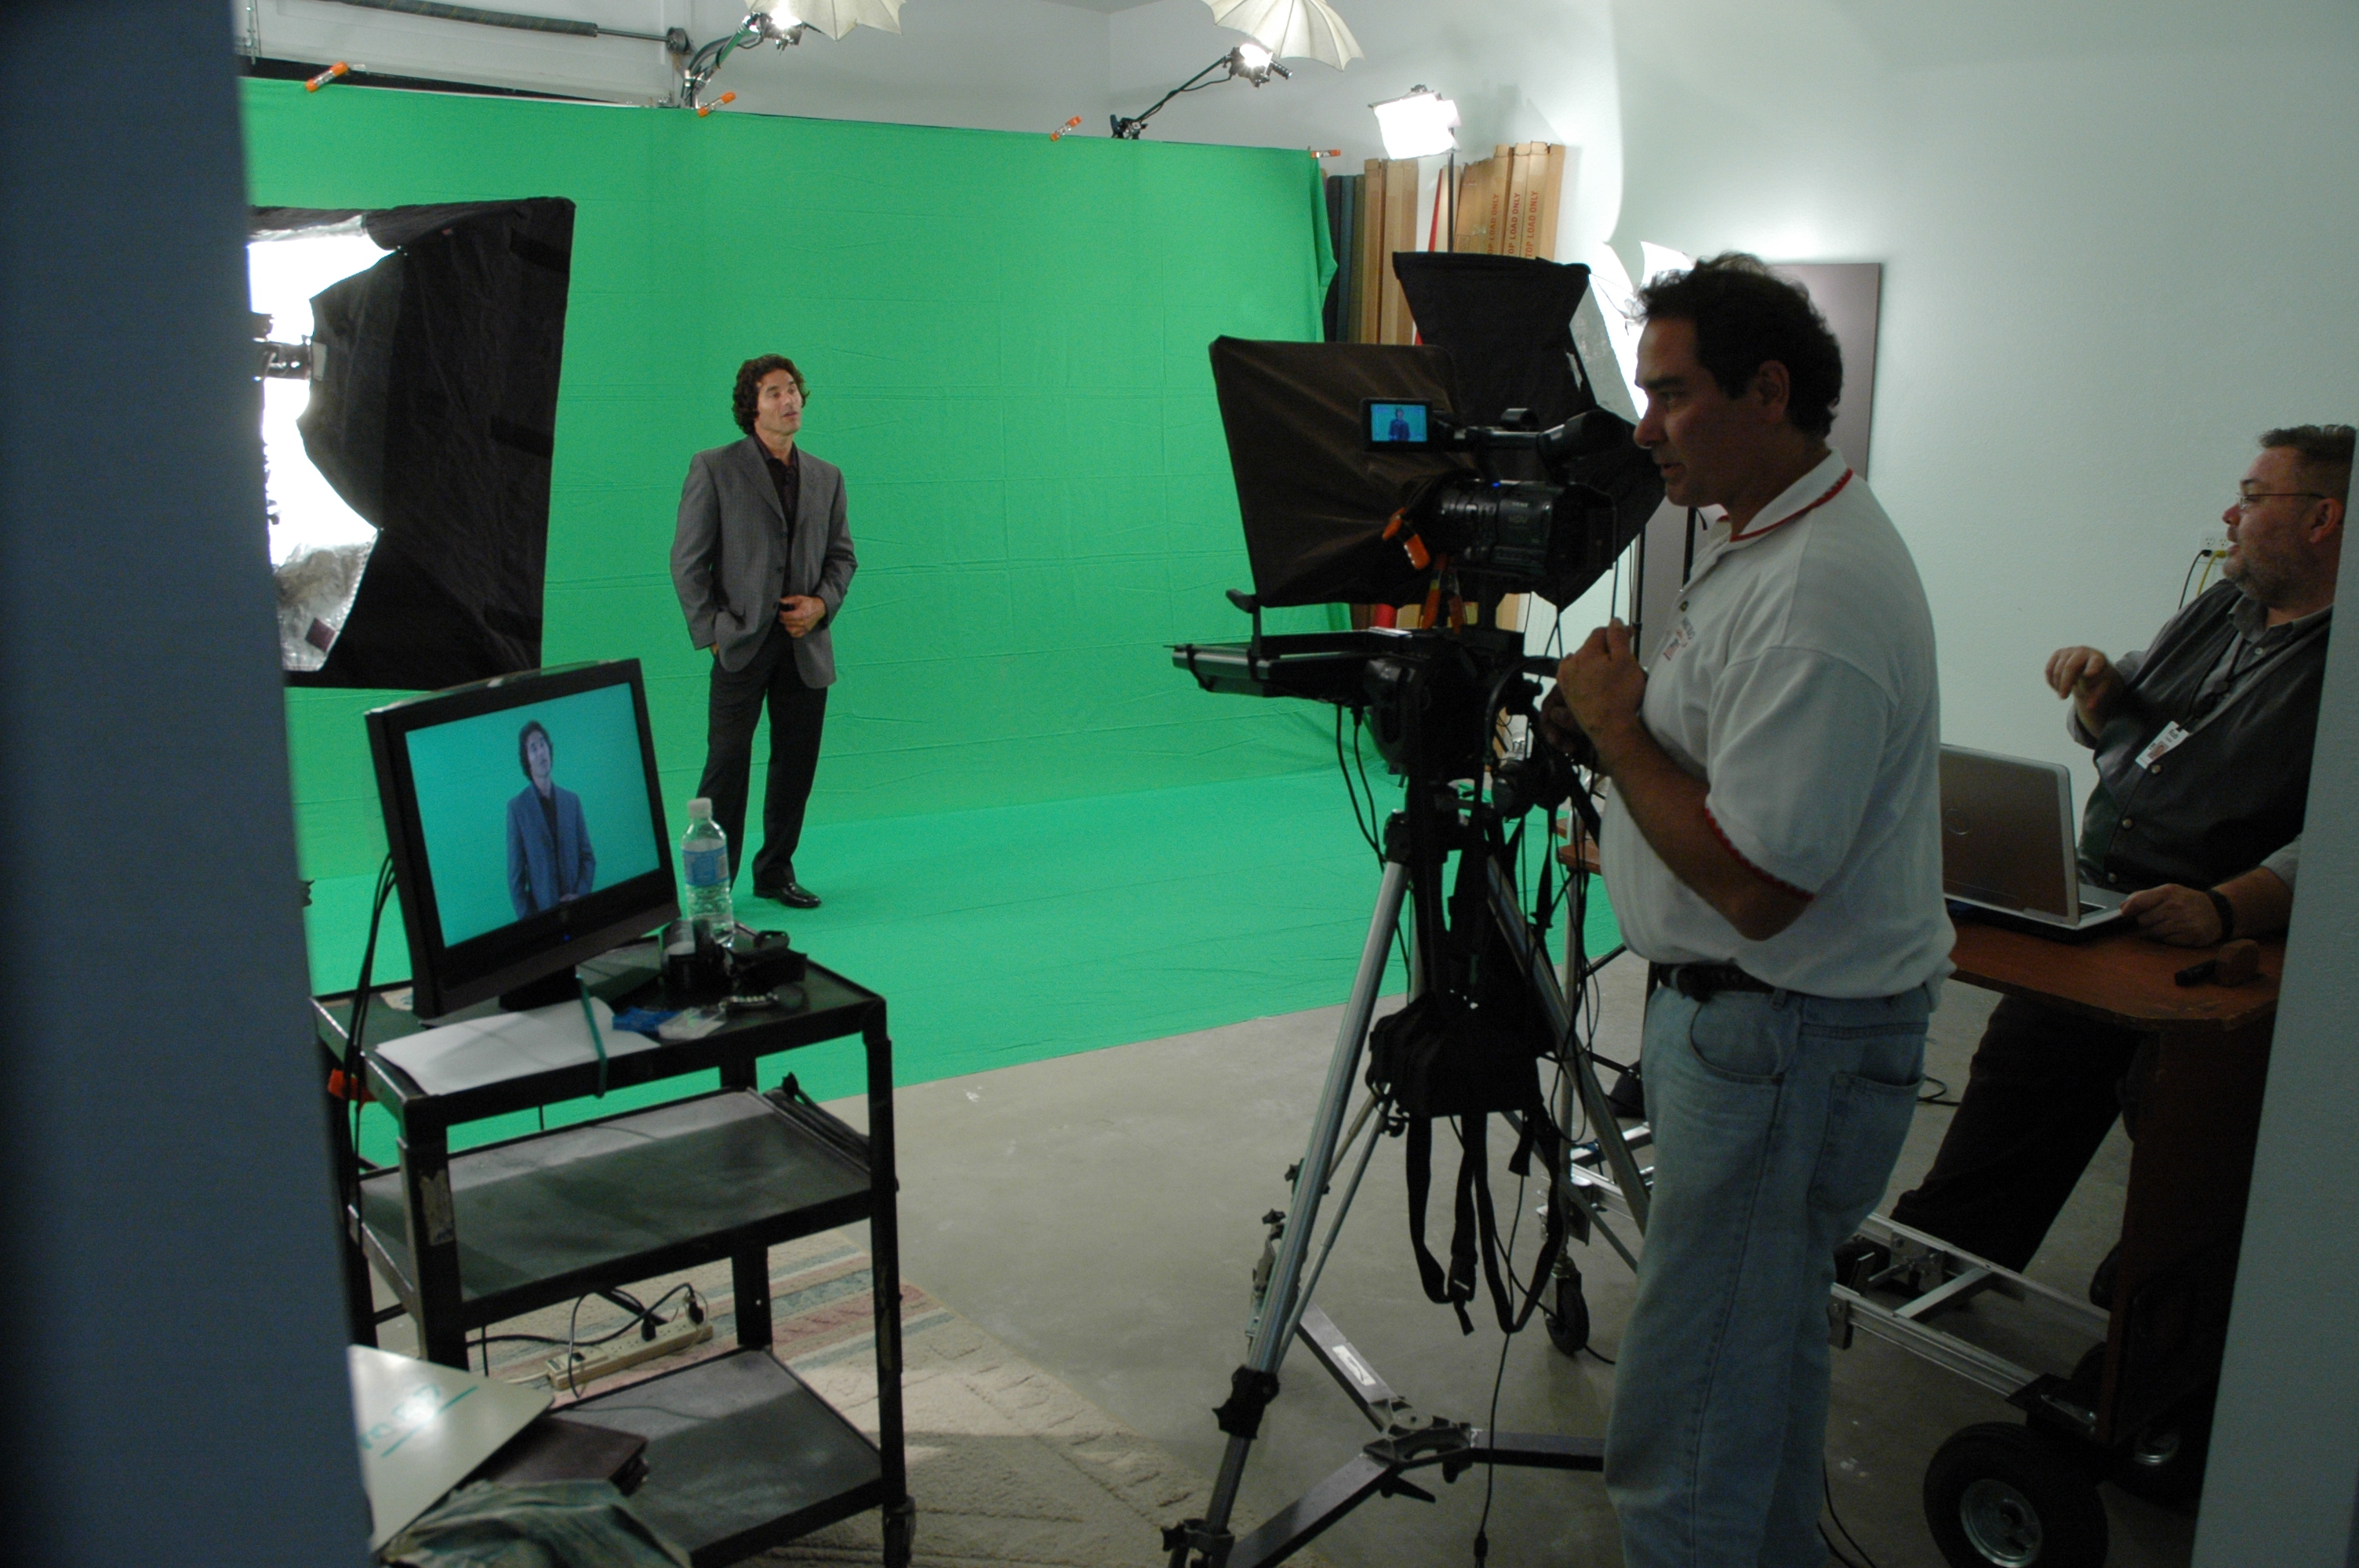
If you’re a C-suite leader, product manager, or marketing director, you need message precision and a human, trustworthy presence. A teleprompter makes that possible—when it’s set up, scripted, and operated correctly. Below is the playbook we use in studio and on location to help non-actors look relaxed, sound authoritative, and land the message on time.
Why Use a Teleprompter in the First Place?
Accuracy: Legal, compliance, and investor language must be exact.
Consistency at scale: One message across multiple markets, languages, or spokespeople.
Throughput: Shoot more segments per day with fewer retakes and faster approvals.
Editorial efficiency: Prompter scripts feed captions, translations, and transcripts.
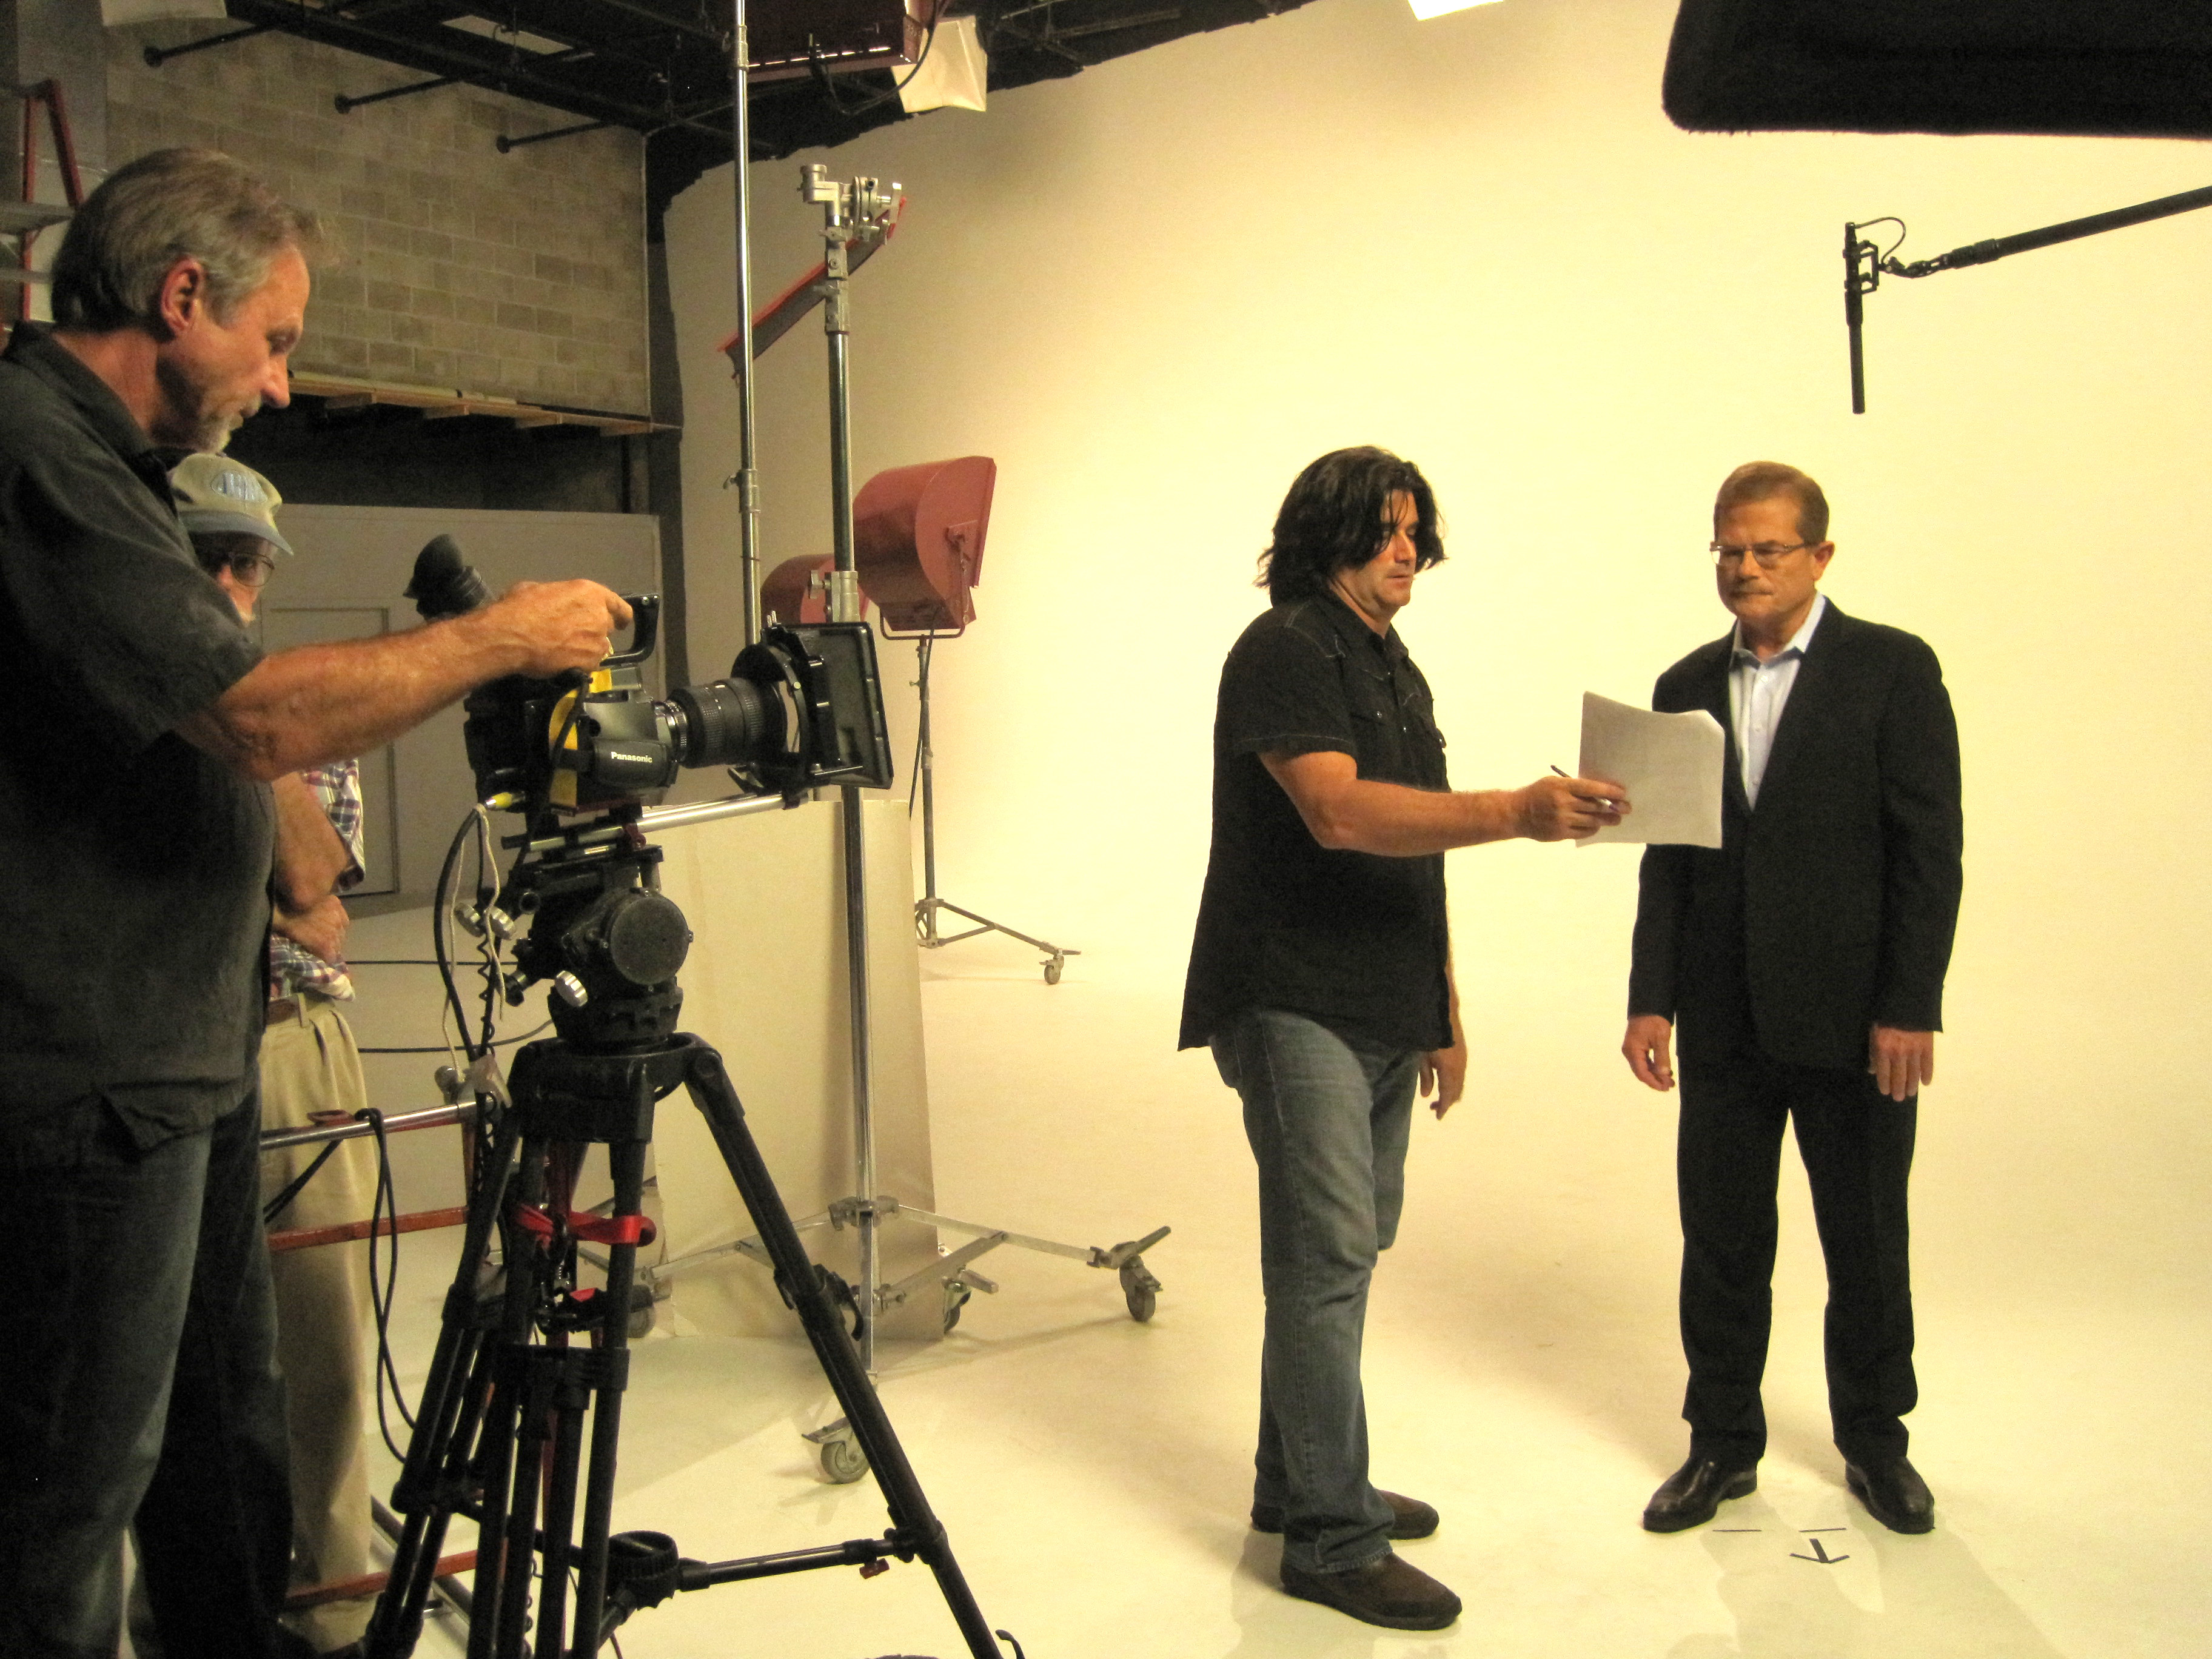
Eye-Line & Optics: Where Authenticity Starts
Goal: align the audience’s eyes with yours. Do that and you’ll read as confident and sincere.
Prompter type: Through-the-lens (TTL) beam-splitter in front of the lens for direct-to-camera delivery.
Lens choice: 50–85 mm (full-frame) subtly compresses perspective and reduces visible eye travel.
Distance & font: Place talent ~5–10 ft from the glass; set font so each line reads without scanning (typically 48–72 pt at that distance).
Scroll window: Keep active text centered vertically; avoid top/bottom edges which trigger noticeable eye jumps.
Glasses & glare: Slightly raise the key light, tilt the glass a few degrees, use flags/hoods, and favor matte/AR-coated frames.
Script Engineering: Write for the Ear (Not the Page)
Cadence target: 110–135 words per minute for conversational corporate delivery.
One idea per line: 12–18 words; short clauses beat long sentences.
TTL prompter + hood, backup unit, UPS/power distro
Lens set 50/85 mm, flags/matte box, anti-glare wipes
Eye-line test recording (10 s) and speed calibration pass
Mark landing words/CTAs; confirm durations per segment
Copy-Paste Script Skeleton (≈2:00, 240–260 words)
OPEN [SMILE] I’m [Name], [Title]. Today, three updates designed to help your team move faster and make smarter decisions. [PAUSE]
BENEFIT HEADLINE First: [Feature/Program] reduces steps in [workflow] so your process is simpler, safer, and easier to scale. [B-ROLL CUT]
PROOF Teams like [Client] saw results in weeks—not months—and cut [metric] by [X%]. [PAUSE]
WHAT’S NEW Second: [Feature] adds [capability], so admins spend less time on manual tasks. Third: [Feature] improves [process], with clearer approvals and better visibility. [GRAPHIC]
CALL TO ACTION If you’re on [plan], these roll out [date]. To learn more, visit your admin panel or talk with your account team. [SMILE]
CLOSE [HOLD 2s] Thanks for choosing us to help you do more with less. [HOLD SMILE]
Why This Matters for Decision Makers
Teleprompter-driven workflows reduce retakes, protect compliance language, and shorten post-production—all while helping your leaders show up as themselves. The business result: tighter schedules, faster approvals, and on-brand content that persuades.
Work With a Studio That Makes Prompters Invisible
St Louis Video Studio is a full-service professional commercial photography and video production company with the right equipment and creative crew service experience for successful image acquisition. We offer full-service studio and location video and photography, as well as editing, post-production and licensed drone pilots. St Louis Video Studio can customize your productions for diverse types of media requirements. Repurposing your photography and video branding to gain more traction is another specialty. We are well-versed in all file types and styles of media and accompanying software. We use the latest in Artificial Intelligence for all our media services. Our private studio lighting and visual setup is perfect for small productions and interview scenes. Our studio is large enough to incorporate props to round out your set. We support every aspect of your production—from setting up a private, custom interview studio to supplying professional sound and camera operators, as well as providing the right equipment—ensuring your next video production is seamless and successful. We can fly our specialized drones indoors. As a full-service video and photography production corporation, since 1982, St Louis Video Studio has worked with many businesses, marketing firms and creative agencies in the St. Louis area for their marketing photography and video.
If your interviews feel flat, the fix usually isn’t a new camera—it’s better B-roll. Thoughtful cutaway footage elevates on-camera answers into a narrative that persuades, clarifies, and moves viewers to act. Below is the framework we use at St Louis Video Studio to plan, capture, and integrate B-roll that makes interviews land with authority and style.
Why B-Roll Matters (to Business Outcomes)
Context & credibility: Show the process, place, and people behind claims to reduce viewer skepticism.
Clarity: Visualize features, workflows, and outcomes so complex ideas become self-evident.
Pace & retention: Varied imagery resets attention and smooths jump cuts, increasing watch-through.
Repurposability: A great B-roll library fuels social edits, sales decks, product pages, and launch reels.
Start with Message, Not a Shot List
Before we talk lenses or gimbals, we map the message arcs you need to land:
Who is speaking and why they’re credible.
What is the benefit or transformation.
How it works (process or proof).
What’s next (CTA or desired action).
For each arc, we pair visual proof points—moments that demonstrate the claim. Example: if an interview mentions “same-day turnaround,” we capture time-stamped workflow boards, scan guns, courier hand-offs, and the final product leaving the dock.
Pre-Production: The B-Roll Blueprint
Interview beat sheet: Highlight phrases you know will need cover (jargon, lists, long sentences).
Location walk-through: Identify hero spaces, quiet zones, natural movement paths, and drone-safe corridors (we can fly specialized cinewhoop drones indoors).
People & permissions: Confirm who can be filmed doing what; secure releases and any brand or safety approvals.
Props & demos: Stage real artifacts—devices, packaging, dashboards, product cross-sections.
Wardrobe & brand color cues: Ensure textures and tones that play nicely at your brand white balance.
Shot architecture: Pre-plan W-M-T (wide/medium/tight) passes for every key activity to guarantee editorial flexibility.
Shot Design That Sells the Story
Prioritize “people doing” over “people pointing.” The most valuable B-roll types for interviews:
St Louis Video Studio is a full-service professional commercial photography and video production company with the right equipment and seasoned crew to ensure reliable, high-quality image acquisition—in studio or on location. We handle studio and location video and photography, editing, and post-production, and our licensed drone pilots (including specialized indoor flight) add dynamic perspectives safely and legally.
We customize productions for diverse media requirements and repurpose your photography and video branding to extend reach across platforms. Our team is well-versed in all file types, media styles, and the accompanying software, and we leverage the latest in Artificial Intelligence for transcription, tagging, cleanup, color assistance, and accelerated post workflows—always with human creative oversight.
Our private studio lighting and visual setup is ideal for small productions and interview scenes, with enough space to incorporate props and create on-brand environments. We support every aspect of your production—from setting up a private, custom interview studio to supplying professional sound and camera operators and the right gear—so your next video is seamless and successful.
Since 1982, we’ve partnered with businesses, marketing firms, and creative agencies across the St. Louis area to deliver marketing photography and video that performs. If you’re ready to transform your interviews with B-roll that actually moves the needle, we’re ready to roll.
Businesses understand the importance of high-resolution visuals, polished editing, and dynamic motion graphics—but often, one critical element gets shortchanged: audio.
At St Louis Video Studio, we know from experience that high-quality audio can be the difference between a compelling piece of branded content and one that viewers click away from within seconds. It’s easy to underestimate sound when the visuals look sharp, but industry research and real-world feedback prove that audio clarity and design have a greater psychological impact on your audience than many realize.
The Science Behind Sound
Viewers will often tolerate less-than-perfect visuals, but poor audio immediately signals unprofessionalism. According to a USC/Annenberg study on multimedia effectiveness, audiences were more likely to trust a video with clear audio and mediocre visuals than the reverse. Why? Because sound is deeply tied to how we interpret meaning and emotional context. Music, tone of voice, ambient sound, and silence each carry subconscious weight that informs how we feel about what we see.
What Bad Audio Does to Good Video
You’ve invested in quality cameras, lighting, and editing—but if your audio is plagued by room echo, inconsistent volume, or background noise, you risk undermining the entire production. Common issues we’ve seen in rushed or underfunded productions include:
Echo-heavy audio from untreated rooms or wide-open locations
Inconsistent dialogue levels from lav mics or boom mics improperly placed
Distracting ambient noise that competes with the message
Low bitrate compression that degrades voice quality, especially on mobile devices
These issues are often introduced during production and are costly or impossible to fully fix in post-production, especially when speech intelligibility is compromised.
How Professional Studios Get Audio Right
At St Louis Video Studio, we’ve engineered our private studio space with sound clarity in mind. From acoustically treated walls to purpose-built mic placements and isolation setups, every detail supports optimal audio recording. Our experienced sound operators monitor levels in real-time, ensuring every line of dialogue and every sound cue is clean, crisp, and emotionally tuned to your brand message.
We also bring extensive post-production audio design capabilities to the table—sweetening interviews, removing ambient noise, balancing multi-mic setups, and even designing immersive soundscapes for motion content. Whether your final product will be viewed in a boardroom, at a trade show, or on a smartphone, we ensure your message hits with clarity and authority.
The Competitive Edge of Good Audio
For corporate video interviews, training content, brand stories, and testimonials, superior audio elevates credibility. Subtle shifts in vocal tone and delivery are essential to establishing authenticity and trust. A confident voice without distortion resonates better, and the seamless blend of music and sound design enhances emotional engagement.
This is particularly vital when repurposing your content. Clean audio tracks allow for easier editing into shorter versions for social, broadcast-ready cuts, or podcasts. If you’re trying to get more life out of your production investment—as many savvy marketers are—great audio is a future-proofing strategy.
Why Businesses in St. Louis Trust St Louis Video Studio
Since 1982, St Louis Video Studio has partnered with businesses, marketing firms, and creative agencies throughout the region to deliver high-impact studio and location productions. We are a full-service professional commercial photography and video production company, equipped with the latest tools and the creative insight necessary for successful image acquisition. From full-service studio and location photography and video to editing, post-production, and licensed drone operations, we’ve supported countless successful marketing campaigns.
We specialize in repurposing your existing photography and video branding to generate more traction across platforms. We are well-versed in all file types, media styles, and production software. Leveraging the latest artificial intelligence tools, we optimize workflow and enhance output quality.
Our private studio lighting and visual setup is ideal for small productions, interviews, or controlled environment shoots. The studio can incorporate props to customize your set, while our team handles everything—from sound and camera operators to gear and set design—ensuring a seamless and professional production experience. We can even fly specialized drones indoors, expanding creative options within our custom-built environment.
At St Louis Video Studio, we understand that great visuals open the door, but great audio makes people stay. Let us help you deliver both—exceptionally.
In a world saturated with visual content, businesses need more than just great footage—they need compelling stories that hold attention and inspire action. One of the most effective ways to elevate your brand narrative is by combining ground and aerial video. When expertly integrated, these two perspectives deliver a cinematic experience that resonates with viewers on multiple levels—emotionally, spatially, and intellectually.
As experienced storytellers at St Louis Video Studio, we help companies transform simple visuals into strategic brand messages. In this article, we’ll explore how to leverage both ground and drone footage to craft a more powerful, memorable story for your audience.
Why Both Perspectives Matter
Storytelling is about perspective—both figuratively and literally. Ground-level footage creates an intimate, human connection. It captures facial expressions, textures, and close interactions that build emotional depth. Aerial footage, meanwhile, shows scale, movement, and geographic context. It lets viewers see the bigger picture—the facility, the environment, the journey.
When used together, ground and aerial videos:
Establish a location and tone
Provide narrative rhythm and variety
Highlight both scale and detail
Reinforce brand authority and production value
This multi-layered approach keeps viewers engaged and communicates more information in less time.
Structuring Your Story with Layered Visuals
Whether you’re producing a corporate overview, a customer testimonial, or a product launch video, integrating ground and drone shots requires thoughtful structure:
Open with an aerial shot – Introduce your location, set the tone, and grab attention with a sweeping view of your facility, event, or landscape.
Shift to ground footage – Bring the story in closer with interviews, operations, or interactions that offer human context.
Alternate perspectives – Use drone shots to transition between scenes or emphasize key moments (like a warehouse in action or a crowd from above).
Conclude with a dynamic blend – Wrap up with a combination of both viewpoints to reinforce your message and leave a strong impression.
Our editing team at St Louis Video Studio excels at pacing, matching color and motion between cameras, and ensuring each transition is both seamless and purposeful.
Technical Considerations for a Cohesive Look
To tell a unified story visually, you need more than great footage—you need a technically sound integration of camera styles. This includes:
Matching frame rates and resolution
Color grading across both drone and ground footage
Consistent motion direction and lens choice
Clean, professional audio to tie everything together
Our creative crew is experienced in managing multi-camera environments and blending footage from different sources, so your final video looks polished and intentional.
When and Where to Use Ground + Aerial Storytelling
This approach is especially impactful for:
Brand stories and origin videos Show where your company started, where it operates, and who drives the mission.
Client testimonials Combine interview footage with aerial B-roll of operations, locations, or client sites.
Product demos or walkthroughs Start with an aerial setup and transition into hands-on usage or close-up interaction.
Events and activations Use drone coverage to capture the energy and scale, then cut to audience or speaker reactions from the ground.
Partner with a Studio That Can Do It All
At St Louis Video Studio, we don’t just shoot video—we tell visual stories that work. As a full-service professional commercial photography and video production company, we’ve been helping businesses, marketing firms, and agencies in the St. Louis area since 1982.
We offer:
Studio and on-location video and photography
Licensed drone pilots, including indoor flight capabilities
Custom studio setups with private lighting and prop integration
Post-production services, including editing, color grading, and audio mastering
AI-powered tools for faster and smarter content refinement
Our team understands the art and science of integrating multiple visual formats into a single compelling message. Whether you need a custom interview scene, promotional video, or branded campaign content, St Louis Video Studio delivers seamless production from concept to final cut.
Let us help you tell your story—from the ground up, and from the sky down.
Contact St Louis Video Studio today and see how we can elevate your next production into something truly unforgettable.
In the world of corporate and marketing video production, businesses often feature their own employees, customers, or leadership in front of the camera. While this approach brings authenticity and relatability to the content, it also introduces a unique challenge: guiding non-professional talent to deliver natural, compelling performances on camera.
As experienced videographers, producers, and directors at St Louis Video Studio, we’ve helped countless organizations transform everyday people into confident on-camera storytellers. In this guide, we’ll walk through best practices for working with non-actors to ensure your next video production captures genuine, effective, and professional results.
1. Start with a Clear Vision and Script Support
Non-professional talent thrives when they understand the purpose of the video and their role in it. Provide them with:
A simplified script or talking points: Avoid industry jargon and memorization. Focus on clarity and key messages.
Context for the scene: Explain who the audience is and why their words matter.
Flexible phrasing: Let them say things in their own words—authenticity wins over perfection.
2. Create a Comfortable Environment
Stage fright is common. To ease nerves:
Limit the crew: A smaller set makes talent feel less intimidated.
Warm up with casual conversation: Break the ice before the camera rolls.
Keep the set quiet and calm: Reduce distractions and maintain a positive tone.
At St Louis Video Studio, we’ve designed our private studio space specifically for these situations—comfortable lighting, minimal foot traffic, and a focused atmosphere ideal for first-time on-camera guests.
3. Use Prompting and Interview Techniques
Rather than asking someone to deliver a monologue, guide them with:
Prompt-based questions: Lead with questions that encourage natural responses. Example: “Can you tell us about a time you saw the company’s values in action?”
Conversational interviews: Our producers often sit just off-camera and engage talent in a genuine back-and-forth, then edit for flow and clarity.
4. Position and Direct Gently
Help your talent look and feel their best by:
Framing them properly: Use flattering angles and even lighting.
Giving clear direction: Guide posture, eye line, and pacing without overwhelming.
Reassuring with playback: Show quick takes to boost confidence when appropriate.
We’ve seen time and again how small adjustments—like encouraging someone to slow down their speech or reposition slightly—can significantly elevate a performance.
5. Plan for Extra Takes and Patience
The magic often happens in take two or three. Build time into your schedule to:
Allow for warm-up: Initial takes are just practice.
Capture multiple angles: Especially helpful in editing for continuity and best moments.
Keep energy positive: Encouragement matters more than critique with non-actors.
6. Enhance with Post-Production Polish
Even great raw footage can benefit from post-production:
Edit for clarity and flow
Add B-roll or visuals to cover rough cuts
Include professional audio mixing and color correction
Our editing suite at St Louis Video Studio brings everything together to ensure your final product feels polished and aligned with your brand.
Trust Your Team and Partner with Professionals
Non-professional talent can deliver powerful, authentic performances with the right environment, guidance, and post-production support. It’s a process built on empathy, patience, and experience—and we’re here to help.
At St Louis Video Studio, we bring decades of hands-on experience in directing on-camera talent of all types. As a full-service professional commercial photography and video production company, we provide the equipment, creative expertise, and tailored support needed for successful image acquisition.
We offer:
Full-service studio and on-location video and photography
Licensed drone pilots for indoor and outdoor flight
Skilled editing and post-production teams
Custom productions designed for businesses and agencies
AI-enhanced media services and repurposing strategies
Private, flexible studio setups for interviews and small productions
Since 1982, we’ve helped countless businesses and marketing firms across the St. Louis region turn everyday people into standout on-camera talent. Whether you’re creating a testimonial, internal training, or branded video content, our team at St Louis Video Studio ensures every detail—from lighting to final export—is handled with precision.
Let us elevate your next production. Get in touch today.
When it comes to marketing your business, few tools are as effective and persuasive as a well-produced video testimonial. These authentic endorsements allow real customers or clients to tell your story from their perspective, adding a level of trust and relatability that scripted ads simply can’t achieve.
But a successful testimonial video doesn’t happen by accident—it requires thoughtful planning, a comfortable interview environment, and most importantly, the right questions. As an experienced videographer, photographer, and producer at St Louis Video Studio, we’ve helped countless businesses capture powerful on-camera testimonials that resonate. In this post, we’ll break down which types of questions help uncover clear, emotionally engaging stories that move viewers to act.
1. Start with Context: Set the Scene
Before diving into the customer’s experience with your brand, it’s important to establish context. Help the viewer understand who this person is and what problems they were facing before finding your business.
Sample Questions:
Can you tell us a little about your business or role?
What challenges were you facing before working with our company?
What prompted you to start looking for a solution?
These questions serve as an introduction, grounding the testimonial in a real-life situation and establishing the speaker’s credibility.
2. Dig Into the Decision: Why You?
Now that we know the background, help the subject explain why they chose your company. This step is key to showing what sets your brand apart from competitors.
Sample Questions:
What stood out about our company during your search?
Was there something specific that made you choose us?
What expectations did you have going in?
This section offers a chance to highlight your unique value propositions—through the authentic voice of a satisfied client.
3. Highlight the Experience: The Heart of the Story
This is where the testimonial becomes compelling. Ask open-ended questions that let the speaker describe the process and their interaction with your team.
Sample Questions:
What was it like working with us?
Can you walk us through how we helped you?
Were there any standout moments or team members?
These answers bring the story to life and help future clients imagine themselves having a similar positive experience.
4. Show the Results: Before vs. After
People watching your testimonial want to know what results they can expect. This is your client’s chance to share the impact of your services in a tangible way.
Sample Questions:
What changed after using our service?
What results did you see, and how soon?
How has this made a difference in your day-to-day operations?
Be sure to give room for specific outcomes—metrics, business growth, saved time, or increased confidence all make for powerful statements.
5. Encourage a Recommendation: Close Strong
Wrap up by inviting the client to summarize their experience and make a recommendation. This is often the most powerful clip to end the video with.
Sample Questions:
Would you recommend our company to others? Why?
What would you tell someone considering working with us?
Is there anything else you’d like to share about your experience?
These responses create a confident, satisfying conclusion and give your audience a clear message to walk away with.
The Power of a Comfortable Setup
Of course, getting great answers depends not just on the questions, but the environment. That’s why at St Louis Video Studio, we prioritize creating a relaxed and professional space. Our private interview studio is designed specifically for testimonial interviews, with customizable lighting, camera setups, and the flexibility to include props or branded elements. When people feel at ease, their stories flow naturally.
Why Work with St Louis Video Studio?
At St Louis Video Studio, we’re more than just camera operators—we’re storytellers, strategists, and seasoned producers who know how to help clients speak authentically and effectively on camera.
We are a full-service professional commercial photography and video production company, offering both studio and on-location services. With years of experience in editing, post-production, and licensed drone operation, we’ve helped countless businesses across St. Louis and beyond craft testimonial videos that engage, convert, and build trust.
Whether you need a single interview or a full campaign of client stories, we have the right equipment, creative crew, and technical expertise to support every aspect of your production. We specialize in customizing content for diverse media requirements and are experts at repurposing video and photography for maximum reach across digital platforms.
Using the latest in Artificial Intelligence-enhanced media tools, we ensure your testimonial content is not only compelling but also professionally polished and optimized for modern marketing needs.
Let’s bring your customer success stories to life—clear, authentic, and powerfully told.
In the world of video production, crafting a compelling documentary often comes down to the editing process. Even with the best footage, a documentary can feel disjointed without the right storytelling structure. Editing is where raw material transforms into a narrative that connects with an audience. If you’re struggling to find your story in the edit, here are some expert tips to help shape your documentary into a cohesive and engaging piece.
Avoid over-explaining and let the visuals and sound design speak for themselves.
1. Define the Core Message Early
Before diving into the edit, define the central theme of your documentary. What is the key takeaway for your audience? Whether it’s an emotional journey, an exposé, or an educational piece, this guiding principle will shape the editing decisions. Without a strong focus, the story can feel scattered, making it difficult for viewers to connect.
2. Review and Log Footage Thoughtfully
Take the time to watch all your footage before making any cuts. Organize clips into categories based on themes, subjects, or moods. Create a detailed log noting the strongest interviews, b-roll, and soundbites. This process helps identify the most impactful moments that align with your core message.
3. Craft a Strong Opening
First impressions matter. The opening sequence should immediately draw viewers in and set the tone for the documentary. Whether it’s a powerful soundbite, a compelling visual, or an intriguing question, the first moments should hook the audience and make them want to keep watching.
4. Structure Your Story with an Arc
A well-structured documentary follows a clear story arc—beginning, middle, and end. It may not follow a traditional chronological order, but it should build momentum and resolve in a satisfying way. Introduce your main subject, develop tension or conflict, and conclude with a resolution or call to action.
5. Let Emotion Drive the Edit
Great documentaries evoke emotion. Lean into moments of authenticity—whether they are raw interviews, silent pauses, or unscripted reactions. Avoid over-explaining and let the visuals and sound design speak for themselves. Emotional connection keeps the audience engaged and invested in the story.
6. Use B-Roll Creatively
B-roll isn’t just filler; it’s a storytelling tool. Use it to visually reinforce interview points, create mood, or transition between scenes. Well-placed b-roll adds depth and context to the story, making it feel more immersive and dynamic.
7. Master Pacing and Rhythm
A documentary should flow naturally. Avoid overly long scenes that slow momentum or abrupt transitions that break the narrative. A balance of fast-paced sequences and slower, reflective moments creates a rhythm that keeps viewers engaged.
8. Sound Design and Music Matter
Audio is just as important as visuals in documentary editing. Clean up dialogue, remove unnecessary background noise, and use sound design to enhance the storytelling. Music should complement the tone without overpowering the narrative. Thoughtful audio choices can heighten emotion and impact.
9. Test Screen and Get Feedback
Before finalizing your edit, test screen the documentary with a fresh audience. Colleagues or target viewers can provide valuable feedback on pacing, clarity, and engagement. Be open to constructive criticism and make adjustments to refine the final product.
10. Keep Repurposing in Mind
Your documentary footage can serve multiple purposes beyond the final cut. Create shorter social media clips, promotional trailers, or extended interviews for additional content marketing opportunities. A well-planned edit can maximize the reach and longevity of your documentary.
Partner with St. Louis Video Studio for Expert Editing and Production
At St. Louis Video Studio, we understand that the editing process is where a great story truly comes to life. As a full-service professional commercial photography and video production company, we bring expertise, creativity, and the right equipment to every project. Our team specializes in studio and location video, editing, post-production, and licensed drone cinematography. Whether you need a custom interview studio setup, sound and camera operators, or advanced post-production services, we have the resources to make your documentary shine.
Our private studio lighting and visual setup is perfect for small productions and interviews, while our large space allows for creative set designs with props. We also offer specialized indoor drone capabilities, giving your project a unique edge. Since 1982, St. Louis Video Studio has worked with businesses, marketing firms, and creative agencies in St. Louis to produce high-quality photography and video content that drives results.
Let us help you craft a compelling story with professional documentary editing. Contact St. Louis Video Studio today to discuss your next production!